Are you looking for global site tag (gtag.js) support for your WordPress website?
Google Analytics starts using Global Site Tag (gtag.js) to provide useful insights into the behavior of your website visitors. If you are using the old Google Analytics script (analytics.js), you have to switch to the new Global Site Tag (gtag.js).
Each day, Google creates new tracking features in Google Analytics that useful to get more insights over website visitors. You need to move into Google analytics Global Site Tag (gtag.js) to get these features working for your website.

If you using WordPress, you can easily add or move to Global Site Tag (gtag.js) support on your website. To add support, I recommend WordPress users to Install MonsterInsights on their website. You don’t need to manually change the script from analytics.js to ‘gtag.js’ when using MonsterInsights.
In this post, you will learn the step-by-step process of adding Global Site Tag (gtag.js) to your WordPress website.
What is Global Site Tag (gtag.js)?
Global Site Tag (gtag.js) is a javascript code for websites add to send event data to Google Analytics and other marketing tools. Website owners have to integrate it to get the insights into user’s behavior on their websites.
It is an on-page tracking code that supports Google Analytics, Google Ads, and many other Google products. The code measures the user’s interaction on websites and sends them to Google Analytics. After that, users can easily check it to analyze the performance of their websites.
Google replaces all its other script libraries with this ‘gtag.js’ to work with all the Google products. In the future, every people needs to switch to this script to use Google products and their growing features.
Why ‘gtag.js’ is Important for WordPress Websites?
There are many reasons why ‘gtag.js’ is important and a few tops of them are given below:
- Track Users Behaviour: It is useful to track the behavior of users and the pages they reached. After getting the behavior, you can identify the events on your websites and the actions they performed.
- Get Conversion Tracking Features: You can easily track conversions on your website that helps to get more sales. It can provide useful tracking insights that you can follow to increase the revenue of your business.
- Global System for All Google Products: If you have a business online and using Google products to get traffic and tracking reports. It is recommended to add the ‘gtag.js’ script that is required to use Google products and their features.
- Analyze Website Traffic: It helps you to track visitors on your website and the pages they visit. After getting the reports, you can optimize the pages of your website to increase traffic.
Let’s find out the step-by-step process to install Google Analytics and add Global Site Tag (gtag.js).
How To Add Global Site Tag Support for WordPress
Follow the steps given below to properly install Google Analytics on your WordPress website and add Global Site Tag (gtag.js).
Step 1: Signup with Google Analytics
First of all, you need to have an account on Google Analytics.
To create your Google Analytics account, you have to open the Google Analytics website and sign in using your Gmail account. If you don’t have an account with Gmail, you can create one by clicking on the link ‘Create account’ as given in the image below.
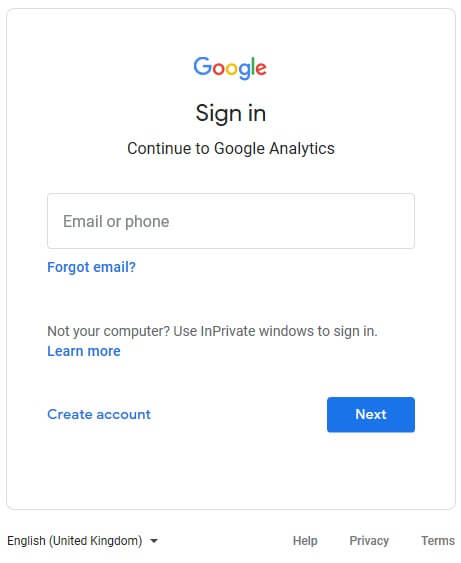
If you already have an account with Gmail, you have to provide your email id in the input box as given in the image above and click the ‘Next’ button. After that, enter the password of your Gmail account to log in.
You will get a welcome page of Google Analytics as given in the image below. Click on the button ‘Start measuring’ to start creating an account with Google Analytics.

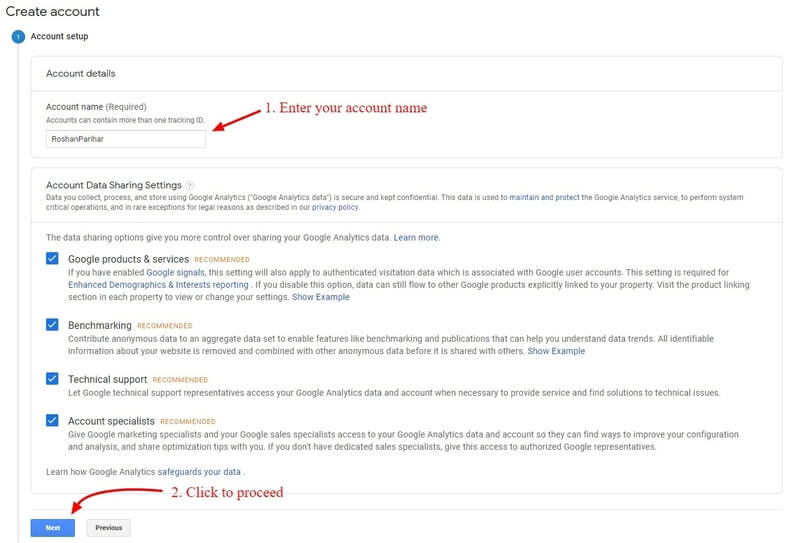
A create account form will open where you have to fill in your account name as indicated in the image below.
After that, you will get four checkboxes that you have to Leave and click the ‘Next’ button to go to the next section.
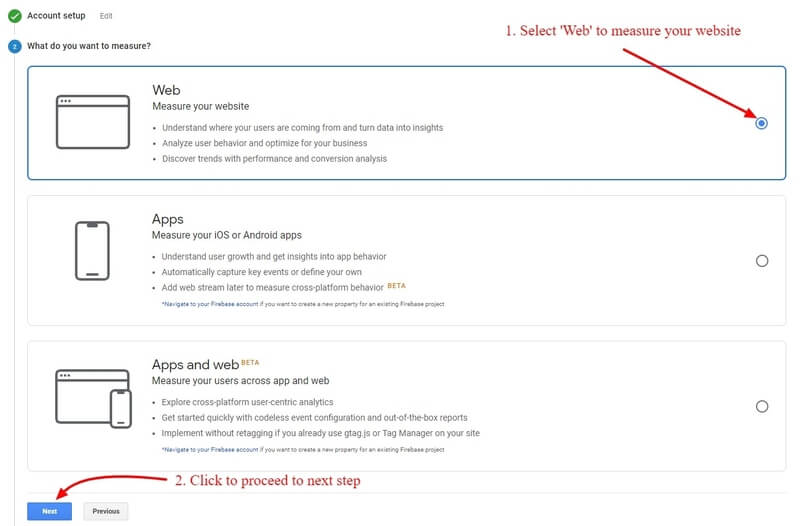
Here, you have to select an option that you want to measure using Google Analytics. Select the first option ‘Web’ to start measuring your website that provides all analytics data. After selecting the option, click the ‘Next’ button to go to the next step.
In this step, you have to enter property details that are the details of your WordPress website. Enter your website name, URL, and category of your website. After that, select a timezone to get the analytics data according to the time of your country.
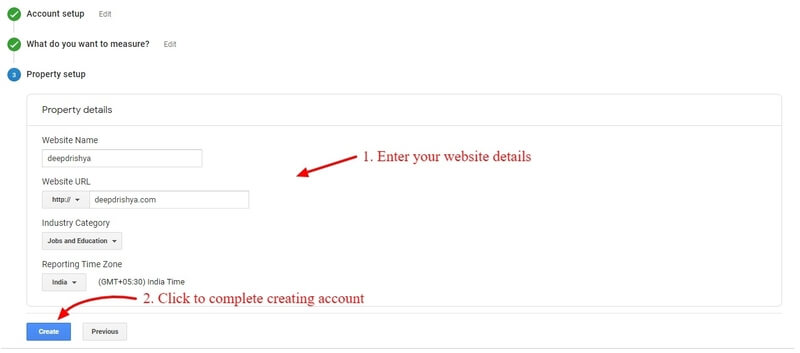
After selecting the reporting time zone, you have to click the ‘Create’ button as indicated above to complete creating an account with Google Analytics.
It will take you to the dashboard of Google Analytics whose first lookup is as given in the image below.
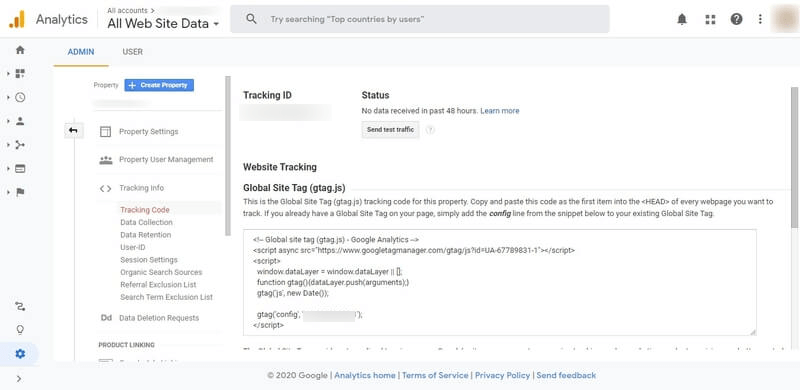
Here, in the dashboard, you will get the ‘gtag.js’ to paste to the header part of your website. However, manually pasting a code requires coding knowledge and breaks your website. If you are following all the steps given here, you don’t need to copy and manually paste the ‘gtag.js’ tracking code to the head part of your website.
Step 2: Install MonsterInsights Plugin on Your WordPress Website
After you have completed creating an account with Google Analytics, I recommend WordPress users to install the MonsterInsights plugin to add ‘gtag.js’ to your website. With more than 3 million users Worldwide, MonsterInsights is the #1 Google Analytics plugin that adds a Global Site tag to your website. You need to just install the plugin and connect your website with Google Analytics using.
Get MonsterInsights Now (50% discount with this link)
By using this MonsterInsights, you can easily connect your website with Google Analytics and add its Global Site Tag (gtag.js). You can easily get all analytics reports directly on your WordPress website dashboard. So, it’s the best choice to add ‘gtag.js’ and start analyzing your website traffic to know your visitors.

MonsterInsights comes with the free and premium version. The MonsterInsights premium version offers more features like eCommerce tracking, page scroll tracking, Google Ads tracking, CCPA compliance, Core Web Vitals, Forms tracking, and many more.
To install the plugin, you need to login into your WordPress website admin dashboard. In the dashboard, visit WordPress dashboard menu Plugins >> Add New and search for the plugin as showing below.
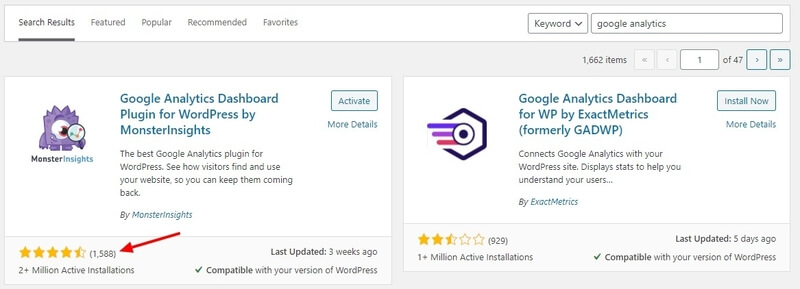
When you get the plugin, click the install and activate button to completely install the plugin on your WordPress website.
Step 3: Connect Your WordPress Website with Google Analytics
Now, you have created an account with Google Analytics and install the MonsterInsights plugin. You can now start connecting your WordPress website with Google Analytics using the MonsterInsights plugin.
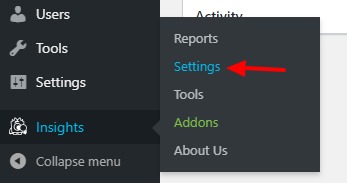
To start connecting your WordPress website with Google Analytics, you have to visit the WordPress dashboard menu option Insights >> Settings.
Here, you will get various MonsterInsights setting options like General, Engagement, eCommerce(premium), Publisher, Conversions(premium), and Advanced. To make the connection between your website and Google Analytics, you have to click the ‘General’ setting tab.
In the ‘General’ tab, click the ‘Launch Setup Wizard’ that is the fastest way to connect your website with Google Analytics. It also adds the Global Site Tag (gtag.js) script with the connection. So, let’s open the setup by clicking on the ‘Launch Setup Wizard’ button as given in the image below.

In the setup wizard, you have to select the category that best describes your website. If you have a blog or content publishing website, you can select the option ‘Publisher (Blog)’ and click the ‘Save and Continue’ button.

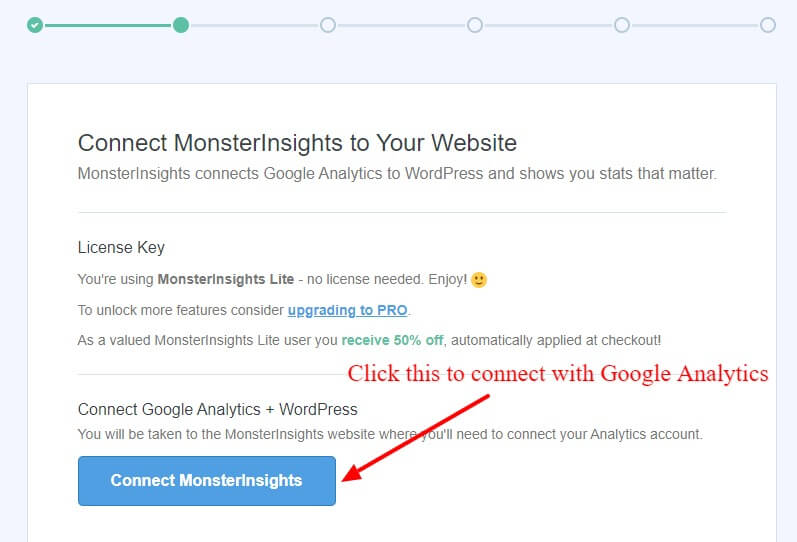
The next process is to connect with Google Analytics by clicking on the ‘Connect MonsterInsights’ button. You will be taken to the MonsterInsights website to connect to Google Analytics.
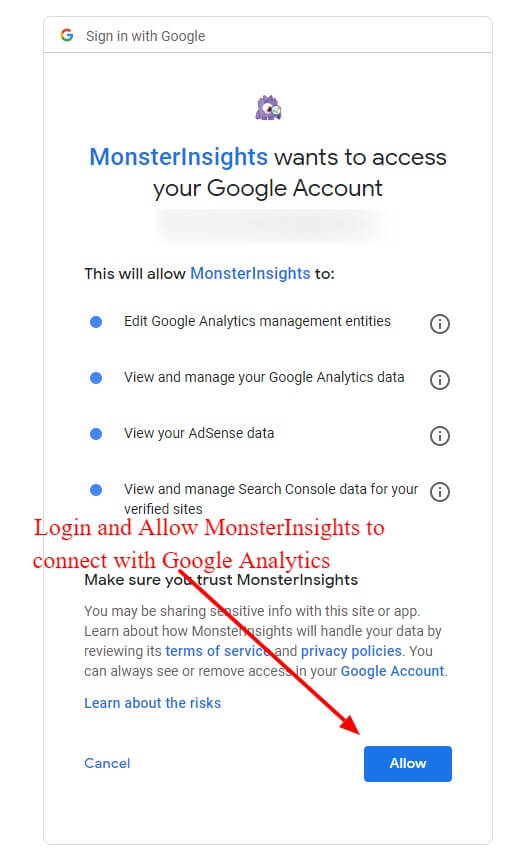
Here, you need to provide your Google Analytics login details that you have created above.
Enter your Google Analytics username and password and click the ‘Allow’ button to allow MonsterInsights to access your Google Analytics account. This will fetch analytics data from the Google Analytics account to display on WordPress.
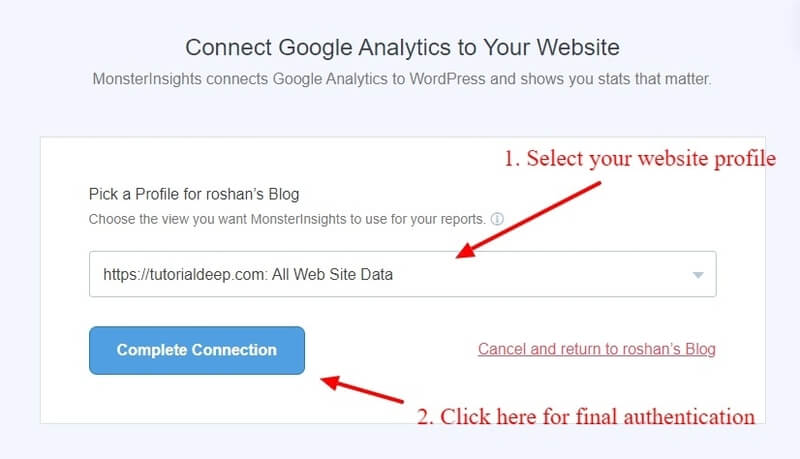
Now, you will get a page where you have to select your website Google Analytics profile. Select your Google Analytics profile to allow the MonsterInsights plugin to fetch the ‘gtag.js’ tag and generating reports. After that, click the ‘Complete Connection’ button to complete connecting to Google Analytics account.
You have to now make other settings for MonsterInsights to see reports on your WordPress website. By default, MonsterInsights offers few recommended settings that you can change as per your requirements.
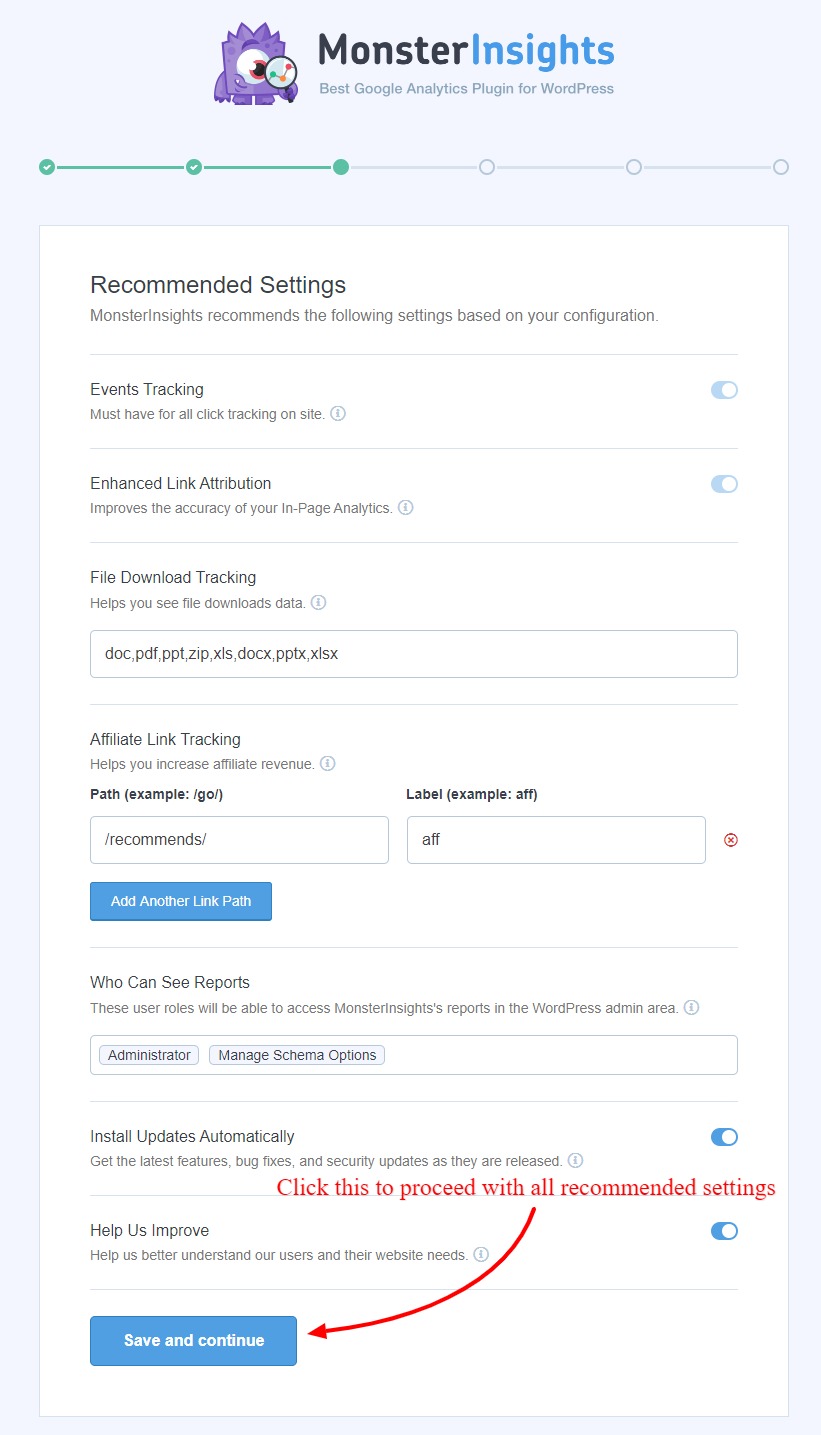
After you have done with all the settings, you can click the ‘Save and Continue’ button to proceed further.
MonsterInsights provides some useful add-ons that require ‘Premium version of plugin’ to get more advanced reports. To get all premium features, you can install the MonsterInsights Pro plugin that gives you addons to get more tracking features.
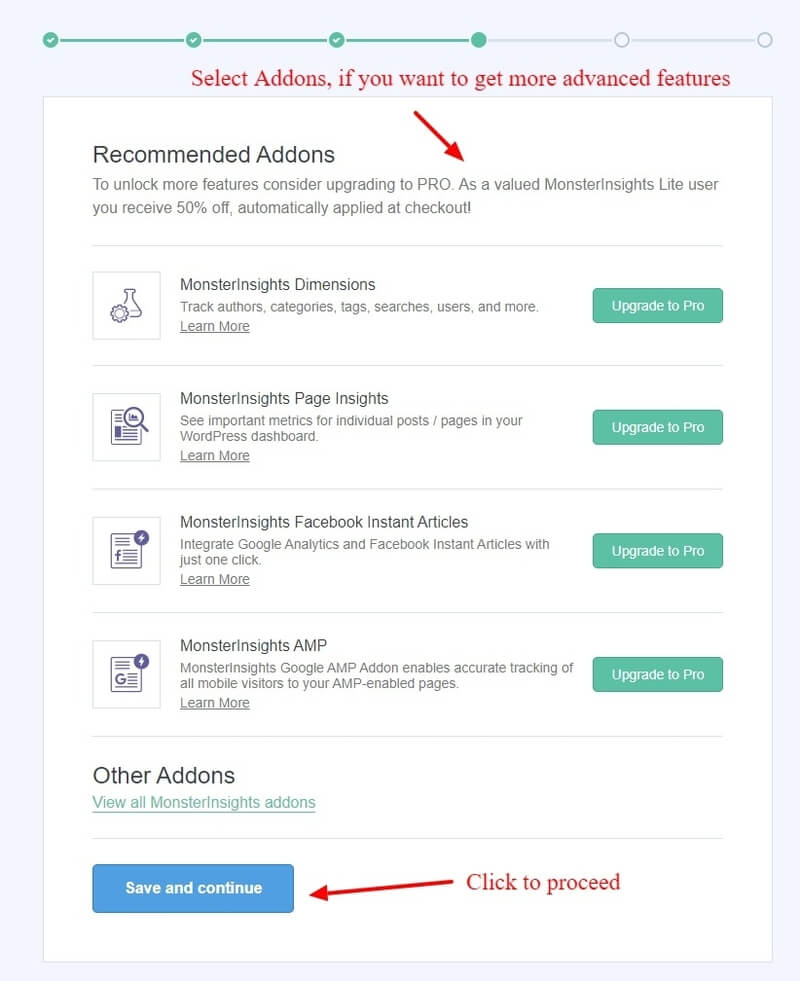
If you want to take your website analytics to the next level, you can buy these premium add-ons on your website. After that, you have to click the ‘Save and Continue’ button to proceed further.
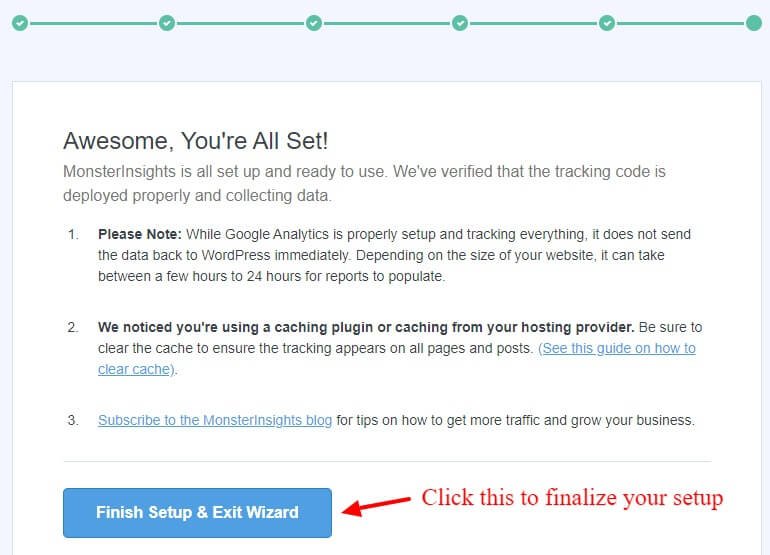
You are now ready to use the MonsterInsights plugin features on your website. Click the ‘Finish Setup & Exit Wizard’ button to finish and exit from the setup wizard. This will automatically add the Global Site Tag (gtag.js) script to your WordPress website.
Congratulations! you have successfully added the Global Site Tag (gtag.js) script to your WordPress website. You can now start checking analytics reports on your WordPress website
Conclusion
MonsterInsights is the #1 tool to easily add Google Analytics ‘gtag.js’ script to analyze your website traffic. It gets automatically added to your website after connecting your website with Google Analytics.
It’s the best method for beginners and website owners to connect your website with Google Analytics and add ‘gtag.js’ without touching any codes. After making the connection, your website is ready with the analytics reports that you can on your WordPress website dashboard.
You May Also Like to Read
- MonsterInsights Review
- Easy How To: Form Conversion Tracking in Google Analytics
- How To Track File Downloads in Google Analytics
- Easy How To: Improve Core Web Vitals with Speed Reports
- How To Add Google Analytics in WooCommerce
- Quickly Export WordPress Analytics with Google Analytics
I hope this post helps you to easily add global site tag (gtag.js) support on your WordPress website? If you have any queries regarding the tutorial given above, please comment below.