Have you ever thought to boost email list with WordPress content locking?
Content locking is a great strategy for your blog and one of the easiest ways to get more email subscribers. You can get the most targetted leads that can easily be converted into sales.
You can easily turn your website visitors into subscribers by locking your most popular content. When the visitors of your website wants to read the popular content of your website. They need to subscribe before making the content visible to read.
In this post, you will learn a step-by-step process on how to boost an email list with WordPress content locking.
Affiliate Disclosure: At Tutorialdeep, we believe in transparency for our users. In this blog, there are some referral links. If you signup with these links we will earn some commission with no extra cost to you. We recommend these links because these are our trusted brands.
What is Content Locking in WordPress?
Content Locking is the way of locking your most valuable content to generate leads from the signup forms. When the user wants to get access to your popular content, they require to signup to unlock the content for details.
You can create online courses, step-by-step beginners guide, tutorials, and others more valuable content that helps you get more leads with content locking.
After getting more targetted leads from content locking, you can send automated emails to easily make sales to increase revenue.
How To Boost Email List with WordPress Content Locking
You need to create content locking campaigns for your WordPress website that contains signup form to generate leads. I recommend using the OptinMonster plugin to create content locking campaigns.
OptinMonster is the #1 lead generation plugin that helps you easily grow your email list and increase revenue. With more than 1,000,000 users and marketing professionals, OptinMonster is the most trusted plugin to turn your traffic into high-quality subscribers.
The plugin comes with all the features like lightbox popup, exit-intent technology, fullscreen welcome mat, floating bar, coupon wheel optins, content locking campaigns, and many more. You have to use it’s ‘Content Locking’ feature to create content locking campaigns for your WordPress website.
Follow the step-by-step process given below to start creating content locking campaigns for your website:-
Step 1: Create an OptinMonster Account for Content Locking Campaigns
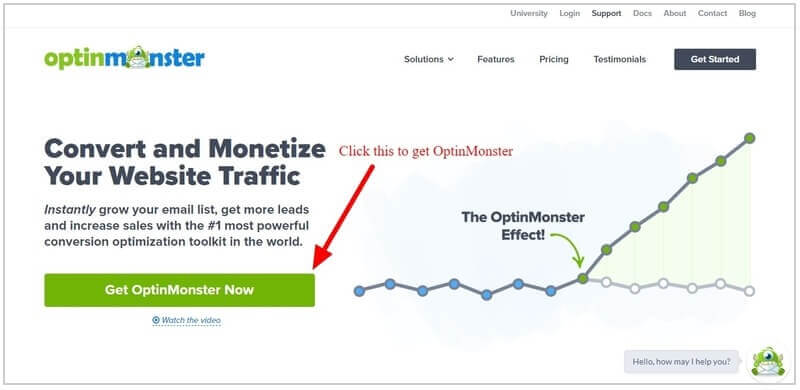
First of all, go to the OptinMonster homepage to start creating your account.
➜ Click Here to Open the OptinMonster Homepage
On the homepage, click the ‘Get OptinMonster Now’ button to create an account with OptinMonster.
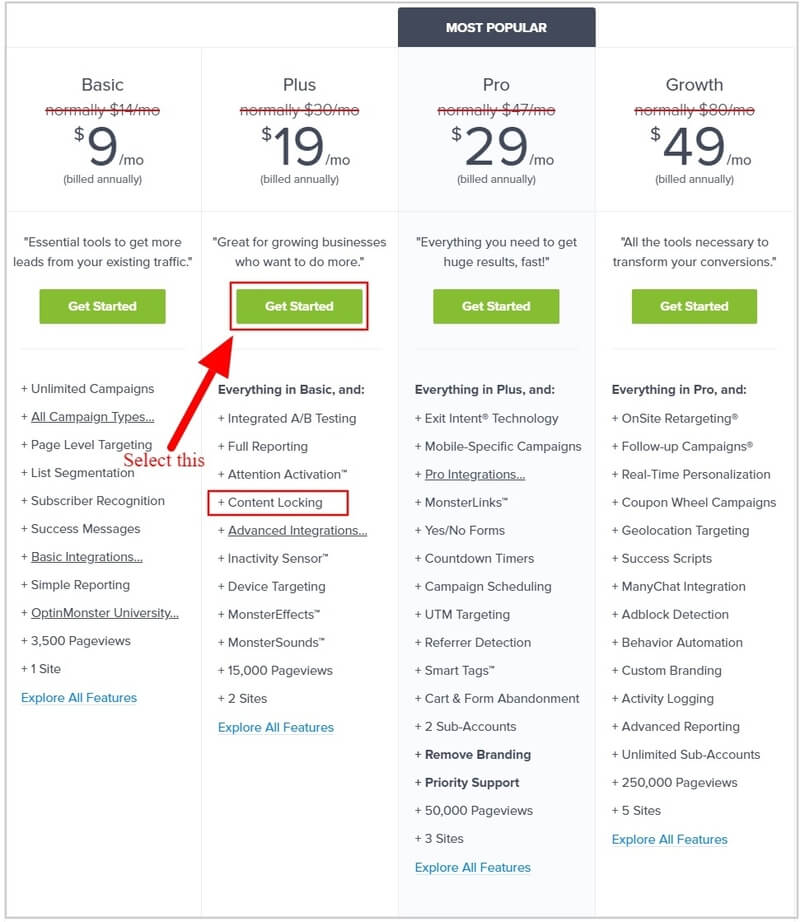
You will get a pricing page of OptinMonster where you have to select a plan to create your account. The ‘Plus’ plan comes with a ‘Content Locking’ campaign as indicated in the image below.
However, I recommend you choose the ‘Pro’ plan that comes with all the ‘Plus’ plan features and other essential features required at a single pack to grow the email list.
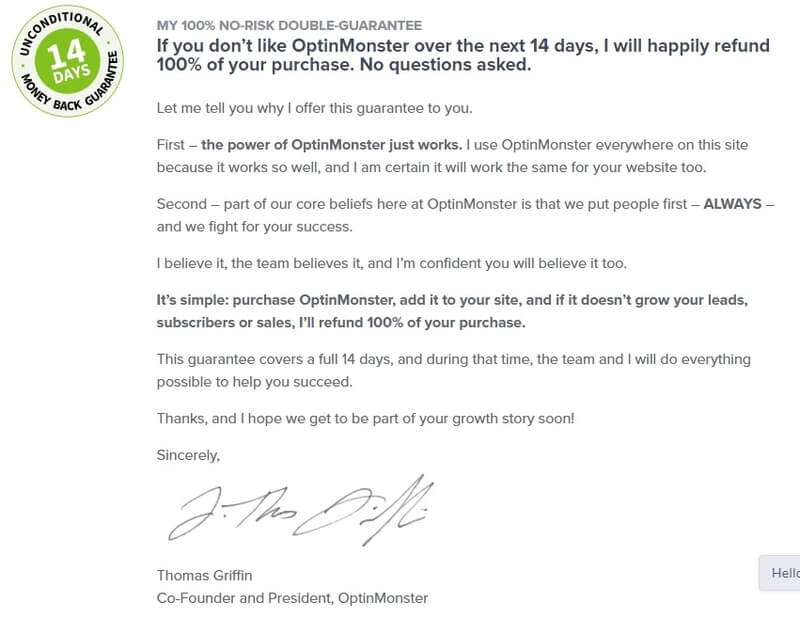
The founder of the plugin is very confident about their product and its features. If you are not satisfied with the OptinMonster plugin features over the next 14-days after purchase. They will happily refund 100% of your money with no questions asked.
So, all the premium features of OptinMonster come with a satisfaction double-guarantee. See the image below showing the no-risk double-guarantee from the founder of the plugin.
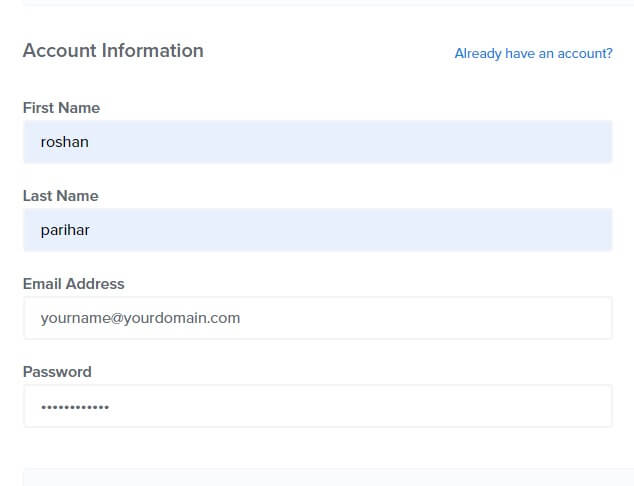
After you click on the ‘Get Started’ button under the ‘Pro’ plan above, you will get a form where you have to provide your account information like name, email, and password for the OptinMonster account.
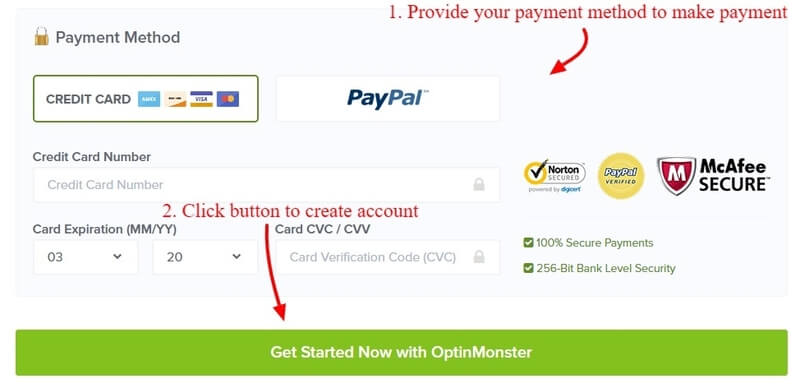
Fill your payment information and click the ‘Get Started Now with OptinMonster’ button to complete the purchase.
After that, log in to the email account that you have provided in the account information above to verify your email. This is required to complete creating your account with OptinMonster.
Step 2: Connect Your WordPress Website with OptinMonster
After you have completed creating your account with OptinMonster, log in to your WordPress admin dashboard to install the OptinMonster plugin on your website.
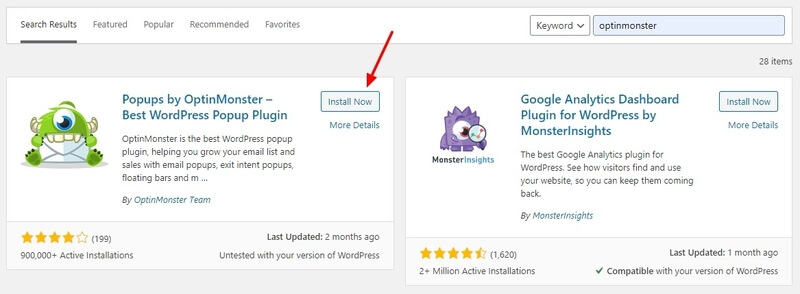
Go to WordPress menu option Plugins >> Add New and search for the OptinMonster plugin there as showing in the image below.
After you found the plugin, click the ‘Install Now’ button under the plugin to install and activate it on your website.
When you have done with installing the plugin, you will get a screen as showing in the image below. Click the ‘Connect Your Account’ button to start connecting the WordPress website with your OptinMonster account.

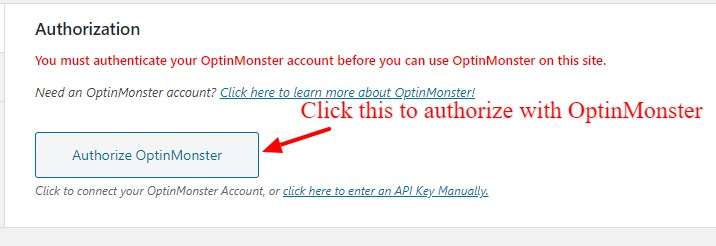
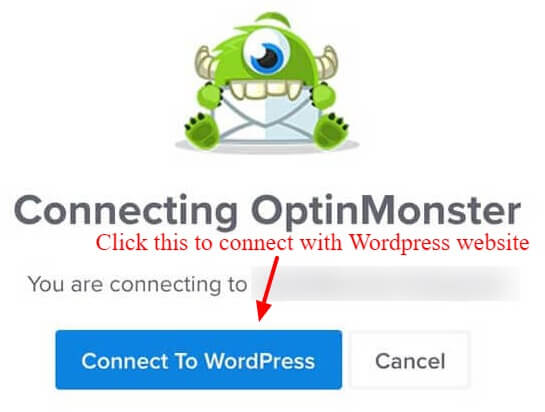
After that, click on the ‘Authorize OptinMonster’ button that opens the OptinMonster login page. Enter your OptinMonster account details that you have created above to login and authorize.
Click on the ‘Connect To WordPress’ button to connect your WordPress website with the OptinMonster account.
Now, you have successfully connected your OptinMonter account with your WordPress website. You can now start creating the OptinMonster Content Locking campaign for your WordPress website to generate qualified leads.
Let’s start creating content locking campaigns for your WordPress website.
Step 3: Go to New Campaign and Select Inline/After Post Type
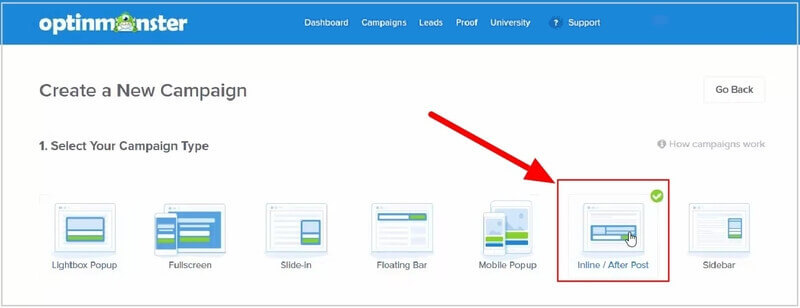
After you have done connecting your WordPress website with OptinMonster, you have to log in to the WordPress admin dashboard. Click the dashboard menu option OptinMonster >> Campaigns. Here, you have to click the ‘Create New Campaign’ button given at the top right corner of the screen.

A page will open where you have to select the ‘Inline/After Post’ campaign type to create a content locking campaign for your website.
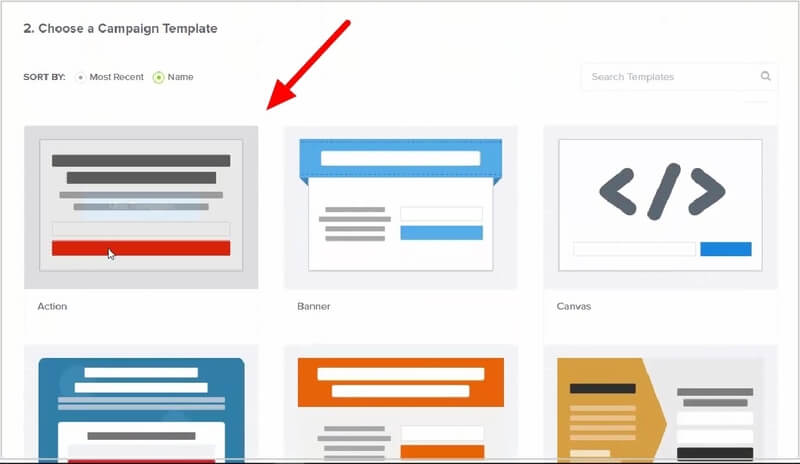
Step 4: Choose a Template for Your Content Locking Campaign
You will get many templates to choose for your content locking campaign. Select the best one to create your campaign.
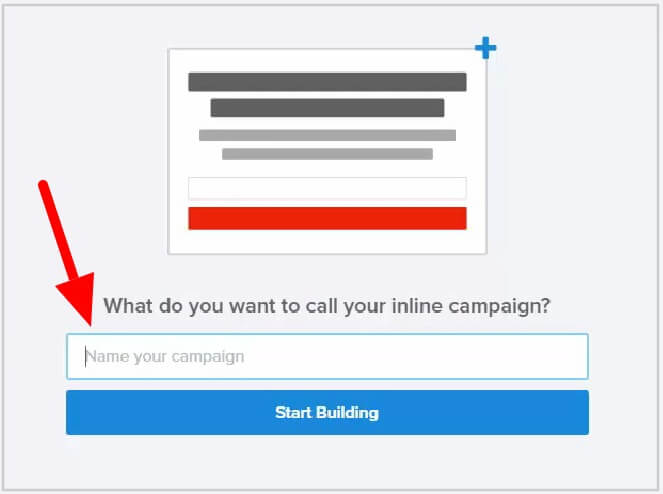
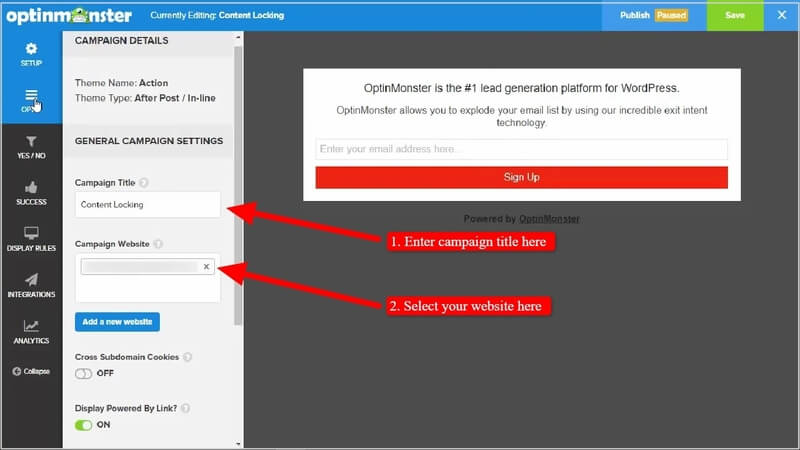
After that, name your campaign and select the website where you want to display your campaign. The below image indicated the place where you have to enter the campaign name.
Now, you have selected the campaign template and given a name to identify it from other campaigns. It’s time to change the design of your campaign as per your requirements.
Step 5: Change Design and Content of Your Content Locking Campaign
To change the design and content of your campaign, click the content you want to change. You will get an editor on the left side to easily change the text content of the campaign.
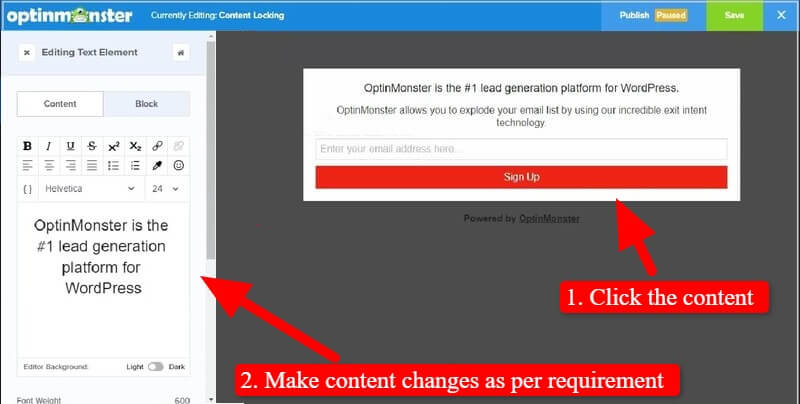
Also, click the signup button to change the button text and color to match it with your website color.
Step 6: Make Campaign Optin Settings and Enable Content Blocking
If you have not given a name for your campaign, you can do it here. Also, select a website for which you have created and display the campaign.
After that, remember to enable the ‘Block Content Below Campaign’ to make on your content locking campaign for your website. Also, select the content blocking method for your campaign. The ‘Obfuscation’ method makes all your content blur after the added content locking campaign. Users need to signup to make your content visible to read.
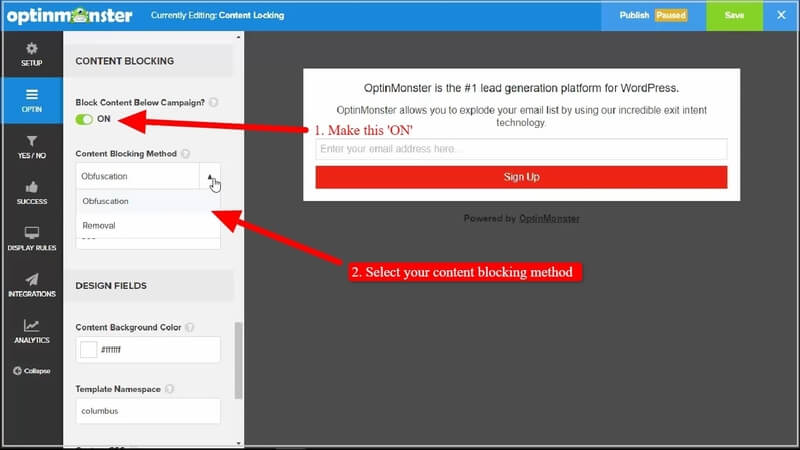
The second method ‘Removal’ removes all your content after the added content locking campaign. Here, you can select the ‘Obfuscation’ method to make content blur after the campaign.
Step 7: Final Save and Publish Your Content Locking Campaign
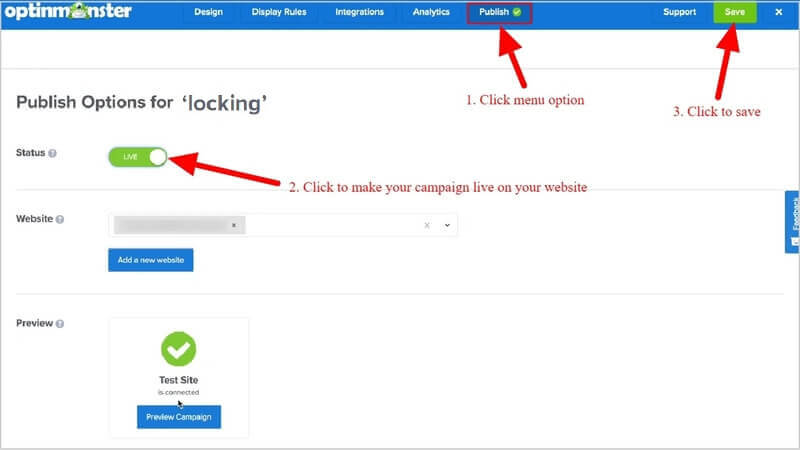
After you have done with all the above steps, select the ‘Publish’ menu option as indicated below in the image.
Here, you can finally save and publish your campaign for the selected website. Click the ‘Save’ button and click the ‘Publish’ button to final publish your content locking campaign.
You can now go to the list of campaigns and select the shortcode of the created content locking campaign. Add the shortcode to the place of your popular post content where you want to display the campaign and make the below content blur.
Congratulations! you have successfully created and added your content locking campaign to your website.
Now, each time the users visit your popular post, they need to provide email id to make content visible for details. This way you can grow your email lists and generate most targetted leads that convert well.
Conclusion
OptinMonster is the most powerful lead generation WordPress plugin in the market that helps you easily convert your traffic into subscribers. You can easily create eye-catching content locking campaigns and add it to your popular posts to attract more targetted leads and convert them into sales.
You can also offer free EBooks, downloads, and many more to attract visitors and grow your targetted email lists. Content locking is the best option to monetize your website and increase revenue.
➜Click Here to Get OptinMonster Now
You May Also Like to Read
- OptinMonster Review
- How to Get Started with Mobile Exit-Intent on OptinMonster
- Easy How To: Add an Announcement Bar, Boost Sales
- How to Create Spin to Win Campaigns in WooCommerce
- Sendinblue VS Mailchimp: Which One is Better?
- Best Email List Cleaning Services (FREE & Paid)
I hope this post helps you to easily create content locking campaigns for your WordPress website. If you have any queries regarding the tutorial given above, please comment below.
Also tell me, how you are using your content locking campaigns on your WordPress website? do comment below.