So, you have decided to start a blog on Bluehost.
Congratulations! You have made a great decision in your life to become an entrepreneur. You’re awesome!. It can be a life-changer step for you that changed my life too.
Below, you will also get a discount price with Bluehost to save a few more dollars with a free domain name. You need to take action faster to grab that offer that is available for a limited time period.
A blog is the first step in your entrepreneur journey to create and become independent in the future. It’s not a get-rich-quick scheme and you need to work hard for about 1.5 years (My recommendation) to start making passive income from your blog. Anyone can start earning passive income from a blog.
After you learn every technique of blogging and creating better content for your blog, you will be able to start earning handsome income from your blog. Click here to get Bluehost and follow the step-by-step process given below for beginners to start a blog.
Affiliate Disclosure: At Tutorialdeep, we believe in transparency for our users. In this blog, there are some referral links. If you signup with these links we will earn some commission at no extra cost to you. We recommend these links because they are our trusted brands.
In this post, you will learn how to start a blog on Bluehost hosting. This is a step-by-step beginner’s guide that you need to follow to easily create your blog today.
So, are you ready to create a blog on Bluehost? If yes, then let’s get started.
10 Reasons Why You Should Start a Blog on Bluehost?
There are many reasons why you should start a blog on Bluehost and a few tops of them are given below:
- Recommended By WordPress.org Since 2005:
WordPress is the #1 blogging platform to create a blog and easily manage your blog content without any coding knowledge. Bluehost is recommended by WordPress.org as one of the most trusted hosting to your WordPress website.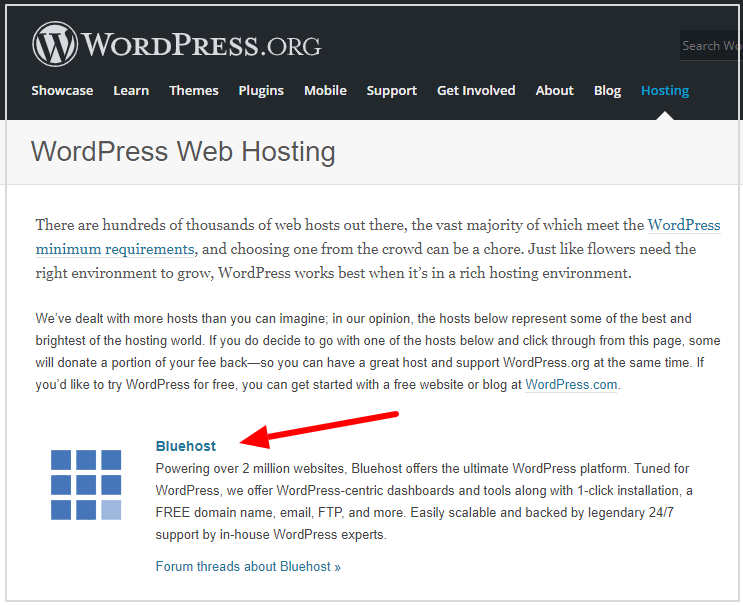
- Free Domain Name:
Other hosting providers charge about $8-$10/year for a domain name. With Bluehost, you will have a domain name (including .com) free for 1 year. - Easy to Use Interface:
It comes with an easy-to-use interface for beginners to easily manage everything from the Bluehost control panel. - Free Email Accounts: You can easily create domain-specific email ids (like [email protected]) with its free email accounts.
- Affordable Plans for Beginners with no Hidden Costs:
All its plans are affordable and come at a reasonable rate with no hidden costs. - Free CDN and SSL Certificate:
CDN is a content delivery network that delivers your resources like CSS and JS faster on browsers. SSL is a Secure Encryption Certificate. All plans come with a free CDN and SSL certificate. - Automatic WordPress Installation:
Each hosting comes with an automatic WordPress installation. You don’t need any coding knowledge to manage your blog. WordPress comes with every tool to easily manage every part of your blog. - Fast Expert 24/7 Support:
If you have any problems related to your blog hosting and domain, you can ask their expert team to resolve problems faster. - No-Risk 30-days Full Money Back Guarantee:
All its plan comes with a no-risk full satisfaction guarantee. If you are not satisfied with their hosting, you can ask for a 100% refund within 30-days of purchasing. So, there is no risk to buy Bluehost hosting.
Let’s learn the step-by-step process of how to start a blog on Bluehost.
How to Start a Blog on Bluehost (In 7 Easy Steps)
You need to follow the steps given below to start a blog on Bluehost:-
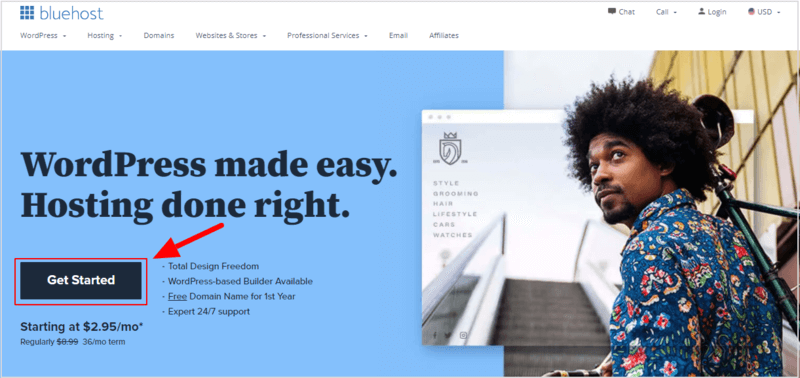
Step 1: Go To Bluehost and Select a Plan to Start a Blog
You can click here to get the Bluehost with a 70% discount with this link and open Bluehost homepage. After the 70% discount is applied, the price now starts from $2.95/month as showing in the image below. Here, you have to click the ‘Get Started’ button.
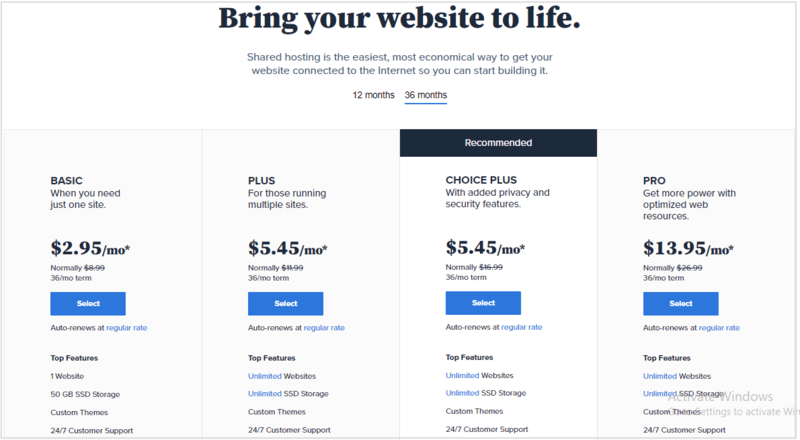
You will be taken to the pricing page of Bluehost where there is four pricing option. If you are a beginner, you can choose the ‘BASIC’ plan to get Bluehost hosting at $2.95/month when you select hosting for 36 months. I recommend you select the highest time period to get the benefits of 70% discount and save more money.
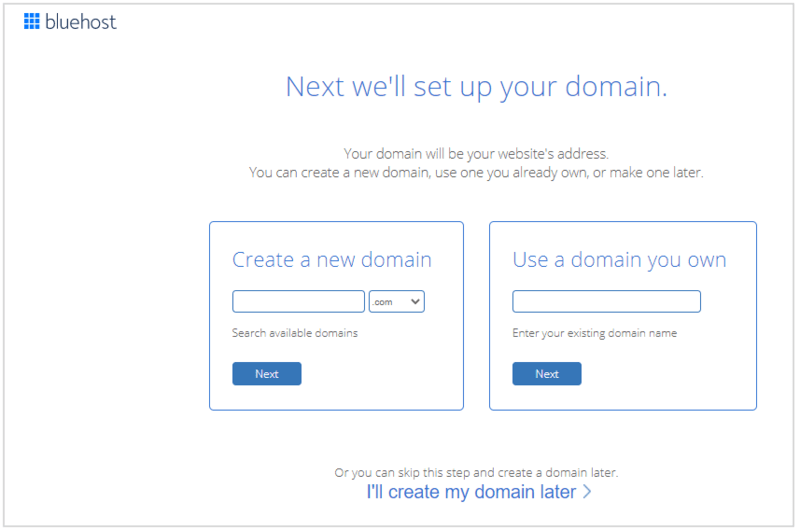
Step 2: Register a Free Domain Name
A domain name is the name of your Blog. After you select the plan above, you can register a domain that comes for free with Bluehost hosting. You have to enter the domain name in the input box given under the ‘Create New Domain’ box. After that, click the ‘Next’ button to find whether the domain name is available for you or not. If the domain name is available, you can proceed to the next page.
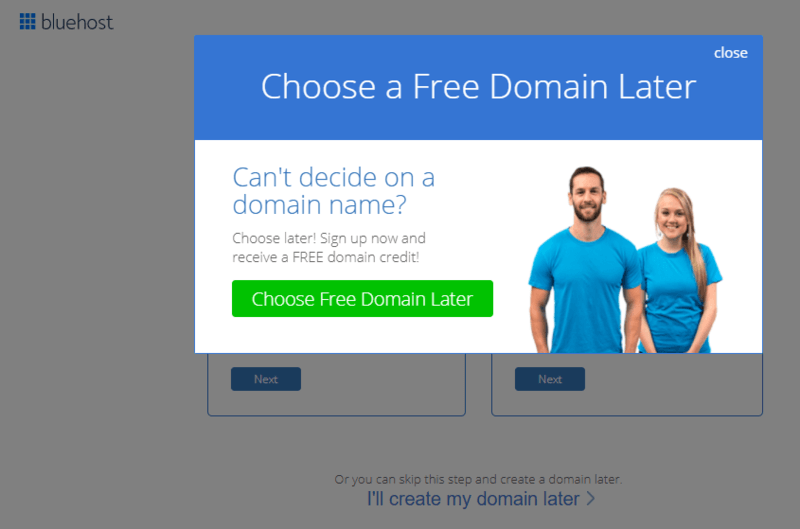
If you don’t have any domain name in your mind, you can select to choose your free domain later. You have to move your mouse towards the top of the page to get the popup as showing in the image below. Click the ‘Choose Free Domain Later’.
After you get a domain name for your blog or select choosing it later, it will take you to the create your Bluehost account page.
Step 3: Create Your Bluehost Account
To create your Bluehost account, you have to provide details like Account Information, Package Information, Package Extras, and Payment Information.
After you have completed filling in these details, your Bluehost account will be ready for your blog. So, go ahead and fill in these details.
Enter Account Information
In the Account Information section, you have to enter your details for the account like name, complete address, phone number, and email address.
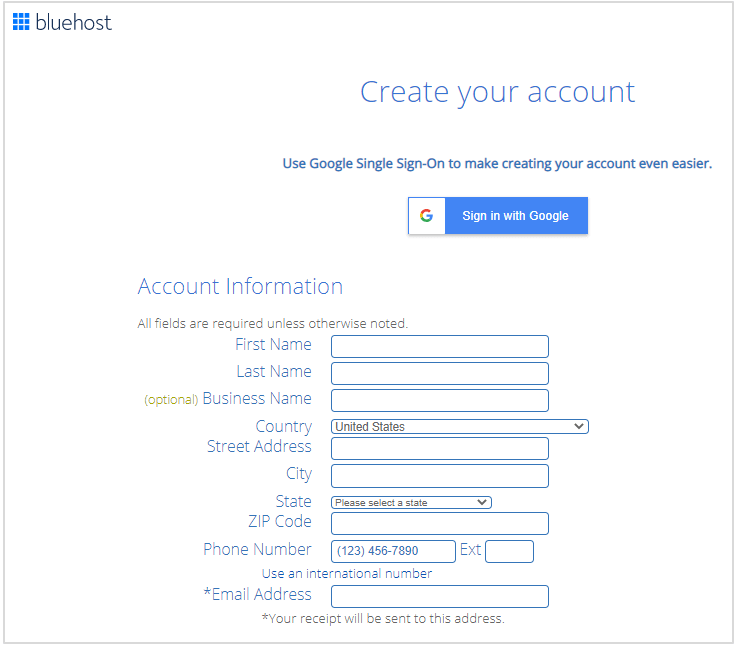
All the above fields are required to fill except the business name. So, go ahead and fill in these details for your Bluehost account. Also, make sure you use a valid email address where you will receive your Bluehost login details and account information.
Select a Best Hosting Package for Your Account
In the Package Information section, you have to choose the duration of your Bluehost hosting. I recommend you to choose the higher duration that is 36 months get the hosting at the lowest possible price.
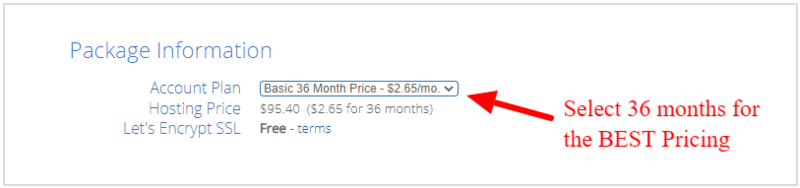
You need to pay $2.97/month when you choose to host for 36 months. After the 3 years of hosting, you will have to pay full money ($7.99/month) to renew your hosting. That’s why I recommend you choose the higher duration to save more money when you have a tight budget. By doing this, you can reduce your initial investment and get hosting at the very lowest price (at $2.97).
Choose Extra Package to Add
You can leave this section to unselect as you can get these extra packages later during your blogging journey when required.
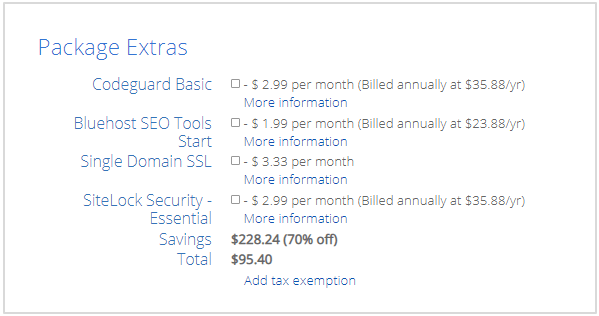
So, leave all these and move further to fill in other details.
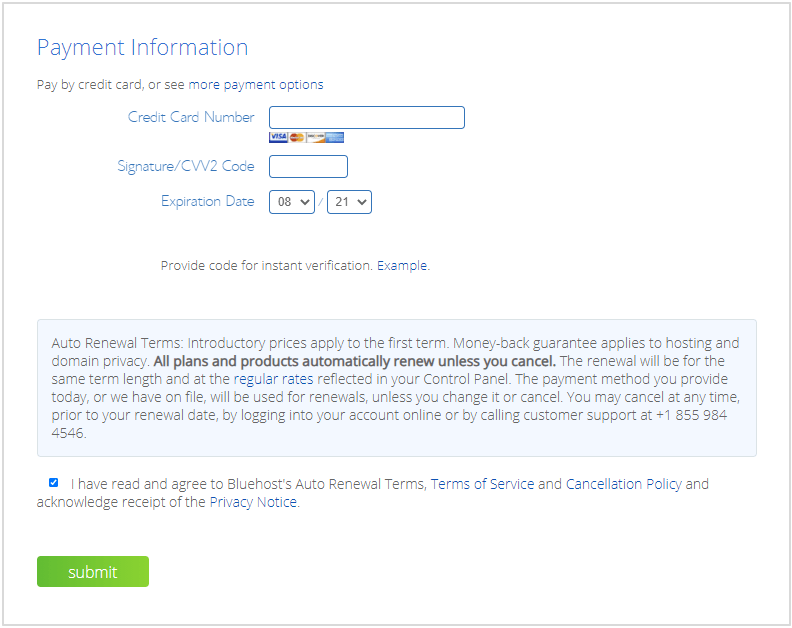
Enter Payment Information
This is the final step where you have to fill in your payment information, click the ‘I have read and agree…’ checkbox, and click the ‘Submit’ button
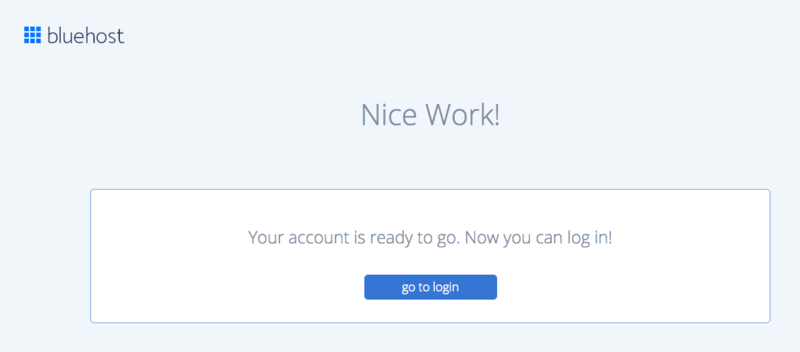
Congratulations! you have successfully purchased hosting with a Free domain name. Your blog is ready and running with the pre-installed latest version of WordPress.
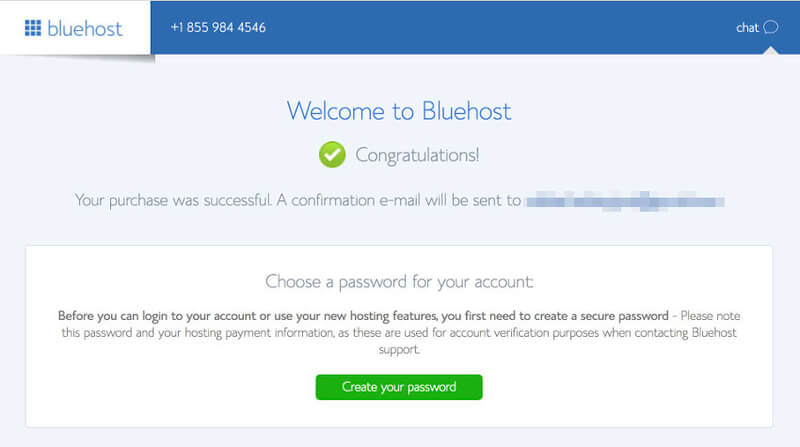
Once you have completed the above steps, you have completed the process to start a blog. You will get a welcome message as showing in the image above.
Step 4: Create a Password For Your Bluehost Account
Now, before you see your blog live, you need to create a password for your Bluehost account. to create a new password, click the green button ‘Create your password’ as given in the image above.
You will get a page where you need to enter your domain name and a new password for your Bluehost account. After you enter the password, click the button given below it to save the new password.
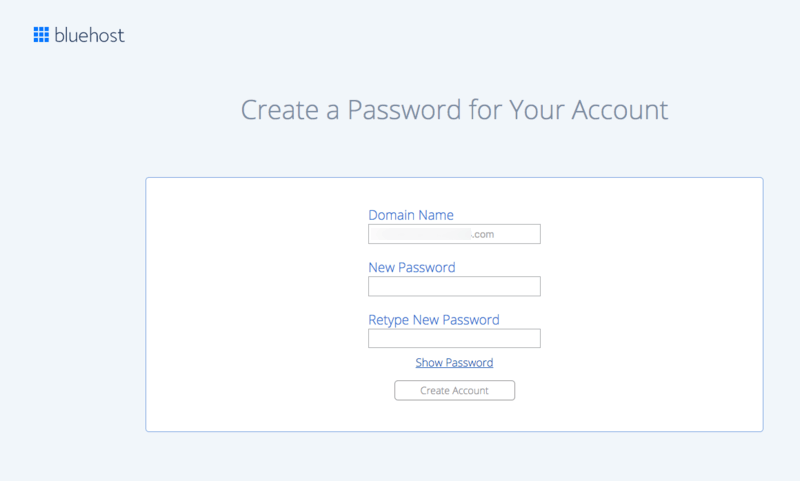
Your Bluehost account is now ready to make the login. Now, each time you want to make a login, you have to use the password you have saved above. The below image shows that your Bluehost account is ready and you can log in with it.
Step 5: Make Bluehost Login and Pick a Theme for Your Blog
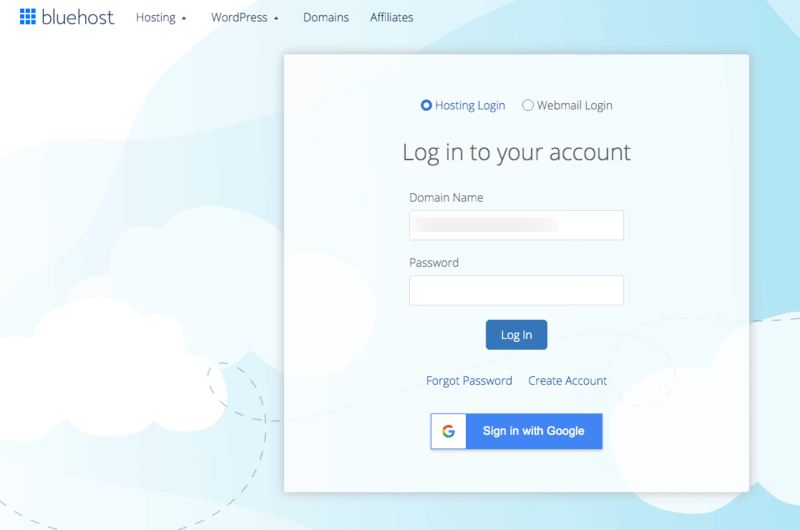
To make a login into your Bluehost account, you have to click the button ‘go to login’ as given in the image above. After you click the button, you will get the Bluehost login page as given below.
Here, you have to enter your domain name and the password you have created above. After you enter the login credentials, click the ‘Log in’ button to make a login.
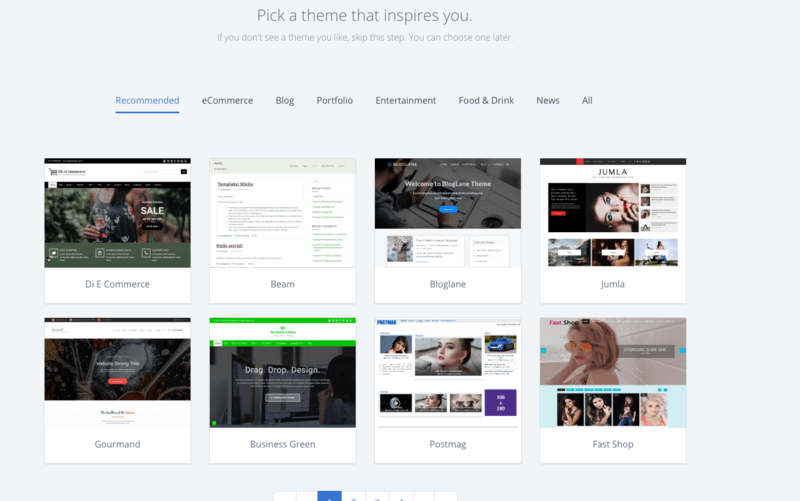
On the next page, you can select a theme for your blog that decides the overall design and look & feel of your blog. The best theme I recommend is the Astra theme. It is easy to use for beginners and comes with many features to easily manage your WordPress website.
However, if you don’t have any idea of themes, you can skip that step below the screen of the page.
Step 6: Access Your WordPress Blog Dashboard
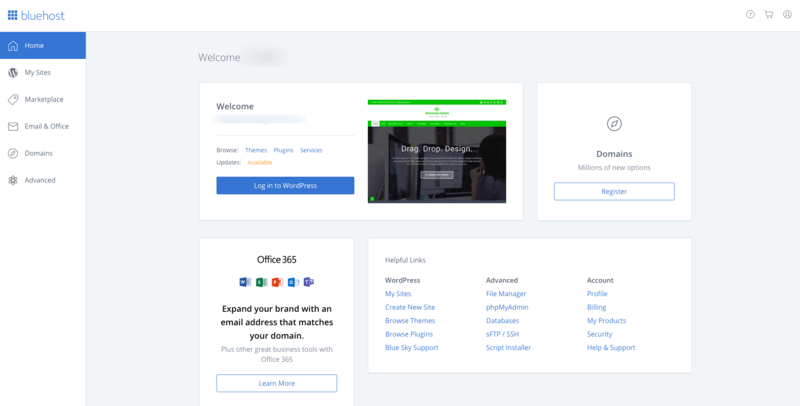
After you are done selecting a theme for your blog, you will be taken to the Bluehost dashboard whose first appearance is as given below. Here, you have to click the ‘Login to WordPress’ button to log in to your WordPress blog dashboard.
You will get a WordPress login page as showing in the image below. Here, enter your WordPress blog login username and password. Alternatively, you can also make login to your WordPress blog by entering the URL given below.
Change the name ‘yourblogname’ with the name of your blog and place it in the address bar of your browser for your WordPress blog login. If you don’t have a WordPress blog username and password, please check your email received from Bluehost to your WordPress blog login information.
After you enter the username and password and click the ‘Log In’ button, you will be taken to your WordPress blog dashboard as showing in the image below.
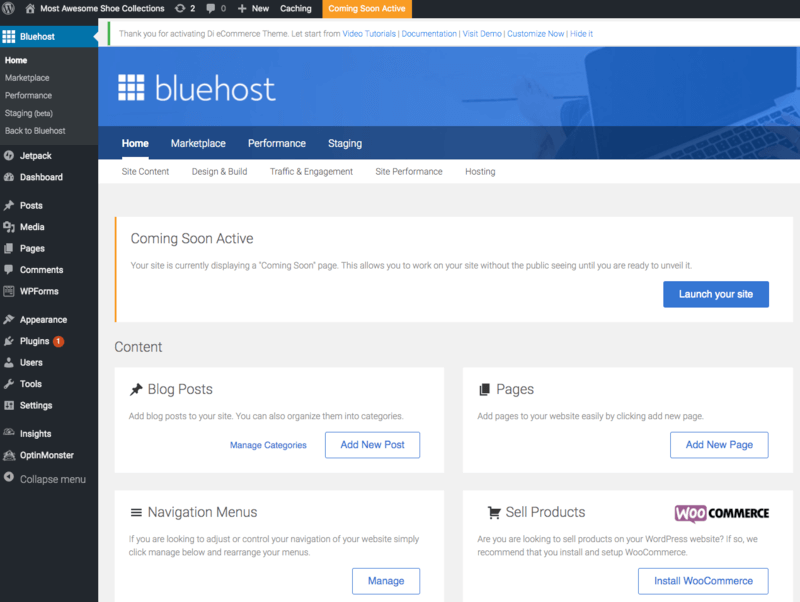
You can check each left-hand side menus option to familiarize yourself with the WordPress dashboard features and uses. Each option is useful to easily manage every part of your WordPress blog.
Description of Each Menu Options of WordPress Dashboard
The dashboard contains the following menu options as given below:-
- Posts: A post is the place where you can write, edit, and delete your blog content.
- Media: Add, upload, and delete media files like images, documents, videos, and others.
- Pages: Add pages like homepage, about, contact, etc.
- Comments: Check the comments you receive from your audience. You can approve, edit, and delete your audience’s comments.
- Appearance: You can install, update, and delete themes. It also contains options to customize themes, add widgets, add blog menus, and theme editor to edit your theme codes.
- Plugins: You can add more functionality to your WordPress blog by adding plugins. WordPress has a lot more plugins that provide more features like forms, SEO, security, and more.
- Users: Add users who can manage your WordPress blog. Initially, only you are showing here as you are the admin who can manage everything.
- Tools: You will get different tools here like import, export, and other available tools.
- Settings: The setting menu contains many options like General, Writing, Reading, Discussion, and others to make settings for your WordPress blog.
Step 7: Write First Content For Your Blog
Now, you can start writing content for your blog. You don’t need to be a professional writer to create content. The content can be anything based on the niche you want to write.
To write the first content for your blog, go to your WordPress blog dashboard menu option Posts >> Add New.

You will get the WordPress editor as showing in the image below. The editor contains the header and the body part. If you want to visit the WordPress dashboard again, you have to click the WordPress icon () given at the top left corner.
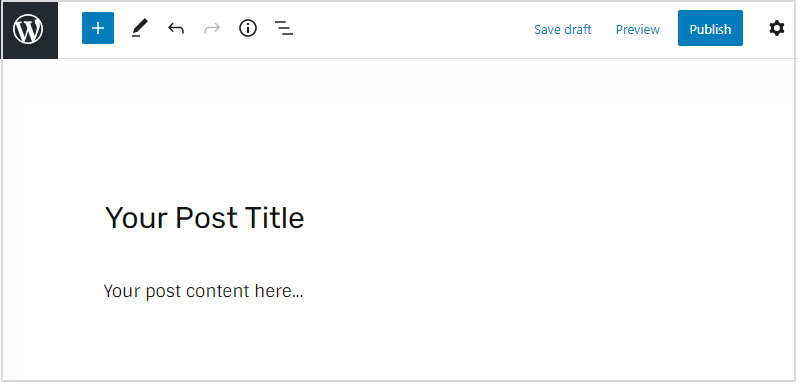
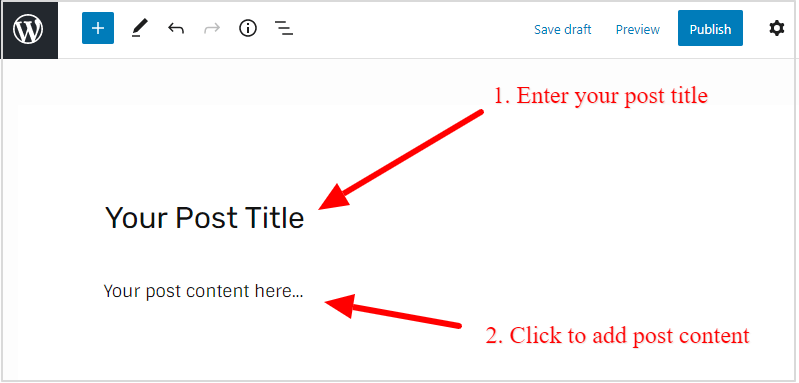
1. Enter Your Posts Title and Add Post Content
First of all, enter the post title as indicated in the place below. After that, you can start adding content for your post to the place showing below. To create the next paragraph for the content, press the enter button and add another content in a different paragraph.
You can add as many content as you want. Let’s find out how to add images, other headings, and list items to your post content.
2. Add an Image to Your Post
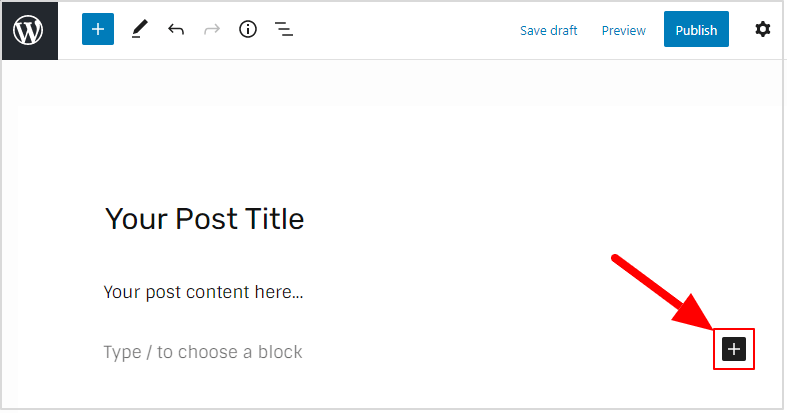
To add images to your post, you have to click the plus icon (+) icon as indicated in the image below. It is the icon that you can click to get different block types to click and add to your post content.

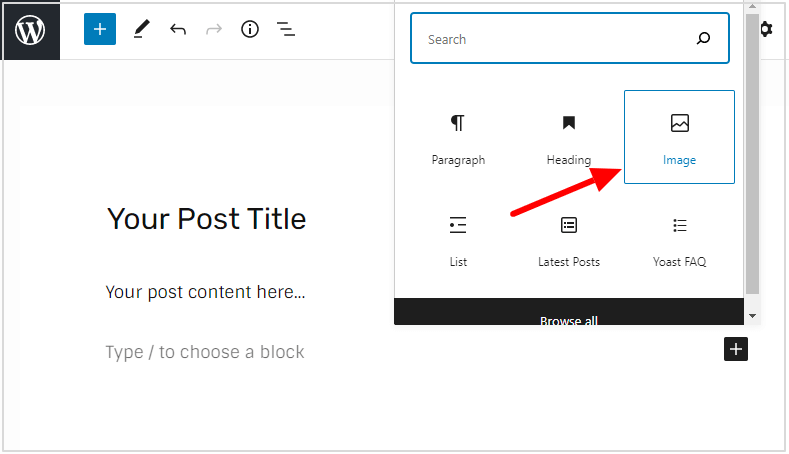
After you click the icon, you will get different block items where you have to click the image widget. The below image shows the image widget that you have to click to get the image on your content.
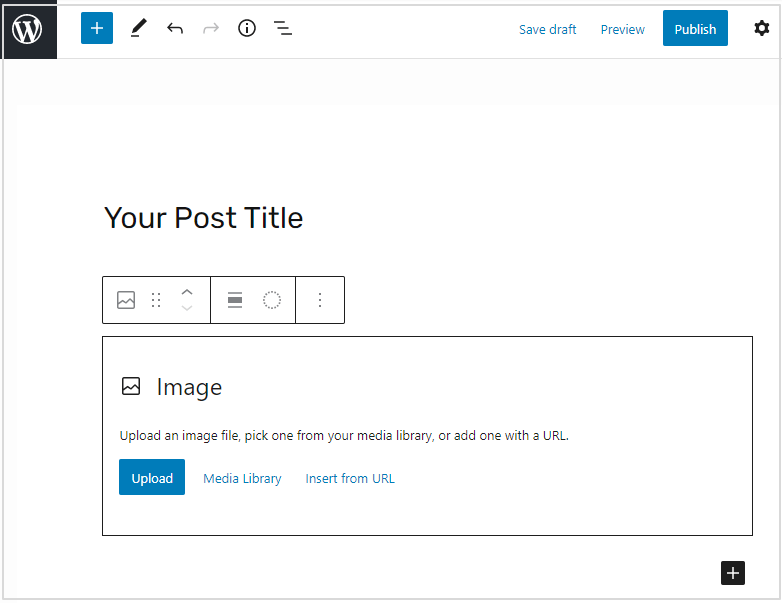
You will get the image widget where you have to click the ‘Upload’ button to add a new image to your post content. If you want to add the pre-existing image, you have to click the ‘Media Library’ link given in this widget.
3. Add Headings
There are many heading types (like h2, h3, h4, …h6) that you add to your blog post content. To add a heading to your post content, you have to click the same plus icon (+) to get different widget items.
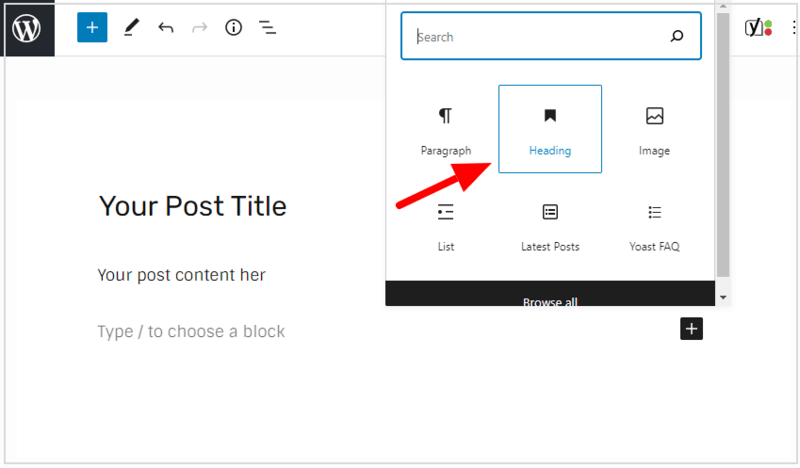
Here, you have to click the ‘Heading’ widget as indicated in the image below. It will give you all the heading options to add to your post content.
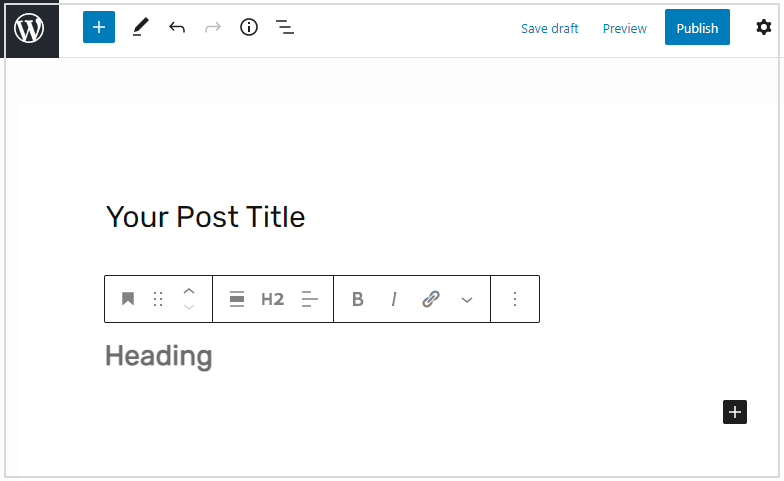
After you click the heading widget above, you will get the h2 heading added to your post content. You can add text for the heading to add to your post content. It displays the heading with its pre-defined size.
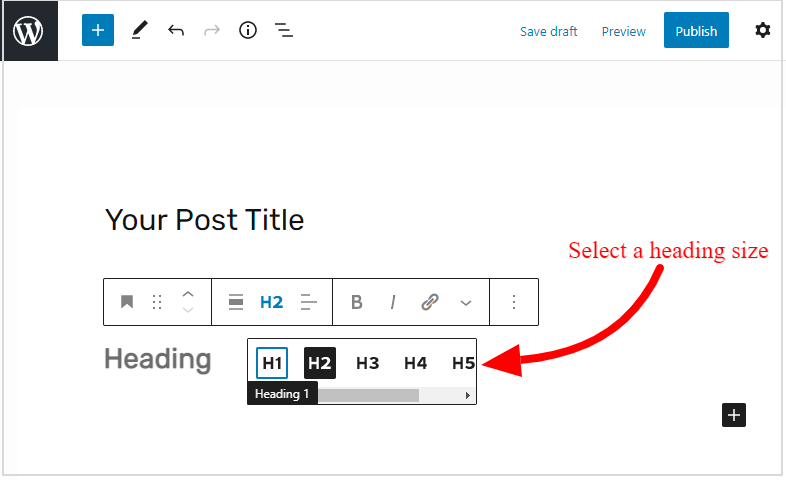
If you want to add other heading types, you have to click the ‘H2’ text given in the widget. You will get all the heading types that you can select to add to your post content. To change the heading types again, you can again click the same ‘H2’ text to get the different heading types to select others.
4. Add List Items
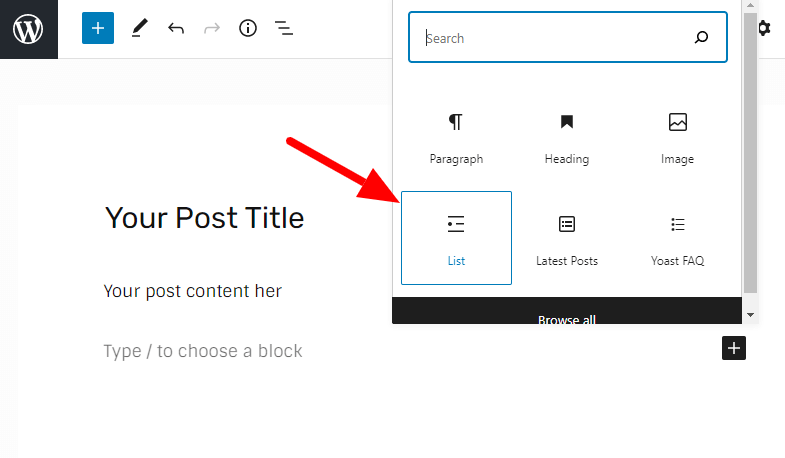
To add the list items to your blog post content, you have to click the same plus icon (+). After that, you will get different widgets where you have to click the ‘List’ widget to add list items to your content.
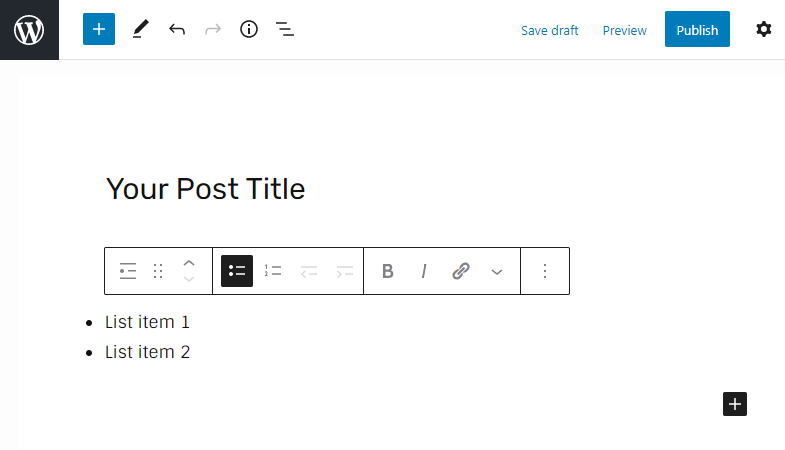
The below image shows the added list items and you can click the enter button to add more list items. You can change the list items to bulleted and numbers.
Now, if you have completed adding the content for your first post, you can click the ‘publish’ button to make your post live. You can check your live post by clicking on the ‘Preview’ button’
Congratulations! you have published your first post to share it with your audience. Go ahead and share it with your social media profiles like Facebook, Twitter, and other profiles. You can also comment on other blogs to start getting some traffic to your blog.
Now, you have completed the process of how to start a blog on Bluehost. After that, you have created the first post for your blog.
That’s all about this post. If you have any queries or are confused at any stage, you can always send me an email to my email id [email protected]. I can help you out with any questions you have on how to start a blog on Bluehost.