Do you want to make eCommerce website in WordPress? Are you looking to sell your products online?
Creating an online eCommerce store can be the best choice for you to increase your customer’s reach globally. Online eCommerce store helps you earn more and sell your product anywhere without the need to present physically.
You can easily create an eCommerce website with WordPress and start selling your product online in minutes. WordPress is a blogging platform and you have to install the WooCommerce plugin to make it a fully-functional eCommerce platform.
The best thing is that WordPress is free and comes with almost every feature to easily sell anything you want on your online store.
In this post, you will learn a step-by-step beginner’s guide on how to make an eCommerce website in WordPress. If you are ready, then, let’s get started.
What is an eCommerce Website?
An eCommerce website is an online shop where you can sell your products online. The products can be Digital, Online Services, and Physical that requires online transactions to transfer funds during purchase.
The internet can be the best medium for businesses to sell their products online according to the demands of customers. It is the most convenient way to open a shop without the need for a living room for selling products.
You can easily sell your products online from anywhere to any location with just a need for an internet connection. Customers can view your online from any size device whether it is a desktop, laptop, tablet, and mobile phone. The smartphone makes it easier to easily capture more customers from a small device.
Reasons Behind Creating eCommerce Websites
There are many reasons behind creating eCommerce websites and a few tops of them are given below:-
- Establish Your Brand Stable Online: If you want to create your branding online for your business, eCommerce websites can be the best solution for you. It helps you make your presence online for your customers to find and start getting your products.
- Attract More Audience Globally: eCommerce stores can increase your audience reach and you are not limited to your current locations. It can make your products visible globally and attract more customers from search engines and social media sites.
- Sell Products Online At Very Low Risk: It requires fewer efforts and low investment without the need for extra human resources. There is less risk of losing your money to invest in your business.
- Make Money Online: You can easily make money online after creating your eCommerce store. Each time customers make a purchase, money starts flowing to your bank account.
- Automate Your Business 24/7/365: By making your shop online, you can automate your business to run 24/7/365 days. That means, your shop will also work when you are in a sleeping position at your home.
- Make Your Shop Available From Anywhere: Customers can easily access your shop from anywhere and from any location of their choice. They can see your store and buy your products from any device like desktop, laptop, tablet, and mobile phone.
So, eCommerce stores can be the best choice to easily sell your products with just less effort and at very little investment. You can operate your product online and people can buy your products from any location of their choice.
What Things You Need for Creating an eCommerce Website
You just need 4 things for creating an eCommerce website for your online business:-
- Domain Name (Name of your Online Store) – Cost $10 annually
- Hosting (Store your eCommerce website files and databases) – Cost $3 to $5 each month
- WordPress CMS (To easily manage your website content) – Free and open-source to use
- WooCommerce Plugin (Get essential eCommerce features on your website) – Free and open-source to use
If you want to start creating your online store today, you can start with HostGator that provides hosting at $2.75/month along with a free domain name when you buy it annually or more.
Affiliate Disclosure: At Tutorialdeep, we believe in transparency for our users. In this blog, there are some referral links. If you signup with these links we will earn some commission at no extra cost to you. We recommend these links because they are our trusted brands.
How to Make an eCommerce Website in WordPress (Step-by-Step)
If you want to make an eCommerce website in WordPress from scratch, you have to follow the given below:-
Step 1: Decide Your Niche Products and Name of Your Store
You have to decide what products you want to sell online on your eCommerce store. It can be physical products like clothes, shoes, spectacles, or it can be digital products like ebooks, software, etc or any other types.
After you have decided on your products, you have to choose a name for your online store. The name should match your products or brands. You can easily make branding online for your business by choosing the best name for your store. So, be careful before choosing your store name.
Your store name can create a great impact on your business to make an online presence. It should be easier for your customers to easily remember and should not be short and simple.
Step 2: Get Domain Name and Hosting for Your eCommerce Store
A domain name (my domain name is tutorialdeep.com) is the address of your eCommerce store that your customer type of their browser to visit your store. As you have chosen a name for your online store in the previous step, you have to create a domain name from it.
To create a domain name, you have to add an extension to your store like ‘.com’, ‘.us’, ‘.in’, etc. Out of this domain extension, ‘.com’ is the standard and most popular extension recommended to every store to choose.
Hosting is the place where you house your eCommerce store on the internet. Without hosting, you cannot be able to make your website live and accessible to your customers.
HostGator offers hosting at $2.75/month to our readers with a Free domain name for 1 year. It is the oldest and the most trusted hosting and domain provider company already running 2 million websites live. With hosting and free domain, you will also get a Free SSL certificate and a 99.9% uptime warranty
➜ Click Here to Get this HostGator Offer
You will also get a 45-days money-back guarantee. This is a great chance to test HostGator for 45 -days and if you are not satisfied, they will return all your money back. So, a full satisfaction guarantee from HostGator.
Step 3: Install WordPress and WooCommerce
To install WooCOmmerce on your WordPress website, you have to visit your WordPress dashboard menu option Plugins >> Add New.

You will get a page where there is an input box as given in the image below. You have to enter ‘WooCommerce’ in the input box to get the WooCommerce plugin.
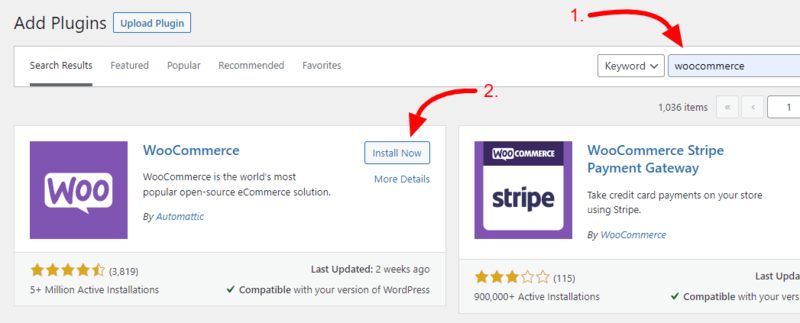
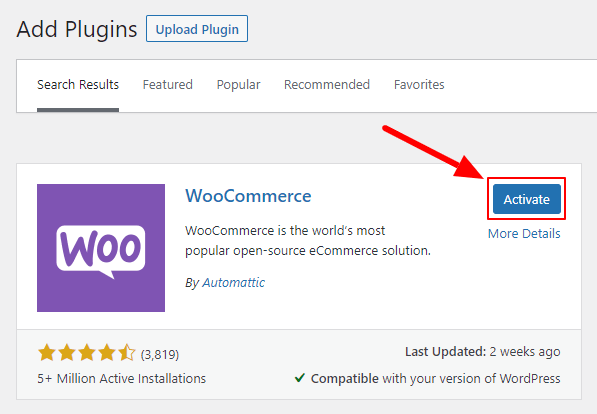
After you get the WooCommerce plugin, you have to click the ‘Install’ button to install and activate the plugin on your WordPress website.
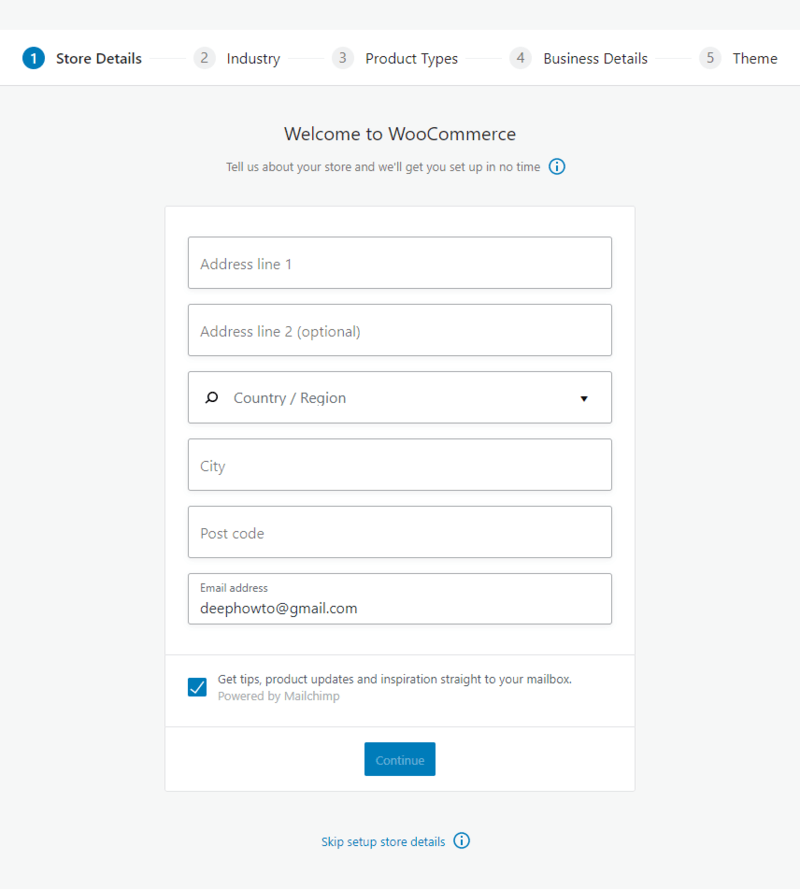
When you have completed installing the WooCommerce plugin, you will get an easy setup process to enter the details of your eCommerce store. this is 1st step where you have to enter your address details and your emails address for the store.
If you have completed filling in your store details, you can click the ‘Continue’ button to proceed further.
The 2nd step contains the checkboxes where you have to select your industry type for your store. After selecting your industry type, you can click the ‘Continue’ button to go to the next step.

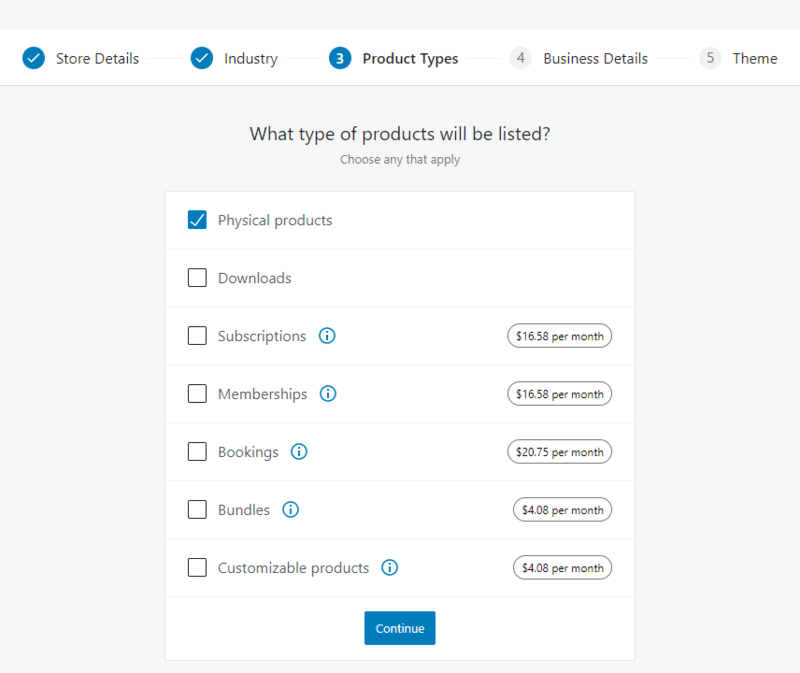
Now, you have to select your product type in the 3rd step that you want to sell on your online WooCommerce store. If you are going to sell physical products, you can select the ‘Physical products’ options. But, if you want to sell digital products in your store like eBooks, software, etc, you can select the ‘Download’ option.
After selecting the required option, you have to click the ‘Continue’ to get the next step for the setup.
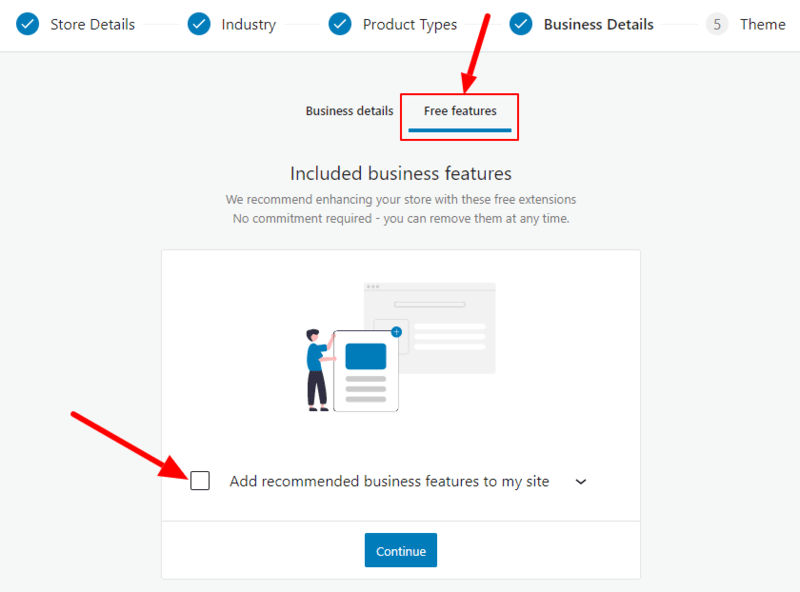
The 4th step requires entering your business details like the number of products and currently selling place. If you are creating this store for your client, you can click the checkbox to mention it. After giving all the required inputs, you can click the ‘Continue’ button to proceed.

In the 4th step, it also asks you if you want to get free features of WooCommerce. It is recommended to leave this unchecked for now as you can add them at a later time also.
Furthermore, the 5th step requires selecting a theme for your online store. You can choose the WooCommerce made ‘Storefront’ theme as it is a fully eCommerce premium theme.

Now, you have completed the setup wizard of your WooCommerce, you can move further to set up a payment method for your store to start accepting payments online.
Step 4: Set Default Currency and Payment Method to Collect Payments
To set up your default currency, you have to visit your WordPress dashboard menu option WooCommerce >> Settings

You will get the settings page of WooCommerce where you have to open the ‘General’ tab as given in the image below.

Here, scroll down to the currency options section to get the currency dropdown to select your default currency for your store. You can set any currency of your choice here.
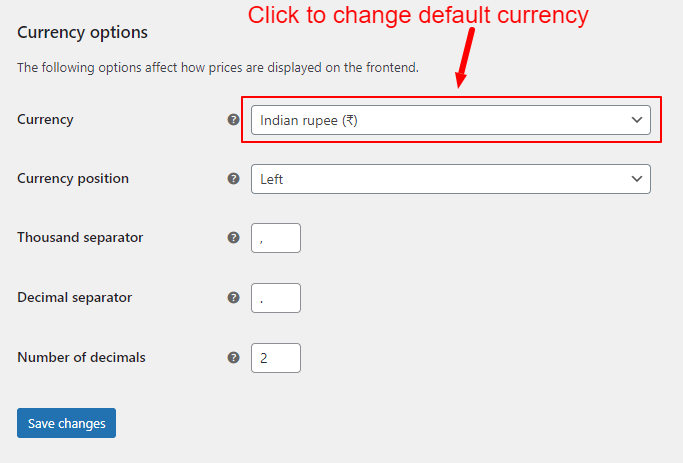
After you set up your default currency, don’t forget to click the ‘Save’ button to save the setting.
Setup Razorpay Payment Gateway
Razorpay is the easy payment collection system to collect payments from your online store to your bank accounts directly. It supports 100+ currencies around the world with easy activation and seamless integration.
So, let’s start integrating Razorpay to your WooCommerce website with the process given below:-
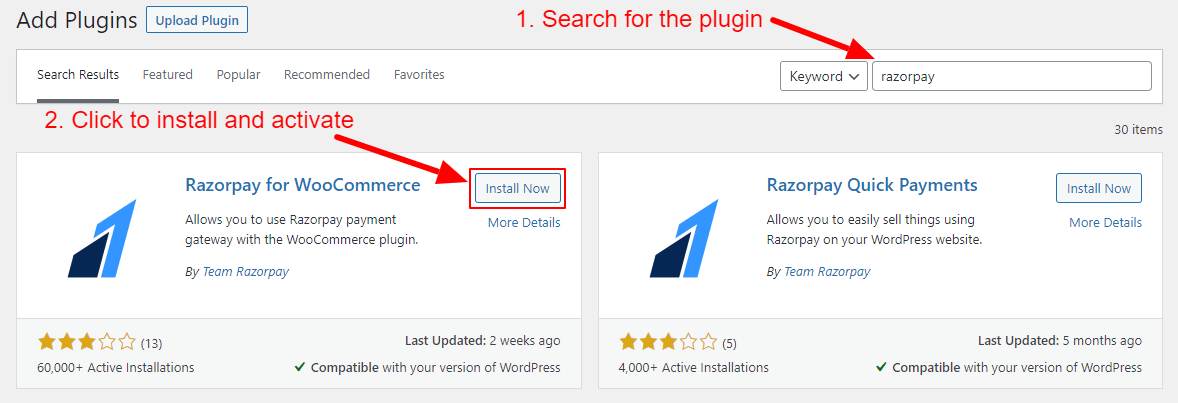
To set up a Razorpay payment gateway integration system to your online store, you have to first install the Razorpay payment Gateway plugin on your WordPress WooCommerce website. Visit your WordPress website dashboard menu option Plugins >> Add New as show in the image below.
You will be taken to a page where you will get an input box and you have to enter ‘Razorpay’ there to find the Razorpay plugin. After you get the Razorpay plugin, you have to click the ‘Install Now’ button to install and activate the plugin on your WooCommerce store.
To set up the Razorpay payment system on your online store, you also have created and activated your Razorpay account.
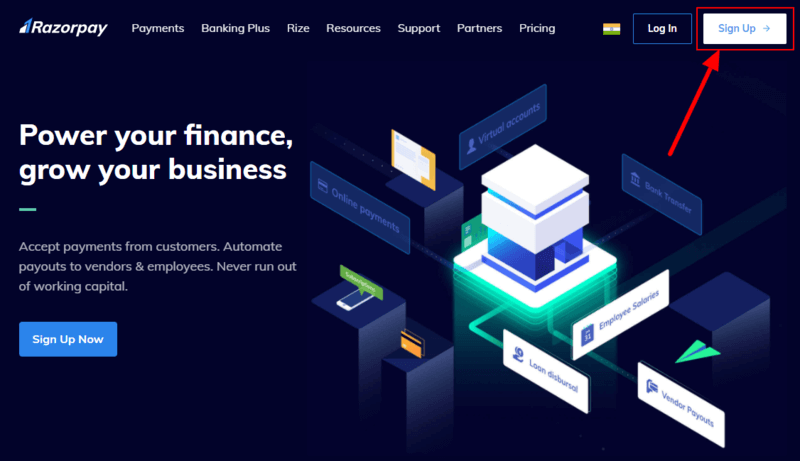
For creating and activating your Razorpay account, visit the Razorpay website and click the ‘Sign Up’ link as given in the image below.
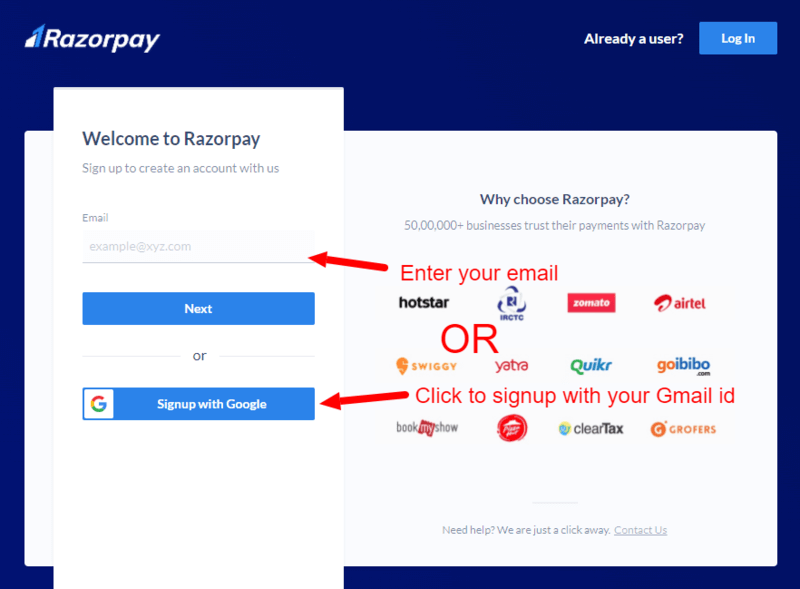
It will take you to the Razorpay account creation page where you have to provide an email address for your account. You can also choose to create your account with your Gmail account by clicking on the ‘Signup with Google’ button.
After selecting your preferred signup option above, you have to select your business type. The below image shows that you can select either Unregistered business type or registered business type.

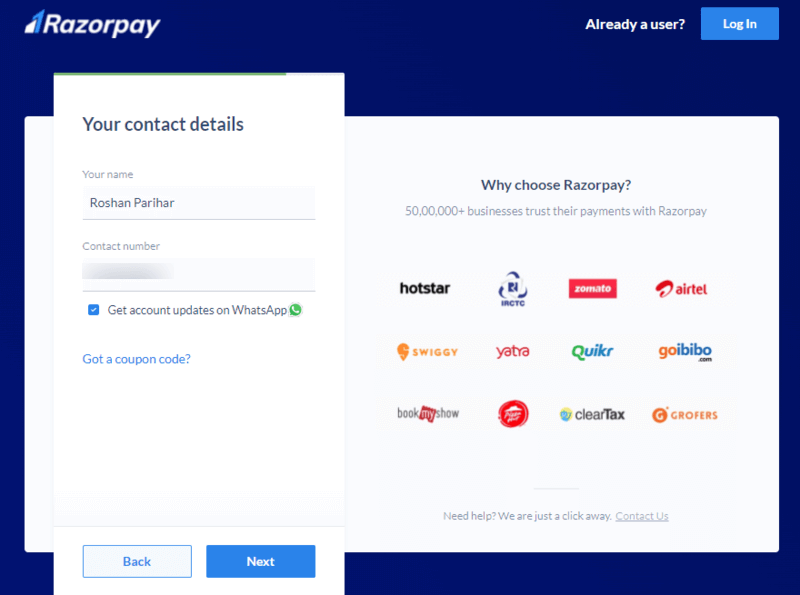
If you have completed your business type above, you have to enter your contact details like your name and contact number.
After you have completed filling in your contact details, it will take you to the page where you will get a button. You have to click the ‘Activate your account’ button to start activating your Razorpay account for payment collection on your online store.

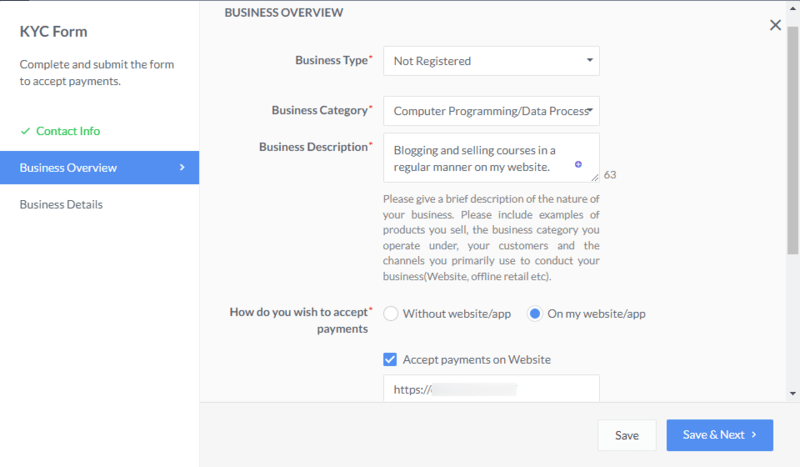
A KYC form will open where you will get three different tabs that are Contact Info, Business Overview, and Business Details. The Contact Info tab already shows checked and completed with green color as you have already filled your contact details above.
The second tab is the ‘Business Overview’ where you have to select your Business Type, Business Category, and Business Description. You also have to select and enter your website as you are going to accept payment through your online website.
After you have completed filling in your business overview and your website, click the ‘Save & Next’ button to proceed further.
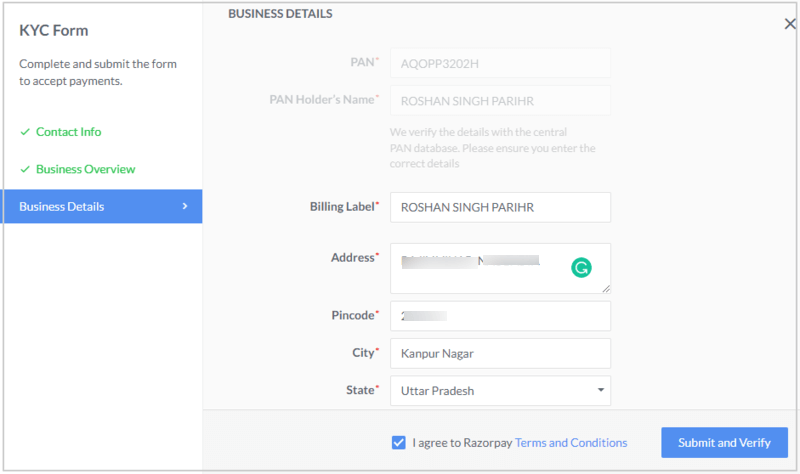
The last tab is the ‘Business Details’ where you have to enter your business details. Here, you will have to provide your PAN Number, PAN Holder’s Name, Billing Label (Enter your name), and your full address details.
When you have completed filling in your business details, you have to select the checkbox that you agree with Razorpay terms and conditions. Click the ‘Submit & Verify’ button to proceed further.
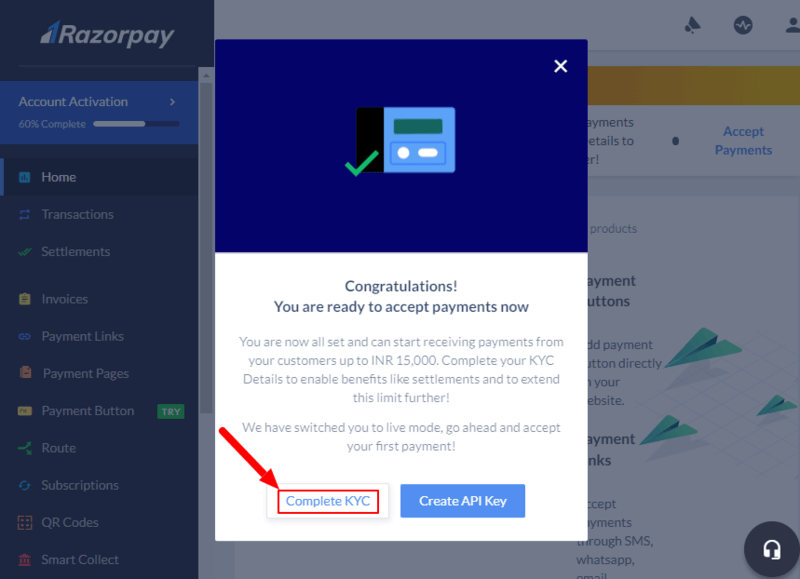
Now, you can start accepting payments from your customers on your online store using the Razorpay payment system. But, the limit for online transactions is Rs 15,000. You have to complete your KYC details to get settlement benefits and increase this limit.
To complete your KYC, you have to click the ‘Complete KYC’ link to fill.
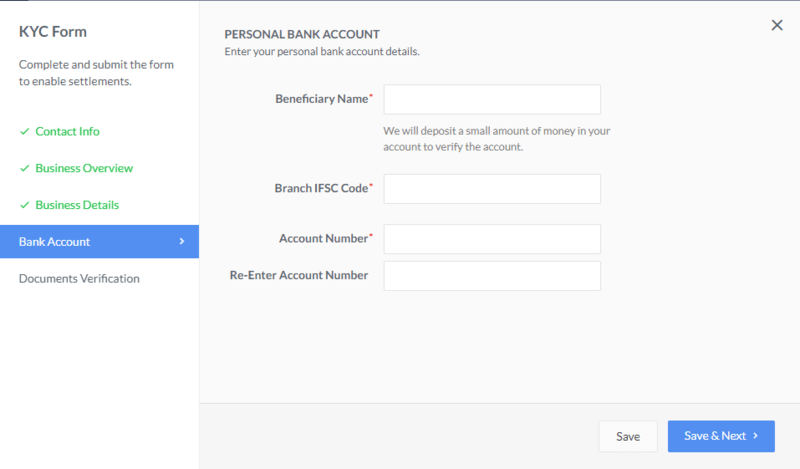
After that, you will get a tab ‘Bank Account’ to fill in your bank account details like Beneficiary Name, Branch IFSC Code, and Account Number. Click the ‘Save & Next’ button to proceed further.
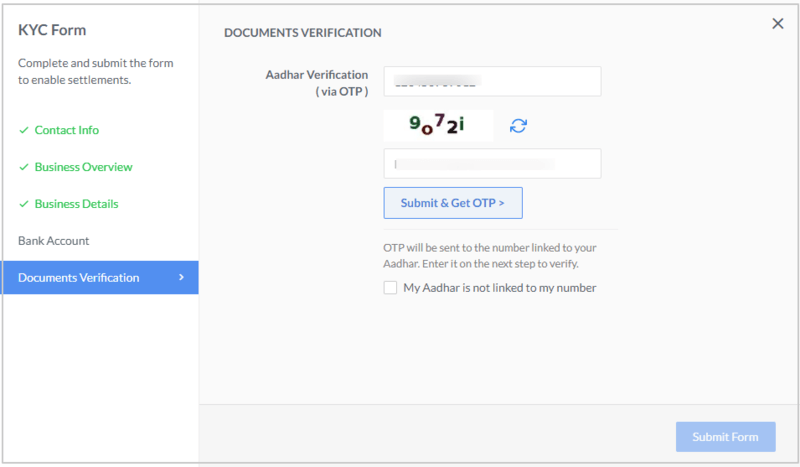
Furthermore, the last tab is ‘Documents Verification’ where you have to fill and provide your documents like Aadhar Card for verification. After you enter your Aadhar card and press the ‘Submit & Get OTP’ button, you will get OTP to your mobile number added with your Aadhar card.
If your Aadhar card is not connected with your mobile number, you have to provide more documents and details for verification.
Once you have completed the above steps, your Razorpay account is ready to collect payments with extended limits.
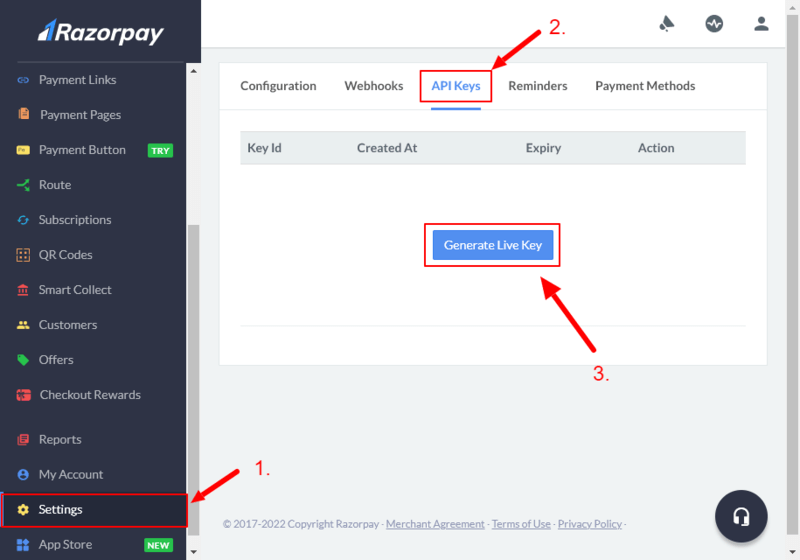
Now, move further and generate the API for Razorpay payment integration. To generate API, visit your Razorpay dashboard menu option Settings >> API Key and click the ‘Generate Live Key’ button.
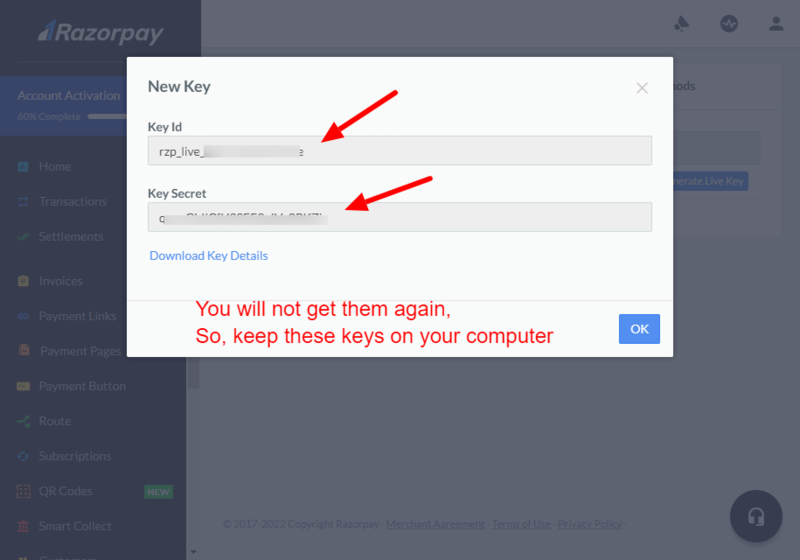
After you click the ‘Generate Live Key’ button above, you will get Key Id and Key Secret that you have to keep safe on your computer for further use.
Now, you have placed these keys to your WordPress WooCommerce website to activate your Razorpay payment gateway. For this, you have to visit your WordPress website dashboard menu option WooCommerce >> Settings and click the ‘Payments’ tab to get the Razorpay payment option.
You have to first enable Razorpay by clicking on the radio button as indicated in the image below. After that, click the ‘Manage’ button to set up your Razorpay payment option and enter the key you obtain above.

On the Razorpay setup page, you have to enable the module, Enter a title for Razorpay payment, Description, and enter your saved Key ID & Key Secret.
Finally, click the ‘Save Changes’ button to make your Razorpay Payment Gateway active on your WooCommerce website.

Now, your website is ready to collect Razorpay payments through Credit, Debit, and Net Banking.
Step 5: Start Adding Your Products
As you have done with all the above setup, you can create products to sell them online on your WooCommerce store.
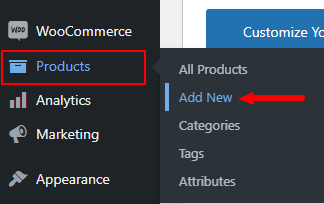
To start adding products to your WooCommerce store, you have to open your WordPress dashboard menu option Products >> Add New as given in the image below.
You will get a page as shown in the image below to start adding a product to your WooCommerce store. Here, you have to first add the name of the product and a description of the product.

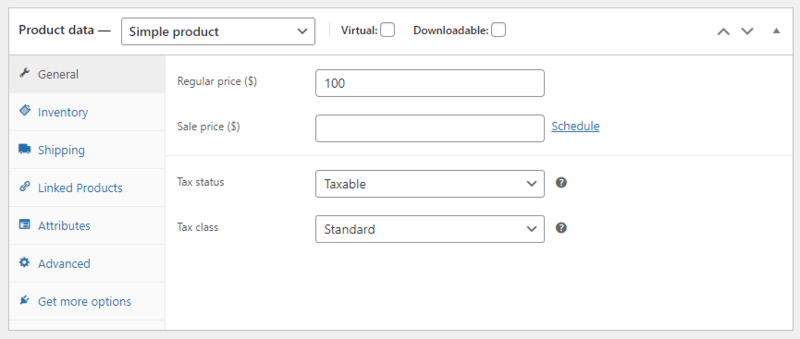
When you scroll down the page, you will get a product data section to add all the required data for the product to add to your store.
You can start with the ‘General’ tab where you have to add a regular price of the product to display in the frontend to customers. If you are running a sale and want to show less price from the regular price, you have to enter a lower price in the Sale price input box.
If you want to manage the inventory of the product on your WooCommerce store, you can use the ‘Inventory’ tab of the product data section. In the inventory tab, you can add SKU (Stock Keeping Unit) code for the product that is useful to track the stocks of products.
When you have a limited quantity of products for your business, you can click the Manage Stock checkbox and enter your quantity for the product. This is useful to show stock and not in-stock products on your WooCommerce store.

The shipping tab as indicated in the image below is useful when you want to ship your products to your customers. Here, you can add the weight and dimensions of the product to ship.

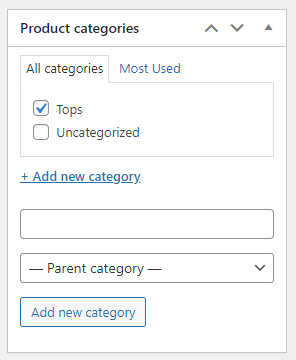
The products are easily managed and organized on your WordPress website using Categories. On the product page, you can add and assign a category to your product. The below image shows the added category to the product.
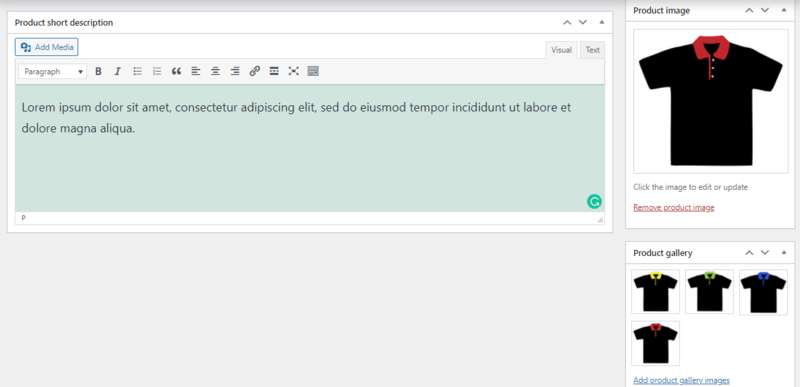
Lastly, you have to add a short description for your product to display in the frontend to your customers. The right-hand side in the image below is useful to add a product image for your store to display to your customers.
You can add a single main image for the product and a gallery of images from different side views of the product. This helps customers to deeply see the product with look and feel. This attracts customers and grab attention to encourage them to buy your products online from your store.
Keep adding all the products to your store with the above-given process. Your online WooCommerce store is ready with your products and payment collection system.
Now, each time your customers want to buy your product, they will reach your online store, select a product, and proceed to checkout to make payment to you.
Bonus Tip: You can install the best WooCommerce plugins to your WordPress website to add more useful features to your online store. These plugins can help you easily gain more customers and generate more sales from your customers.
Conclusion
You can easily make an eCommerce website in WordPress by combining it with the WooCommerce plugin. The plugin comes with all the essential features to easily create your online store in minutes.
After creating your online store, you can start selling your products and collecting payments. You can easily integrate your online store with payment gateway options like PayPal, Stripe, Razorpay, and many more. These payment gateways help you easily get paid and collect payments to your bank account.
I hope you like this post on how to make an eCommerce website in WordPress. If you have any queries regarding this post, you can comment below.
Also tell me, what product you are selling on your online WooCommerce store?