Are you looking to create a countdown timer popup to boost sales like crazy and grow your website?
Creating countdown timers helps you to add flash sales with timers to promote urgent holiday offers. You can display urgent deals and promotions when the users try to leave your website to increase conversions.
The countdown timers contain the clock widget that counts down in seconds, minutes, hours, and days that is perfect for flash sales. It can drive more sales and conversions to grow your business.

In this post, you will learn how to create a countdown timer popup for sale growth.
Affiliate Disclosure: At Tutorialdeep, we believe in transparency for our users. In this blog, there are some referral links. If you signup with these links we will earn some commission at no extra cost to you. We recommend these links because these are our trusted brands.
How to Create Countdown Timer Popup for Sale Growth
To create countdown timer popups for your WordPress website, I recommend you to use the OptinMonster plugin.
OptinMonster is the #1 lead generation plugin for WordPress that helps you to boost sales and conversions. It comes with easy to use interface to create countdown timer popups and create flash sale offers, holiday sale offers, and more to grab more customers and increase sales. You can also use OptinMonster Exit-Intent technology to display popups when the users try to leave the website.
Follow the step-by-step process given below to create countdown timer popups for WordPress:-
Step 1: Create OptinMonster Account to Create Countdown Timer Popups
First of all, you have to open the OptinMonster homepage. You can also use the button given below to go to the OptinMonster website.
➜Click Here to Open the OptinMonster Homepage
On the homepage, you have to click the ‘Get OptinMonster Now’ button to go to the pricing page of OptinMonster.

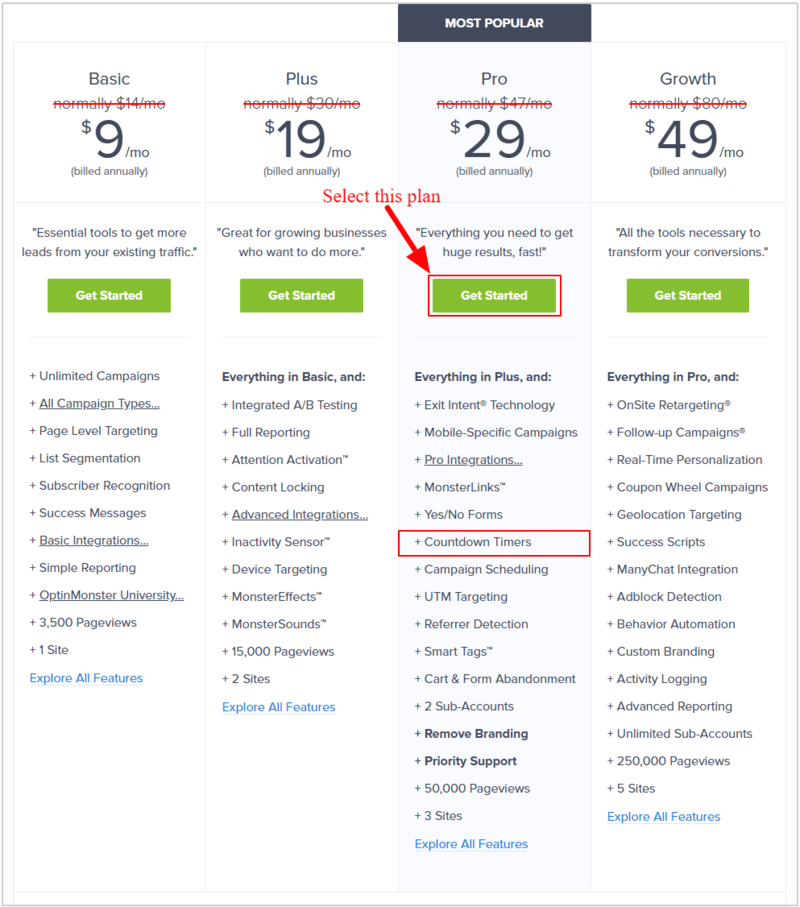
A pricing page will open where you will get four pricing options to select for the OptinMonster account. Out of these four plans, I recommend you to choose the OptinMonster ‘Pro’ to get all the essential features including the countdown timer feature.
Click the ‘Get Started’ button given under the ‘Pro’ plan to get the plan that gives you the Countdown Timer feature as given in the image below.
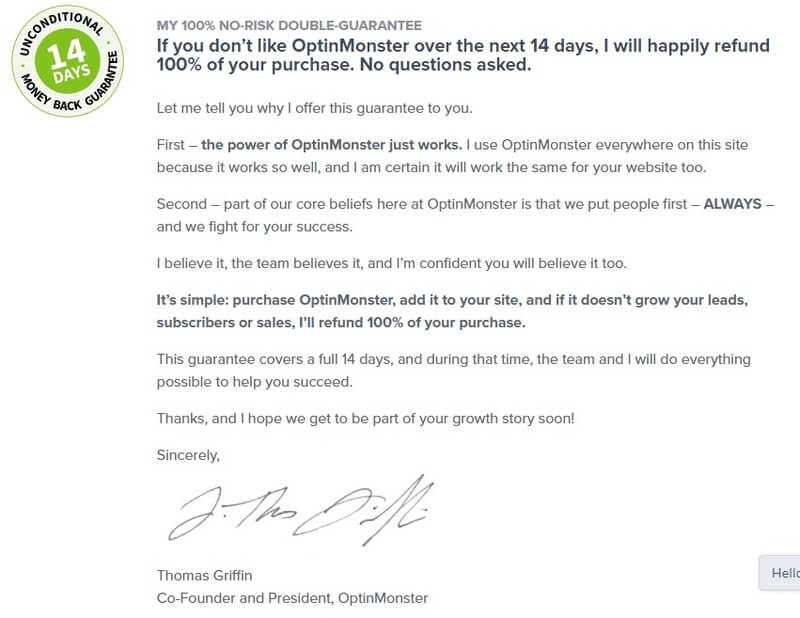
The founder of the OptinMonster plugin is very confident of their product and the features of the plugin. If you found the plugin is not fulfilling your needs, they will happily refund 100% of your money with no questions asked.
So, every plan of the OptinMonster plugin comes with a double satisfaction guarantee. See the image below from the founder of the plugin that provides an unconditional 14-days money-back guarantee.
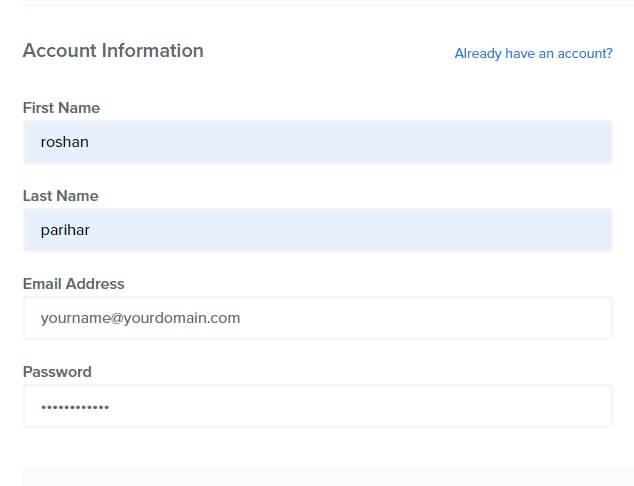
After you click the ‘Get Started’ button above on the pricing page, you will get a form to create an OptinMonster account. Here, you have to provide your account information and payment method to make payment and create your OptinMonster account. Enter your name, email, and password for OptinMonster account information.
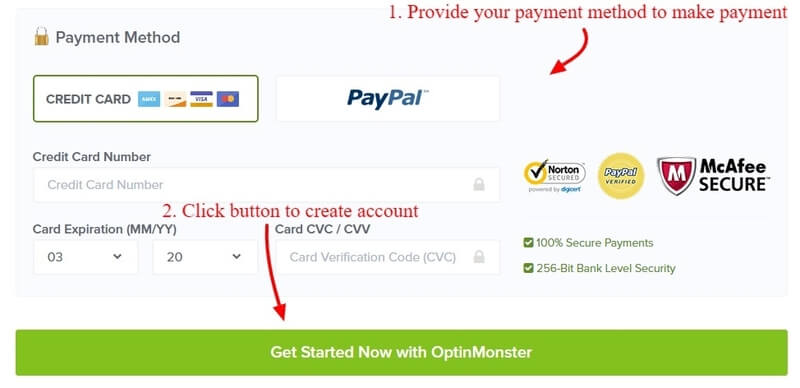
To complete the purchase of the OptinMonster plugin, there are two payment options to make payment. These options are through a credit card or Paypal method.
You have to select your preferred method of payment to complete the purchase. After that, you have to click the ‘Get Started Now with OptinMonster’ button to complete the purchase of the plugin.
Now, login to your email account that you have provided in the account information above to click the email verification link. This is required to complete creating an account with OptinMonster.
Step 2: Connect WordPress Website with OptinMonster
After you have done creating the OptinMonster account, you have to connect your WordPress website with the OptinMonster account. To connect WordPress with OptinMonster, you have to install and activate the OptinMonster plugin on your WordPress website.
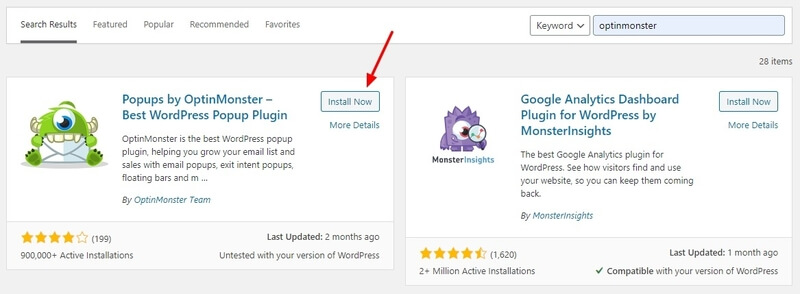
Login to your WordPress admin and go to WordPress dashboard menu option Plugins >> Add New. Here, you have to search for the OptinMonster plugin as showing in the image below. After you find the plugin, click the “Install Now” button to install and activate the OptinMonster plugin.
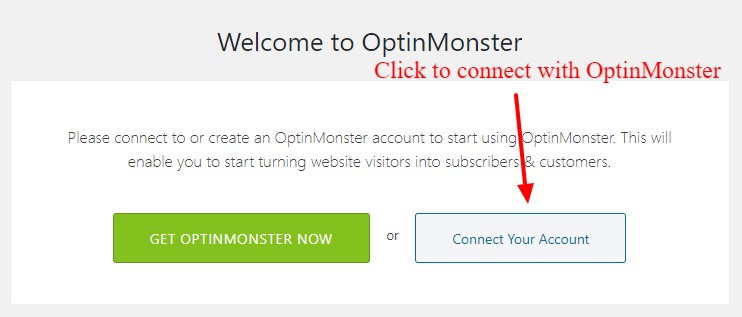
After the installation of the plugin, you will get an OptinMonster welcome page. Here, you have to click the ‘Connect Your Account’ button to start connecting your WordPress website with OptinMonster account.
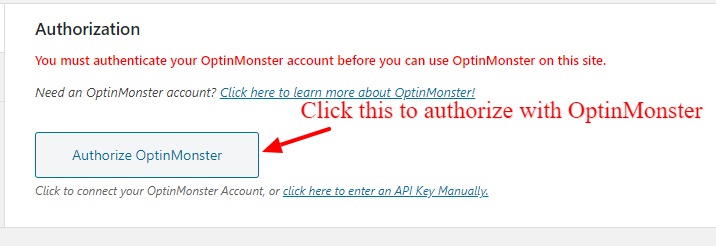
Now, you need to authorize your OptinMonster account to start using OptinMonster on your WordPress website. You have to click the ‘Authorize OptinMonster’ button to open the login page of OptinMonster. Enter your OptinMonster account details to log in and authorize with your WordPress website.
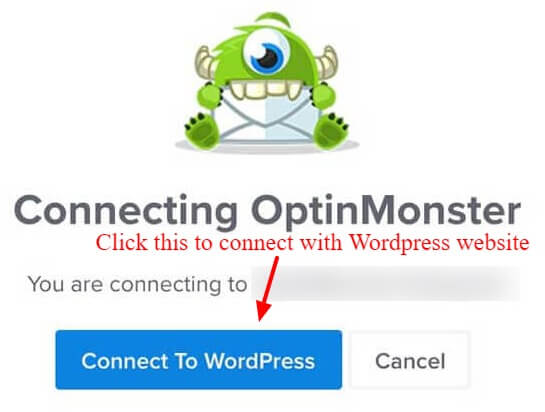
To finally complete the connection of your WordPress website with the OptinMonster account, you have to click the ‘Connect To WordPress’ button to final authorize your WordPress website.
Now, your website is successfully connected with your OptinMonster account. You can now start using the OptinMonster Countdown Timer popup in combination with exit-intent technology to boost sales.
Let’s create a countdown timer popup campaign with exit-intent technology to display flash sales, promotions, and deals.
Step 3: Go to New Campaign and Select Popup Type
To create a popup campaign for your website, open your WordPress admin and go to the dashboard menu option OptinMonster >> Campaigns. In the dashboard, click the ‘Create New Campaign’ button given at the top right corner of the screen as showing in the image below.
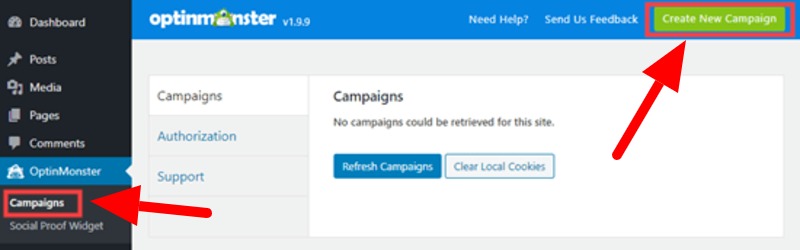
You will get a page where you have to select the ‘Popup’ campaign type to create a countdown timer popup campaign with exit-intent technology for your WordPress website.
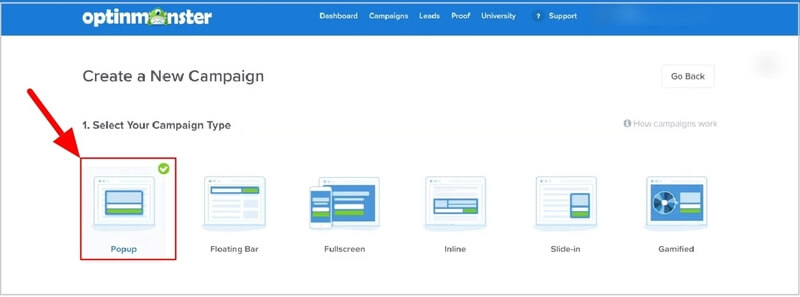
Step 4: Choose a Template to Create Countdown Timer Popup Campaign
Here, you will get many popup templates and you need to select one for your countdown timer popup campaign. I am selecting the ‘Entice’ template to create the campaign for the WordPress website.

After you select the template, enter a name for the template and select a website where you want to display the countdown timer popup campaign. The below image indicated the fields where you have to fill in the details and click the ‘Start Building’ button.
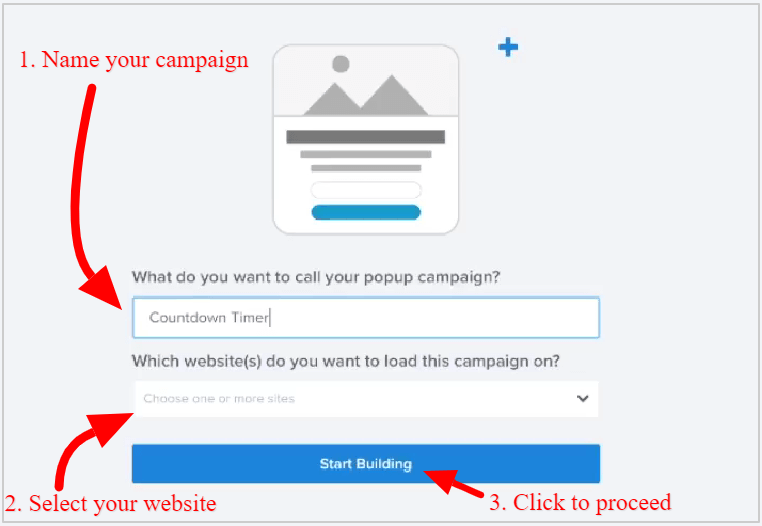
A page will open where you will get the first appearance of your template and its content. You need to change it as per your requirements and add a timer to make it a countdown timer popup for your website.
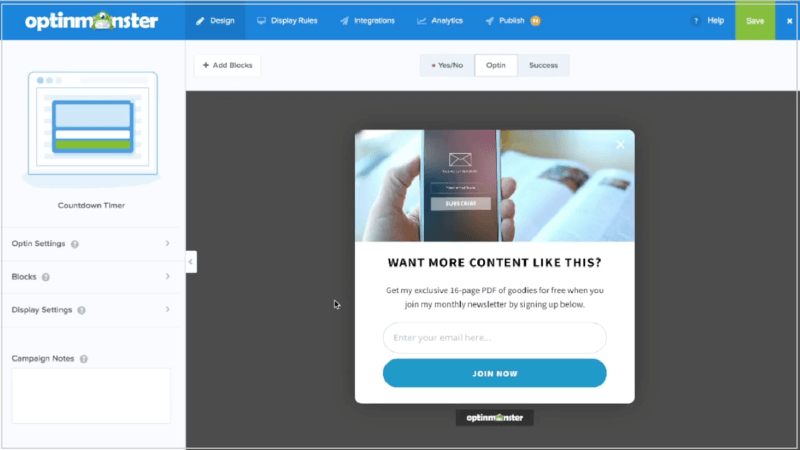
Step 5: Change Design and Content of Your Countdown Timer Popups Campaign
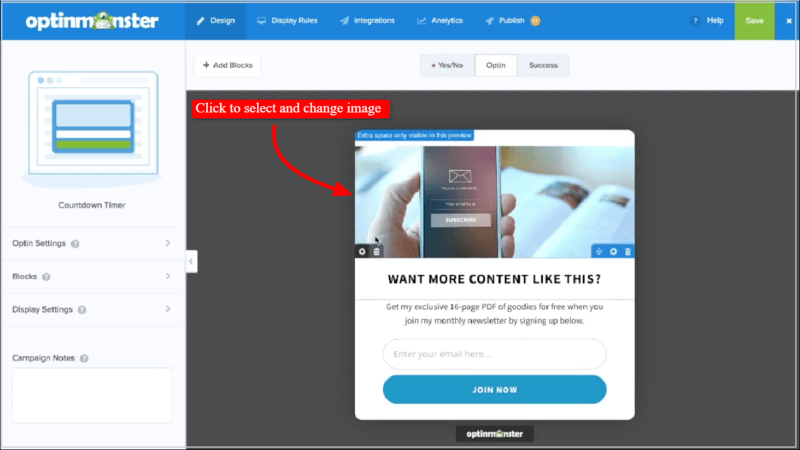
To make the design of the popup as per your requirements, you have to change the image and content of the popup. Let’s start with changing the image of the popup.
If you want to change the image of the campaign, click the image on the popup, and select a new image of your choice to replace it.
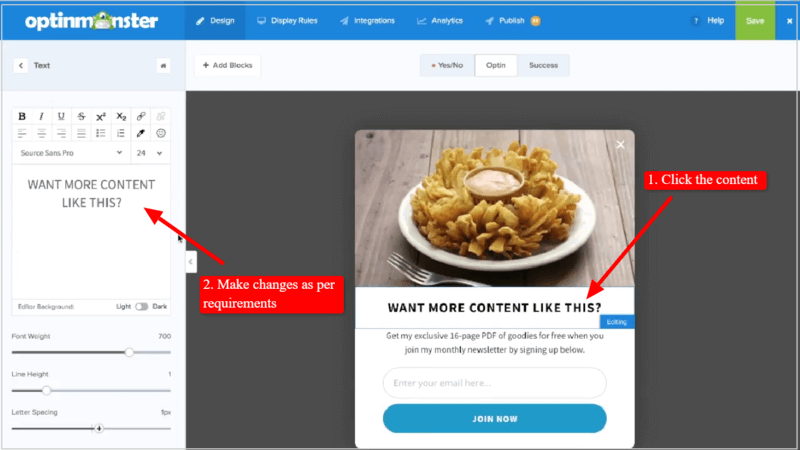
To change the content part of the popup, click the content. After that, you will get the text editor to the left-hand side of the screen as showing below. You can now start changing the content as per your requirements.
Step 6: Add Countdown Timer to the Popups Campaign
For making the popup campaign a countdown timer popup, you need to add a countdown timer to your campaign.
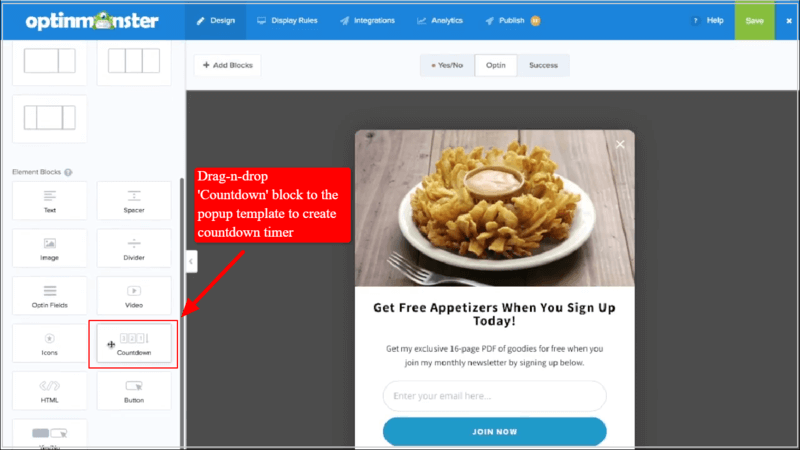
To add a countdown timer, click the ‘Add Blocks’ given as indicated in the image below.

You will get a list of blocks to the left-hand side of the screen. Scroll down the block list screen to find the ‘Countdown’ as indicated below. Drag-n-drop the countdown block to the popup campaign template to the location where you want to display it.
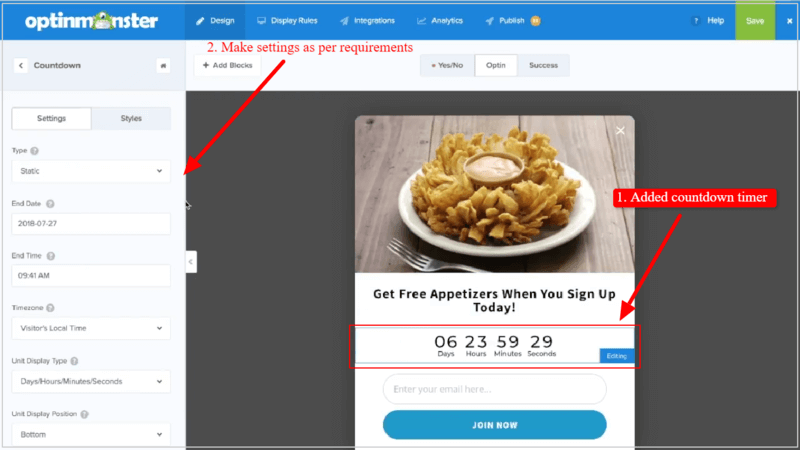
A countdown timer will start to appear on your popup template as showing below. You will also get the various setting options for the countdown timer as showing on the left-hand side of the screen. Make the setting to the countdown timer as per your requirements to display on your WordPress website.
Now, you have completed creating your countdown timer popup for your website. Let’s start setting up the display rules to properly define how to display the popup on your website posts and pages.
Step 7: Set Display Rules to Display Countdown Timer Popup Campaign
Display rules are useful for your campaign to set the Exit-Intent, time, and URL where you want to display the countdown timer popup when the customers about to leave your website.
To start setting up the display rules for your popup campaign, you have to click on the Optinmonster menu option ‘Display Rules’ to open the display setting options. The below image showing the menu option to click.
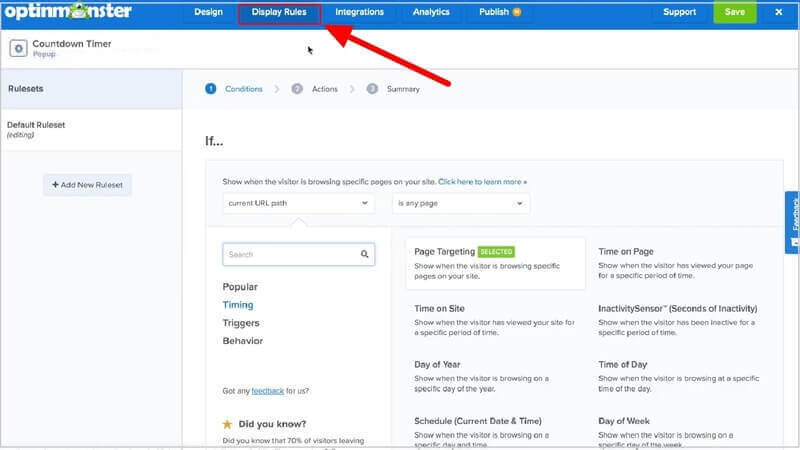
You will get a page where you have to set the URL of the pages where you want to display the countdown timer popup campaign to your customers.
After that, you can set the Exit-Intent technology to display campaigns when the customer tries to leave your WordPress website. The combination of these two display rules triggers the campaign on the mentioned URL when the customers are about to leave the page.

When you have done with setting up the display rules, click on the ‘Next Step’ button to save the settings go to the next step.
On the next page, you don’t need to do anything, and just click the ‘Next Step’ button as indicated below to proceed to the next step.

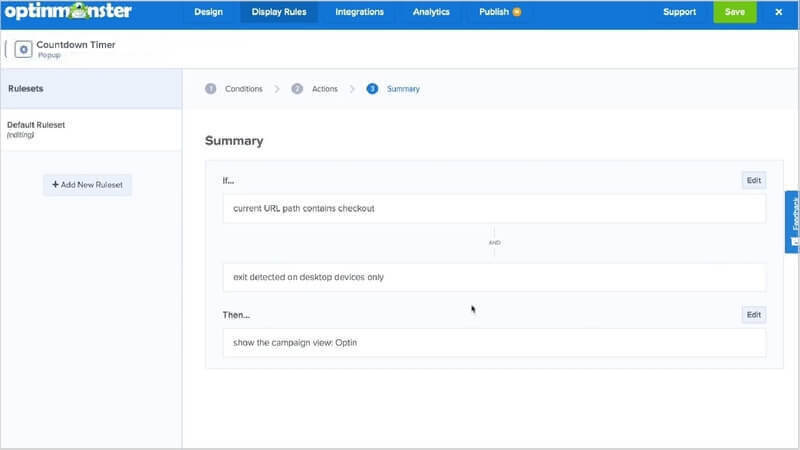
A page will open where you will get a summary of your display rules for your countdown timer popup campaign. The below image showing that you set the URL containing the ‘checkout’ keyword with Exit-Intent technology for the desktop devices. This displays the campaign to all the devices but with exit detection on the desktop.
Step 8: Final Save and Publish Your Exit Popups Campaign
Once you have done all the above steps to create a countdown timer popup campaign, you have to publish the campaign to display on your WordPress website posts and pages.
To publish your countdown timer popup campaign, click the ‘Publish’ menu option as indicated below in the image. A page will open where you have to click and change the ‘Status’ as ‘Live’. After that, you can click the ‘Save’ button to finally save your countdown timer popup campaign.

Congratulations! You have successfully created and added your countdown timer popup campaign to your WordPress website to boost your sales.
Now, open your WordPress website pages to check your countdown timer popup campaign in the specified URL pages on customer exit detection.
Conclusion
OptinMonster is the #1 lead generation plugin for online marketers to easily convert your website visitors into customers. You can easily create eye-catching countdown timer popup campaigns to attract your visitors and convert them into sales.
You can use countdown timer popup campaigns to display promotional offers, deals, and discount coupons to generate more sales. It can also be used to display flash sale offers in the holiday season to increase your revenue.
Countdown timer popup campaigns can easily attract more sales and engagement by displaying flash offers when the users try to leave your WordPress website.
➜Click Here to Get OptinMonster Now
You May Also Like to Read
- OptinMonster Review
- How to Quickly Create Exit Popups for WooCommerce
- Increase Conversions with Easy Multi-Step Popups
- How to Create Spin to Win Campaigns in WooCommerce
- Boost Email List with WordPress Content Locking
I hope this post helps you to easily create countdown timer popup campaigns for your WordPress website. If you have any queries regarding the tutorial given above, please comment below.
Also tell me, how you are using your countdown timer popup campaigns on your WordPress website? do comment below.
Reference