The Bootstrap 4 typography includes learning headings, text formatting, lists, description lists, blockquotes, etc. It is useful to display content with global display settings.
Bootstrap 4 add global default font size of 1rem(same as 16px) with a line-height of 1.5 applies to the document body and all the paragraph content.
The margin-top is removed for all the elements as it may collapse with others. So, a margin-bottom is added to the heading of .5rem and the paragraphs of 1rem.
Let’s start learning Bootstrap 4 typography with examples below.
Headings Typography
Headings typography in Bootstrap 4 is useful to define headings from <h1> to <h6>. There are many different classes available in Bootstrap 4 to style the elements to look like a heading as given below.
Headings from <h1> to <h6>
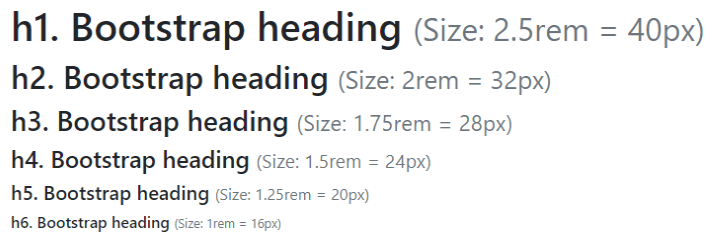
Bootstrap 4 defines a standard font size for each headings elements <h1> to <h6>. These elements can be used to define the heading with added Bootstrap 4 styles that you can find in the example below:
|
1 2 3 4 5 6 |
<h1>h1. Bootstrap heading (Size: 2.5rem = 40px)</h1> <h2>h2. Bootstrap heading (Size: 2rem = 32px)</h2> <h3>h3. Bootstrap heading (Size: 1.75rem = 28px)</h3> <h4>h4. Bootstrap heading (Size: 1.5rem = 24px)</h4> <h5>h5. Bootstrap heading (Size: 1.25rem = 20px)</h5> <h6>h6. Bootstrap heading (Size: 1rem = 16px)</h6> |
Output

The fond size of <h1> is 2.5rem that is equals to 40px. The rems sizes in Bootstrap 4 is used instead of ems and px for scalable component spacing.
Match Heading Style Classes
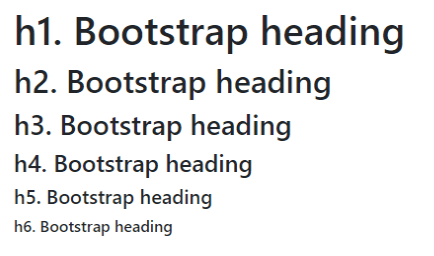
There are 5 classes of Bootstrap 4 to create headings that start from .h1 to .h6. You can add these classes to any of the elements to easily make it headings like appearance as given below:
|
1 2 3 4 5 6 |
<p class="h1">h1. Bootstrap heading</p> <p class="h2">h2. Bootstrap heading</p> <p class="h3">h3. Bootstrap heading</p> <p class="h4">h4. Bootstrap heading</p> <p class="h5">h5. Bootstrap heading</p> <p class="h6">h6. Bootstrap heading</p> |
Output

The above example contains the <p> elements that are converted to headings using the Bootstrap classes from .h1 to .h6. The output shows the content that is the same as the headings in the previous example.
Small Secondary Text in Headings
In Bootstrap 4 typography, the content of headings can easily be styled using the <small> that add a smaller size text inside the heading element. You can make is slightly faded secondary text using the Bootstrap 4 class .text-muted as given below:
|
1 2 3 4 |
<h2> h2. Bootstrap heading <small class="text-muted">with faded secondary text</small> </h2> |
Output

The above text content looks beautiful with slightly visible text content.
Display Headings to Stand Out
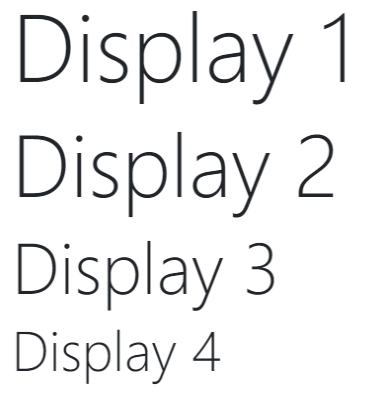
In Bootstrap 4 typography, when you want to create headings that stand out from the above heading elements, you can use the display headings. There are 4 classes .display-1, .display-2, .display-3, and .display-4 introduced new in Bootstrap 4 to create extra-large heading elements. It adds maximum font size and font-weight to the element as given below:
|
1 2 3 4 |
<h1 class="display-1">Display 1</h1> <h1 class="display-2">Display 2</h1> <h1 class="display-3">Display 3</h1> <h1 class="display-4">Display 4</h1> |
Output

Make Paragraphs Stand Out
In addition to the above heading items to stand out, you can also create a paragraph in Bootstrap 4 that stands out of normal text content. You have to use the Bootstrap 4 class .lead as given in the example below:
|
1 2 |
<p>This is a regular paragraph with normal text.</p> <p class="lead">This is a lead paragraph to stand out regular size.</p> |
Output

The above example showing the difference between the normal text and text that is created using the .lead class of Bootstrap 4. This makes the paragraph text content stand out from normal paragraph
Text Formatting Typography
The text formatting tags in Bootstrap 4 are useful to style the text content and change the appearance. There are many text formatting tags like <mark>, <del>, <s>, and many more as given below with examples.
<mark> – Highlight Text
The <mark> tag is useful to highlight the text content. It highlights the text by adding a light background color and the small padding of .2em to the text content.
|
1 |
<mark>This is a highlighted text.</mark> |
Output

<del> – Deleted Text
The <del> tag is useful to display the deleted text content. It adds a cut line to the text content s given in the example below:
|
1 |
<del>The text is deleted from the line.</del> |
Output

<s> – No Longer Accurate Text
The <s> appears as a text that is no longer accurate or relevant. This looks the same as the deleted text with a line through it.
|
1 |
<s>The text is treated as no longer accurate.</s> |
Output

<ins> – Inserted Text
The inserted text can be created using the <ins> tag. The below example shows the inserted text that displays with the underline below the text content.
|
1 |
<ins>The text is an inserted text.</ins> |
Output

<small> – Small Text
You can create text content that is slightly smaller than the normal text content using the <small> tag.
|
1 |
<small>This is a small text.</small> |
Output

The above example shows the normal text and the text created using the <small> tag.
<strong> – Strong Text
When you want to make text content strong, you can use the <strong> tag that adds font-weight to the element. However, you can also use the <b> tag to make the text bold.
|
1 |
<strong>This is a strong text.</strong> |
Output

<em> – Emphasizes Text Rendered as Italic Text
The <em> tag emphasizes the text content that makes the text italic. However, the tag cannot be used to make the text italic and you have to use the <i> instead of this tag.
|
1 |
<em>This is a emphasized text that rendered as italic text.</em> |
Output

<abbr> – Abbreviations
The <abbr> tag adds a dotted border to the bottom of the text content. The tag can be used to display abbreviations and acronyms that display the expanded version when the users hover over the text content.
You can also add a class .initialism to make the abbreviated text slightly smaller than the normal text.
|
1 2 3 |
<p>Learn HTML, CSS, <abbr title="Et cetera (Latin word that mean other similar things)">etc</abbr> with TutorialDeep</p> <p><abbr title="Hypertext Markup Language" class="initialism">HTML</abbr> is useful to define the structure of a web page.</p> <p><abbr title="Cascaded Style Sheet" class="initialism">CSS</abbr> is useful to design the web page.</p> |
Output

Blockquotes
You can place quoted text content from other sources on your web document using the <blockquote class="blockquote">. The blockquotes contain the content and footer to indicate the person related to the quoted text.
The footer content can be created using the <footer class="blockquote-footer"> with the <cite> tag to wrap the name of the source work as given below:
|
1 2 3 4 |
<blockquote class="blockquote"> <p>Many of life's failures are people who did not realize how close they were to success when they gave up.</p> <footer class="blockquote-footer">by <cite>Thomas A. Edison</cite></footer> </blockquote> |
Output

The above example shows the quoting block content with the source name in the footer of the blockquotes.
Lists Typography
The list can be created using the <ul> for an unordered list and <ol> for an ordered list. You can create inline and unstyled classes with the examples given below.
Bootstrap 4 List Unstyled
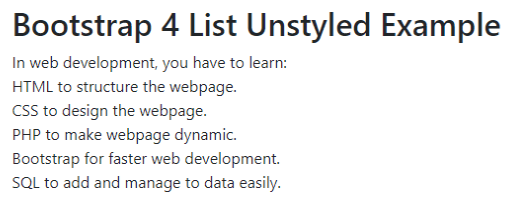
You can create unstyled list elements using the Bootstrap class .list-unstyled. It adds list-style:none to the list that removes the bullets from the list elements as given in the example below:
|
1 2 3 4 5 6 7 8 |
In web development, you have to learn: <ul class="list-unstyled"> <li>HTML to structure the webpage.<li> <li>CSS to design the webpage.<li> <li>PHP to make webpage dynamic.<li> <li>Bootstrap for faster web development.<li> <li>SQL to add and manage data easily.<li> </ul> |
Output

Bootstrap 4 List Inline
The inline list is useful to create list elements that displayed inline. It applies a light margin to the list elements using the class .list-inline to the lists and the class .list-inline-item to the <li> items as given below:
|
1 2 3 4 5 6 |
<ul class="list-inline"> <li class="list-inline-item">First item</li> <li class="list-inline-item">Second item</li> <li class="list-inline-item">Third item</li> <li class="list-inline-item">Forth item<li> </ul> |
Output

Description Lists
The description lists elements that can be aligned horizontally using the Bootstrap 4 grid columns. You have to use the .row class with the <dl> element and the Bootstrap 4 predefined classes with the <dt> and <dd>. When the text of the list element increases the size of the columns, you can use the .truncate class to truncate the class with the ellipses as given below:
|
1 2 3 4 5 6 7 8 9 10 |
<dl class="row"> <dt class="col-md-3">PHP Language</dt> <dd class="col-md-9">PHP is a server-side scripting language to create dynamic and interactive web pages.</dd> <dt class="col-md-3">HTML Language</dt> <dd class="col-md-9">HTML is a Hypertext Markup language to define the structure of a web page that displays on web browsers.</dd> <dt class="col-md-3 text-truncate">CSS Language (Useful to beautify the websites)</dt> <dd class="col-md-9">CSS is a Cascaded Style Sheets used to describe the overall presentation of a web document.</dd> </dl> |
Output

The above output shows the description lists and the third item shows the truncated list item.
So, this is all about Bootstrap 4 typography and text formatting.
Next Chapter ➔ Bootstrap 4 Codes >>
