Do you want to show WooCommerce product categories in the menu of your WordPress website?
When you add the WooCommerce plugin to your WordPress website and create categories for products, you may want to add the categories to your website menu. This makes it easier for your customers to get products according to their categories.
However, the categories are not available on your WordPress dashboard menu page to add to your website menu. You need to make some settings to make product categories available on the WordPress dashboard menu page.

In this post, you will get a step-by-step process to easily get WooCommerce product categories on your WordPress dashboard menu page. So, let’s get started.
How to Show WooCommerce Product Categories in Menu
To get Woocommerce product categories to add to your WordPress menu, you need to follow the step-by-step process given below:-
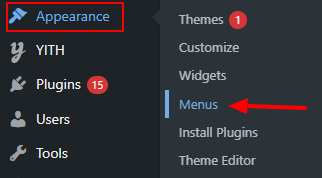
Step 1: Login Your WordPress Dashboard and Visit Appearance >> Menus Option
First of all, you have to log in to your WordPress website admin dashboard and visit the menu option ‘Appearance >> Menus’.
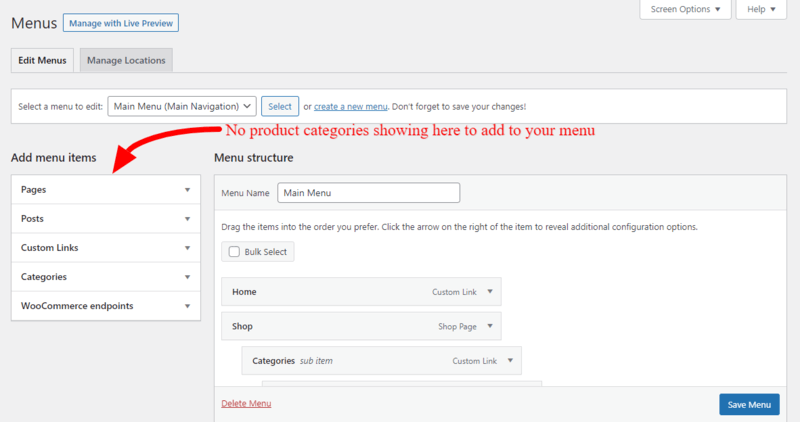
You will be taken to the WordPress website dashboard menu page from where you can add menu options to your website menus. After you add menus, these options start showing in the frontend.
However, you will not get WooCommerce product categories to add to your WordPress website menu. The below image shows that there is no option for product categories.
Let’s follow further steps to show Woocommerce product categories in the menu.
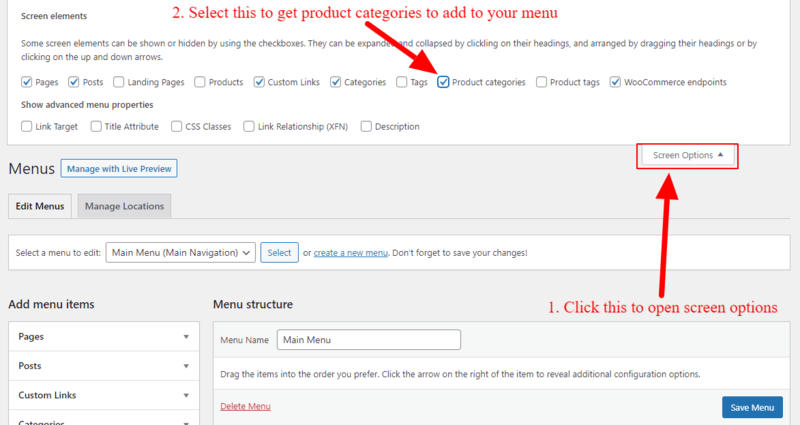
Step 2: Click the ‘Screen Options’ Button and Select WooCommerce Product Categories Option
In the WordPress dashboard menu page, you have to click the button ‘Screen Options’ given at the top right corner of the screen. When you click the button, you will get various checkbox options to select and display for selection to add to your menus.
The below image shows the various options that you can select to get them for addition. This enables the product categories for selection to add to your menu.
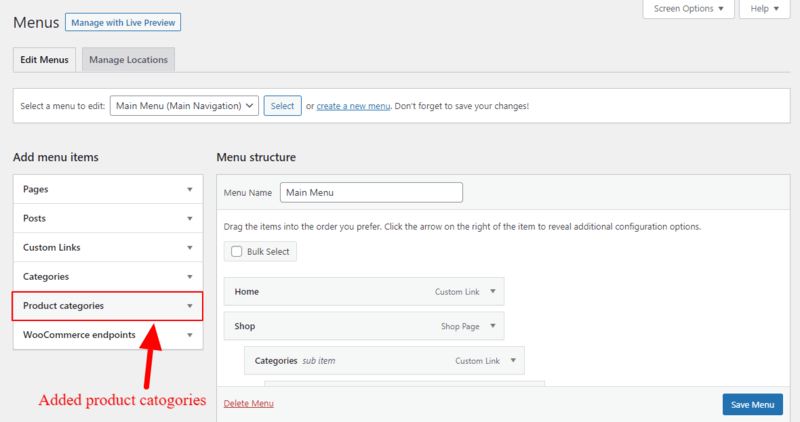
After you select the product categories option above, you will get it for selection as shown in the image below.
Let’s add product categories to your WordPress menus to display in the frontend of your WooCommerce website.
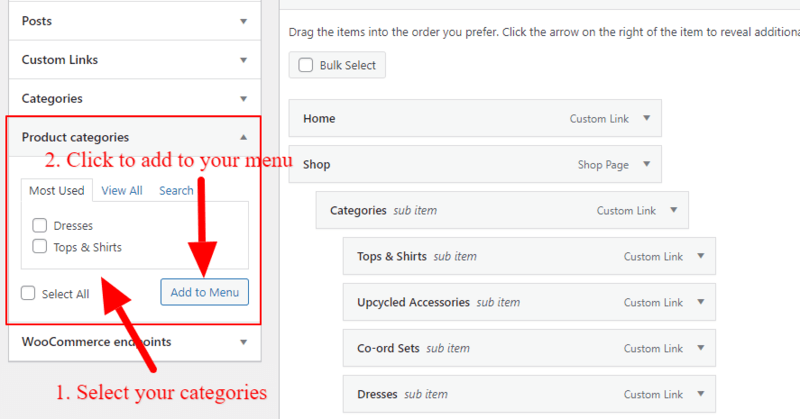
Step 3: Add WooCommerce Product Categories to Your WordPress Website Menus
To get the product categories options, you have to click the ‘Product Categories’ given at the left sidebar. After you click it, you will get your added product categories. You just have to select your categories and click the ‘Add to Menu’ button to add to your WordPress menu.
Once you have completed adding the menus, you can click the ‘Save’ button to save your WordPress menu. Now, you can open your WordPress website frontend to check the added product categories to your website menu.
I hope you like this post on how to show WooCommerce product categories in the menu on your WordPress website. If you have any queries regarding the tutorial, you can comment below.