Learn how to use the contact form 7 plugin on your WordPress website. Setup and configure the plugin to create the contact form with the right steps given here.
Contact form 7 is the most popular plugin to create forms in WordPress. In addition to this, you can also make mail settings to send on submission, confirmation messages settings, and more.
It supports ajax form submission to submit the form without refreshing the page. You can also configure reCAPTCHA to add security to your form that does not allow spamming on your forms.
But, some features of contact form 7 are not beginners friendly. You need to know the correct and simple way of using its features. That’s why to make things simpler for you, I have added small steps to easily create a contact form for your WordPress website.
So, let’s get started.
How to Use Contact Form 7 Plugin in WordPress (Step-by-step)
Here is the step-by-step process to use the contact form 7 plugin on the WordPress website:-
Step 1: Install Contact Form 7 Plugin
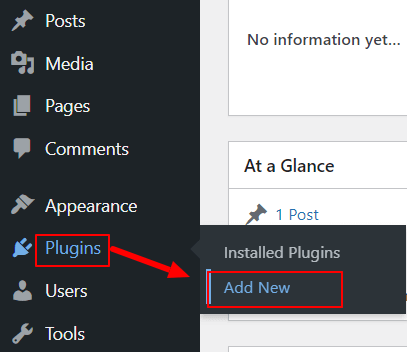
First of all, you have to install contact form 7 on your WordPress website. To do this, login to your WordPress website dashboard and open the menu option Plugins >> Add New.
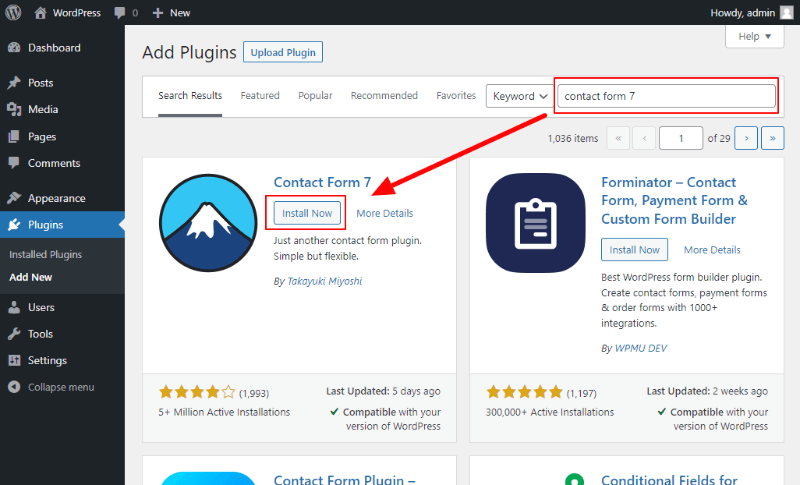
You will get a search box to find the plugin and you have to enter the search term ‘contact form 7’ and click outside to get it. After you get Contact Form 7, click the ‘Install Now’ button to start installing the plugin on your WordPress website.
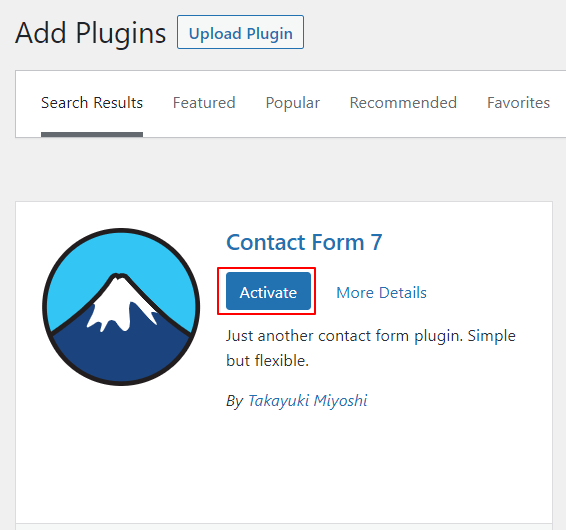
After installation, you have to activate Contact Form 7 plugin to make it work on your website. To activate, click the ‘Activate’ button as shown in the image below.
Step 2: Create and Customize Contact Form Design Using Contact Form 7 Plugin
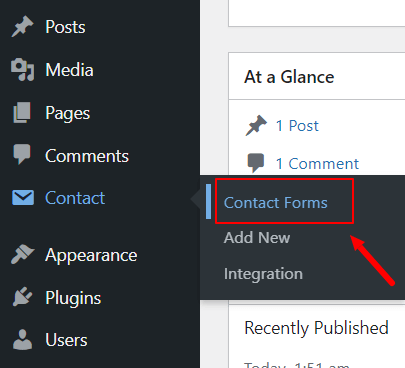
To create a contact form using contact form 7 on your WordPress website, go to the WordPress dashboard menu option Contact >> Contact Forms.
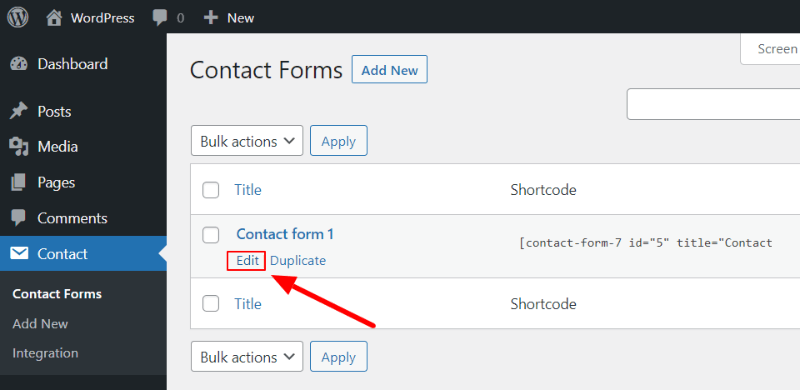
You will get the list of contact forms as shown in the image below. The Contact Form 7 plugin comes with a pre-designed contact form that you can use to create one for your WordPress website. Click the ‘Edit’ button to use it and make the necessary settings to make it ready for your website.
After you click the ‘Edit’ button, you will get the Contact Form 7 setup page as shown in the image below. You have to first give it the name ‘Contact Form 1’ already given.
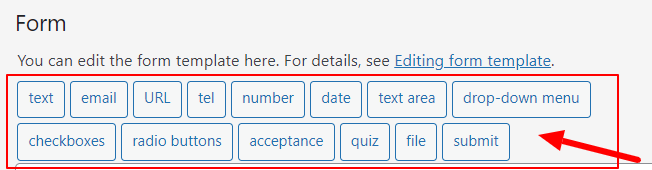
It also contacts different form fields like text, email, URL, tel, number, date, text area, drop-down menu, etc. You can use these fields to add and create forms for your website.
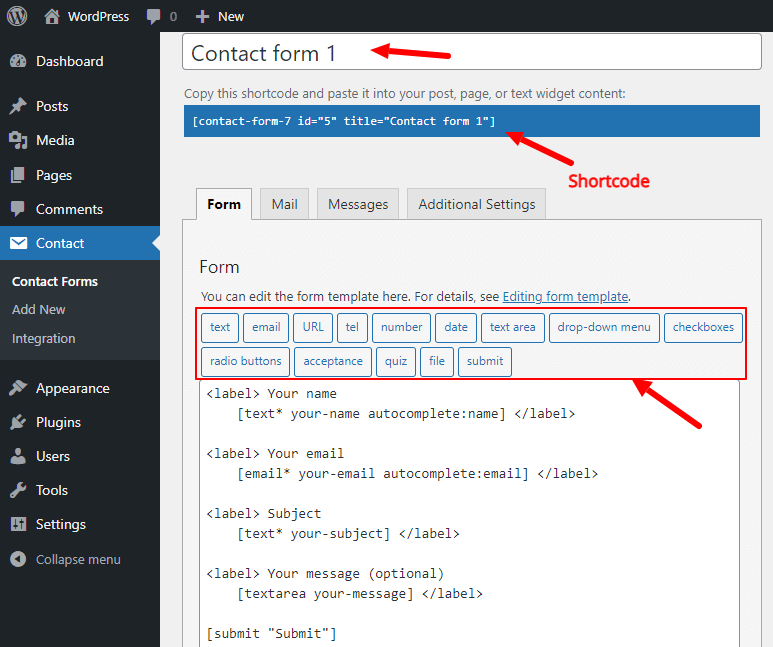
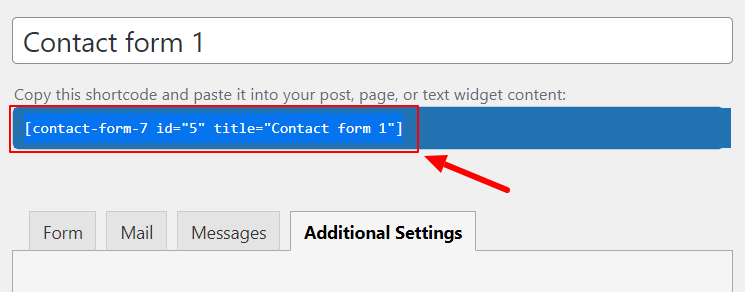
After the creation of the contact form, you can add the contact form to your website pages using the shortcode as shown in the image below.
The Contact Form 7 form design contains form fields in shortcode format with labels to help users understand form fields.

Add New Form Field to contact form
To add form a new form field to your contact form, you can use any form field. Let’s add a phone field to the contact form. You can add the phone field using the ‘tel’ button as it is specially created to capture phone numbers from your form. Click the ‘tel’ button form field to proceed.
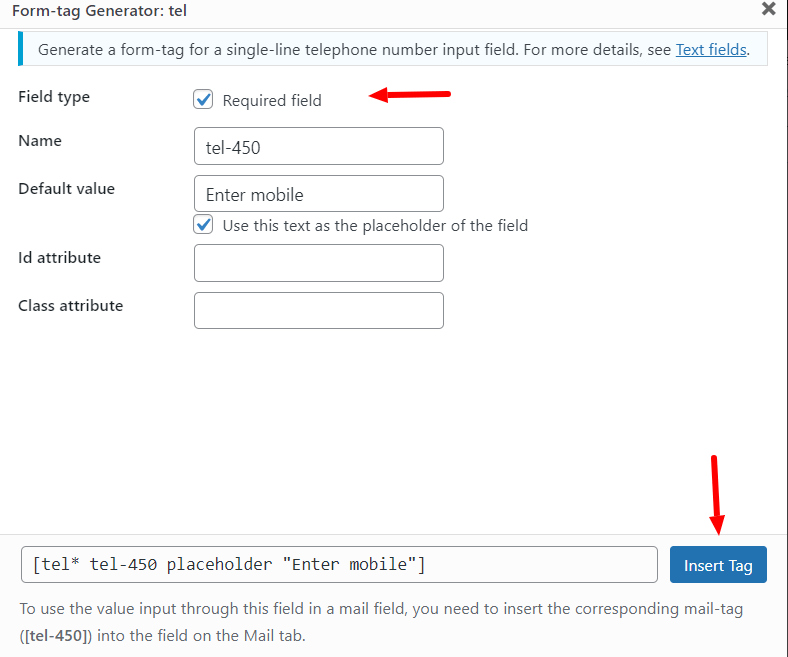
You will get the ‘Form-tag Generator: tel’ popup as shown below. Let’s see how you can fill it:-
- Field Type: You can make the field required to fill for users with this option. Click the checkbox to make it required.
- Name: It is the name for the form field that should be different for each field.
- Default Value: You can set the default value for the form field or can make it a placeholder by clicking on the checkbox.
- Id attribute: It is useful to give an id to the form field. After that, you can add CSS to it using id.
- Class attribute: You can also give a class to the form field. After that, you can add CSS to it using class.
When you complete filling in all these details, you can click the ‘Insert Tag’ button to add the field to your contact form.
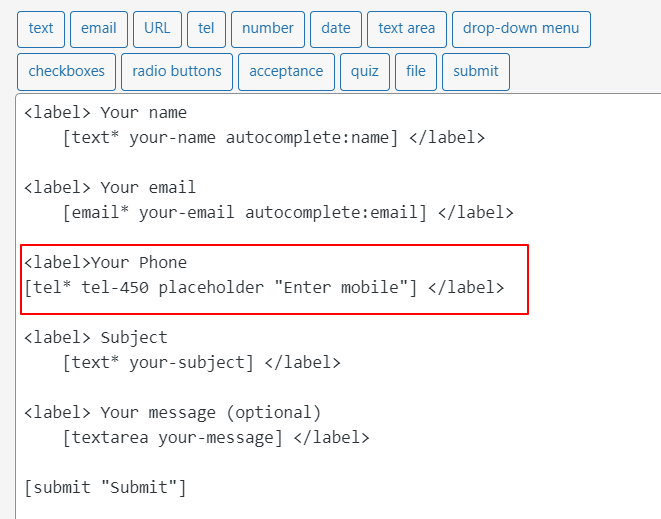
After you click the ‘Insert Tag’, you will get the tag inserted into your contact form as shown below.
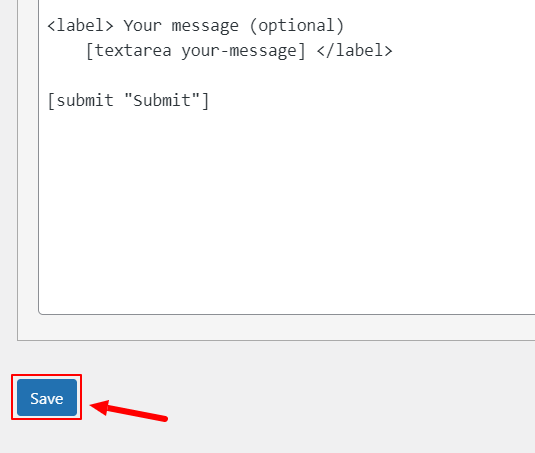
Now, click the ‘Save’ button to save your contact form with your added fields.
Step 3: Configure Mail Delivery Settings and Email Format
The mail delivery settings are useful to send emails to the website owner and the person who fills out the form.
To get the mail settings, click the ‘Mail’ tab as indicated in the image below. You will get all the names of your form fields as shown below that you can add to your email message to display in emails. It also contains some input fields to set up for sending emails as shown below.
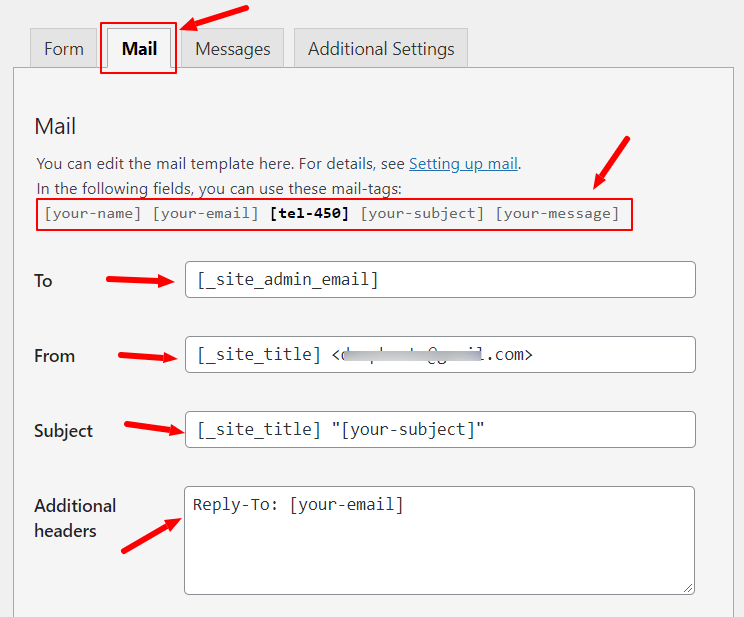
Let’s understand each input box in the mail settings:-
- To: Here, you have to fill in the email of the website owner using the default shortcode ‘
_site_admin_email‘ to send emails. - From: It should contain the site title with the shortcode
[_site_title] <[email protected]>. Consider adding your domain-specific email address to make it work. - Subject: Add the subject of your contact form with a name you have created in the contact form for the subject field.
- Additional headers: It should contain the email address of the person who fills the form with ‘Reply-To:’ before the email field name.
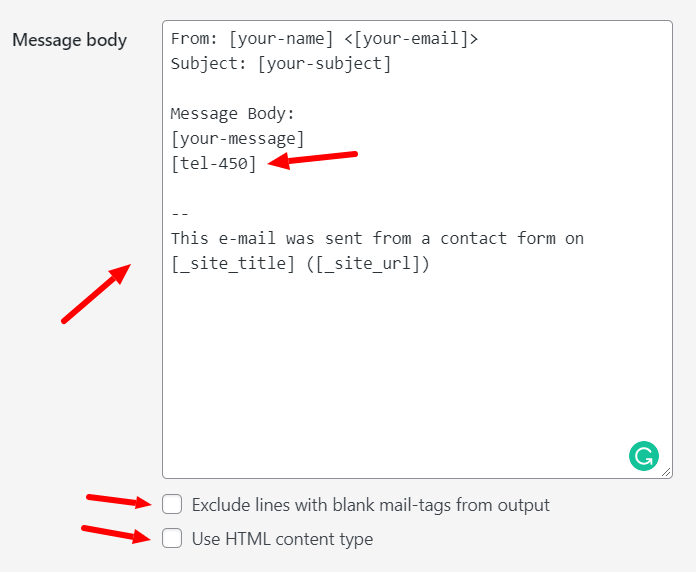
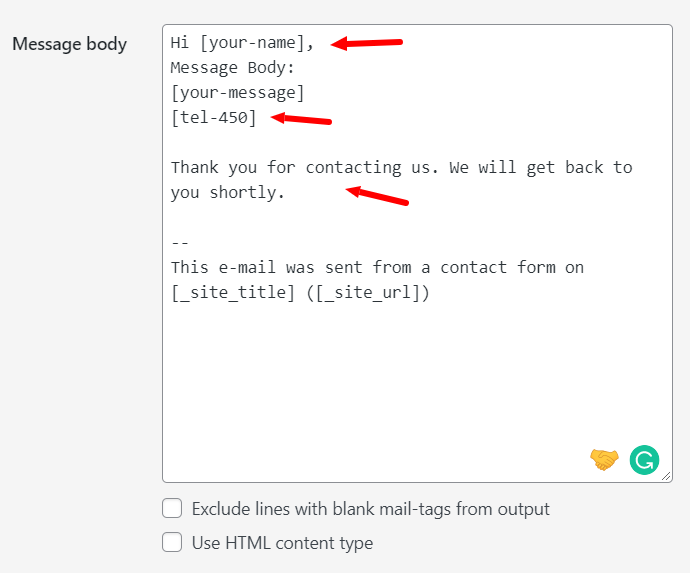
Now, let’s create a message body for the email. Add all form field names in the message body to capture each input users fill in the contact form. The below message body also shows the newly added form field [tel-450] to capture the mobile number of your customer.
If you want to add the HTML code in the message body, you can click the checkbox with the option ‘Use HTML content type’.
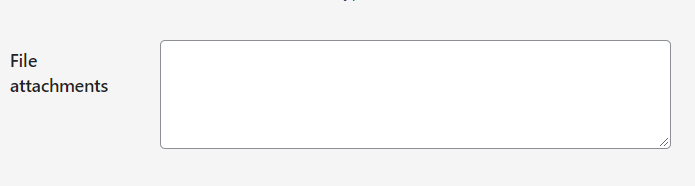
File inputs are also useful in the contact form when you want to collect screenshots from users. Add the file field name in the file attachment input box as shown below.
Send thank you autoresponder email to the submitter
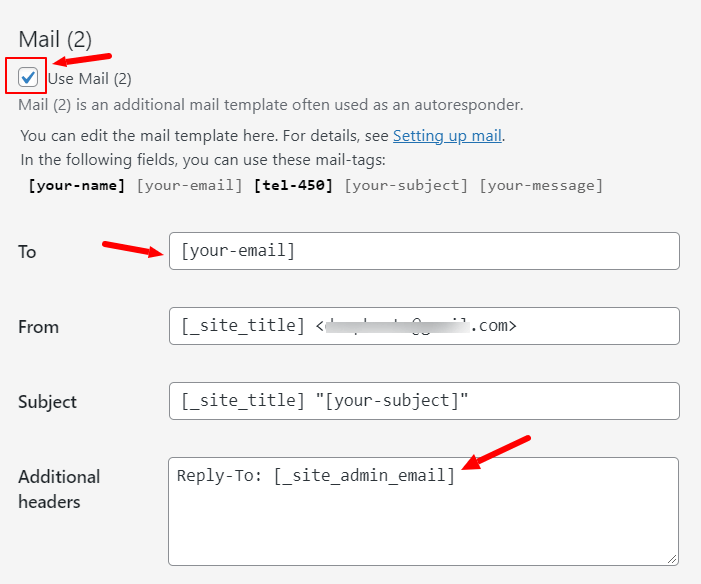
To send thanks autoresponder emails to your customers when they fill out the contact form, you can use the ‘Mail (2)’ option. Just click the checkbox will name ‘Use Mail (2)’ to make it activate the contact form.
You also have to make the settings like ‘To’, ‘From’, ‘Subject’, and ‘Additional headers’.
The message body of the autoresponder can be different from the website owner’s emails. You can add thank you content in the message body. If you want to add some HTML in the message body, don’t forget to make the checkbox ‘Use HTML content type’ checked.
Now, save your mail settings for the contact form.
Step 4: Set Contact Form Confirmation Messages
Next, you can make confirmation message settings to display below the contact form after submission. The settings should be made according to the input fields you are using on your contact form.
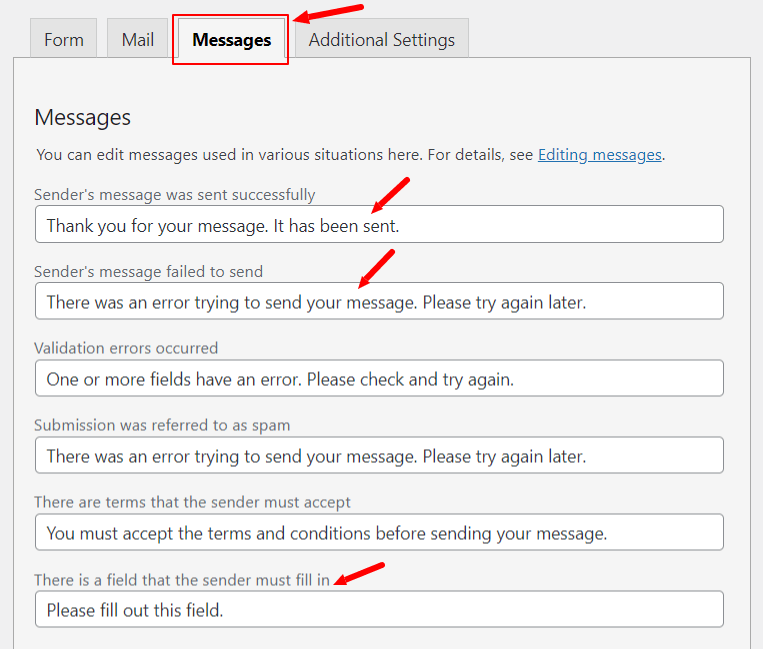
The below image indicated the places where you can make message settings for the successful form submission, email sending failed, and all field-required messages.
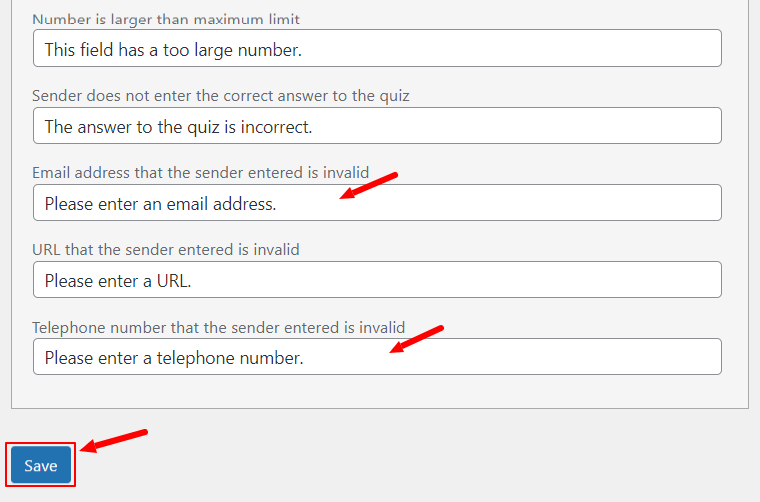
As your contact form contains the email address field and a phone number field. You will have to make a message setting for them as shown below.
Step 5: Publish Contact Form to Your WordPress Website
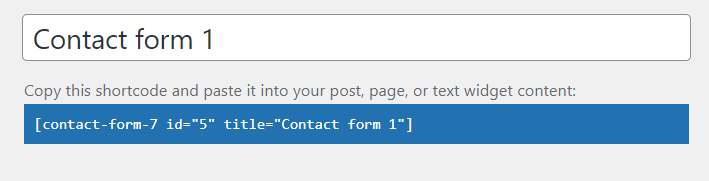
Furthermore, scroll up your screen and copy the shortcode as shown below.
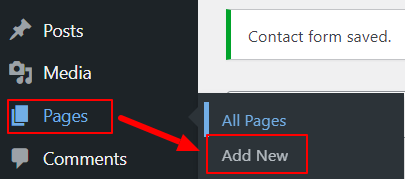
Now, let’s create a contact us page and add a contact form to it. Go to your WordPress website dashboard menu option Pages >> Add New.
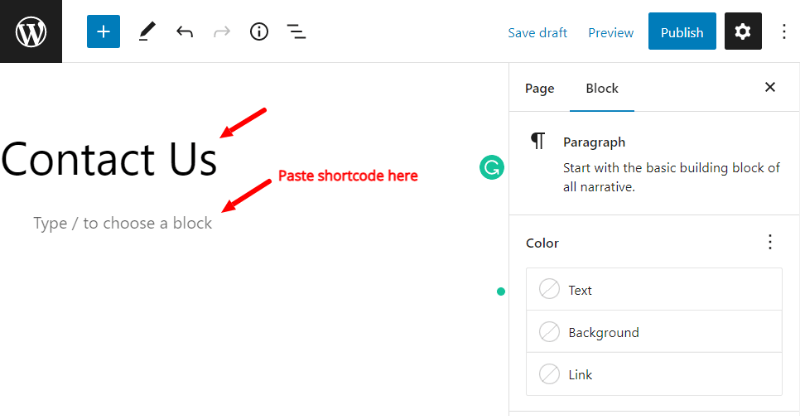
Enter the page name as ‘Contact Us’ and paste the contact form 7 shortcode in the box indicated in the image below.
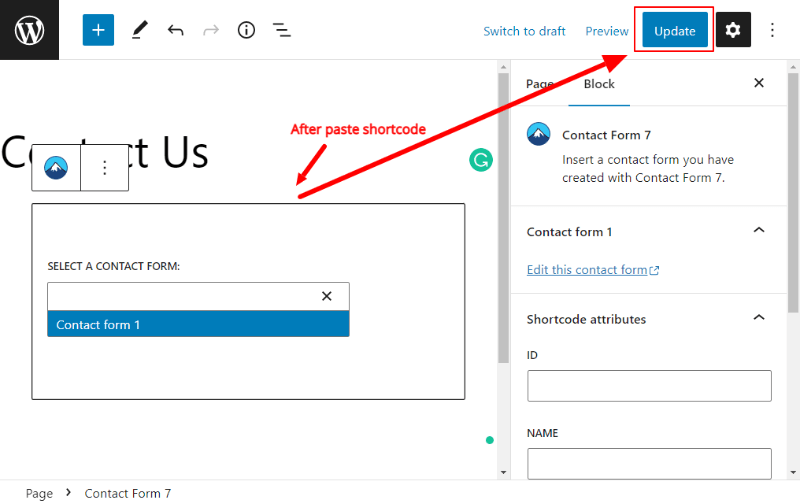
After you paste the shortcode, finally publish your contact us page. If you have already created a contact us page, you can add the shortcode and update the page.
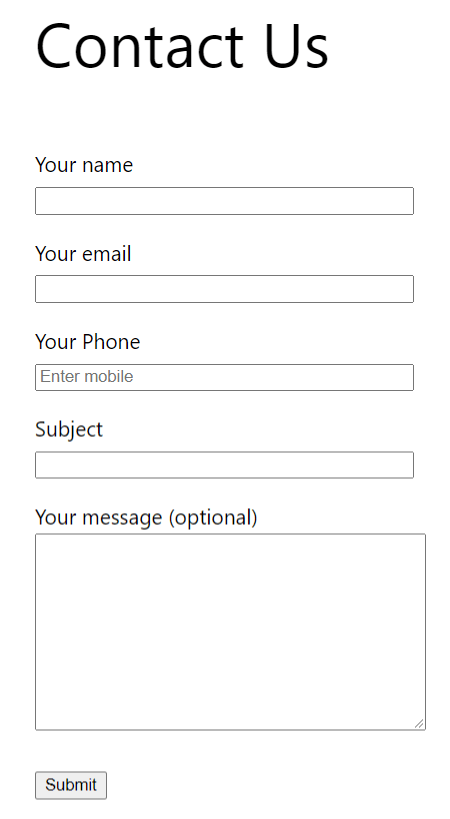
Now, your contact form is ready on your WordPress website using contact form 7. Open your website contact us page to see your contact form 7 working. Fill out the form and click the submit button to test confirmation messages and emails.
Step 6: Add reCAPTCHA to Make Your Contact Form Secure
A contact form is not secure without adding reCaptcha for security. Contact form 7 comes with many integrations out of which reCaptcha is one of them.
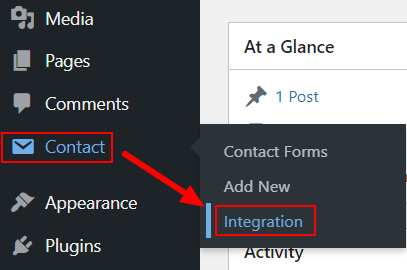
To integrate your contact form with reCaptcha, login to your WordPress dashboard and go to the menu option Contact >> Integration.
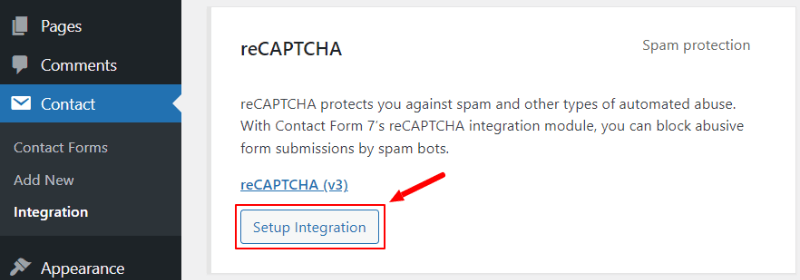
Scroll down to get the reCaptcha integration option and click the ‘Setup Integration’ button as shown in the image below.
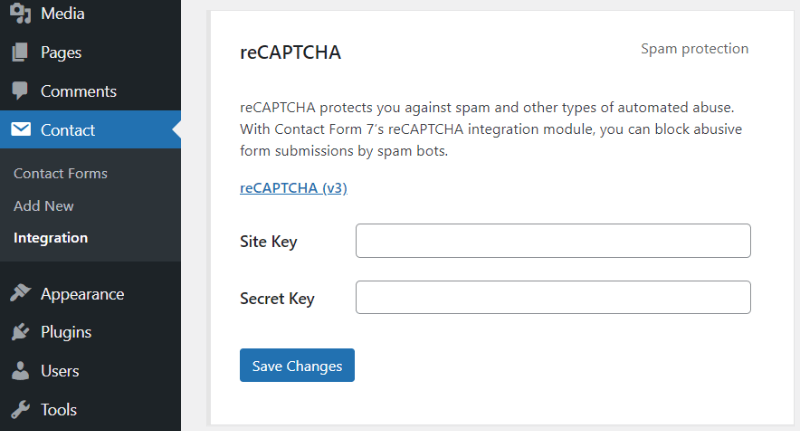
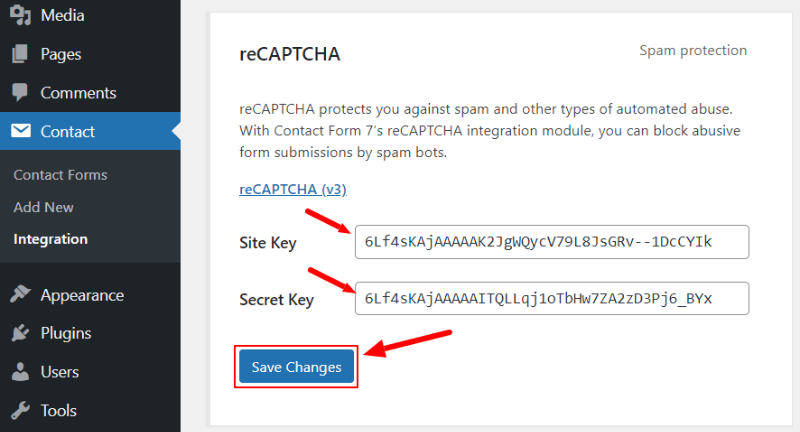
You will get a setting option where you need to enter your Google Site and Secret keys.
Let’s create Site Keys and Secret Keys below.
Get Site Key and Secret Key From Google
To get the keys from Google, log in to your Google account and visit the Google reCaptcha admin panel.
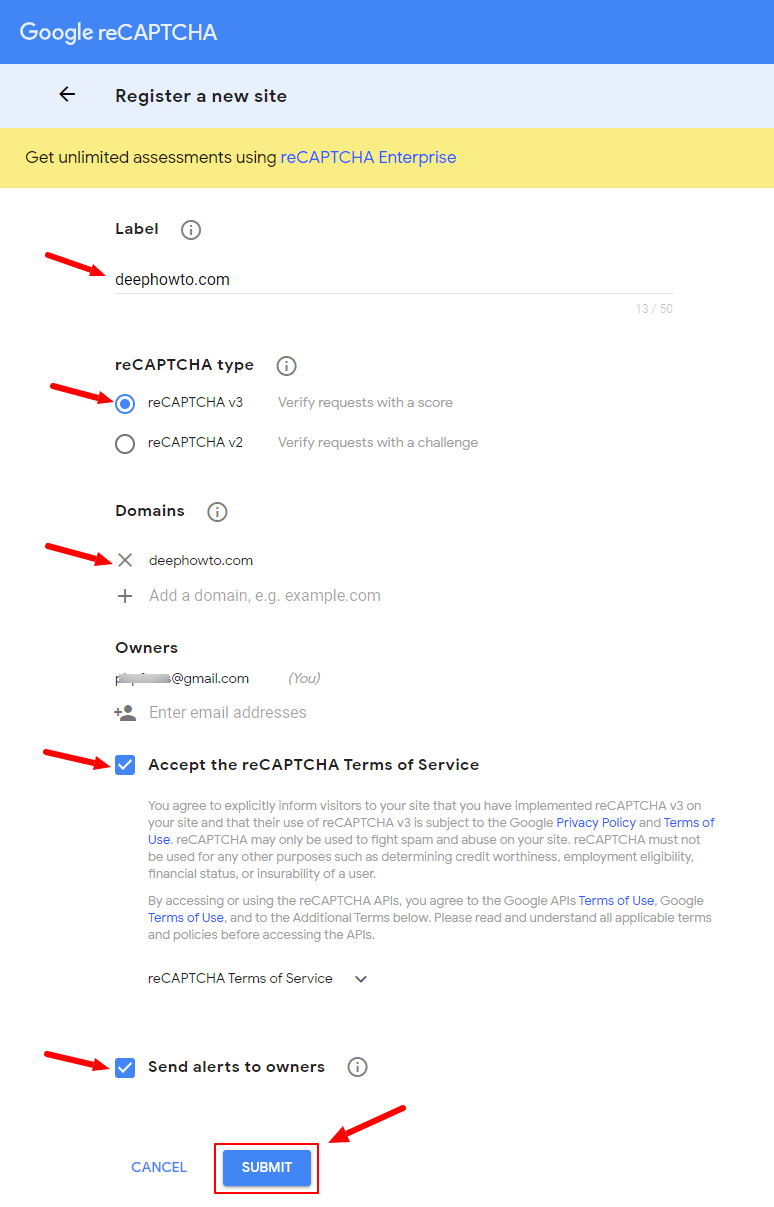
After that, you will get a setting page where you have to make the setting as below:
- Label: Add your domain name here.
- reCaptcha type: Select version 3 (reCaptcha v3).
- Domains: Add your domain name here and press enter to make it selected.
- Owners: Your Google email address already showing selected here.
After you complete filling in the above setting details, accept reCaptcha terms of service and send an alert by clicking on the checkboxes. Click the ‘Submit’ button to save these settings.
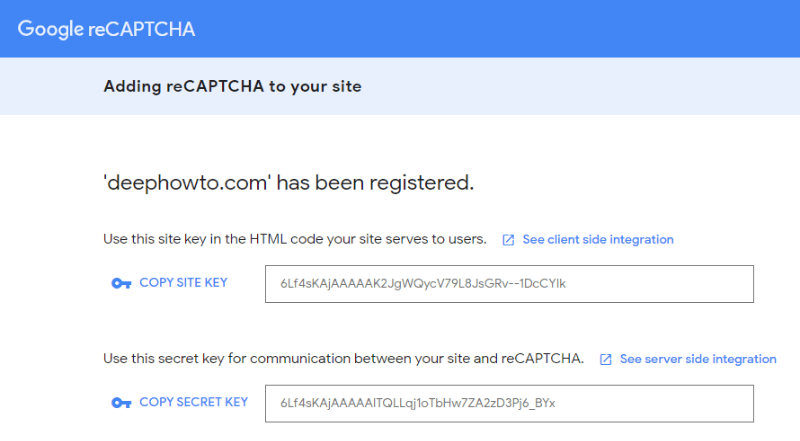
You will get the Site key and Secret key as shown in the image below.
Enter Site Key and Secret Key in Contact Form 7 on WordPress
Click the ‘COPY SITE KEY’ and ‘COPY SECRET KEY’ links above and go back to your WordPress Contact Form 7 reCaptcha settings page. Paste your site and secret keys and press the ‘Save Changes’ button to save the keys.
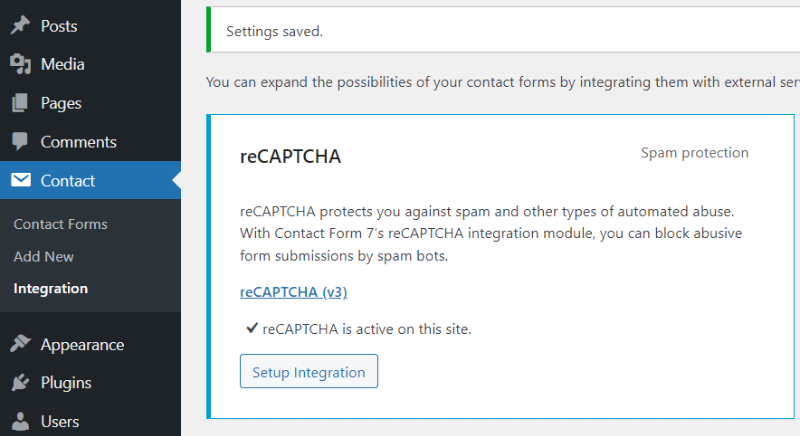
Now, your reCaptcha setup integration settings are saved and showing active as shown in the image below. It will automatically get added to all your Contact Form 7 forms on your WordPress website.
Google reCaptcha Showing in Contact Form 7 on Contact Us Page in WordPress
To see the reCaptcha on your WordPress website contact form, open your contact us page. You will get reCaptcha on your contact form as shown in the image below.
Conclusion
Contact form 7 is useful when you want to create a contact form for your WordPress website. You just have to use the pre-added sample of the contact form design and start customizing it. Make mail and message settings and your contact form is ready to add to your website.
It can also integrate with Sendinblue for email marketing, reCaptcha for security, Akismet for spam protection, and Stripe to collect payments online from your WordPress website forms. So, there is plenty of option to use Contact Form features.
You May Also Like to Read