Learn to create a contact form with WPForms on your WordPress website. WPForms is the most popular and trusted form builder plugin for WordPress
If you have a WordPress website from which you are running an online business. You must have a contact form that can collect audience queries from your WordPress website.
Building a contact form in WordPress can be the easiest process when you have the right plugin. The plugin should give you all the features and functionality to easily collect queries and see entries.
WPForms plugin can be the one-stop solution for all your requirements of building online forms. It comes with all the essential features and functionality to easily build a contact form without the need for coding.
In this post, you will learn how to create a contact form with WPForms. So, let’s get started.
How to Create Contact Form with WPForms in WordPress (Step-by-step)
Here is the step-by-step process on how to create a contact form using WPForms plugin on your WordPress website:-
Step 1: Install and Activate the WPForms Plugin
First of all, you need to install and activate the WPForms plugin on your WordPress website. If you don’t know the process of installing the plugin in WordPress, you can read our guide on how to install the WordPress plugin.
You can easily create a contact form using WPForms free version. However, it is recommended to get the WPForms Pro version of the plugin to get all the essential features for your business. After installation of the plugin, follow the further steps to create your contact form.
Step 2: Select Contact Form Template and Customize Fields
Now, you have installed the WPForms plugin on your WordPress website. WPForms comes with many pre-made form templates to create forms without coding knowledge. These templates can help you quickly create your contact form in just a few clicks.
So, let’s select a pre-made contact form template.
Select Contact Form Template
After installation of the WPForms plugin, you will get the screen as shown in the image below. You have to click the ‘Create Your First Form’ button as indicated in the image below to get pre-made form templates.
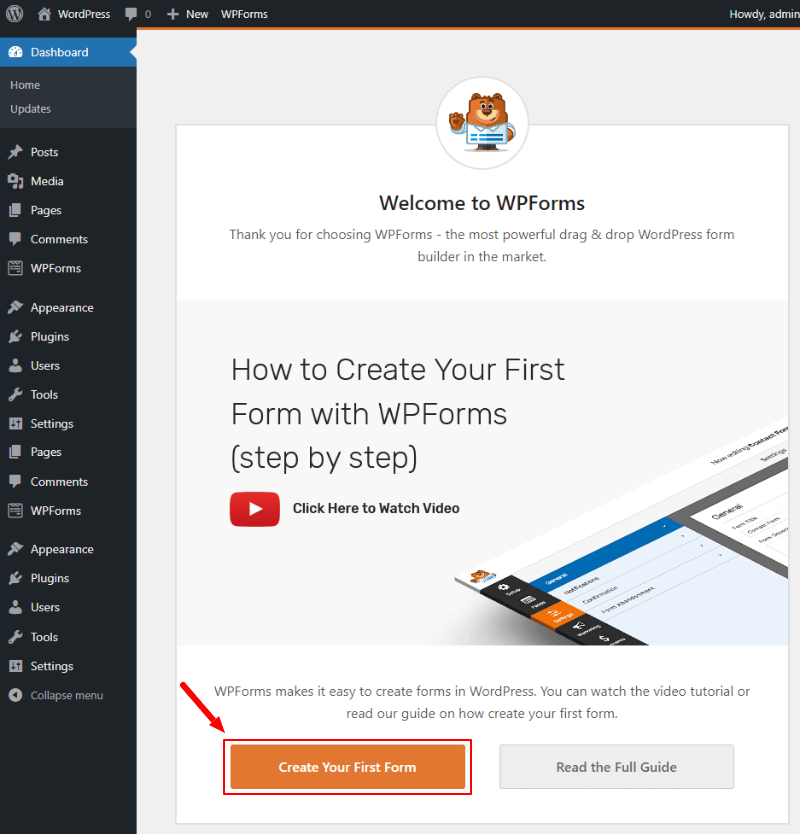
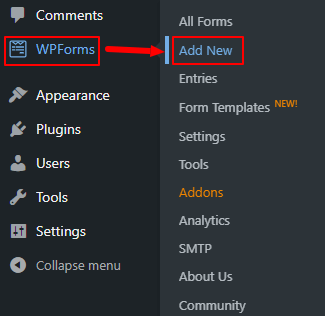
You can also go to the WordPress dashboard menu option WPForms >> Add New to get WPForms pre-made templates.
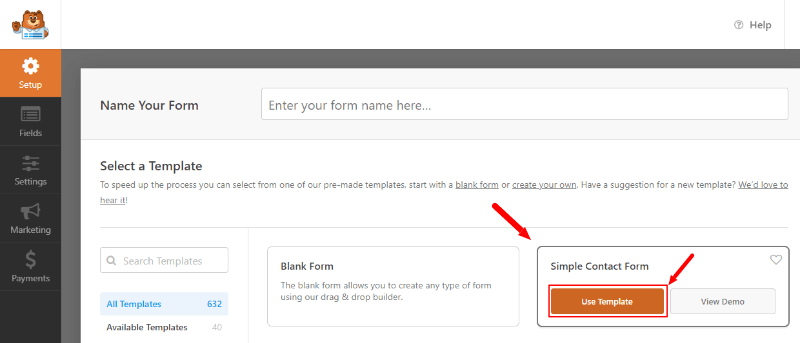
It will take you to the page where you will get pre-made form templates. From the list of templates, you have to select the contact form template by clicking on the ‘Use Template’ button as indicated below.
You will get the contact form pre-made template with form fields as shown in the image below. This is the first appearance of your contact form. You can add more form fields to it and make form field settings for better customization.
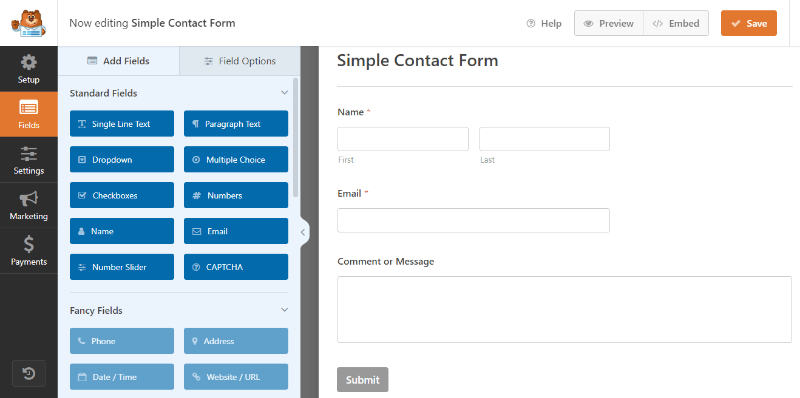
Add or Drag-n-drop Contact Form Fields
To add more form fields to your contact form, WPForms comes with a drag-and-drop editor. You just have to drag-n-drop the required field that you want to add to your contact form. The below image shows the drag-n-drop process of adding more form fields to your contact form.
Make Contact Form Field Settings
When you have done adding the form fields as per your requirement, you can make form field settings. Each form field has different settings options according to the requirements of the users. You just have to click the form field for which you want to get the settings options.
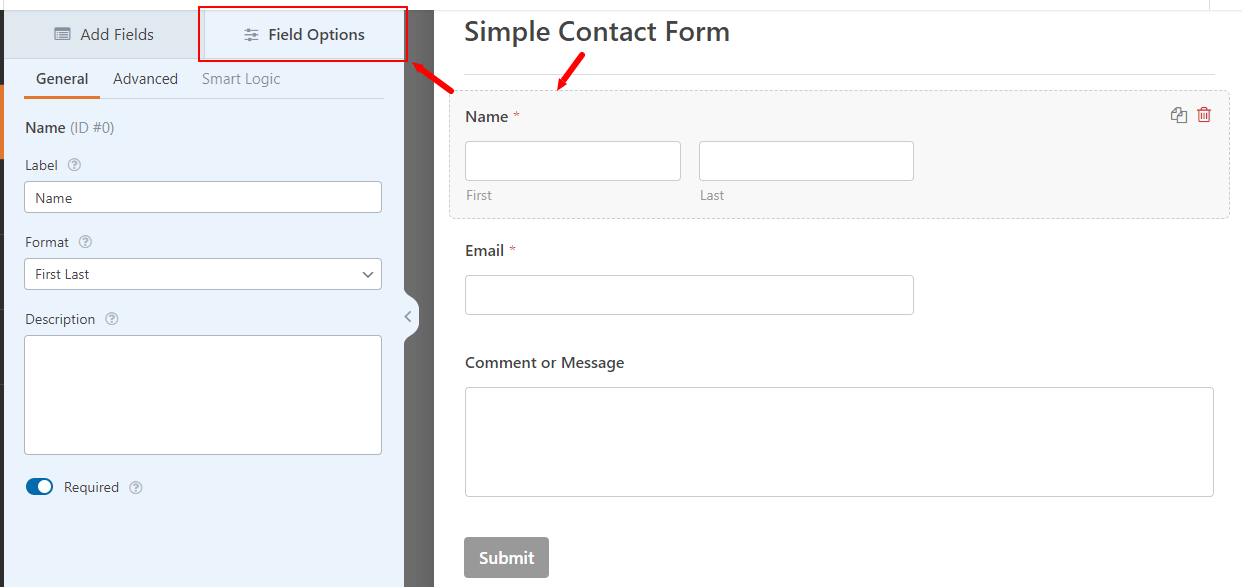
You will get the form field settings options on the left-hand side of the screen under the ‘Field Options’ tab as shown in the image below.
It contains three field-setting options that are General, Advanced, and Smart Logic.
Let’s start with the General field setting option.
In the general setting option, you can make field setting options like Label, Format, Description, etc. If you want to make the field required, you make this setting here.
Next is an advanced setting option where you will get setting options like Field Size, Name, CSS Classes, etc.
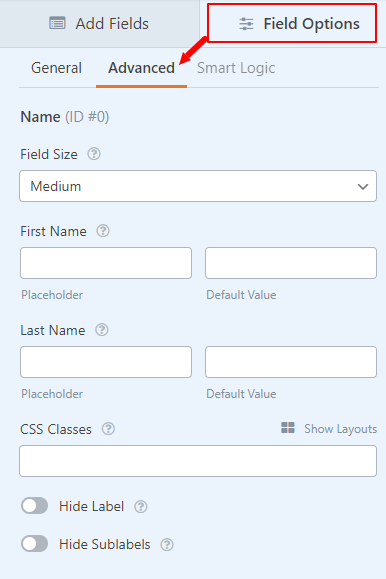
The smart logic field setting option is for more advanced users. That’s why we have not covered it here.
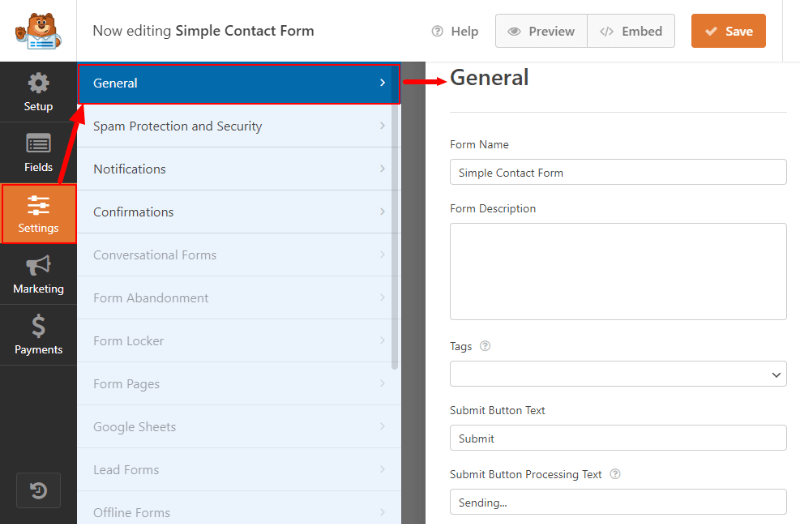
Step 3: Make General, Security, Notifications, and Confirmations Settings
In this step, you can make important settings like form general, security, notifications, and confirmations settings. So, let’s move further to make these contact form settings.
General Settings
In the general form setting options, you can make settings like form Name, description, tags, submit button text, submit button processing text, etc.
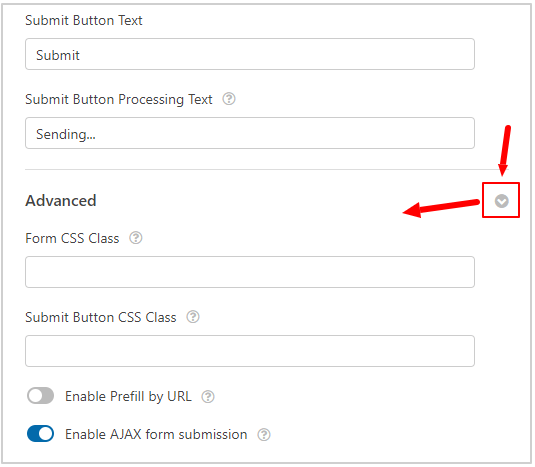
You can also make advanced general settings like Form CSS class, Submit button CSS class, etc. It can also help you to enable AJAX form submissions. After you enable Ajax form submission, your form gets submission without page refresh.
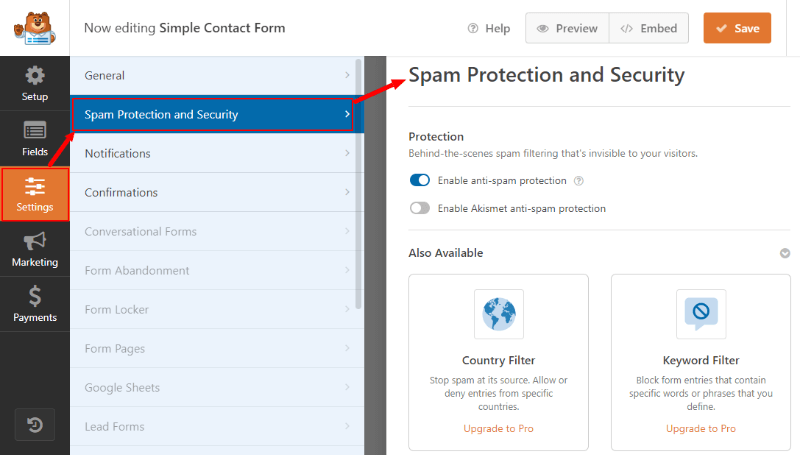
Spam Protection and Security Settings
To make your form secure and protect from spam, you can enable an anti-spam protection system for your contact form. It can be possible that your form can be filled by spammers and bots. This setting can protect your contact form to make it secure on your website.
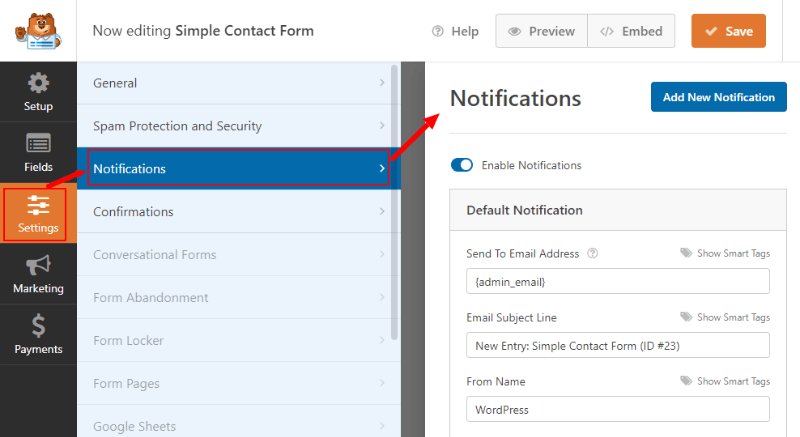
Notifications Settings
You can make notification settings to collect notification emails when someone fills in and submit your contact form on your website. It comes with setting options like Send to email address, Email subject, From name for your email, From Email, Reply-to, and Email message.
If you want to collect attachments from your contact form, you can enable it in the advanced confirmations setting options.
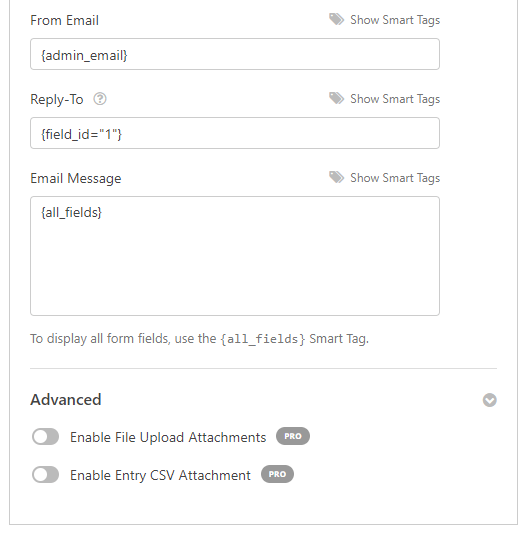
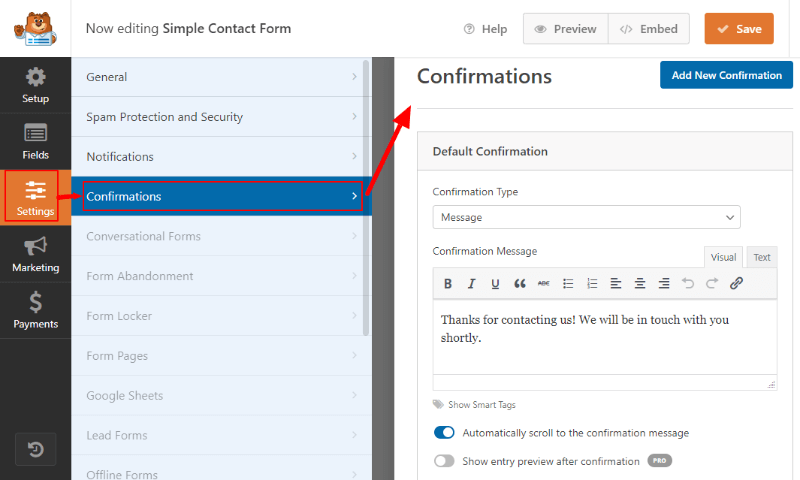
Confirmations Settings
To give confirmations after the contact form submission, you can make this setting. In this setting, you will get setting options like Confirmation type, Confirmation message, etc.
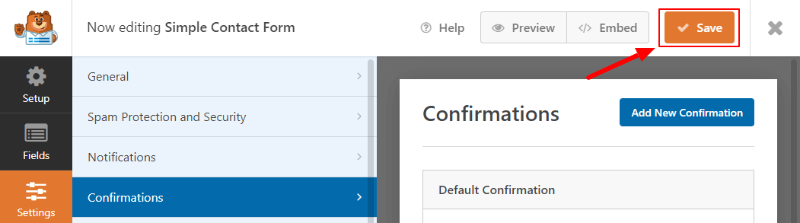
Save Contact Form Settings
After you have completed every setup given above, save all your setup by clicking on the ‘Save’ button as indicated below.
Step 4: Embed WPForms Contact Form to Your WordPress Website Page
Now, your contact form is ready to embed or add to your website pages. To embed the contact form, you have to click the ‘Embed’ button as indicated in the image below.

The easiest way of adding the contact form to your WordPress website pages is to use the shortcode. To get the shortcode, you have to click the link with the text ‘use a shortcode’ as indicated below.
You will get the shortcode you can copy and paste to your website page where you want to display the contact form.
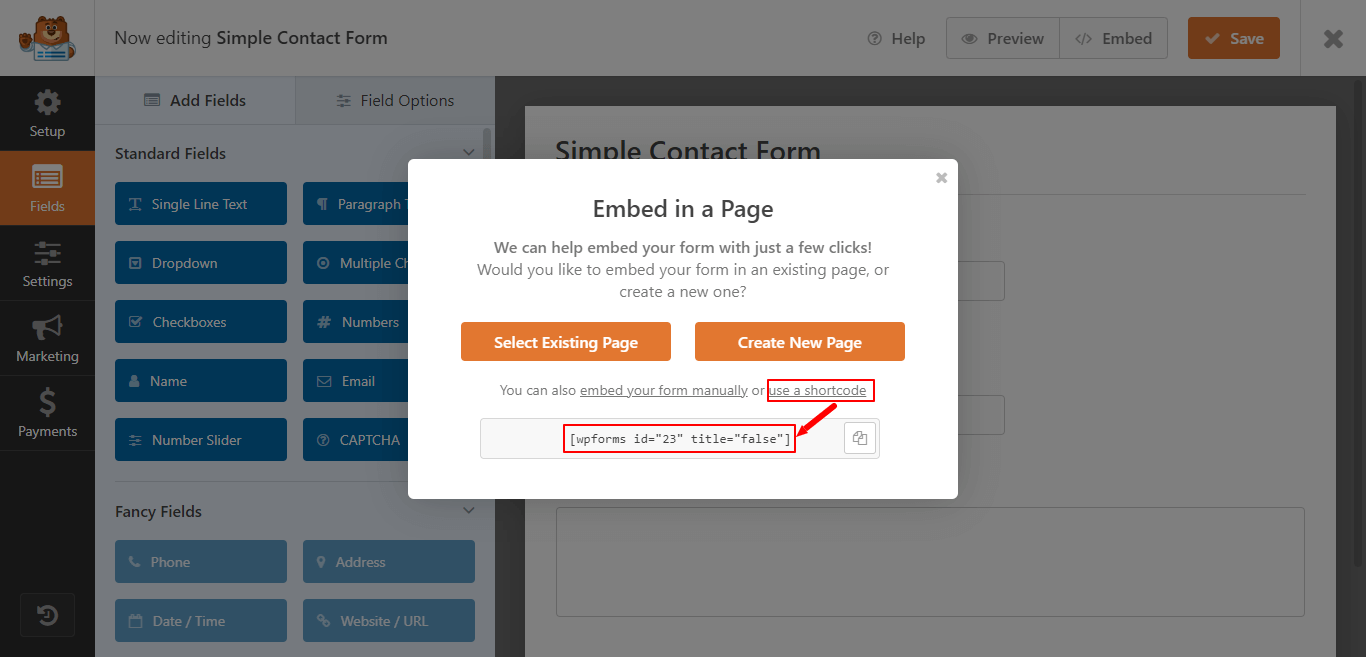
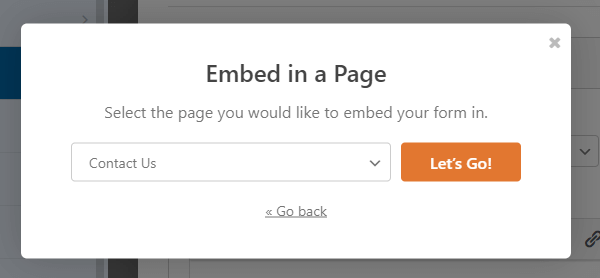
If you click the ‘Select Existing Page’ button, you will get the popup as shown below to select the page. However, the shortcode is still the easiest way of adding the contact form to your website.
That’s all!
You have successfully created and added your contact form with WPForms on your WordPress website. If you have any queries, you can comment below.