In this ClickUp review, you will get a detailed overview of it and its latest 3.0 version with its features, pricing, and process to use ClickUp to improve productivity.
Whether you are a smaller business or a large-sized business, ClickUp is the best productivity tool. You can also easily collaborate with your team members with this software.
Affiliate Disclosure: At Tutorialdeep, we believe in transparency for our users. In this blog, there are some referral links. If you sign up with these links we will earn some commission at no extra cost to you. We recommend these links because they are our trusted brands.
In this detailed ClickUp review with its latest 3.0 version, you will learn all about this productivity platform. It can help you easily decide it as a best productivity platfrom for your business.
So, let’s get started.
Introduction of ClickUp 3.0
ClickUp is an all-in-one cloud-based productivity platform to easily manage projects, tasks, and documents with team collaboration.
It is the best platform to collaborate with your team members and improve productivity. ClickUp 3.0 is the latest version with more advanced features like improved performance, inbox 3.0, universal search, customizable task types, elegant designs, and more. These advanced features can help you easily improve productivity.
Try ClickUp 3.0 Now (It’s Free Forever)
With ClickUp, you can easily add projects and create tasks to assign to your team members to work on and complete. Set deadlines for your team members to improve the performance of your business.
You can make your workspace and add your team members to work with collaborations. It comes with a variety of features like Whiteboards, Calendars, Timelines, Goals, Trackings, in-app Chats, Integration with other work tools, and automation.
The tool works with only one motto to save one day every week. It is a highly positively reviewed platform in top review websites like G2, Capterra, GetApp, and others.
History of ClickUp
ClickUp was founded in 2017 by Zeb Evans with headquarters in San Diego, California. Firstly, he was using it as internal software to manage his team’s work at their office. Now, it’s the world’s most useful platform to make businesses more productive.
It is a cloud-based platform that is capable of replacing all individual workspaces. ClickUp come up with only one motto which is to save one day every week.
Key Features of ClickUp and its Latest 3.0 Version
Here are the top features of the newly improved ClickUp 3.0 that make it the best productivity tool:-
Unmatched Reliability and Performance
ClickUp offers flexibility and reliability with greater performance. The new version 3.0 offers all the features to easily manage your projects on one single platform. Click 3.0 is an advanced version with more advanced features to improve productivity
Inbox 3.0
The new improved inbox 3.0 displays notifications in real-time without the need to refresh the page. The notifications are organized in a way to easily see your important notifications.
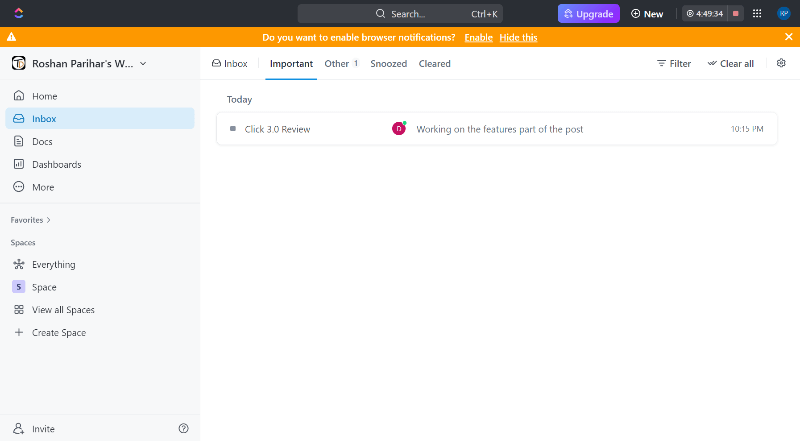
You cannot miss your important conversations with this new improved ClickUp 3.0 inbox. This inbox will keep you always updated with your tasks
Universal Search
ClickUp 3.0 introduces the new global top search bar that can help you quickly find anything on ClickUp. You can easily find your files, tasks, chats, whiteboards, etc.
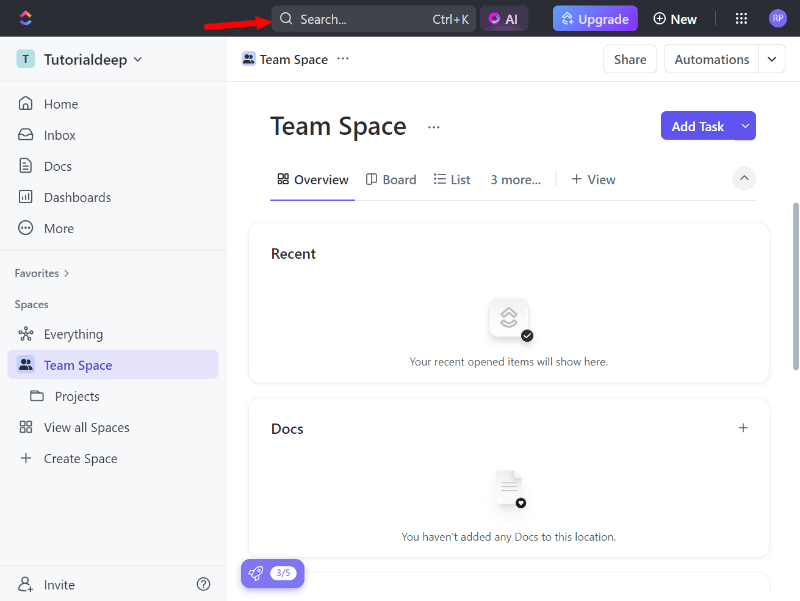
To use it, you just have to click it to get the search popup. Now, enter the search term you want to find in ClickUp. You will quickly get the search results below the search bar.

It can save you time getting your documents in ClickUp. You just have to enter the name of your document in the top search bar to get the document quickly.
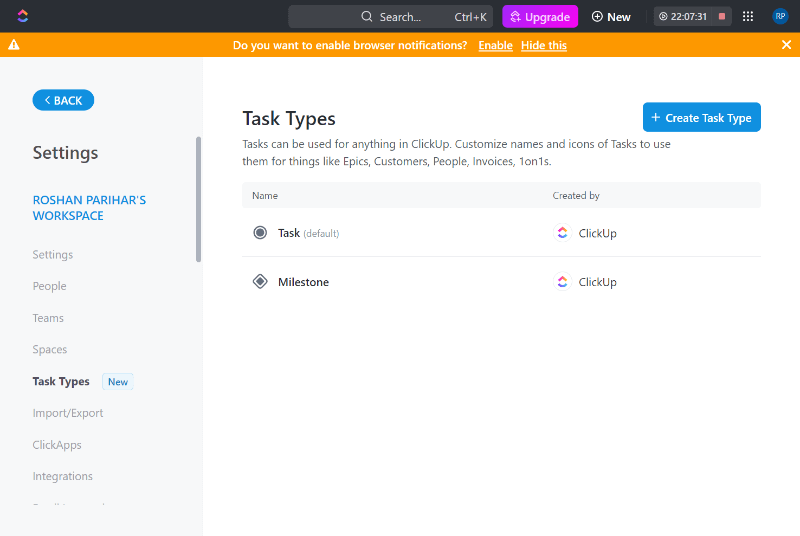
Customizable Task Types
There are two pre-added task types present in ClickUp that are Task and Milestones. However, you can add more task types in the ClickUp 3.0 version by visiting the settings << Task Types in ClickUp.
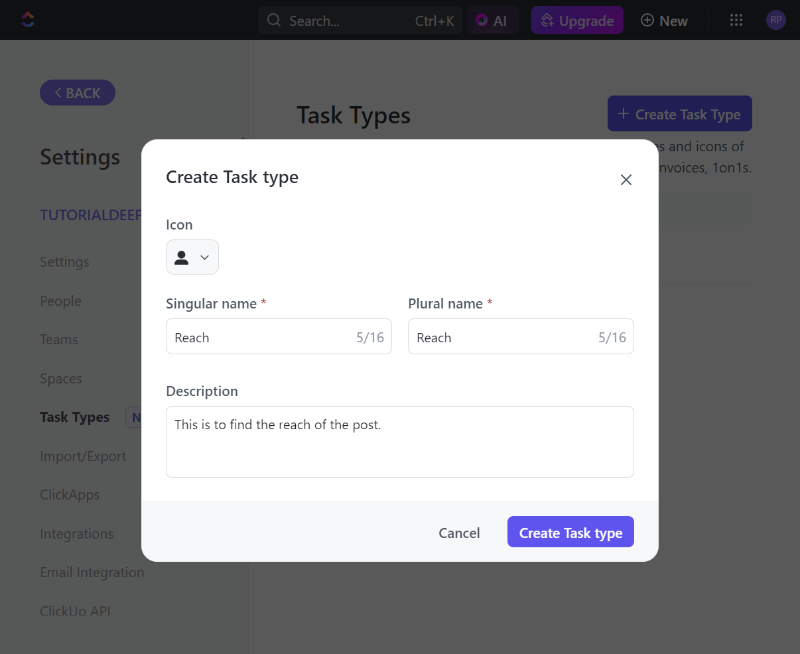
After you visit the settings page, you just have to click the ‘Create Task Type’ button. You will get a form as shown below where you have to enter the singular and plural name of the task with a description. Now, click on the ‘Create Task type’ button to create.
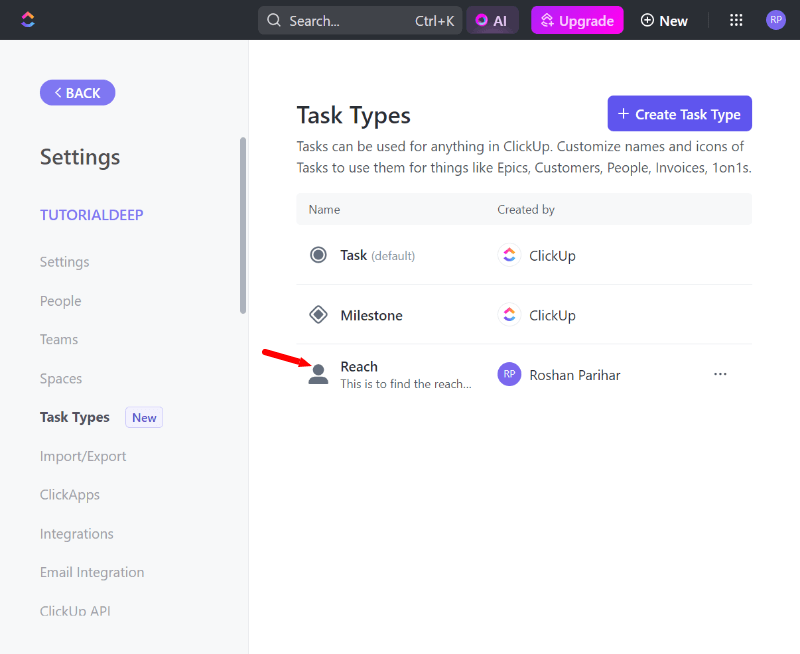
You will get your task type added as indicated in the image below.
Elegant Design
The ClickUp 3.0 comes with a cleaner design to give a great user experience with an easy-to-use interface. A more intuitive workspace can help you easily get the idea of using ClickUp features.
Revolutionized Home
Create personalized dashboards according to the priority of your tasks. You can use pre-defined templates with pre-added cards. You can also customize your dashboard and add more cards using the ‘Add Card’ button given at the top right corner of the screen.
Add your chats, links to your files, graphs, priorities, time tracking, and more card types to your dashboard. This can help you easily get priority things in one single place.
Workspace, Folders, and Lists
You can create a workspace and folders and lists of tasks to work on your projects. After that, you can add documents and resources related to your projects.
Custom Field Manager
ClickUp 3.0 offers new customization options for the workspace. You can add up to 3000 custom fields to your workspace. More custom fields are useful when you have larger projects. The new ClickUp 3.0 helps you to view all your custom fields at one location.
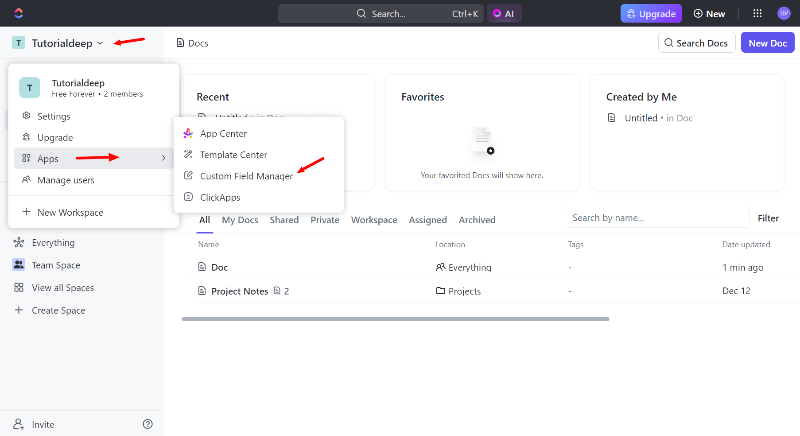
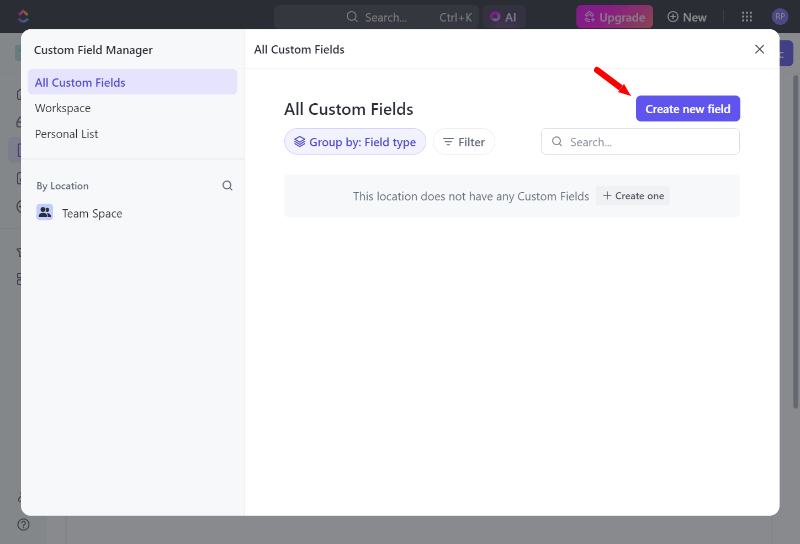
To add a new custom field, you have to visit menu option Workspace << Apps << Custom Field Manager. Here, you will get a button ‘Create new field’ that you have to click to create a custom field.
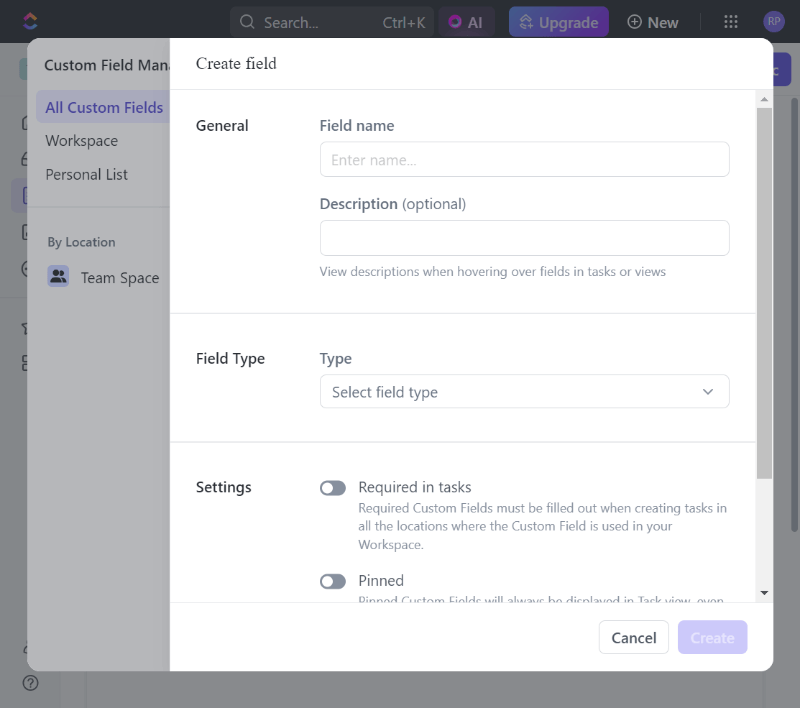
It will take you to the popup where you will get a custom field creation form. You can fill in all required details to create your custom field.
These custom fields are a more advanced tool to easily manage any size projects in ClickUp.
Tasks Management and Customizations
You can easily add tasks for your project and assign them to your team members for completion. Your team member will get an immediate email with task details. When due dates come near to the end, your team member will again get urgent to complete email for regular intimation.
Nested Subtasks and Checklists
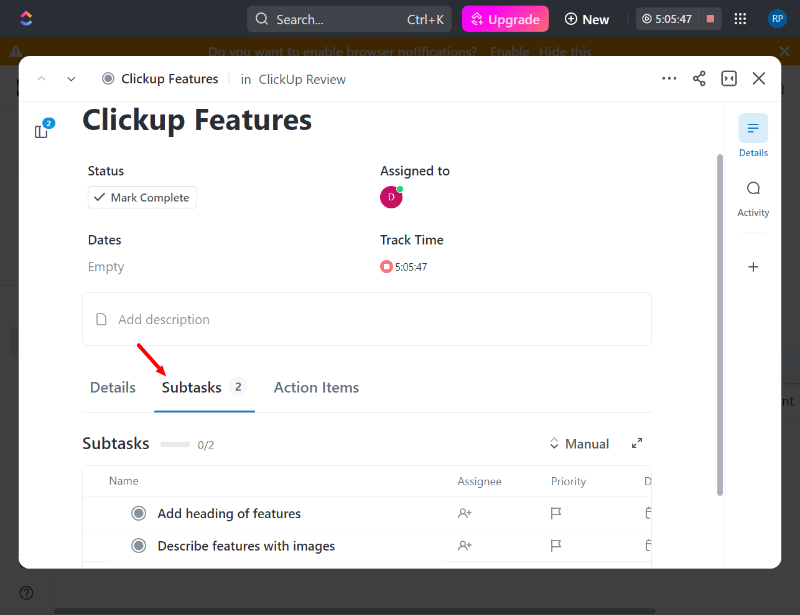
With each task, you can add nested subtasks with due dates. this helps you complete the project with task divisions. You can create a list of tasks with a checklist so as not to miss a single important part of the task.
15+ Different View Options
There are 15+ more powerful views of your projects available in ClickUp. You can select your required view type to see your project. These views can help you check your project tasks, issues, completed tasks, members working on the task, dates in the calendar, and many more.
Each view can give you a different overview of your ClickUp that can make your working in ClickUp more easier and intuitive.
Templates
ClickUp comes with hundreds of templates divided into several categories according to the user’s requirements
Automations
You can easily automate your workflow with ClickUp which can help you save your time. There are 100+ automations with workflow, tasks, projects, and more. You can assign tasks to your team members and take follow-ups on automation.
Set the priorities of tasks and work with your team members accordingly. It does not require you to manually change the status of your tasks. Your team members can also change the status to complete once they finish the task
Relationships
Each task can be categorized to relate them to other tasks in your projects. In this way, you can easily find the documents in that category by relating them.
You can build relationships with your documents and tasks. This can help you move from one link to another easily.
Integrations
ClickUp offers integrations with 1000+ favorite online tools for no extra cost to you. If you are already using any of your favorite online tools, you can easily integrate with ClickUp.
You can sync all your data from your messaging apps, cloud storage apps, and more. If you want to check and eliminate grammar errors and other English writing mistakes, you can also integrate ClickUp with Grammarly. So, ClickUp is a more powerful tool to work with your favorite tool in one single place.
Collaborations
The collaboration feature of ClickUp helps you collaborate with your team members to work on Whiteboards, comments, goals, emails, chats, and more. It can help you work together with your team members in one single place.
Documentation with Sharing
You can create documents and share them with your team members. The documentation can help you create a quick visual overview of your projects. You can also edit your documents in real-time with your team members.
It can help you create a quick knowledge base for your team members to easily understand your project and work efficiently.
Goals and Milestone
You can set goals for your projects and see them completed in ClickUp. With each goal, you can easily reach milestones when you complete your goals. You can easily manage your goals and keep them organized in a folder.
Real-time Tracking, Analytics, and Reports
ClickUp comes with powerful reporting features to easily track and analyze your task progress and completion. You can set goals and check with reports to improve performance.
The reporting includes graphs, charts, goals, status, and many more.
Now, you know all about the features of ClickUp. Let’s move further to sign up and start using all ClickUp 3.0 features.
How to Signup ClickUp 3.0 (For Forever Free)?
Here is the step-by-step process on how to sign up for ClickUp:-
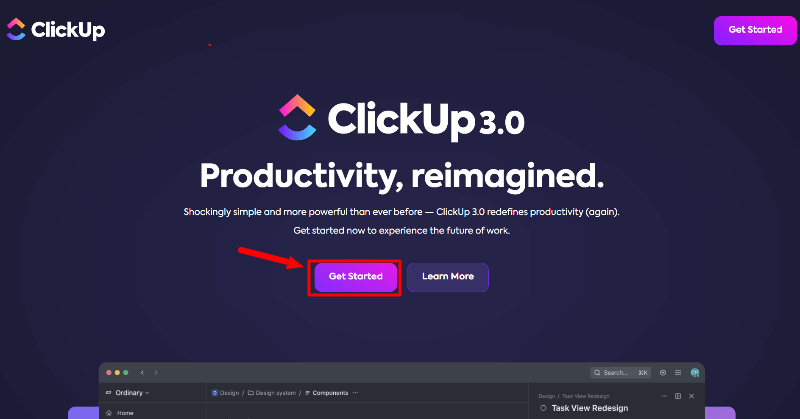
Step 1: Go to ClickUp 3.0 Page to Create an Account
First of all, open the ClickUp 3.0 page. Click the ‘Get Started’ button to start creating an account with ClickUp.
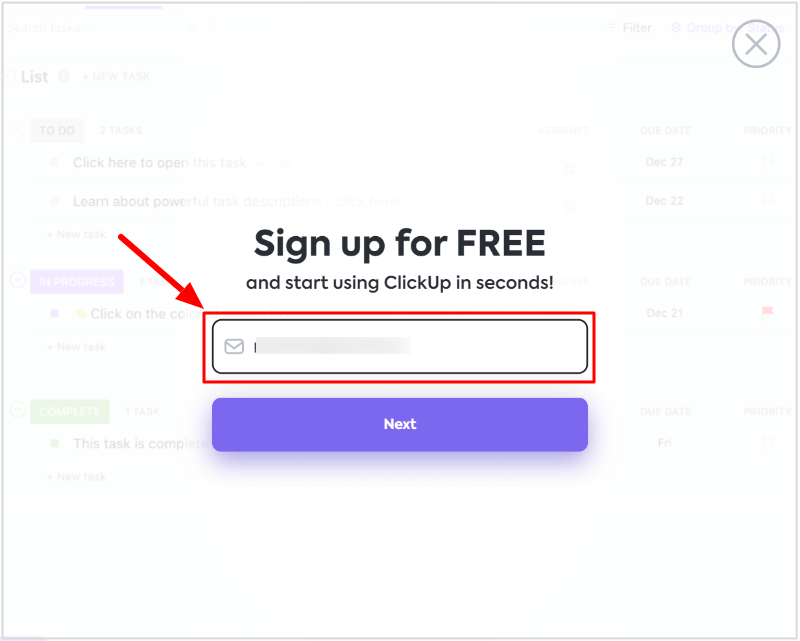
You will get a popup as shown in the image below. Here, you have to enter your email address and click the ‘Next’ button to proceed.
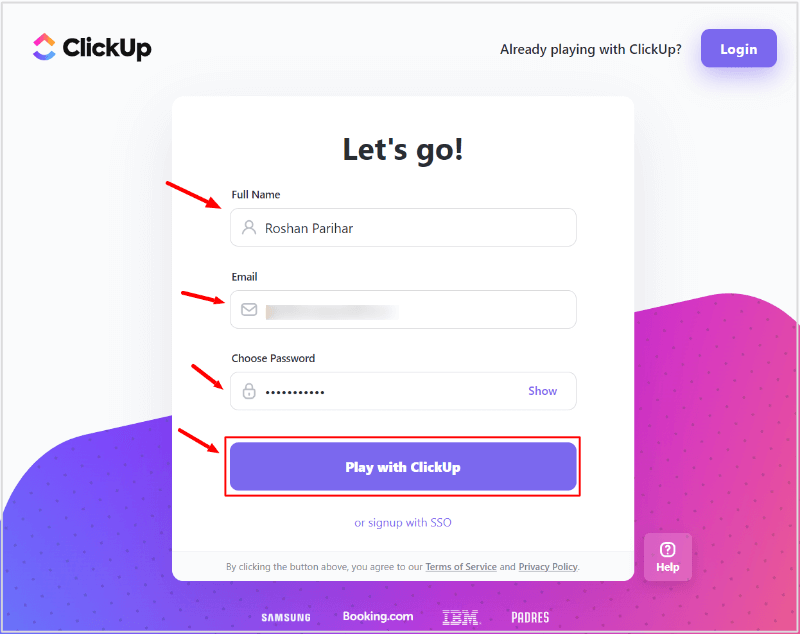
After that, you will get a form where you have to enter your full name, email address, and password for your ClickUp account. Click the ‘Play with ClickUp’ to move further.
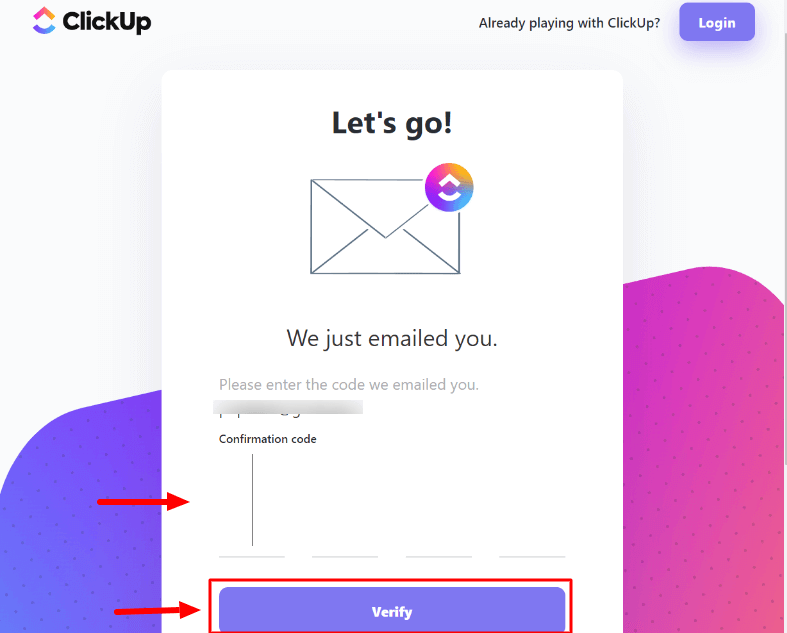
Now, you will get a confirmation code to your email address to enter in the blank field as given below. Open your email address to get confirmation Click just sent enter it and click the ‘Verify’ button.
This is required to verify that you are the real person and not the robot.
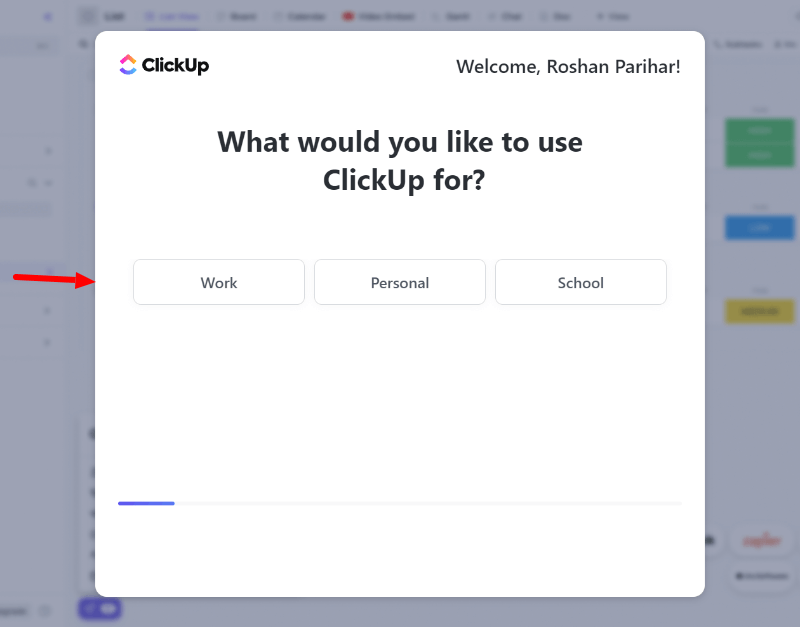
Step 2: Personalize ClickUp for your Use
Next is to personalize ClickUp for your use. Choose what would you like to use ClickUp for.
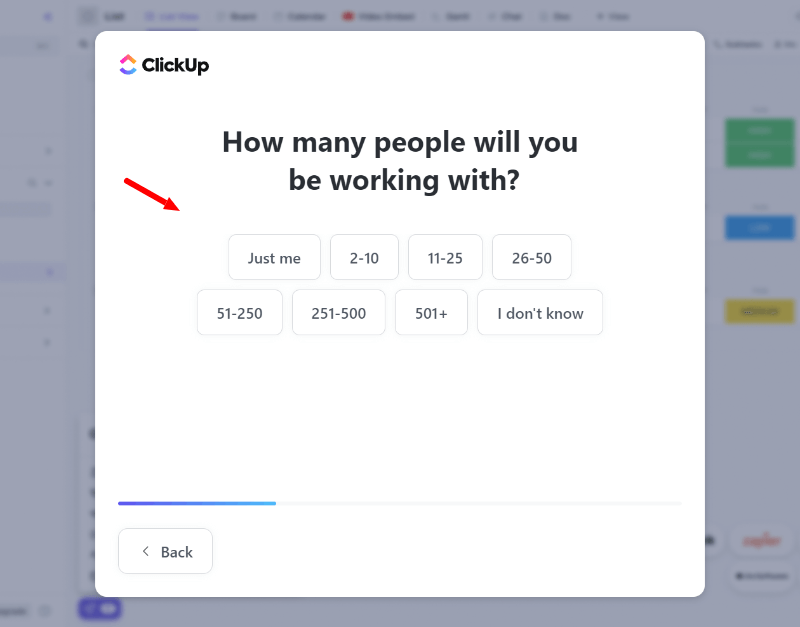
Further, choose the number of people you have in your company.
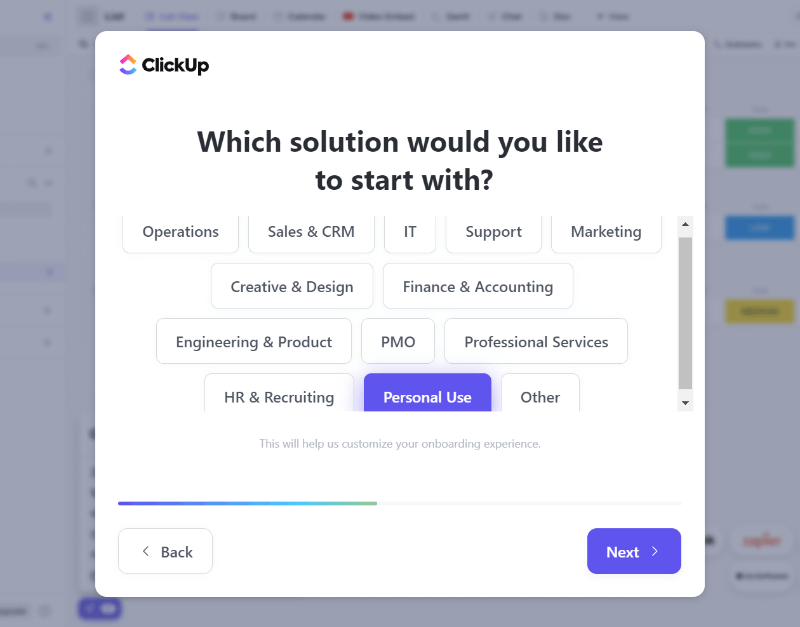
Select the solution you want to start with the ClickUp. Click the ‘Next’ button for next window.
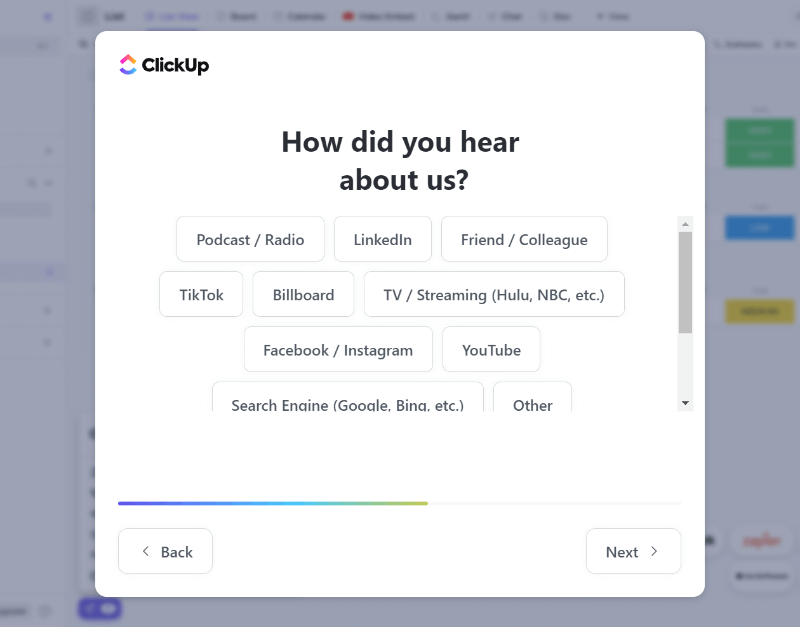
Choose an option from where you hear about ClickUp and click the ‘Next’ button to get the next window.
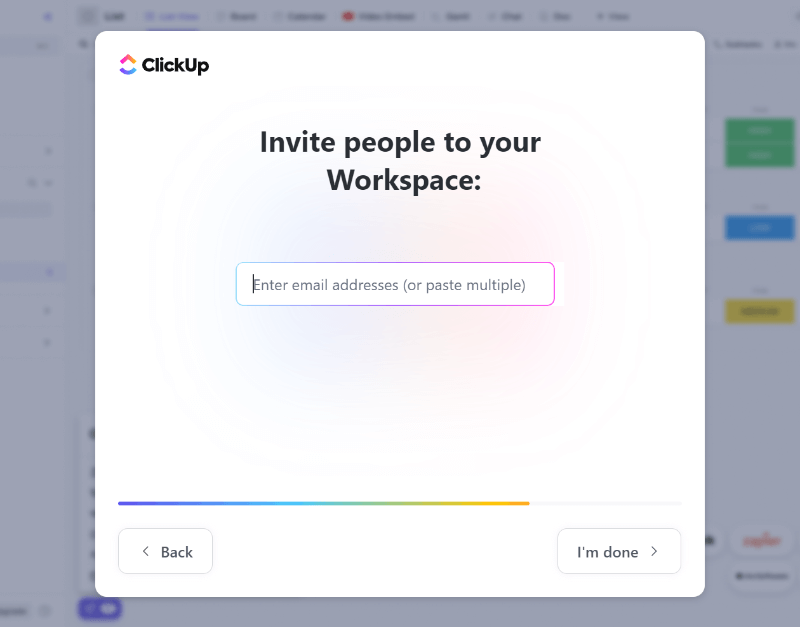
Step 3: Invite Team Members to Work Together
If you have team members and want to collaborate with them, you can enter multiple email addresses of your team members. After you enter the email address of all your team members, you can click the ‘I’m done’ button.
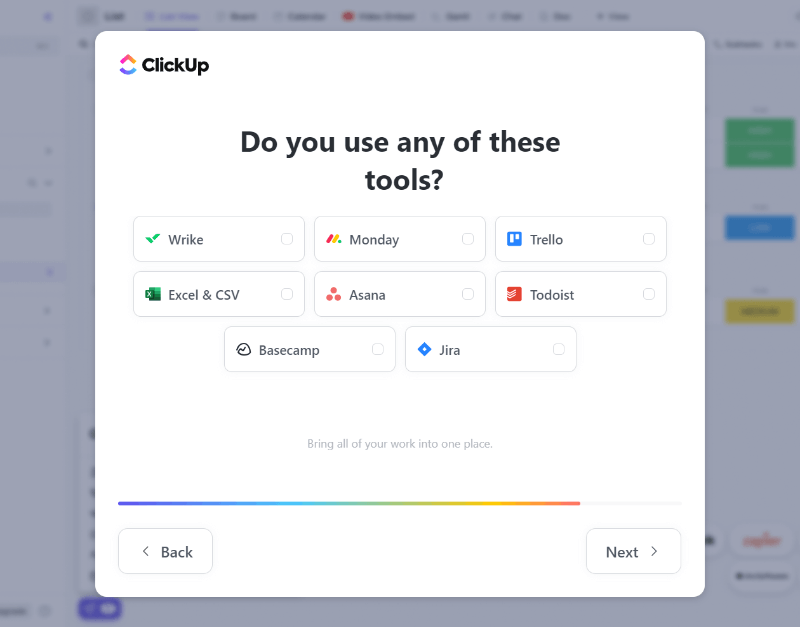
Step 4: Import Data From your Favorite Tools
If you are already using other project management tools given in the list, you can choose them here. This is useful to import all your data from there to ClickUp. After that, click the ‘Next’ button to move further.
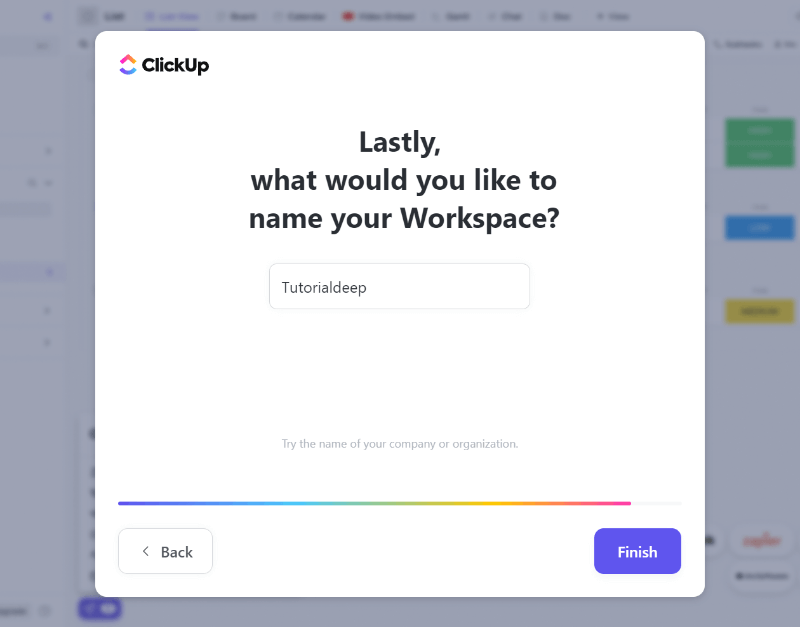
Step 5: Create a Workspace for your Projects in ClickUp
The final window is the enter the name of your Workspace with the name which you want to work on your projects. After that, click the ‘Finish’ button to proceed.
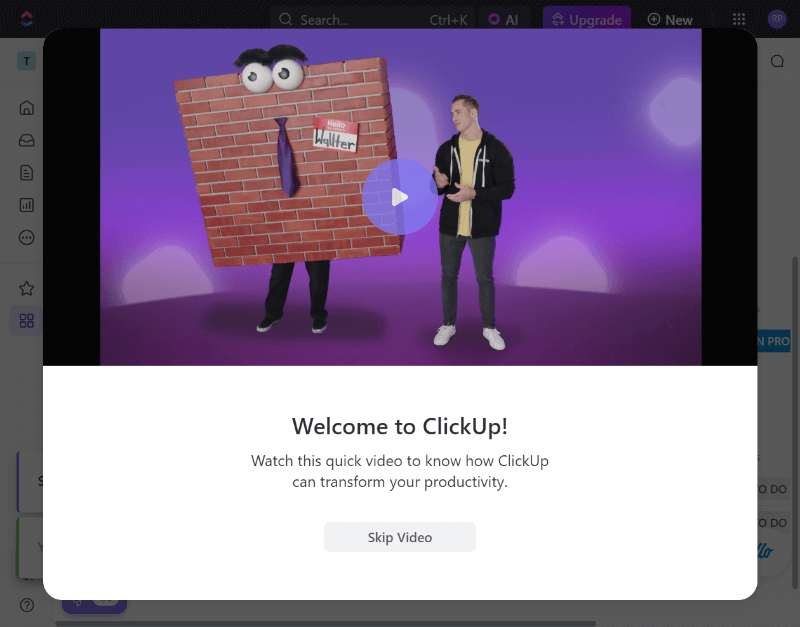
If you want to know about ClickUp visually, you can check the video by clicking on the play button. Users who already know about ClickUp and want to use its features without any delay can click the ‘Skip Video’ button.
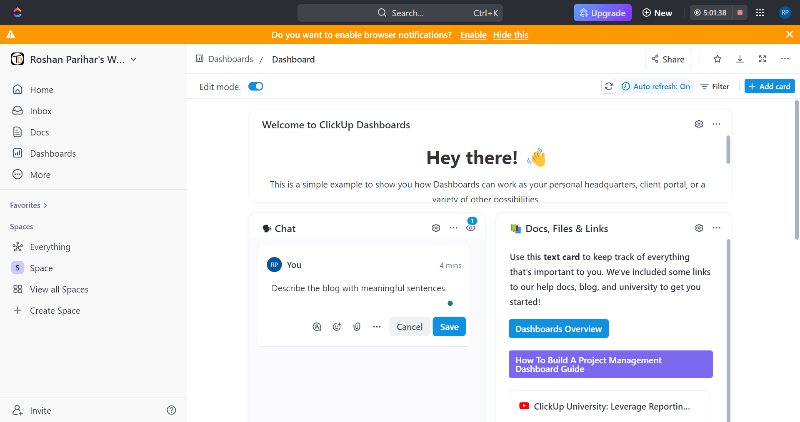
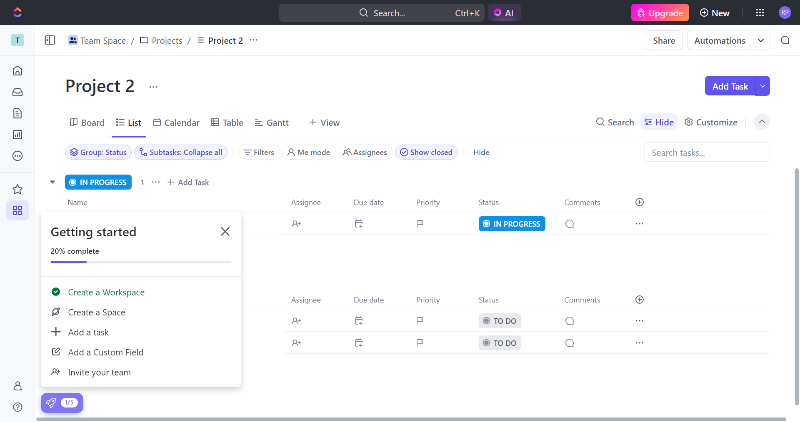
Step 6: Finally, Welcome ClickUp Dashboard
After all the above steps, you will be taken to the dashboard whose first appearance is as given below.
How to Add Team Members, Create Task, and Assign to Team Members in ClickUp?
Now, let’s find out how you can create a task for your project and assign it to your team members for completion. Firstly, we will add a team member to collaborate. After that, create the task and assign it to the team member.
Add Team Members
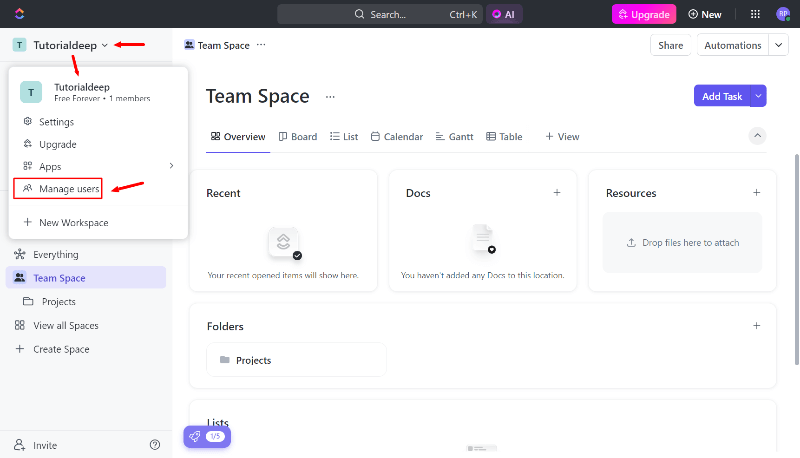
To add a team member, you have to click on the Workspace and click on the option ‘Manage Users’.
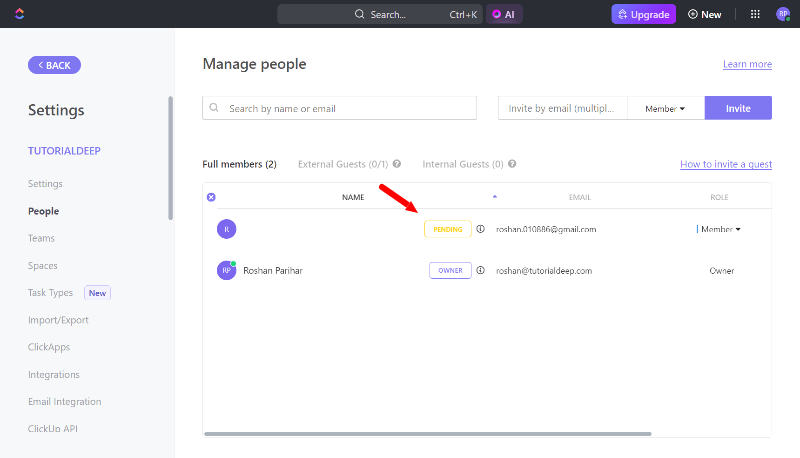
Now, enter your team member’s email address and click on the ‘Invite’ button to invite your team member to your Workspace.

Your team member will get added as a ‘Pending’ to show as a pending user of ClickUp. Your team member has to accept the invitation to join your workspace.
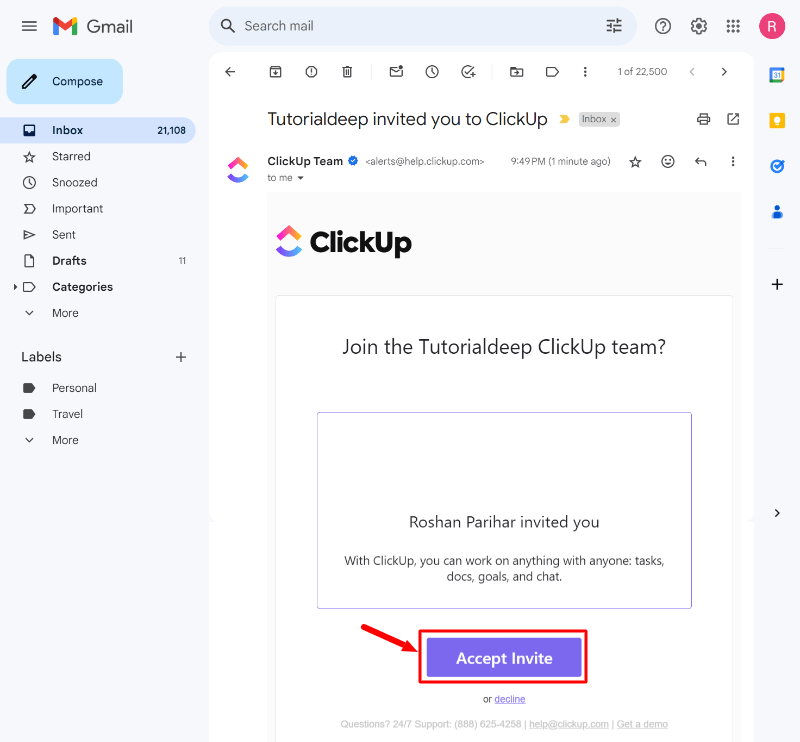
To accept the invitation, ask your team member to open their email inbox and open the invitation email. After that, click the ‘Accept Invite’ button as shown in the image below.
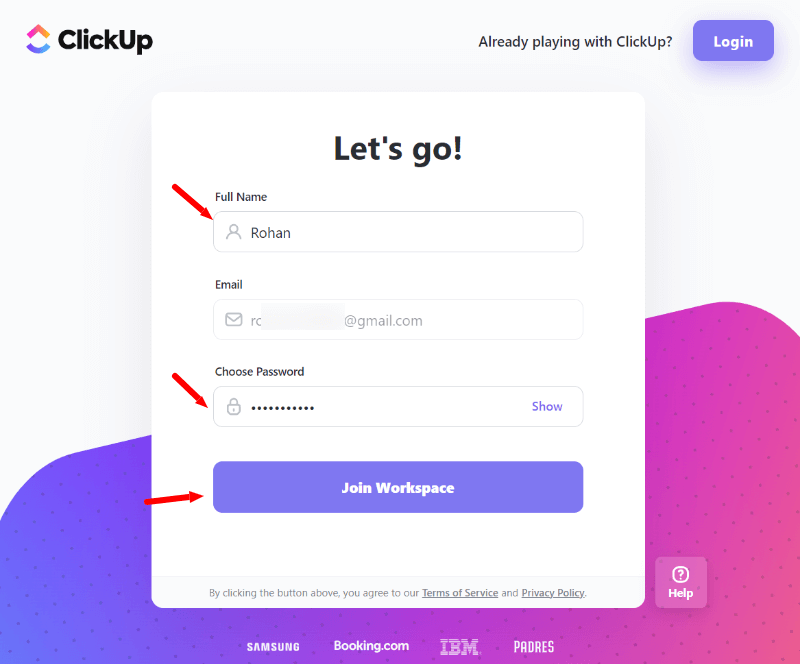
It will take your invited team member to the signup ClickUp page. Here, your team member has to enter their full name, email, and password to make login to ClickUp. After that, click the ‘Join Workspace’.
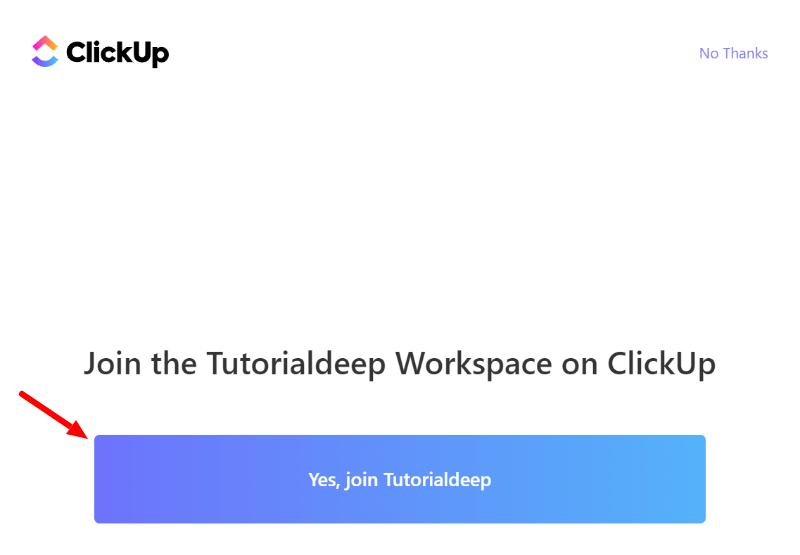
The member will get a button with the text ‘Yes, join Tutorialdeep’ workspace. Just click the button to join with your workspace.
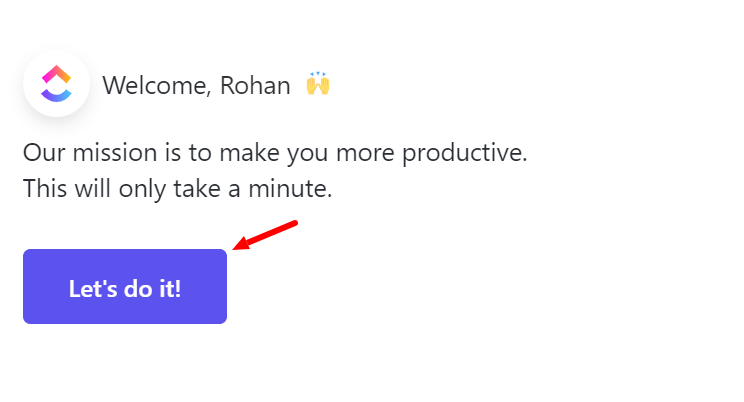
After that, the member will get a welcome message with the button ‘Let’s do it’ that the member has to click to proceed.
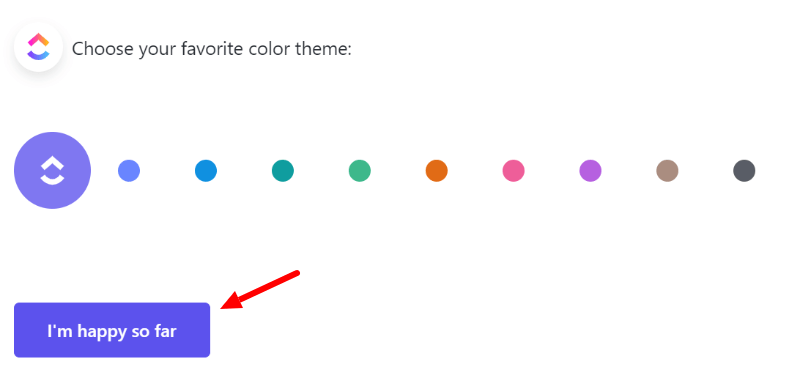
Select a color theme your member wants to use ClickUp with. After that, click the ‘I’m happy so far’ button to move further.
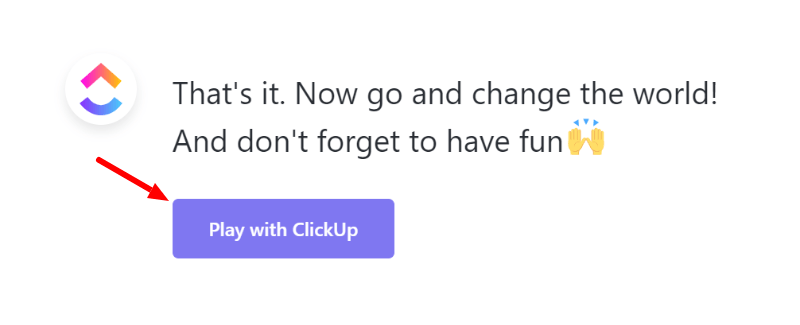
Now, click the button ‘Play with ClickUp’ to start using ClickUp.
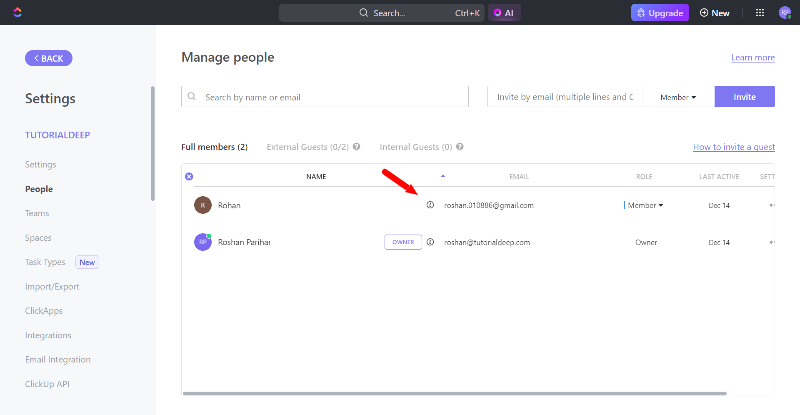
After your member completes these processes, you will get your member added as your full member in your ClickUp.
Now, let’s create a task for your team members and assign it to them.
Create a Task and Assign it to Team Member
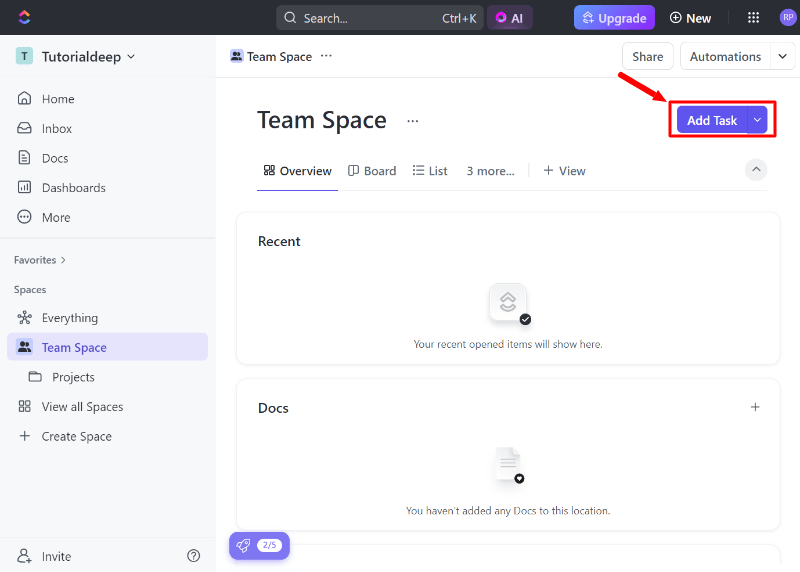
To create a task, you have to go to the left menu option ‘Team Space’. After that, select a project for which you want to create your task. You will get a button ‘Add Task as shown below that you have to click to create a task.
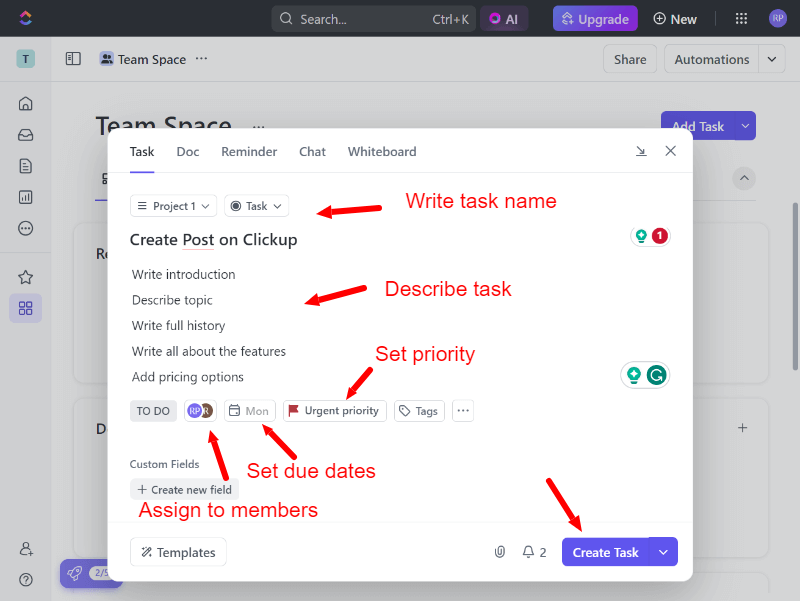
You will get a task creation form as shown below. Enter the task name, and task description, assign the task to your team members, set a due date to complete the task, and set the priority of the task. After that, click the ‘Create Task’ button.
The task will get added and your assigned team member will get an immediate email with the task details. So, it’s a very easy process to create and assign a task in ClickUp.
Pricing Options of ClickUp
There are three pricing options for ClickUp as given in the image below. The first plan is the free plan which is useful to check the interface and features of ClickUp.
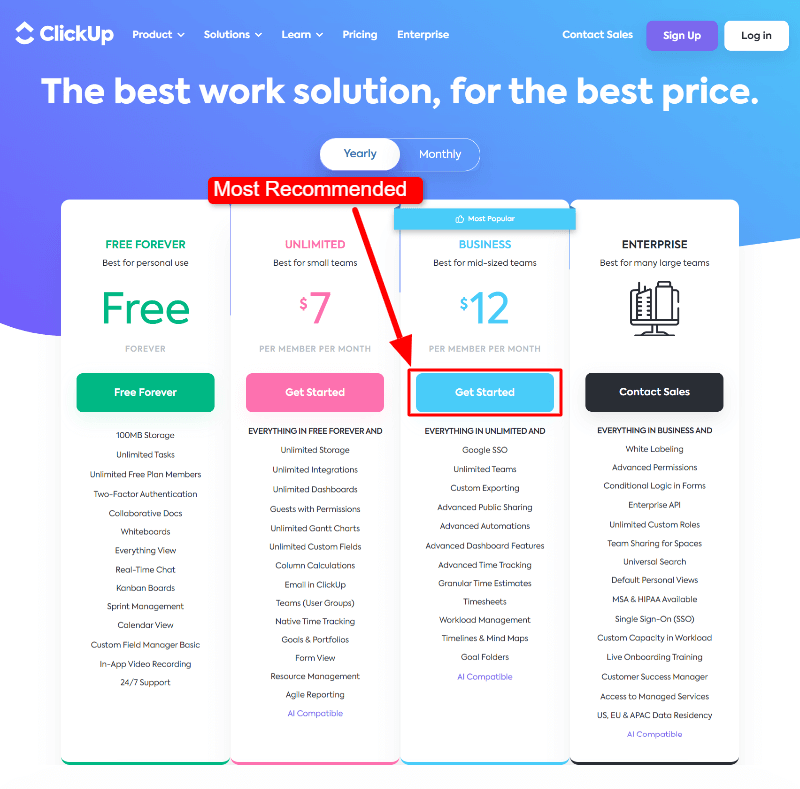
The higher plan comes with more higher features. However, I recommend the ‘BUSINESS’ plan to our readers as it comes with all the essential features to easily improve productivity.
Try ClickUp 3.0 Now (It’s Free Forever)