To insert a new column in Excel using only a keyboard shortcut, you can follow the simple step-by-step process given in this post.
So, let’s find out the keyboard shortcut with the steps given below.
How to Insert New Column in Excel Using Menu Key of Keyboard?
If you want to insert the new column in the Excel sheet, you have to use the keyboard “≣ Menu” key and follow the below-given steps.
Step 1: Press keyboard Menu Key
The menu key of the keyboard is located as given in the image below. The menu key contains the three lines in the symbol. You have to press this key to get the menu options for new column insertion.

Step 2: Select “Insert” in the Menu Options Using the Arrow Key
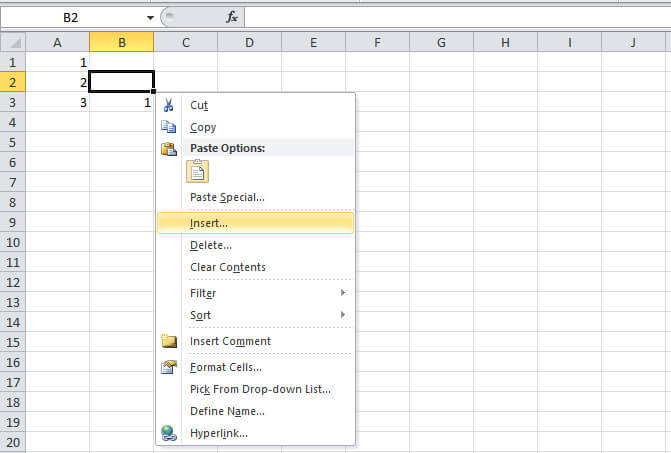
There are various options given on the menu when you press the menu key. You have to select only the single “Insert” option to get the next option for insertion.

Step 3: Select “Entire column” Using Arrow Key or Press c
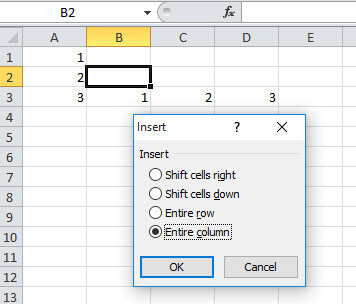
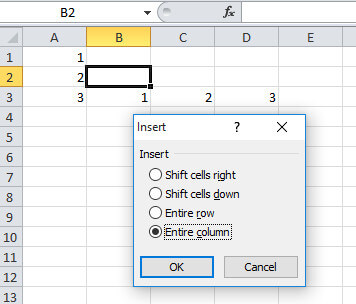
After you click the insert option in the menu. You will get the next window containing the 4 options. On these options, you have to select the “Entire column” option.
If you want the fastest process, you can directly press the keyboard “c” button. This will select the above option to use and insert the column.

Step 4: Finally, Press Enter Key to Insert New Column
The final step is to press the “Enter” key given on the keyboard. This will add a new column to the left side of the selected column.
Using Keyboard (CTRL SHIFT =) Key For Inserting New Column in Excel
This is the 3-step process to insert the new column in a Microsoft Excel sheet. Follow the below-given steps to add a new column.
First of all, visit the cell where you want to insert the new column to the left side.
Step 1: Press Keyboard Shortcut “CTRL SHIFT =”
You have to press the shortcut key of the keyboard given in the image below. This shortcut will open a window where there are 4 different options.

Step 2: Select “Entire column” Using Arrow Key or Press c
Out of the 4 options, you have to select the option “Entire column” using the arrow key. In addition to this, you can also select the option using the “c” button on the keyboard. This will directly select the desired option in the given window.

Step 3: Finally, Press Enter Key to Insert New Column
In the final step, you have to press the “Enter” key on your keyboard. A new column is automatically inserted to the left side of the selected cell.
Using (CTRL SPACE) Key in Excel
Select the entire column of your Microsoft Excel sheet. Many users like to use the mouse and its buttons to select the entire column
But, what is the keyboard shortcut to select the entire column?
Well, the answer is that you have to go to the cell for which you want to select the entire column. After that, press the combination of keyboard shortcut “CTRL SPACE”. This will select the entire column for the selected cell.
This is the simple 2-step process you can check below.
Step 1: Press Keyboard Shortcut “CTRL SPACE”
You have to first go to the cell on which you want to insert the column to the left. After that, press the keyboard shortcut “CTRL SPACE”. The shortcut will select the entire column of the selected cell. Now, follow step 2 to add a new column to the left of the selected cell.

Step 2: Now, Press Keyboard Shortcut “CTRL SHIFT =” to Insert New Column
The final step is to press the keyboard shortcut “CTRL SHIFT =”. This will add the new column immediately after pressing the shortcut key. You can press this key as many times as you times. Each time you press the key, a new column gets added to the left of the selected cell.

The last method is the fastest and quickest method to insert a new cell in the Excel sheet.
You may also like to read
