To add a new row in an Excel sheet using a keyboard shortcut, you can follow the step-by-step process given in this post.
How to Add New Row Using Menu Key of Keyboard in Excel
First of all, go to the place where you want to include the row to the top. Now, use the “≣ Menu” key of the keyboard and follow the steps given below.
Step 1: ≣Menu key Press of your Keyboard
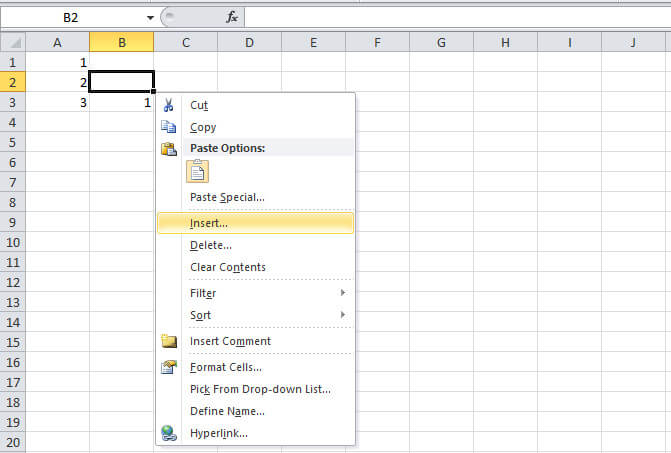
Find your menu key by taking the idea from the image given below. You can identify the button with the three dashes (-) in the symbol printed on the key. It contains options for it in the selected cell. To get those options, you have to press the menu key.

Step 2: Choose the “Insert” Option of the Menu with Arrow Keys Press “i”
You will get the number of options in the menu options list. You have to choose the “insert” option from the menu list. Go to the option using the keyboard arrow key After selection, you have to press the enter key to choose.
Step 3: Choose the “Entire row” option by Using Arrow Key or with Key Press “r”
A new window will open when you select the above option. There are 4 options given in the list out of which you have to select the “Entire row” option.
The fastest way to select this option is by directly pressing the keyboard “r” button. You can check the below image showing the selected and the required option.

Step 4: Final Step is to Press “Enter” key
Finally, you have to press the “Enter” key on your keyboard. This will insert a row to the top of the selected row.
Using (CTRL SHIFT =) Shortcut Key For Appending a New Row in Excel
You have to first visit the row cell to the top of which you want to append the row. After that, follow the steps given below.
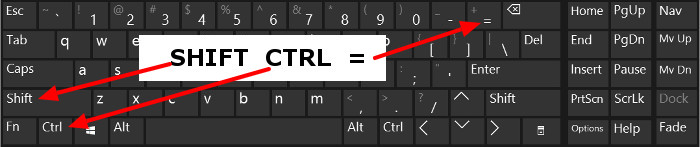
Step 1: Use Keyboard Shortcut “CTRL SHIFT =”
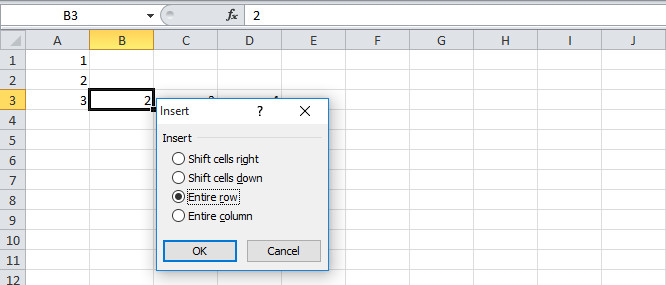
This will give you a direct window that contains 4 different options. These various options are also useful to insert new column to the excel sheet.
Step 2: Choose the “Entire row” option using the arrow key or press the button “r”
There are 4 different options given in the window. Out of which, you have to choose only the “Entire row” option using the keyboard arrow key.
However, You can select the required option directly in the given window. you have to choose this option by pressing the “r” keyboard button.
Step 3: The final step, press the “Enter” key
This is the final step where you have to press the keyboard “Enter” key. After that, you will get a row appended to the top of the selected row.
Using (SHIFT SPACE) Key 2 Step Process
This is the 2-step process on your Microsoft Excel sheet. This method is the fastest as compared to the above.
But to use this method, use the arrow key to go to the cell.
Before you check the below steps, you have to first visit the cell where you want to include the row. Now, follow these 2 steps simple method given below.
Step 1: Use the Shortcut Key “SHIFT SPACE” of Keyboard
You have to just press the keyboard shortcut “SHIFT SPACE” to select the entire row. Now, follow step 2 given below to append a row to the top.

Step 2: Final Step, Press Shortcut Key “CTRL SHIFT =” of Keyboard
This is the final step where you have to just press the shortcut key “CTRL SHIFT =”. This will immediately insert a row to the top of the selected cell. The number of times you press this shortcut, you will get the row the same number of times.
It means each time you press this step shortcut key, you will get inserted automatically.

Out of the above methods, the last method is the fastest method for adding any number of rows in the Excel sheet.
You may also like to read