
If you’ve never built an online form, it can sound technical. It isn’t. With Jotform you can have a working form, whether it’s a contact form, a registration form or a client intake form, live in about ten minutes, with no code.
This tutorial walks you through the whole process: signing up, building a form, customizing it, publishing it and checking the responses. Follow along with your own account and you’ll finish with a real form.
What Is Jotform?
Jotform is an online form builder. You create forms by dragging and dropping fields, then share them as a link or embed them on your website. When someone fills one out, the answers arrive in your inbox and your Jotform account.
People use it for contact forms, event registrations, surveys, order forms, job applications, appointment bookings and payment collection. It has a free plan, so you can learn it without paying anything.
What You’ll Need
- An email address (or a Google or Microsoft account to sign up with)
- About 10 minutes
- An idea for a form. A simple contact form is perfect for practice.
11 Steps to Create Your First Jotform
Step 1: Create Your Free Jotform Account
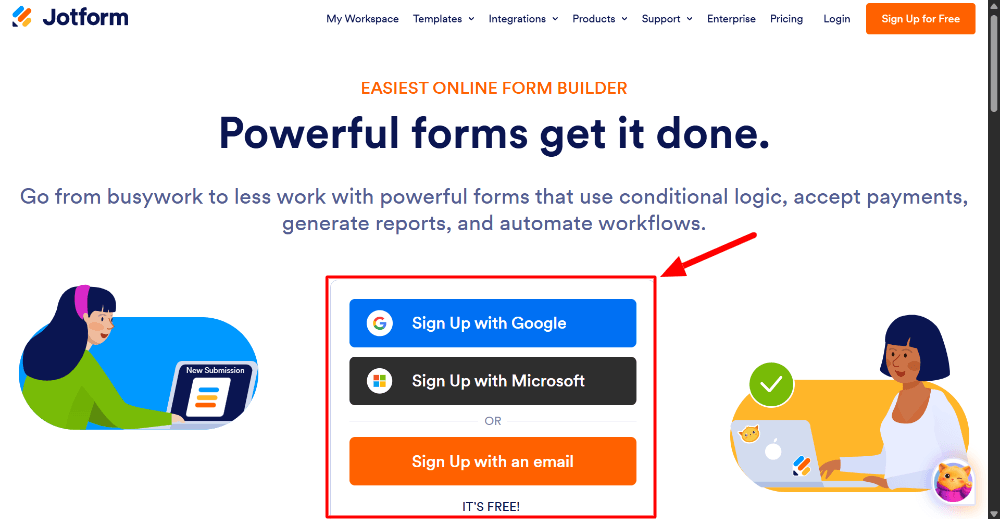
Go to the Jotform website and click Sign Up. Register with your email or a linked Google or Microsoft account. The free plan is enough for this tutorial.
Step 2: Start a New Form
After you log in, you’ll land on your dashboard (My Workspace).
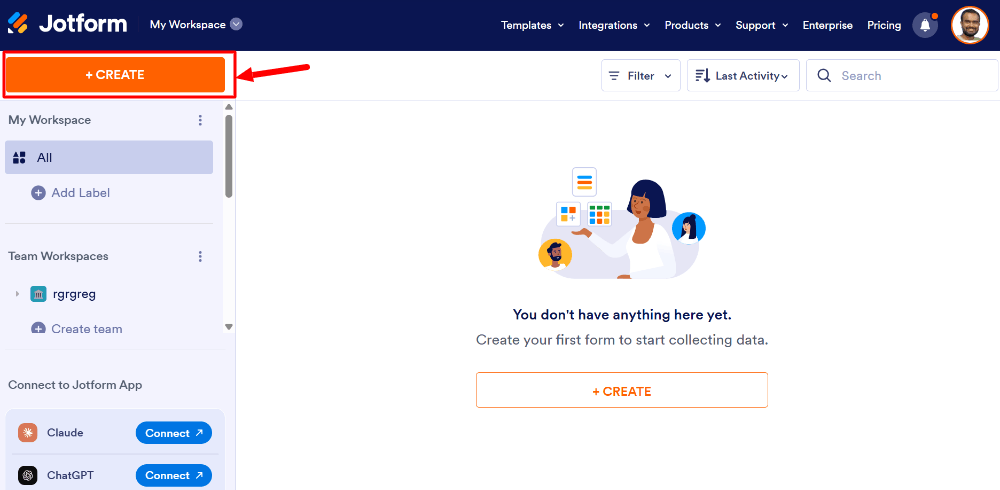
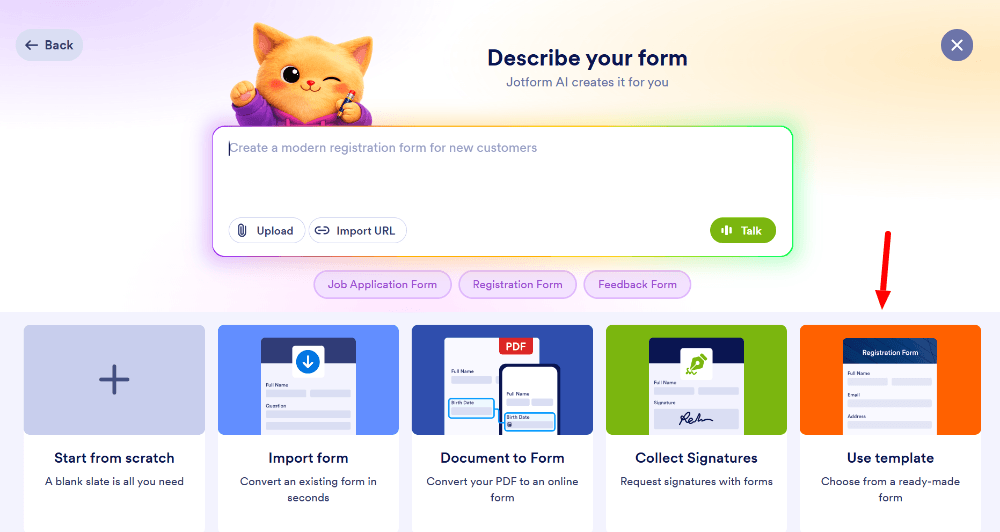
Click Create. Jotform asks how you’d like to start:
- Start from scratch: a blank form you build yourself
- Use a template: a ready-made form you can edit
- Import a form: bring in an existing form
- Build with AI: describe the form you want and let Jotform draft it
As a beginner, a template is the fastest route.
Step 3: Choose a Layout (Classic or Card)
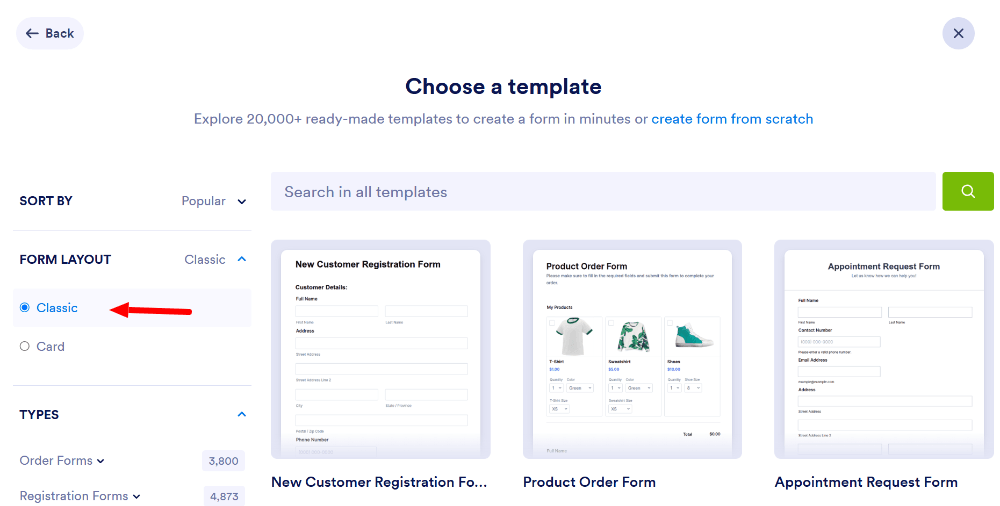
- Classic Form: all questions on one page, like a traditional form
- Card Form: one question at a time, which feels like a conversation
Not sure? Choose Classic. It’s simpler to build and easier for most people to fill out.
Step 4: Pick a Template
Left sidebar has templates categories. Choose the “contact form” or “registration form” category to get the ready-made form templates. Let’s choose ‘Contact Forms’ category.
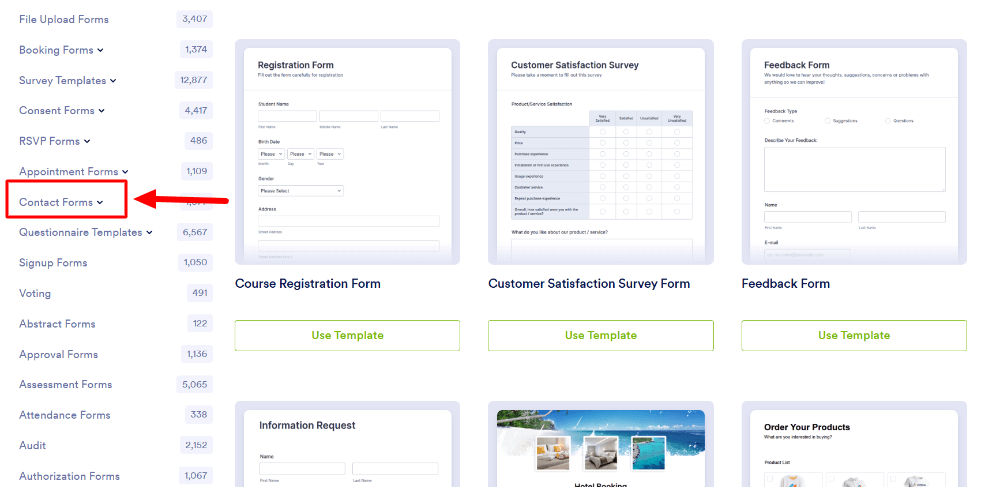
You will get list of beautiful pre-made template as shown in the image below. Click a template to preview it.
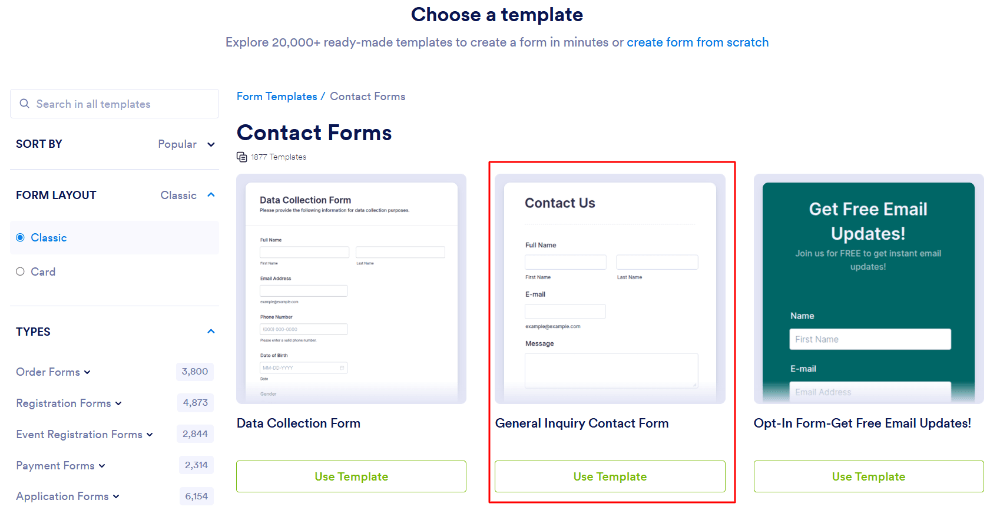
Click Use Template to use it.
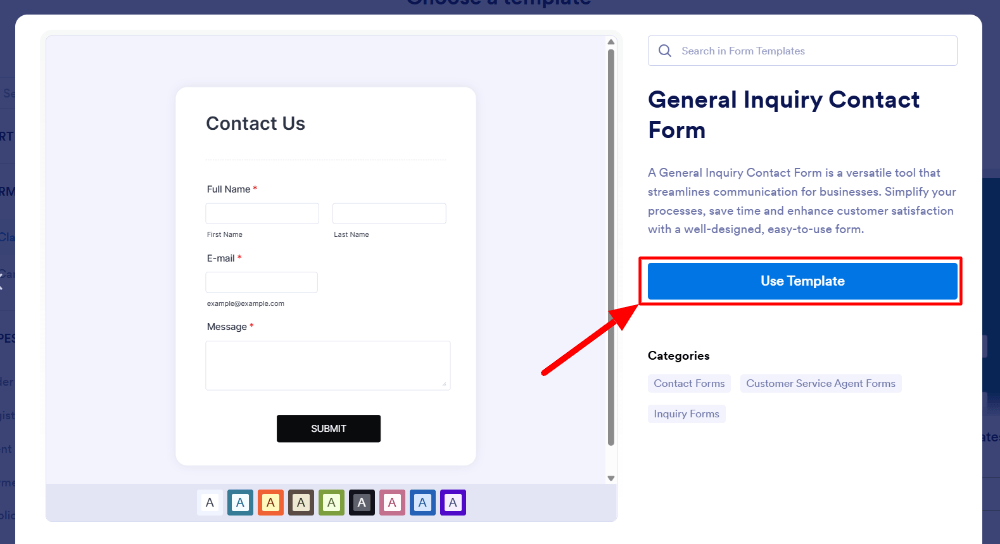
Step 5: Edit Your Form in the Builder
This is where you’ll spend most of your time. The center shows your form, and the Add Form Element menu lets you add new fields.
- Add a field: choose from Short Text, Long Text, Email, Phone, Dropdown, Multiple Choice, Date Picker, File Upload, Signature, Payment and more, then drag it into place.
- Edit a field: click it to change the question text, mark it Required, or adjust the options.
- Delete or reorder: use the trash icon, or drag fields up and down.
Beginner tip: shorter forms get more responses. Only ask for what you really need. A name, email and message is often enough for a first contact form.
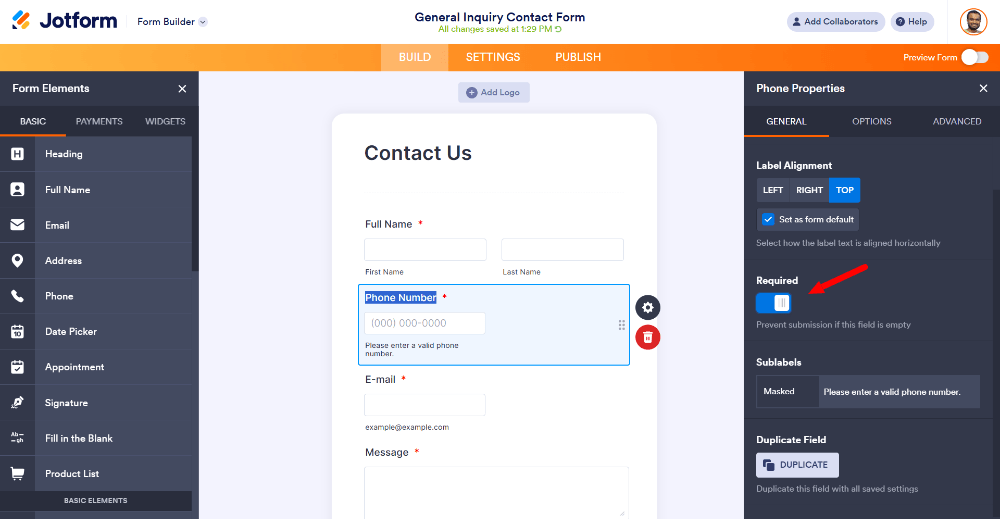
Added a phone field to get mobile number.
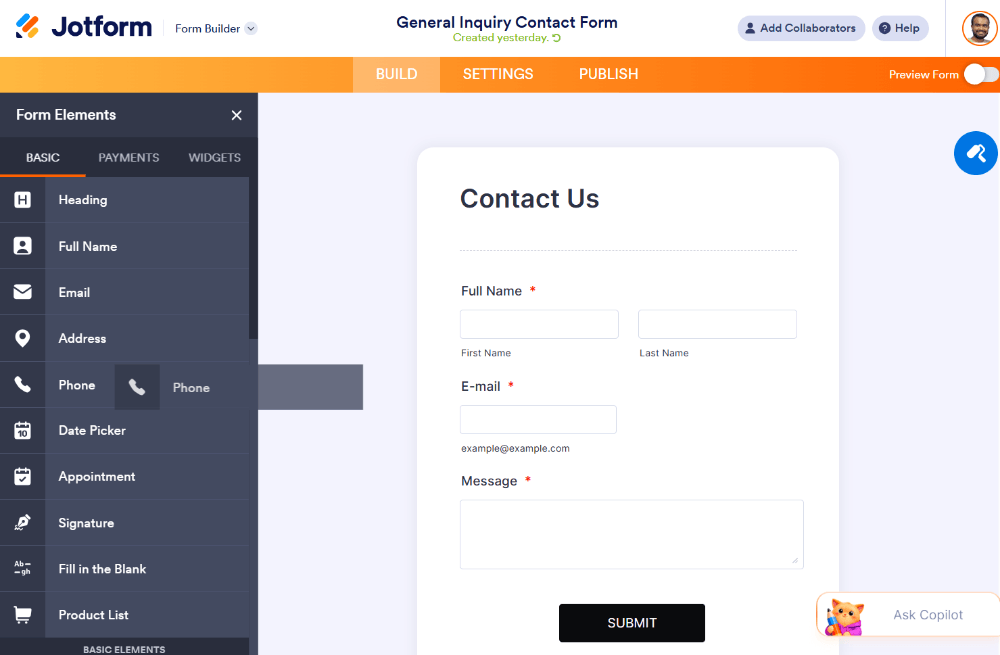
Made mobile number required from the field edit window.
Step 6: Customize the Look with the Form Designer
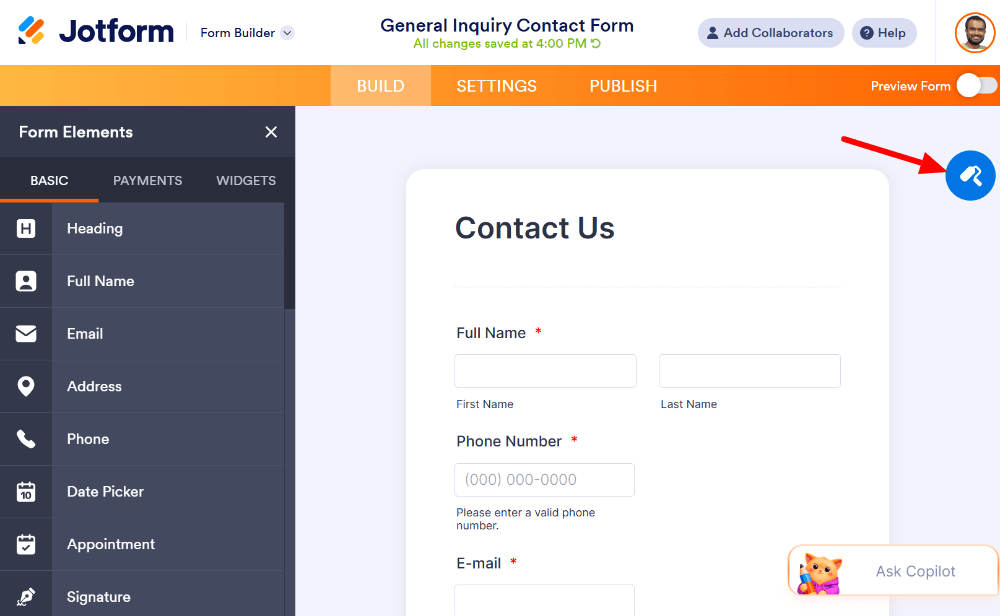
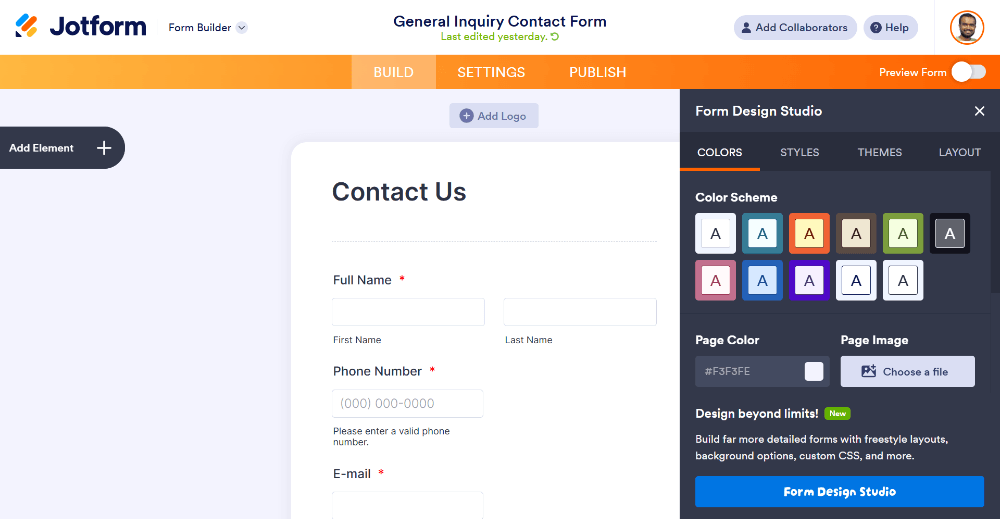
A plain form works, but a branded one builds trust. Click the paint roller icon (Form Designer) to change colors, fonts, background and spacing, and to add your logo. Ready-made themes let you apply a style in one click and tweak it from there.
Step 7: Set Up Email Notifications
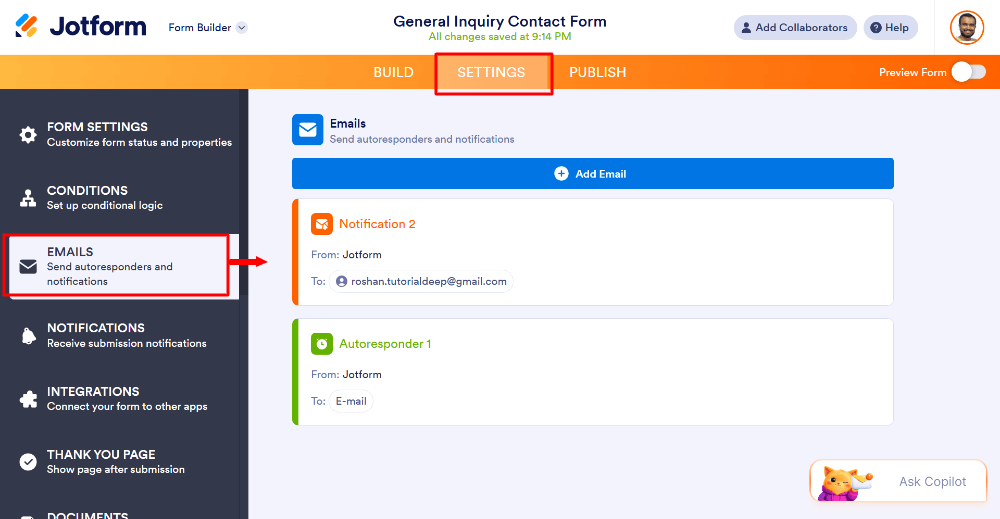
You’ll want to know when someone submits your form. Go to Settings → Emails.
- Notification email: alerts you to each new response
- Autoresponder email: sends the respondent a confirmation, such as “Thanks, we’ll reply within 24 hours”
These are often set up by default, but open the section and check the email address is correct.
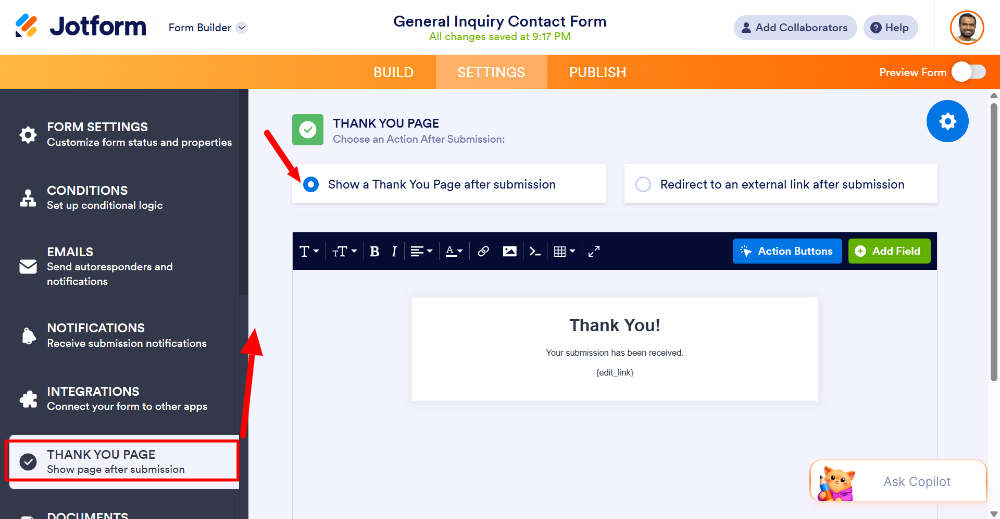
Step 8: Customize the Thank You Page
After someone submits, they see a confirmation. In Settings → Thank You Page, write your own message or redirect people to a page on your website.
Step 9: Test Your Form
Never publish before testing. Click Preview, fill the form out and submit it. Then check that:
- The notification email arrived
- The answers look right in your account
- The form looks good on a phone (use the mobile preview)
Step 10: Publish and Share Your Form
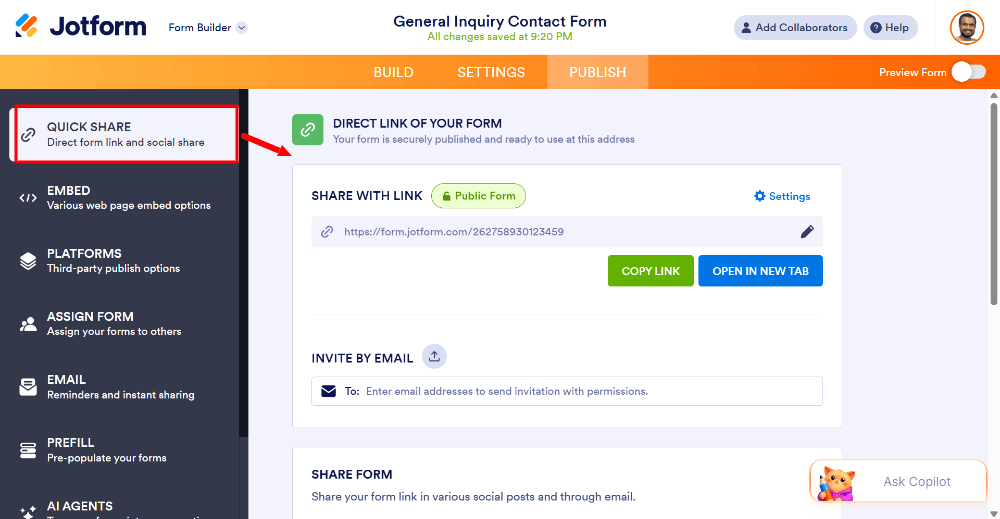
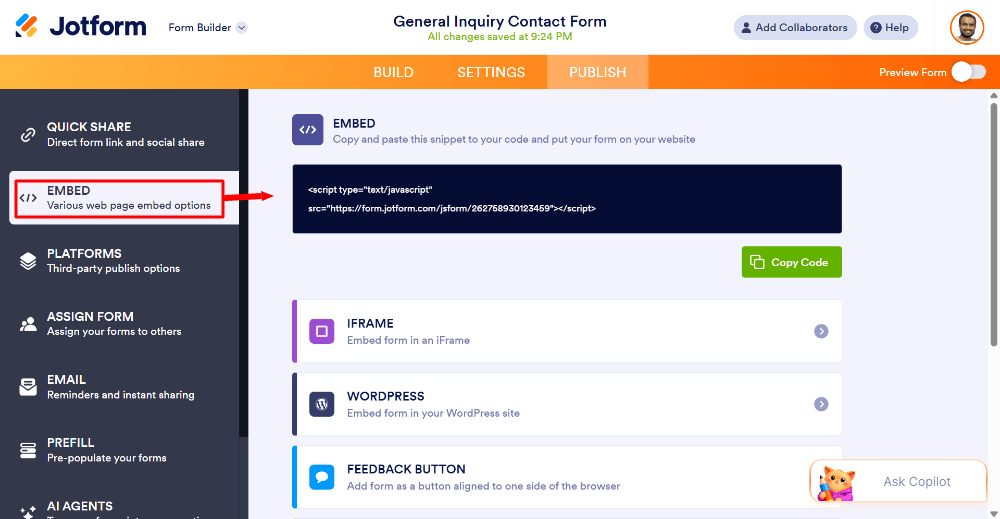
Click the Publish tab. You have three main options:
- Share the link. Copy the form URL and send it by email, WhatsApp, social media or text.
- Embed it. Copy the embed code and paste it into your website (WordPress, Wix, Squarespace and others).
- Use a QR code or social sharing. Handy for events and printed materials.
Step 11: View Your Responses
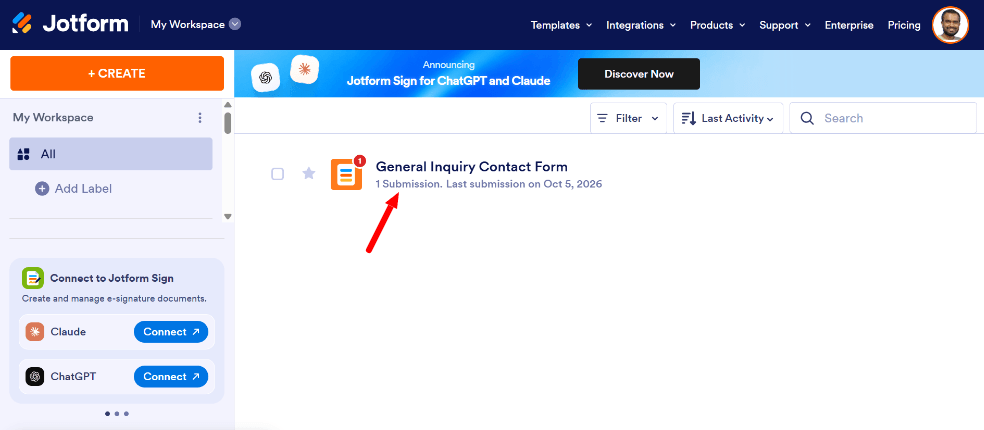
Once people start submitting, open your form from My Forms and click Submissions (or Inbox). You can:
- Search and filter entries
- Export to Excel or CSV
- Print or share entries
- Open Jotform Tables for a spreadsheet-style view
Create your first Jotform for free →
Features Worth Learning After Your First Form
- Conditional logic: show or hide questions based on earlier answers
- Payment fields: collect payments through Stripe, PayPal and other gateways
- E-signatures: let people sign agreements online
- Integrations: send responses to Google Sheets, Slack, Notion and more automatically
- Approval flows: route submissions to the right person for review
Common Beginner Mistakes to Avoid
- Asking too many questions. Long forms scare people off.
- Skipping the test. Always submit one yourself first.
- Forgetting required fields. Mark essentials like email as required.
- Ignoring mobile. Most people will open your form on a phone.
- Not setting up notifications. You could miss new leads.
Frequently Asked Questions
Q1. Is Jotform free to use?
Yes. Jotform has a free plan with a limited number of forms and monthly submissions. Paid plans add more forms, submissions, storage and features.
Q2. Do I need coding skills to use Jotform?
No. The builder is drag and drop. Code is only needed for advanced custom styling.
Q3. Can I use Jotform on my website?
Yes. You can embed any form on your site with copy-and-paste code, or simply share a link to it.
Q4. Can I collect payments with Jotform?
Yes. Add a payment field and connect a gateway such as Stripe or PayPal.
Q5. How long does it take to build a form in Jotform?
A basic form from a template takes about five to ten minutes.
Q6. Can I use Jotform on my phone?
Forms work on any device, and Jotform also has mobile apps for managing forms and responses.
Final Thoughts
Jotform is one of the easiest ways to start with online forms. Pick a template, edit a few fields, hit Publish, and you’re collecting responses. Start with a simple contact form, then explore payments, logic and integrations as you get comfortable.