
If you’ve never used a form builder before, Jotform can look like a lot at first glance – templates, fields, settings tabs, integrations.
But the actual learning curve is much shorter than it looks. Most people can build and publish their first working form within their first ten minutes on the platform, without any prior experience.
This beginner’s guide to Jotform walks through everything a complete beginner needs to know – from creating an account to publishing your first form and understanding the features you’ll actually use.
What Is Jotform? A Quick Overview for Beginners
Jotform is a no-code form builder that lets you create online forms – contact forms, surveys, order forms, registrations, applications, and more – through a visual, drag-and-drop interface.
Instead of writing HTML, CSS, or backend code, you build forms by clicking and arranging pre-made elements, and Jotform handles the technical parts behind the scenes: validation, mobile responsiveness, spam protection, and data storage.
It’s used by everyone from individual freelancers and small business owners to large organizations, precisely because it scales from very simple use cases (a basic contact form) to fairly complex ones (multi-step applications with payments and approval workflows) without requiring any coding knowledge at any point.
This Beginner’s Guide to Jotform: Step by Step
Step 1: Creating Your Jotform Account
Getting started takes less than a minute. Head to Jotform’s website. You can use the link below to visit homepage.
You can sign up using an email address, or use a Google or Facebook account to skip the extra step of creating a new password.
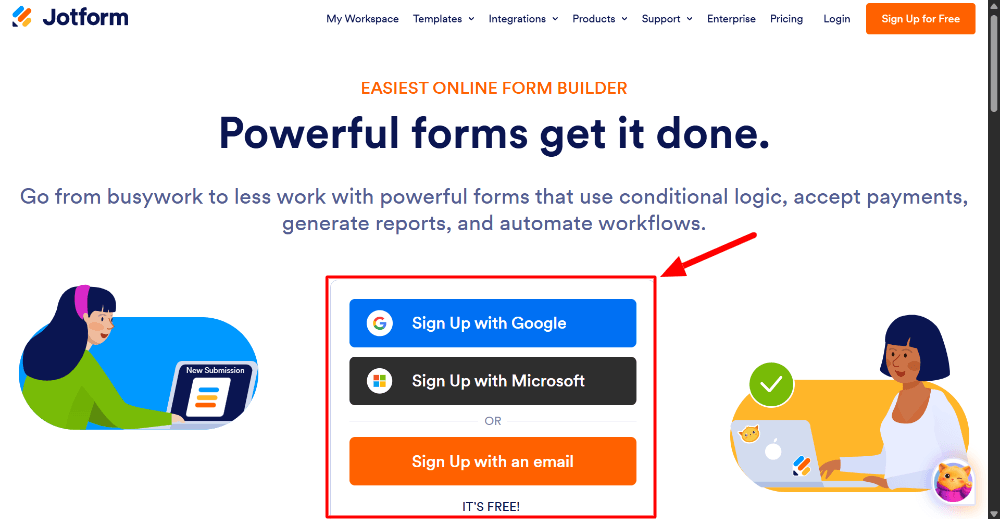
Jotform’s free plan is enough to build and publish real, functional forms, so there’s no need to enter payment details just to try it out.
Once you’re signed in, you’ll land on your My Forms dashboard – this is your home base, where every form you create will be listed going forward.
Step 2: Starting Your First Form
From the dashboard, click Create Form.
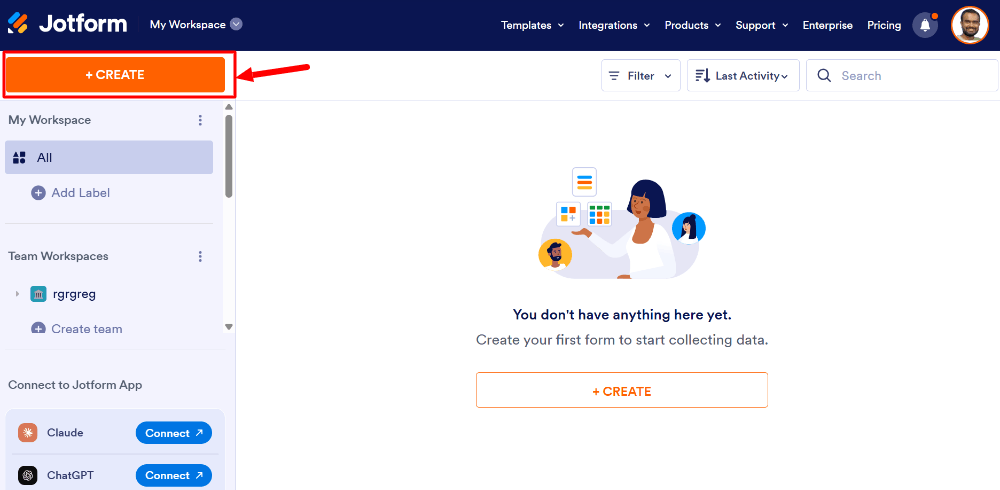
Jotform will offer you a few starting points:
- Start from scratch – a completely blank canvas, useful if you already know exactly what fields you want.
- Use a template – thousands of pre-built forms across categories like contact forms, surveys, event registrations, and job applications.
- Import an existing form – if you have a PDF form or a form built somewhere else, Jotform can often convert it directly.
For a first form, using a template is the easiest way to get comfortable with the builder without having to make every design decision yourself. Search the template gallery for whatever you’re trying to build – “contact form,” “feedback survey,” “event registration” – and pick one that’s close to what you need. You can always adjust it afterward.
Step 3: Understanding the Form Builder Interface
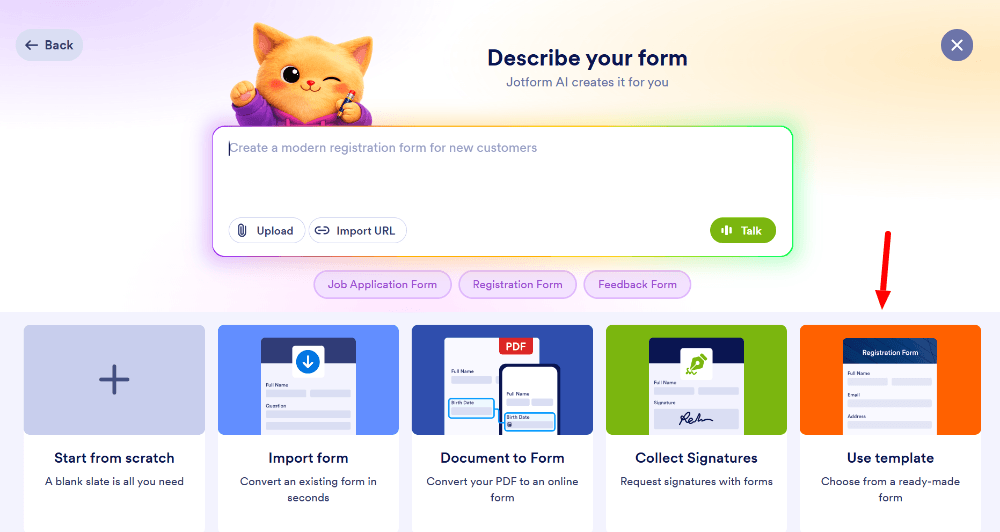
Once you’re inside the builder, you’ll see a few key areas:
The canvas (center). This is your form as it currently looks. You can click directly on any field to edit its label, or drag it to reorder it.
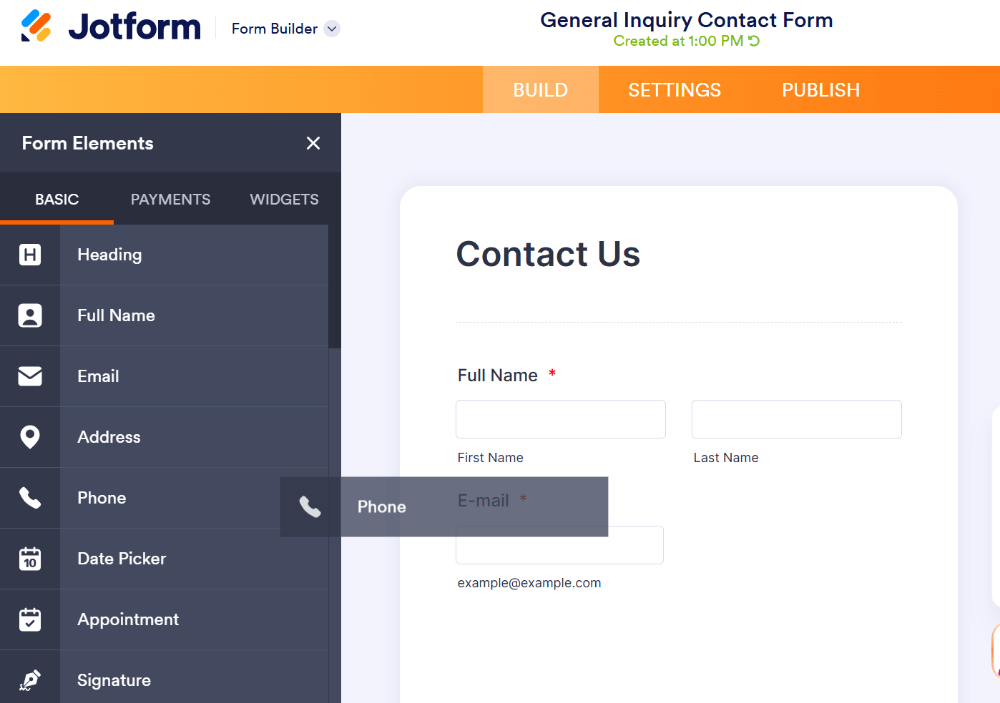
The field library (left side). This is where you’ll find every type of field you can add – text boxes, dropdowns, checkboxes, file uploads, payment fields, e-signatures, and more. To add one, just drag it onto the canvas.
The properties panel (right side, or a popup when you click a field). This is where you adjust settings for whatever field or element you’ve selected – whether it’s required, what placeholder text it shows, and any validation rules.
The top toolbar. This is where you’ll find your Publish button, along with tabs for things like Settings, Integrations, and Reports (which show your form’s analytics once it’s live).
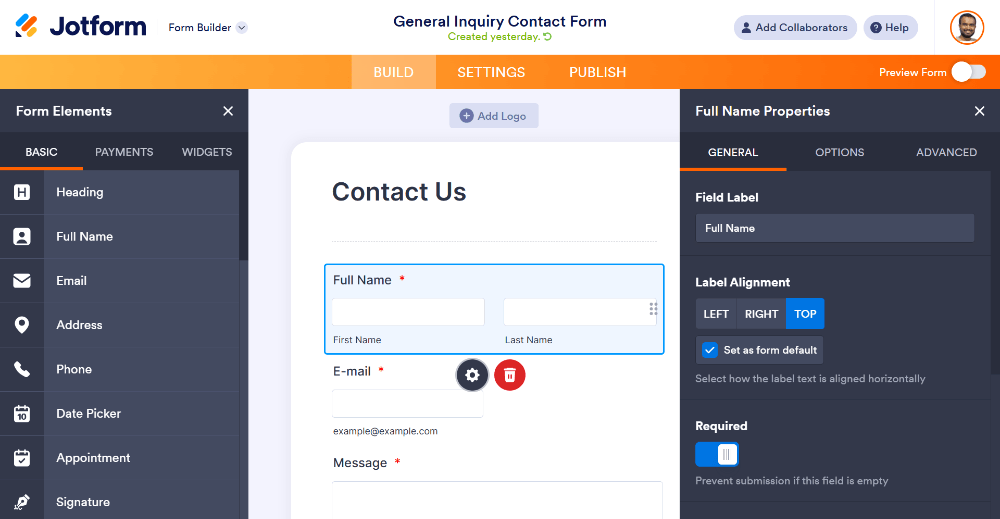
Spend a minute just clicking around here before building anything – dragging a field in, deleting it, undoing it. Nothing here is permanent until you publish, so it’s a safe place to experiment.
Step 4: Adding and Editing Fields
To add a new field, drag it from the field library on the left directly onto the canvas where you want it to appear. To edit an existing field, click on it – this opens its settings, where you can change its label, mark it as required, or adjust formatting (like requiring a valid email format for an email field).
A few field types worth knowing about as a beginner:
- Short/long text – for names, short answers, or open-ended responses.
- Dropdown / radio buttons / checkboxes – for multiple-choice questions.
- File upload – for resumes, images, or documents.
- Payment fields – for collecting orders or fees directly through the form.
- E-signature – for forms that double as agreements or waivers.
If you’re building a simple contact form, you likely only need three or four fields total – name, email, and a message box are usually enough to get started.
Step 5: Using Conditional Logic (Optional, But Useful Early)
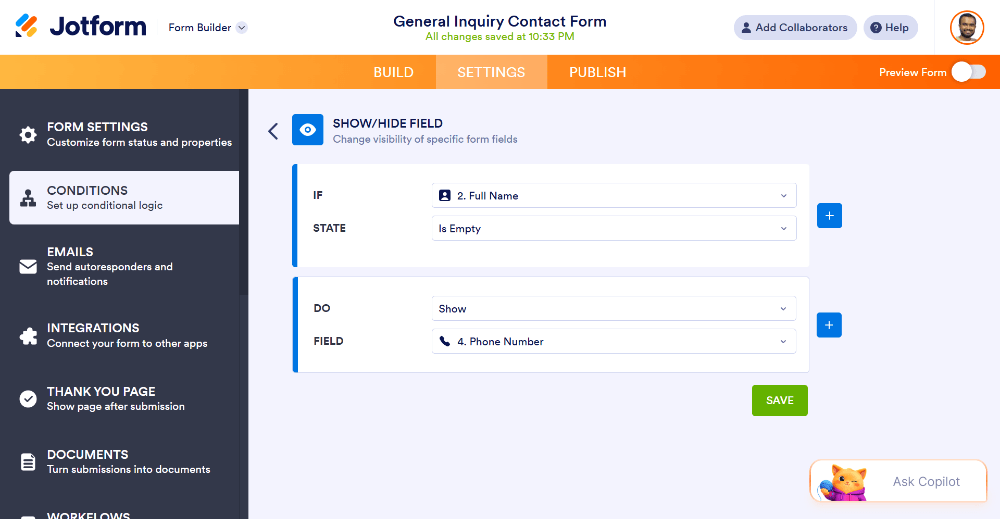
One of Jotform’s most useful features for beginners to learn early is conditional logic – the ability to show or hide fields based on how someone answers a previous question. For example, you might only want to show a “company name” field if someone selects “Business” instead of “Individual” on an earlier dropdown.
To set this up, go to the Settings tab and look for Conditions (sometimes called Form Logic). You’ll build a simple rule: “If [field] equals [value], then show/hide [field].” No code is involved – it’s a menu-based rule builder.
You don’t need this for every form, but it’s worth knowing it exists, since it’s one of the features that separates a form builder from simply writing HTML by hand.
Step 6: Styling Your Form
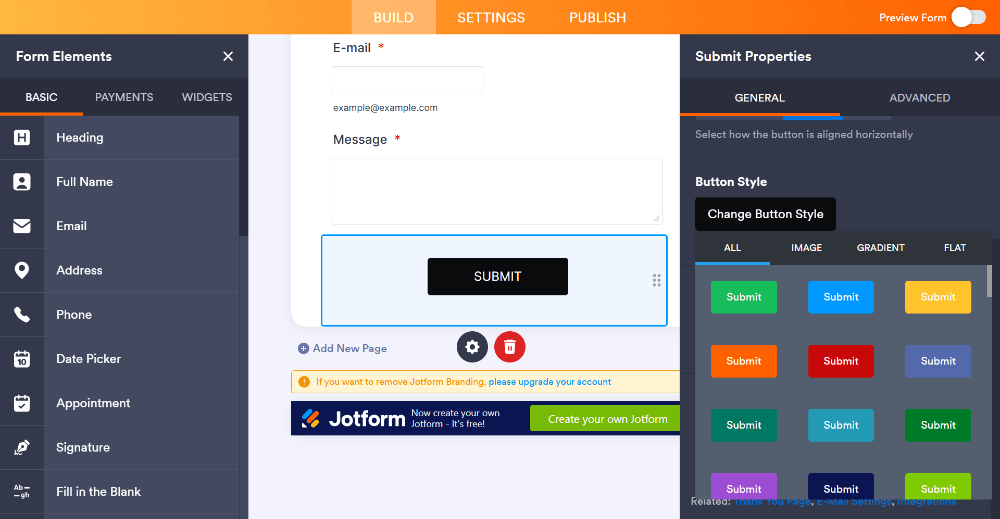
Click on the Style tab (usually represented by a paintbrush icon) to adjust your form’s colors, fonts, and overall theme.
For a beginner, the fastest approach is to pick one primary color that matches your brand or website, and let Jotform apply it consistently across buttons, borders, and accents.
You don’t need to touch every setting here. A clean, simple color scheme that matches your existing branding is usually enough to make the form feel professional and intentional.
Step 7: Setting Up Notifications, Integrations, and Thank You Page
Before publishing, check your form’s Settings tab for two things:
Email notifications – confirm the email address where new submissions will be sent. This is often set automatically to your account email, but it’s worth double-checking, especially if you want submissions to go to a different inbox (like a team or support email).
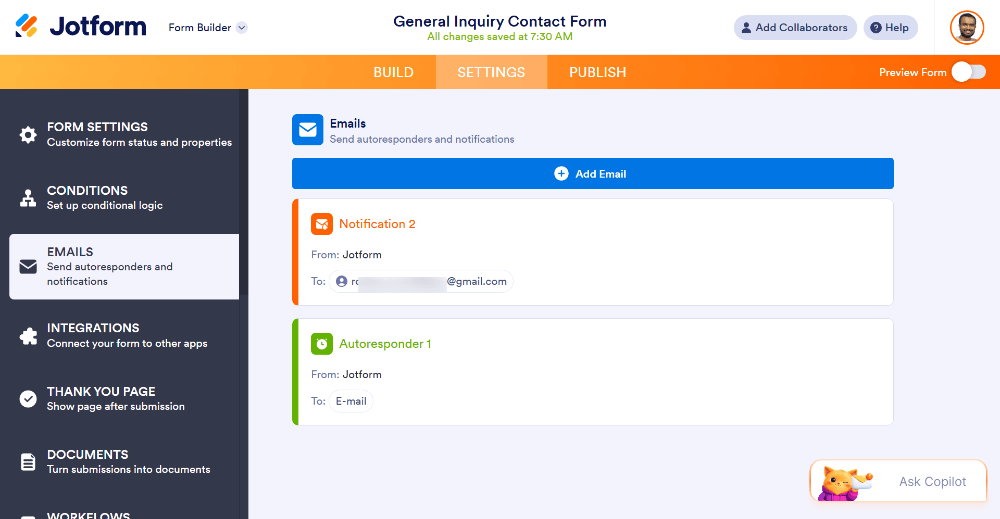
Integrations – under the Settings tab, you’ll find an option to connect your form to other tools: Google Sheets, Slack, Mailchimp, and dozens of others.
If you want your submissions to automatically land in a spreadsheet or trigger a notification somewhere your team already works, this is where you set that up. It typically takes just a couple of clicks per integration – no coding or API keys required for most popular options.

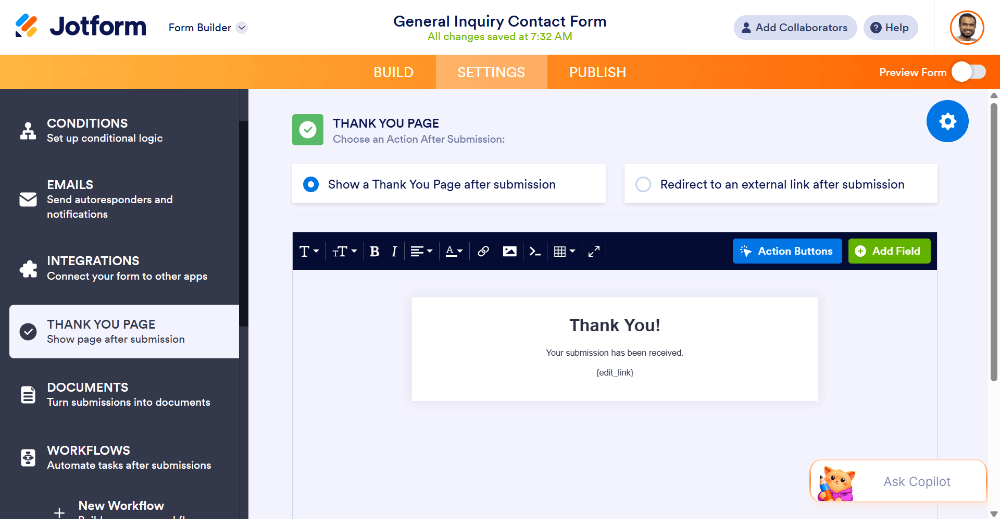
Thank You Page– After integration, the next option is thank you page. A thank you page confirms a visitor’s action was successful. It improves the user experience and builds trust. It guides visitors toward the next step. You can also also increase engagement and conversions.
Step 8: Publishing Your Form
Once your form looks right, click Publish in the top toolbar. Jotform will give you a few ways to share it:
- A direct link – you can share this anywhere (email, social media, a QR code).
- An embed code – paste this into your website if you want the form to appear directly on a page rather than linking out.
- A QR code – generated automatically, useful for print materials or in-person events.
For most beginners building their first form, either the direct link or the embed code will cover what you need.

Step 9: Testing Your Form Before Sharing It Widely
Before sending your new form out to real people, submit a test entry yourself. Check that:
- The submission actually arrives in your email (or wherever you set it up to go).
- The confirmation message displays properly after submitting.
- The form looks and works correctly on your phone, not just your computer.
This takes a minute or two and catches most issues before an actual visitor runs into them.
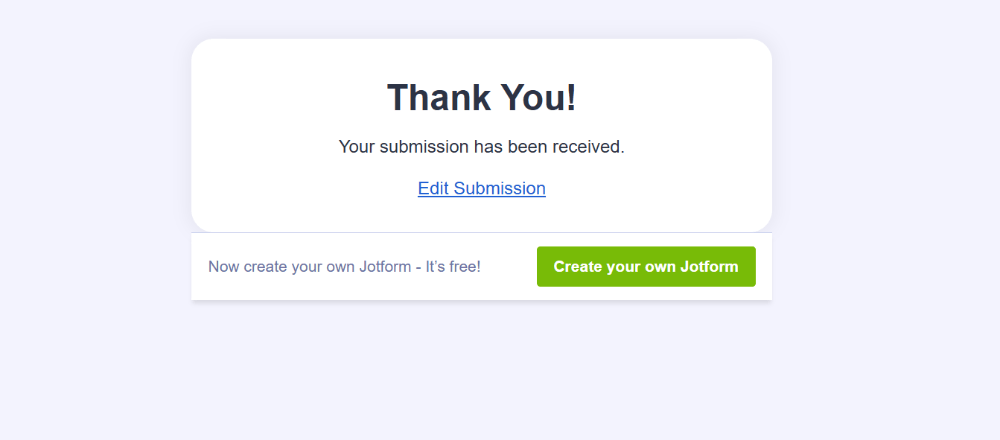
Below image show the thank you page after submission.
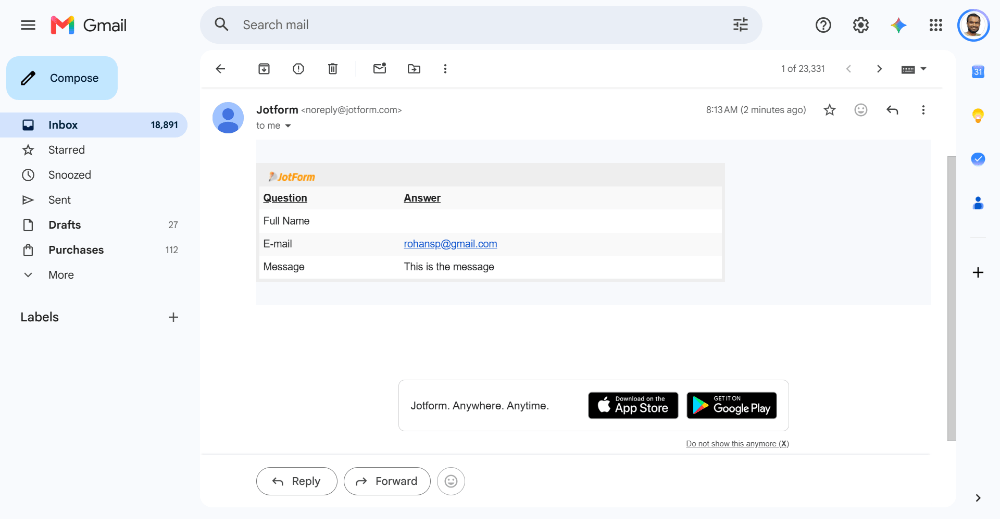
After submission, it will give confirmation email as shown in the image below.
Step 10: Checking Your Form’s Performance
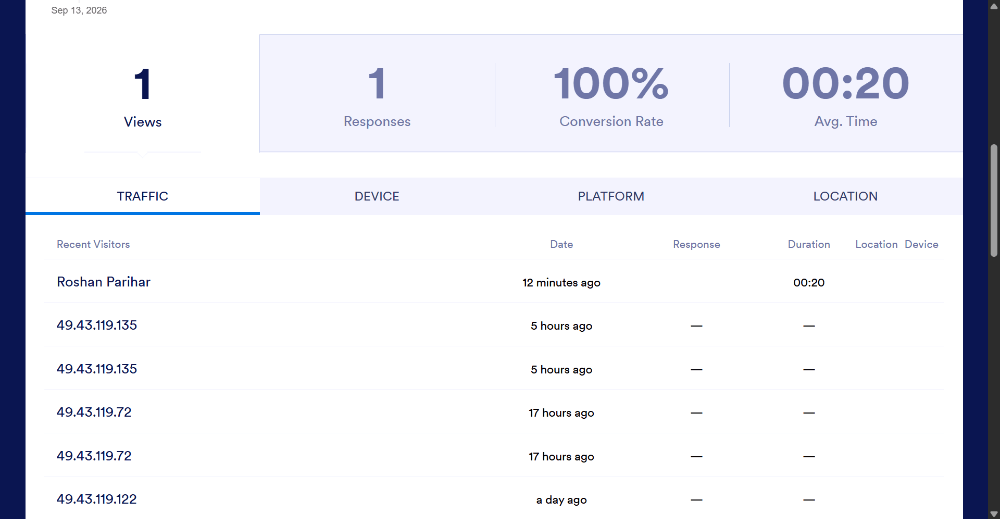
Once your form has been live for a little while, go to the Reports tab (or the equivalent analytics section) to see basic performance data – how many people have viewed the form and how many have actually submitted it.
This is useful for spotting problems early, like a form that’s getting views but very few completions, which usually signals something worth adjusting (too many required fields, confusing wording, or a technical issue).
A Few Beginner Tips Worth Knowing Early
Start with a template, not a blank canvas. Even experienced users usually adjust a template rather than build from nothing – it saves time and avoids overlooking small design details.
Keep your first form short. Three or four fields is plenty to start with. You can always add complexity once you’re comfortable with the basics.
Explore the free plan fully before considering an upgrade. Jotform’s free tier covers the core builder, templates, and most integrations, which is more than enough for most beginners to learn on and even launch a real form with.
Don’t skip the mobile test. It’s the single most common thing beginners forget to check, and it’s often where problems show up first.
Frequently Asked Questions
Do I need any coding knowledge to use Jotform?
No. Jotform is built specifically for people without coding experience – everything from adding fields to setting up logic and integrations is done through visual menus.
Is Jotform free to use?
Yes, Jotform offers a free plan that includes the core builder, a wide range of templates, and access to most integrations. Paid plans unlock higher submission limits and more advanced features.
How long does it take to build a first form as a complete beginner?
Most beginners can build and publish a simple form – like a basic contact form – in under ten minutes, including exploring the interface for the first time.
Can I edit a form after it’s already published?
Yes. You can go back into the builder at any time and make changes; updates are typically reflected on your live form within seconds.
What if I get stuck on a specific feature?
Jotform has an extensive help center and template library, so before assuming something isn’t possible, it’s worth searching for the specific feature you’re trying to use.
The Bottom Line
Jotform’s biggest advantage for beginners isn’t any single feature – it’s that nearly everything that used to require coding knowledge (validation, spam protection, mobile design, integrations) is already handled for you, letting you focus entirely on what your form actually needs to ask and where the answers should go.
→ Create your free Jotform account and build your first form today
Start with a simple template, keep your first form short, test it properly before sharing it, and you’ll likely have something live and working faster than you expected.