
Reading about form builders is one thing. Actually watching one get built, start to finish, with real fields and real decisions, is a lot more useful.
So instead of talking about form-building in the abstract, let’s build an actual form together, step by step, using a real example: an event registration form for a small business hosting a weekend workshop.
By the end, you’ll have seen every decision that goes into a working form – not just which buttons to click, but why each choice was made.
The Scenario
Let’s say you run a small pottery studio, and you’re hosting a “Beginner’s Wheel-Throwing Workshop” this Saturday. You need a form so people can register, pick a time slot, and pay the $45 fee in advance. That’s our real demo for this walkthrough.
Step 1: Start From a Template, Not a Blank Page
Open Jotform and create a free account using step-by-step process given in the link below:
➜ Click to Create a Jotform free account now
After you create an account, you will be taken to the dashboard where you have to search the template gallery for “event registration.” You’ll see dozens of options – some very detailed, some simple.
For this demo, pick a simple registration template rather than an elaborate multi-page one; it’s much easier to add complexity later than to strip away fields you don’t need.
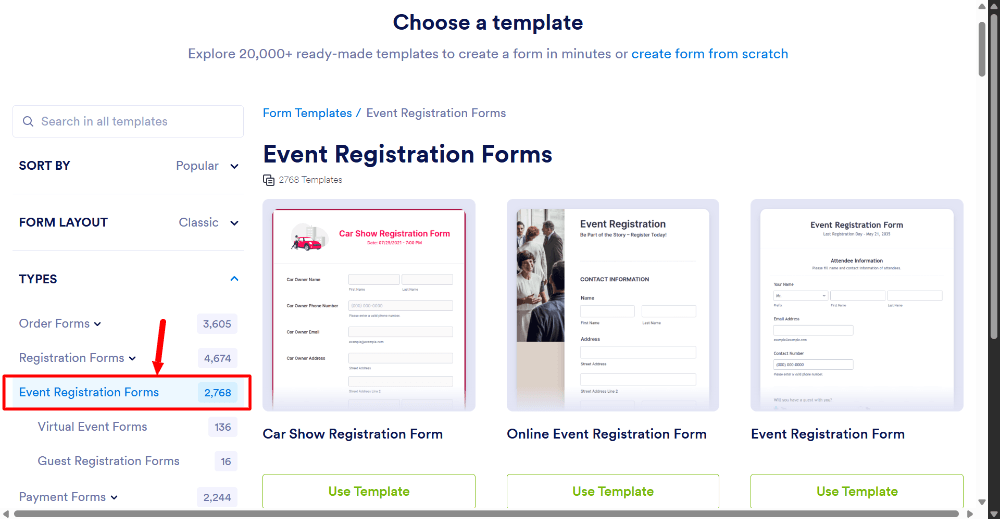
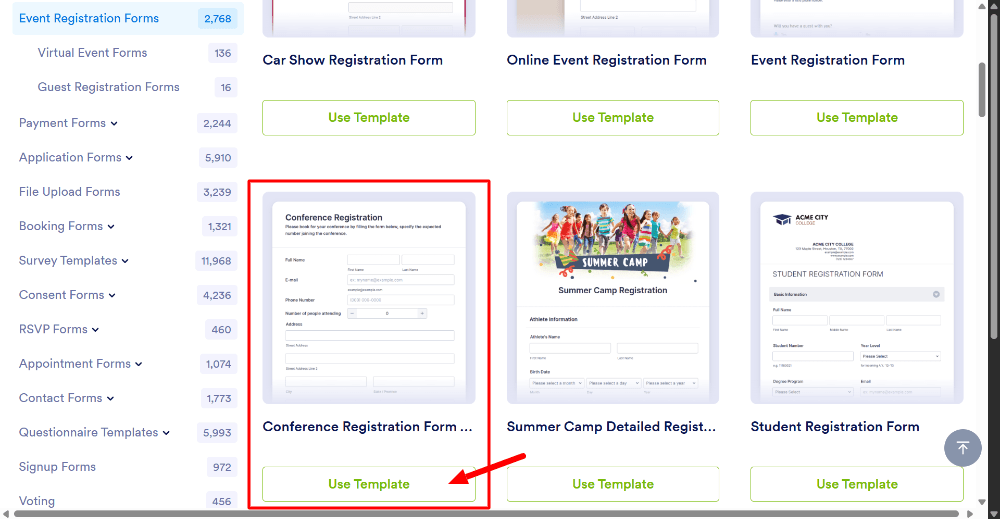
Once you click the ‘Use Template’ button, you’ll land directly in the builder with a working starting point already on the canvas – a few generic fields you’re about to customize for the pottery workshop.
Step 2: Rename the Form and Set the Title
Click on the form’s title at the top of the canvas and change it from the generic template name to something specific: “Beginner’s Wheel-Throwing Workshop – Register Here.”
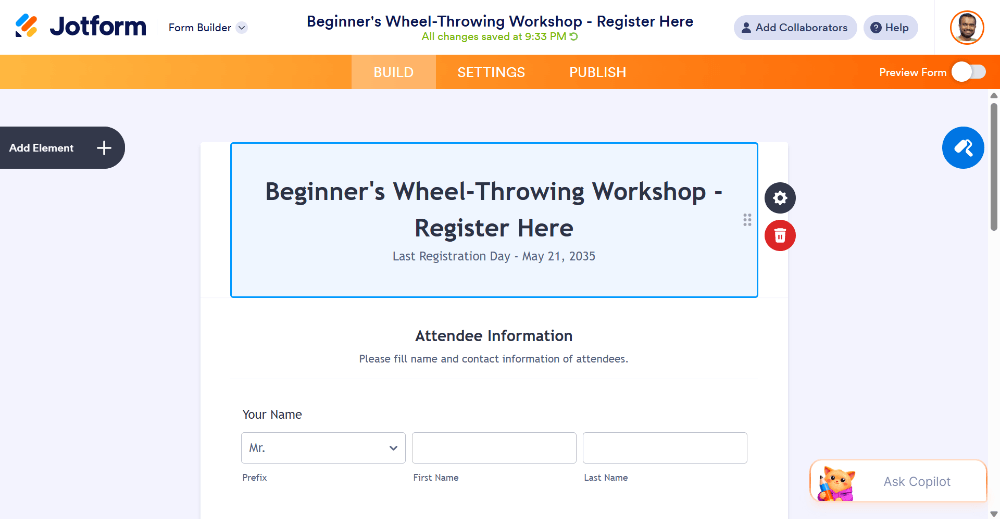
This matters more than it seems. A vague title like “Registration Form” gives visitors no confidence about what they’re actually signing up for. A specific title confirms they’re in the right place the moment the form loads.
Step 3: Set Up the Core Fields
Delete anything the template included that you don’t need, and set up these four fields, in this order:
- Full Name (short text, required)
- Email (email field, required – this ensures Jotform validates the format automatically)
- Phone Number (phone field, optional – nice to have for last-minute changes, but not essential enough to block someone from registering without it)
- Time Slot (dropdown: “Saturday 10 AM” / “Saturday 1 PM” / “Saturday 4 PM”)
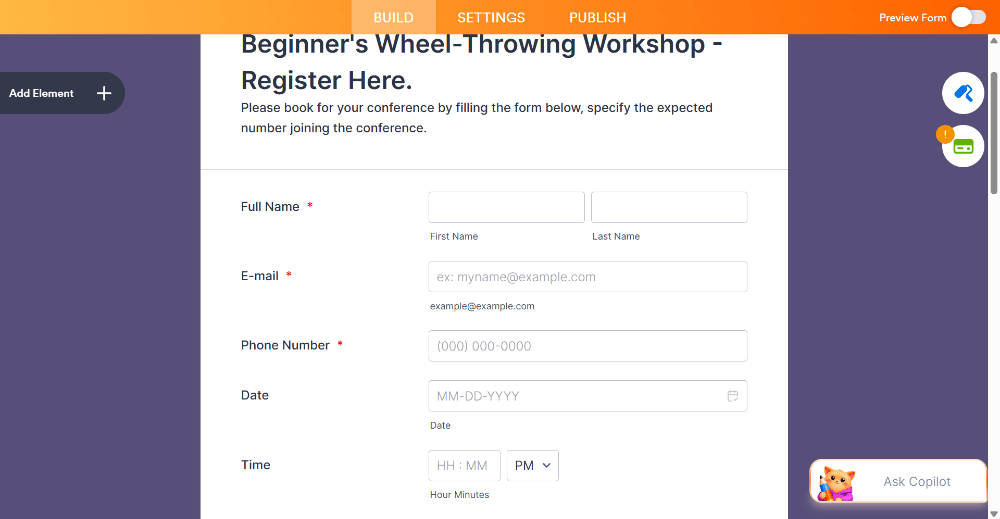
Notice what’s missing here on purpose: no “How did you hear about us?” field, no “Previous pottery experience?” field, nothing that isn’t strictly needed to complete a registration. Every optional question you add is a small reason for someone to hesitate or abandon the form. You can always ask these things in a follow-up email after they’ve registered.
Step 4: Add the Payment Field
Since the workshop costs $45, drag a Payment field onto the canvas from the field library. This opens a setup panel where you:
- Connect a payment gateway (PayPal, Stripe, or Square are the most common options)
- Set the price to a fixed $45, since every registrant is paying the same amount
- Choose whether you want to require full payment to complete registration, or just collect card details now and charge later
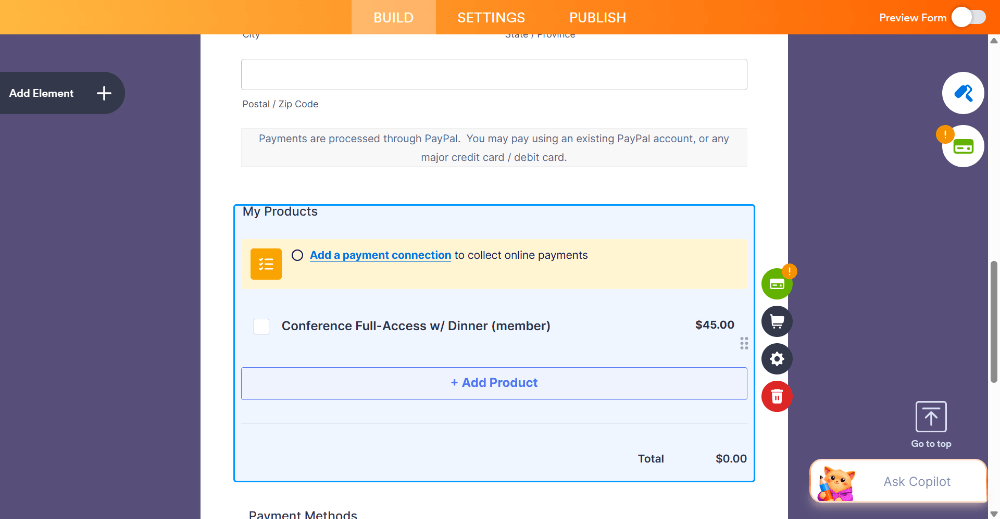
This is the exact feature that would otherwise require integrating a payment processor’s API by hand – here, it’s a drag-and-drop field with a short settings panel.
Step 5: Use Conditional Logic for a Follow-Up Question
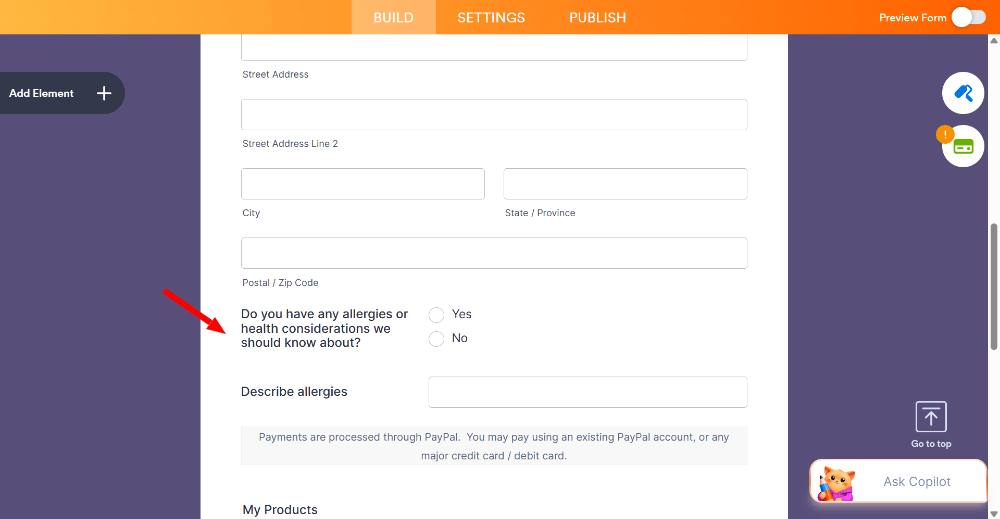
Let’s say you want to ask about any clay allergies or health considerations, but only if someone actually has one – you don’t want to make everyone answer this by default. Add a Yes/No field: “Do you have any allergies or health considerations we should know about?”
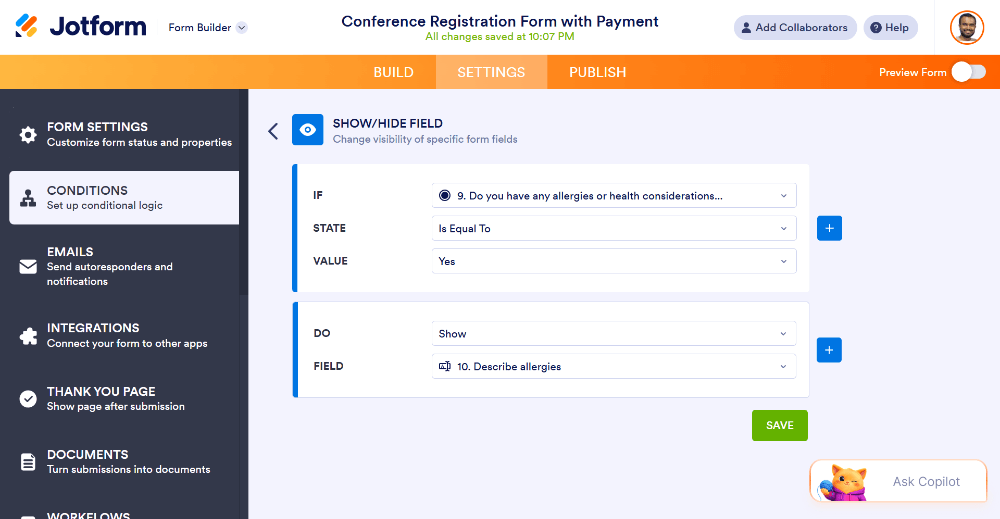
Then go to Settings > Conditions and set up a simple rule: If “allergies” equals “Yes,” then show a text field asking for details. Now the extra question only appears for the small number of people who actually need to answer it, keeping the form short for everyone else.
Step 6: Style the Form to Match Your Studio’s Branding
Click the Style tab and choose an accent color that matches your studio’s branding – in this case, a warm terracotta to match a pottery studio’s aesthetic. Apply it once, and it automatically carries through to the submit button, field borders, and section headers.
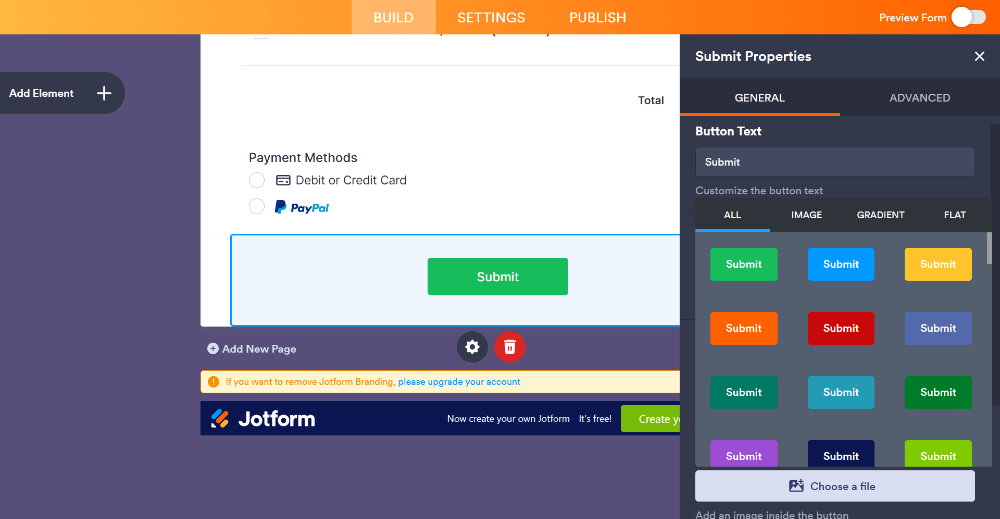
You don’t need to design anything from scratch here – you’re picking one color and letting the template’s existing layout do the rest of the work.
Step 7: Customize the Confirmation Message
Under Settings > Thank You Page, replace the generic default message with something specific: “You’re registered for Saturday’s workshop! Check your email for a confirmation and parking instructions.”
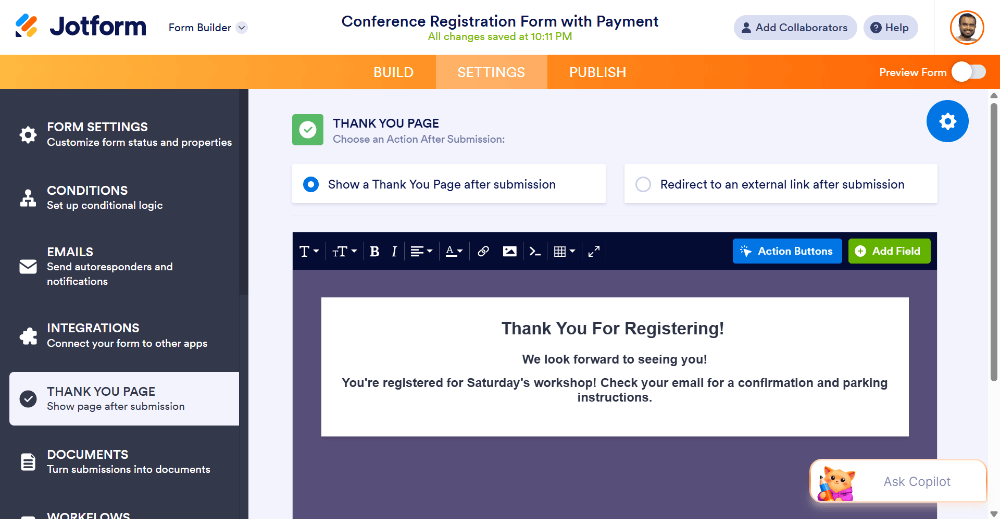
This small detail reassures every registrant that their submission actually went through, and gives them one useful piece of information (parking) without needing a separate email exchange.
Step 8: Turn On Email Notifications and a Spreadsheet Integration
In Settings > Notifications, confirm the email address where new registrations should be sent – in this case, the studio owner’s inbox.
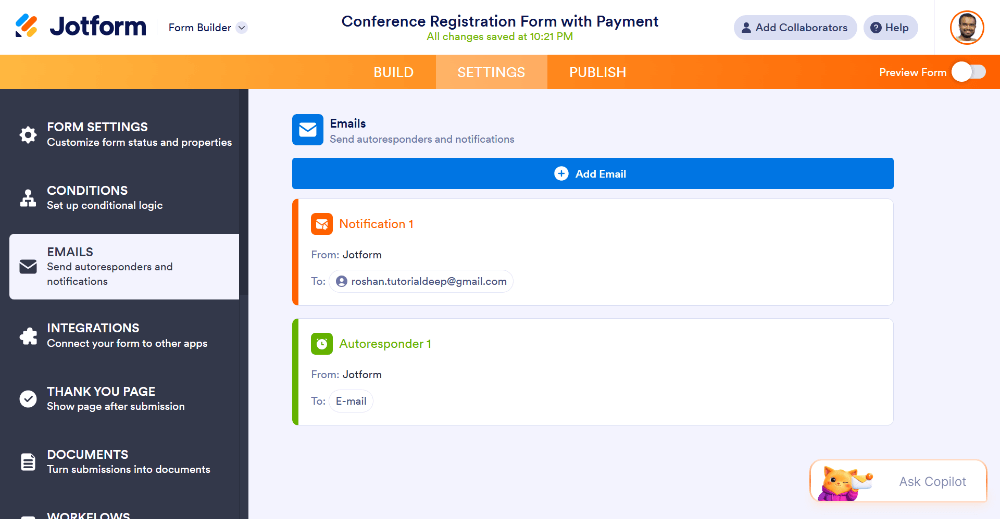
Then, under Settings > Integrations, connect the form to Google Sheets, so every registration automatically adds a new row with the registrant’s name, time slot, and payment status.
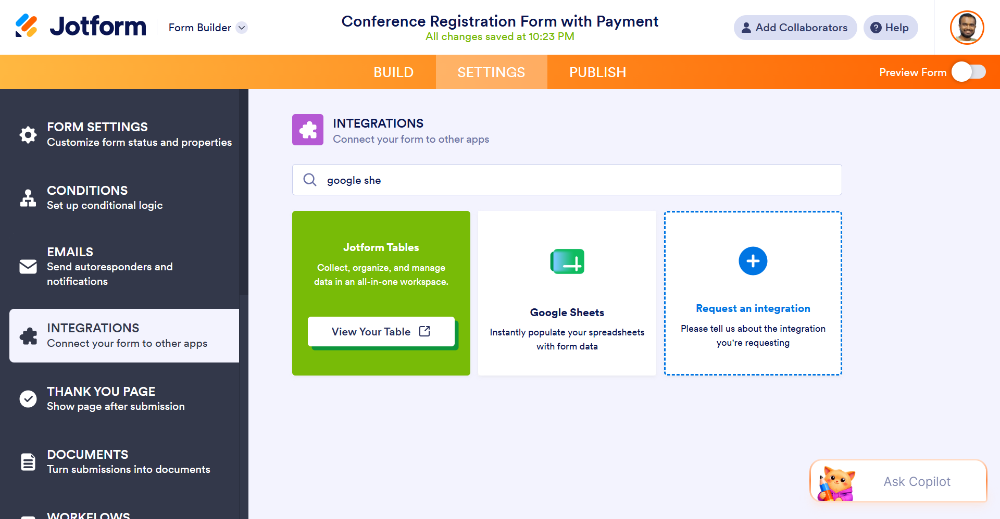
Now, instead of manually checking an inbox and building an attendee list by hand, the studio owner has a running spreadsheet that updates itself with every registration.
Step 9: Test the Form From Start to Finish
Before sharing the form publicly, go through it exactly as a real registrant would:
- Fill in a fake name, a real email address you can check, and select a time slot.
- Answer “Yes” to the allergy question specifically to confirm the follow-up field actually appears.
- Complete the payment step using the payment gateway’s test mode if available.
- Confirm the thank-you message displays correctly, and check that the test email notification and the new spreadsheet row both show up.
This step catches the two or three small mistakes that are easy to miss while building – a field left unmarked as required, a conditional rule that didn’t trigger correctly, or a typo in the confirmation message.
Step 10: Publish and Share
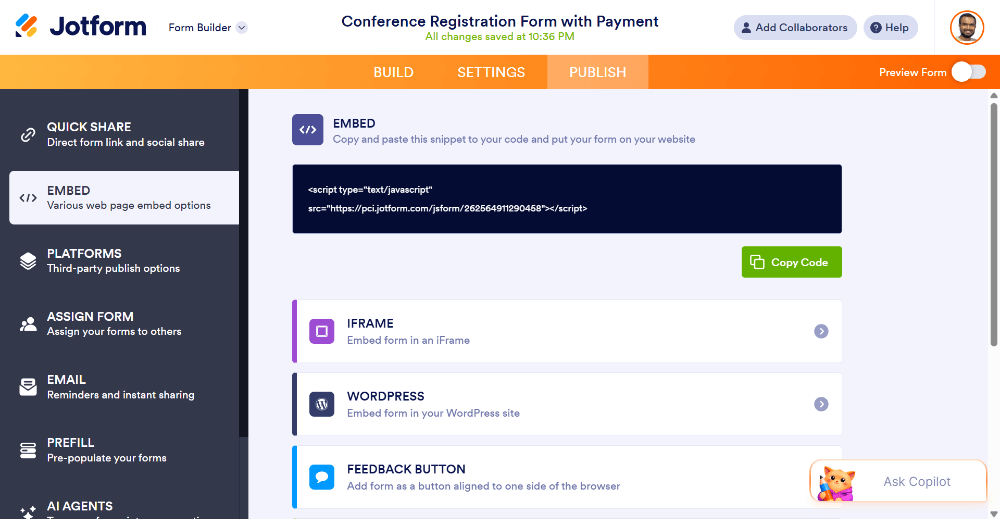
Once everything checks out, click Publish. For this demo, the direct link is the simplest option – it can go straight into an email blast, a social media post, or a QR code on a flyer posted at the studio’s front counter. If the studio has a website, the embed code option would let the form live directly on an “Upcoming Workshops” page instead.
What This Demo Actually Proves
Every step above – payment collection, conditional logic, spreadsheet integration, custom branding, a tailored confirmation message – would typically require real backend development if built from scratch: a payment API integration, custom validation logic, a database, and a script to sync with a spreadsheet.
Here, the entire form went from a blank search box to a fully working, published registration page in roughly the time it took to read through these ten steps.
That’s the actual value of a no-code form builder like Jotform – not that it’s a shortcut with compromises, but that it produces the same end result as custom development, in a fraction of the time, without requiring anyone involved to write a line of code.
If you’re learning coding, that’s great 👍
But if you actually need a form for your business, use Jotform – it saves hours.
Try Jotform free and build your own first form today →
Frequently Asked Questions
Do I need a paid plan to build a form like this demo?
No. Everything shown here – templates, conditional logic, payment fields, and Google Sheets integration – is available on Jotform’s free plan, though very high submission volumes may eventually require an upgrade.
Can I use this same process for a different type of form, not just event registration?
Yes. The steps are essentially the same regardless of the form’s purpose – pick a template, trim the fields, add any special logic or payment needs, style it, set up notifications, test it, and publish.
What if I need more fields than this demo used?
You can add as many as you need. This demo intentionally stayed lean to show how little is actually required for a fully functional form – but the same builder supports far more complex forms when needed.
How long does a form like this realistically take to build?
Once you’re familiar with the builder, a form with this level of detail – payment, conditional logic, and integrations included – typically takes 20 to 30 minutes. A simpler form without payment or logic can take well under 10.
The Bottom Line
The best way to understand what a no-code form builder can actually do isn’t to read a features list – it’s to watch a real form get built from nothing, decision by decision.
This workshop registration form went from a template search to a fully working, payment-enabled, spreadsheet-connected form without a single line of code, and the exact same process applies whether you’re building a contact form, a job application, or a customer survey.