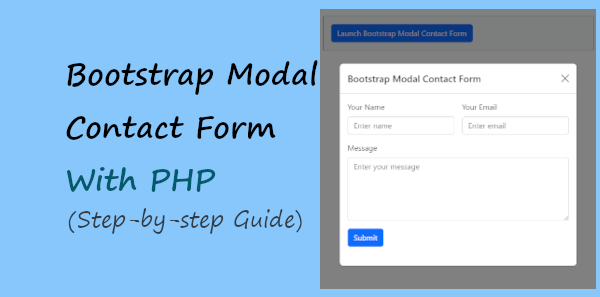
Bootstrap modal contact form displays a popup on button click that contains the form. It is useful when you don’t want to display the whole form.
You can display only the button to let users click and see the form. After that, they can fill it out and click the submit button to contact them via email.

A modal is a responsive popup that you can create using Bootstrap. You can place your contact form inside the modal to display it in the popup. It comes with a button or links to click and get the contact form.
The contact form is not required to display everywhere on your website. A simple modal button is enough to collect users’ queries anywhere on the website. Users will click the button and fill out the form from the place where they are.
In this post, you will learn how to create a Bootstrap modal contact form with PHP to send emails. So, let’s get started.
Bootstrap Modal Contact Form with PHP
Here is the step-by-step process on how to create a Bootstrap modal contact form with PHP:-
Step 1: Bootstrap Modal Contact Form Design
To create a contact form design, you can read our post Responsive Contact Form in Bootstrap. You need to follow the 1st step of this post to create a design using Bootstrap.
After that, you have to add the contact form inside the Bootstrap 5 modal. I am going to use the static backdrop Bootstrap modal to create the modal popup.
A static backdrop means users will not be able to close the modal by clicking outside of the popup. They need to click the close ‘X’ button given at the top right corner of the modal to close it. You can collect more leads with this close feature because users will have to see the modal to close it.
Below is the complete code of the Bootstrap modal contact form design:-
|
1 2 3 4 5 6 7 8 9 10 11 12 13 14 15 16 17 18 19 20 21 22 23 24 25 26 27 28 29 30 31 32 33 34 35 36 37 38 39 40 41 42 43 44 45 46 47 48 49 50 51 52 53 54 55 56 57 58 59 60 61 62 63 64 65 66 67 68 69 70 71 72 73 74 75 76 77 78 |
<!doctype html> <html lang="en"> <head> <title>Bootstrap Modal Contact Form</title> <meta charset="utf-8"> <meta name="viewport" content="width=device-width, initial-scale=1"> <link href="https://cdn.jsdelivr.net/npm/[email protected]/dist/css/bootstrap.min.css" rel="stylesheet"> <link rel="stylesheet" href="https://cdnjs.cloudflare.com/ajax/libs/font-awesome/4.7.0/css/font-awesome.min.css"> <script src="https://cdnjs.cloudflare.com/ajax/libs/jquery/3.6.3/jquery.js"></script> <style> .loader_icon{ background: #0404046b; display: flex; justify-content: center; align-items: center; position: fixed; z-index: 9999; left: 0; top: 0; width: 100%; height: 100%; } .loader_icon i{ font-size: 24px; color: #fff; } </style> </head> <body> <div class="container"> <div class="row"> <div class="col-md-6 offset-md-3 mt-3 bg-light p-3 border border-secondary"> <!-- Button trigger modal --> <button type="button" class="btn btn-primary" data-bs-toggle="modal" data-bs-target="#staticBackdrop"> Launch Bootstrap Modal Contact Form </button> <!-- Modal --> <div class="modal fade" id="staticBackdrop" data-bs-backdrop="static" data-bs-keyboard="false" tabindex="-1" aria-labelledby="staticBackdropLabel" aria-hidden="true"> <div class="modal-dialog modal-dialog-centered"> <div class="modal-content"> <div class="modal-header"> <h5 class="modal-title" id="staticBackdropLabel">Bootstrap Modal Contact Form</h5> <button type="button" class="btn-close" data-bs-dismiss="modal" aria-label="Close"></button> </div> <div class="modal-body"> <!-- Bootstrap main form start --> <form class="row g-3" method="POST"action="send.php"> <div class="col-md-6"> <label for="Name" class="form-label">Your Name</label> <input type="text" class="form-control" name="name" placeholder="Enter name" required> </div> <div class="col-md-6"> <label for="Email" class="form-label">Your Email</label> <input type="email" class="form-control" name="email" placeholder="Enter email" required> </div> <div class="col-md-12"> <label for="message" class="form-label">Message</label> <textarea class="form-control" name="message" placeholder="Enter your message" rows="5" required></textarea> </div> <div class="col-md-12"> <input type="submit" class="btn btn-primary" name="submit" value="Submit"> </div> </form><br> <!-- Bootstrap main form end --> <div id="form_message"></div> </div> </div> </div> </div> </div> </div> </div> <script src="https://cdn.jsdelivr.net/npm/[email protected]/dist/js/bootstrap.bundle.min.js"></script> <!-- Add jQuery ajax script here --> <div class="loader_icon" style="display:none;"><i class="fa fa-spinner fa-spin"></i></div> </body> </html> |
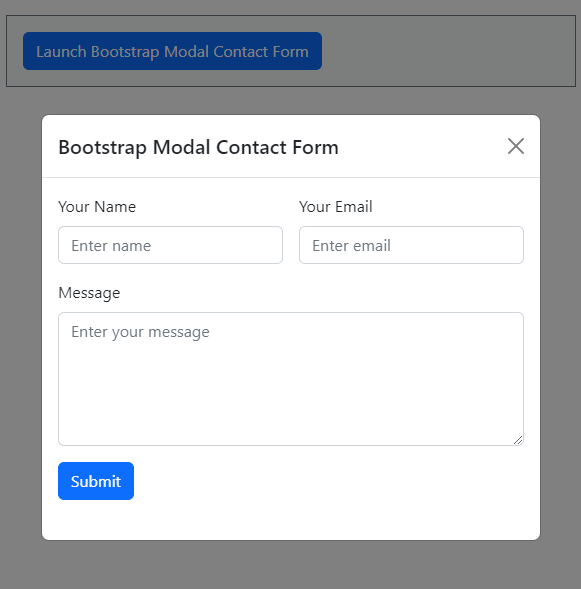
When you run the above code in the browser, you will get the Bootstrap modal contact form design as shown in the image below.

It also contains the loader icon using font awesome icons. When the users submit the form, they will see the rotating icon until they get the result. A rotating loader icon is a confirmation that the form is working backend to give you the result. They will have to wait for some time to get results.
Now, let’s add a jQuery Ajax code to submit the form without a refresh in the next step.
Step 2: jQuery Ajax Submission of Contact Form with Loader Icon
To submit the form without a page refresh, you can use Ajax form submission. You can easily update only the required part of the page using AJax without page refresh.
The below jQuery Ajax code detect the submit event of the form. After submission, it sends the form data to the URL present in the action attribute of the <form> tag. The URL is the PHP file that contains the PHP code to collect and validate form data and send an email when found valid.
The place is indicated in the above design code where you have to place the jQuery Ajax code.
|
1 2 3 4 5 6 7 8 9 10 11 12 13 14 15 16 17 18 19 20 21 22 |
<script> $(document).on("submit", "form", function(e){ e.preventDefault(); // avoid executing the actual submission of the form var form = $(this); $(".loader_icon").show(); $.ajax({ url: $(this).attr("action"), type: $(this).attr("method"), data: new FormData(this), processData: false, contentType: false, success: function (data, status){ $('div#form_message').html(data); $(".loader_icon").hide(); //alert(data); }, error: function (xhr, ajaxOptions, thrownError){ alert(thrownError + "\r\n" + xhr.statusText + "\r\n" + xhr.responseText); } }); }); </script> |
It displays the loader icon immediately after form submission. When the user gets the result, the loader icon automatically hides using the above jQuery code.
Let’s validate the form data in the next step.
Step 3: Get Data and Perform Email Validation Using PHP
To validate the form data, you will have to collect the form data using the $_POST. But, before this, firstly find whether the data is set or not. If the data is not set, don’t allow users to execute the PHP code.
For this, I have added header("location: index.php") to redirect users again to the main page when there is no data available.
When there is some data present, it collects the data and validates the email address with the regular expression you can see below. If the email address is not valid, the PHP code will not allow it to execute further and display an error message that the email is not valid.
|
1 2 3 4 5 6 7 8 9 10 11 12 13 14 15 16 17 18 19 20 21 22 23 24 |
<?php if(isset($_POST['name']) || isset($_POST['name']) || isset($_POST['name'])){ //Get all form data on submission $name = $_POST['name']; $email = $_POST['email']; $message = $_POST['message']; }else{ //if no form data is available header("location: index.php"); } //Validate email address $email_exp = '/^[A-Za-z0-9._%-]+@[A-Za-z0-9.-]+\.[A-Za-z]{2,4}$/'; if (!preg_match($email_exp, $email)) { ?> <div class="alert alert-danger alert-dismissible fade show"> <strong>The Email address you entered is not valid.</strong> <button type="button" class="btn-close" data-bs-dismiss="alert" aria-label="Close"></button> </div> <?php exit; } ?> |
Let’s send form data via email when everything is ok in this step.
Step 4: Send Email with PHP Using mail()
When everything is ok, it will move further and can send the form data using the below PHP code. It is self-explanatory with the comments. However, I have also added the description below the code.
|
1 2 3 4 5 6 7 8 9 10 11 12 13 14 15 16 17 18 19 20 21 22 23 24 25 26 27 28 29 30 31 32 33 34 35 36 37 38 |
<?php //If everything is ok then move further to send an email $subject = "Contact Form"; //Subject of the email //Message content to send in an email $message = "Name: ".$name."<br>Email: ".$email."<br> Message: ".$message; //Email headers $headers = "From:".$email."\r\n"; //Send email in HTML format $headers .= "Content-type:text/html;charset=UTF-8" . "\r\n"; //$headers = "CC: [email protected]"; $headers .= "Reply-To:".$email."\r\n"; $headers .= "X-Mailer: PHP/".phpversion(); //Send email $sendmail = mail($to, $subject, $message, $headers); // If mail sent if($sendmail == true){ ?> <div class="alert alert-success alert-dismissible fade show"> <strong>Message has been sent successfully.</strong> <button type="button" class="btn-close" data-bs-dismiss="alert" aria-label="Close"></button> </div> <?php }else { ?> <div class="alert alert-danger alert-dismissible fade show"> <strong>Message could not be sent. Please try again.</strong> <button type="button" class="btn-close" data-bs-dismiss="alert" aria-label="Close"></button> </div> <?php } ?> |
Explanation of PHP code to send emails
To understand the above PHP code, read the explanations given below:-
$to: Recipient email address who wants to receive emails.$subject: Subject of the email for the contact form.$message: Message or main queries of the customers to collect via email.$headers:- ‘From’: The email address of the website owner that should be domain specific to identify where the email comes from.
- ‘CC’: Other email addresses to receive emails.
- “Reply-To’: Email address of the user who submits the form.
mail(): PHP built-in function to send emails. Pass 4 variables as an argument that is$to,$subject,$message,$headersto pass to be able to send emails on execution.
So, now you know how to create a Bootstrap modal contact form. You also know how to send emails from your form using PHP.
You May Also Like to Read
- Responsive Contact Form in Bootstrap
- Ajax Contact Form with Attachment in PHP (Using Mail() or PHP Mailer)
- How to Create a Working Bootstrap Contact Form with PHP
If you have any queries regarding this post, you can comment below.
