You can move data from one cell to another cell or column using a keyboard. There are various methods which are given below to change the place of data.
Move Data From One Cell to Another Using Mouse in Excel (Step-by-step)
To move data to other cells or columns using the only mouse, you have to follow the below steps. Use only your mouse to perform this task in a few easy steps.
Step 1 Enter Data in Excel
First of all, you have to enter any number of data in the Excel Sheet. Let’s take an example of data as given in the image below.
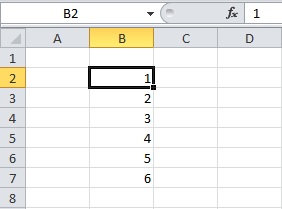
The example contains numbers in column B from cell B2 to B7. you have to now move this data to the cells of column D. Follow the next steps after entering the data.
Step 2 Select Data with Hover Over the Corner and Hold Mouse Left Button
Select your entire data using your mouse. After that, you have to hover over the corner of the selected data. You can hover to any corner position to the left, right, top, and bottom.
Now, hold your mouse left button when you get the pointer sign as  .
.
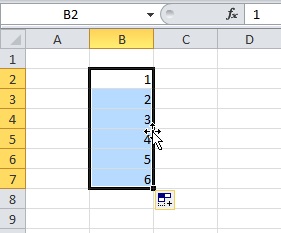
The above example shows the selected data. You can also find the pointer sign when you hover over the corner. Click the corner when you get the sign  in the mouse pointer. Now, Keep your mouse on hold for the next step.
Step 3 Drag-n-drop to the Cell to Move Data in Excel
You have to now drag your mouse to the required column cell. Drop the data when you reach the required cell to move to. It drops the whole data you have selected to move to the other cells.
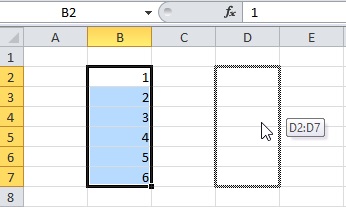
The above example shows the image which you get when you drag your mouse.
Step 4 Finally, Move the Data
This is the final output containing the moved data to the cell of column D. The data is copied from cell D2 to D7.
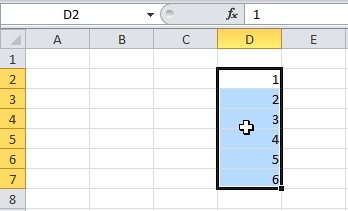
You can also move any of your data after selection using your mouse. If you want to move your data using a keyboard, you have to use the step-by-step process given below.
Using Only Keyboard in Excel Sheet
This is the method of only using the keyboard to change your data position. It’s the simple cut-and-paste method to shift data to other column cells.
Step 1 Put Your Data in Cell of Excel Sheet
Here, you also have to enter your data first in any cell of the Excel. Perhaps, you want to move the data that already exists in the Excel sheet.
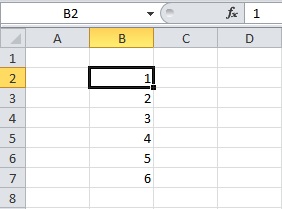
It depends upon you for which data you use. You can use any data to shift to other column cells. The above example shows the same data you have used in the above section.
Step 2 Select the Data Data Using Keyboard
Now, select your chosen data which you have to shift to the other cell. Use your keyboard left and right arrow keys to move to the required data. A combination of shift and the arrow keys can be used to select the entire data.
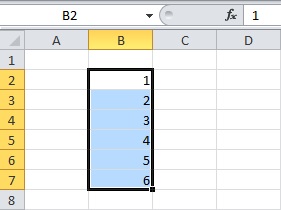
The above image shows the selected data to shift to the other column cells.
Step 3 Press ‘CTRL + X’ to Cut Data
You have to cut the selected cell to shift to the other column cell. For this, press the keyboard key ‘CTRL + X’ to cut the data in Excel Sheet.
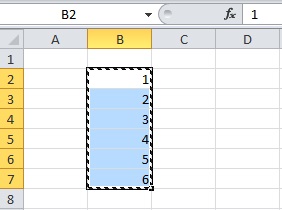
The above image shows the screen which you will get after pressing ‘CTRL + X’. This shows you are using the above data to cut into an Excel Sheet.
Step 4 Go to Cell to Paste Data
After you perform the above step, you have to go to the cell where you want to place data. Press the keyboard arrow keys to visit the required place for data.
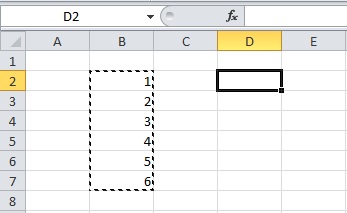
The above example shows that you want to shift data to column D and start from cell D2.
Step 5 Press ‘CTRL + V’ to Paste and Move Data
The final step is to press the keyboard shortcut key ‘CTRL + V’. This is the key to paste the cut data to any required place of the Excel Sheet.
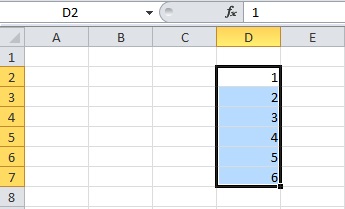
The above image shows the shifted data to column D.
Change Data from One Column to Another in Excel
In addition to the above, you can also change or move one column of data to another column. You have to first choose the data which you want to move. After that, follow the step-by-step guide given below with screenshots.
Step 1 Mouse Hover Over the Column Containing the Data
You have to first take your mouse to the column name which contains the required data. The pointer of the mouse changes to a down arrow-like shape as given in the image.
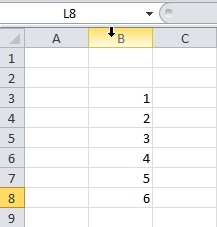
The above image shows the data and the mouse pointer shows a down arrow.
Step 2 Click Column Name to Select Data
Click the column name whose data you have to move. It selects all the cells of the clicked column name.
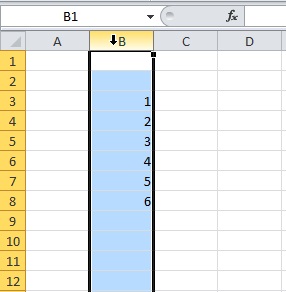
The above image shows the selected column containing the data to move.
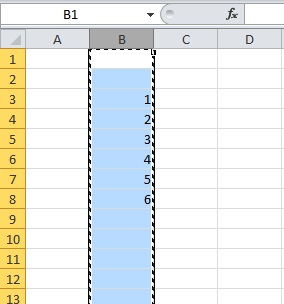
Step 3 Mouse Right Click and Select ‘Cut’ Option
Now, you have to click the mouse right button to get various menu options. In the menu options, you have to select the ‘Cut’ option given on the menu.
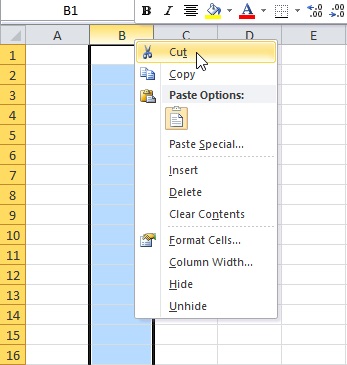
You will get a highlighting column selection as shown in the image below.
Step 4 Click Column Name Where You Want to Shift Data
Click the column name to which you want to move the data. You will get a down arrow pointer for the mouse when you take your mouse to the column name.
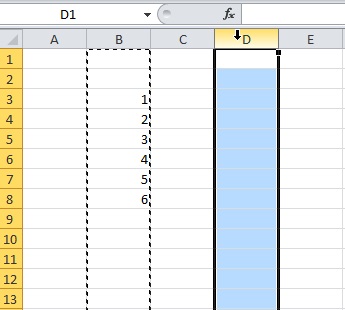
The above example shows the select column where you have to place the data.
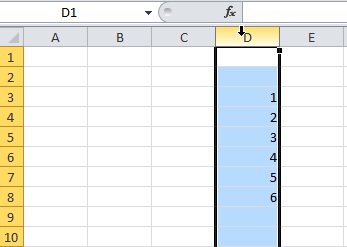
Step 5 Finally, press ‘CTRL + V’ to Paste Data
The final step is to paste the data using the keyboard shortcut ‘CTRL + V’. The below example image shows the pasted data to the new column.
You May Also Like to Read
