Do you want to learn how to start doing email marketing? You have come to the right place to learn this in 3 easy steps with proven tips and different techniques to grow your business online.
In this post of Email Marketing tutorial, you will learn email marketing introduction, the process to start doing email marketing, best email marketing platforms, and proven strategies to grow your email lists to generate more sales.
Email Marketing is the oldest and most effective way of growing customers online. In digital marketing, it is the first choice for professional online marketers to increase their website revenue.
If you have a website with lots of traffic, you can start collecting emails using the top email marketing platforms (like Sendinblue and Constant Contact). Email Marketing can help you easily convert your website traffic into Subscribers. After that, you can send emails to personally communicate with them to convert them into buyers and loyal customers.
➜ Click here to signup with Sendinblue (Forever Free, Unlimited Subscribers, No Credit Card Required)
Moreover, in this email marketing tutorial, you will also learn proven strategies that help you fastly grow your email lists 300% more that convert easily into customers. In addition to this, you will find the best platforms to clean your email list to make it all time fresh. So, stay tuned!
Affiliate Disclosure: At Tutorialdeep, we believe in transparency for our users. In this blog, there are some referral links. If you signup with these links we will earn some commission at no extra cost to you. We recommend these links because these are our trusted brands.
Let’s start with the email marketing introduction in this email marketing tutorial below.
What is Email Marketing?
Email marketing is the process of collecting targetted leads and sending emails to them to convert them into sales. It is the digital marketing strategy using by online marketers and digital marketing professionals to convert website visitors into customers.
It is one of the most effective ways to directly connect with your leads and convert them into sales. Emails are the best option for one-to-one communication to promote products and increase customers and sales.
You can gain subscribers and increase your website traffic than can be regular readers and loyal buyers for your website. It can help you generate more sales and increase the revenue of your business.
9 Reasons Why You Should Start Doing Email Marketing
In this Email Marketing tutorial, you will find many reasons why you should start doing email marketing for online business. A few well-known reasons are given below:-
- Communicate Directly and Personally: You can communicate directly with your audience by sending emails to them. It’s the personal way of messaging someone to build a great relationship to convert them into buyers.
- Own Loyal Subscribers Forever: Collecting leads from your website gives you targetted audience forever that really like what you share. They become your forever audience that loves your content on your website.
- Generate More Leads and Increase Conversions and Sales: You can create signup forms(learn below how to create one for your website) and add it to your website content. Every time visitors come to your website, they signup with the form and it generates leads. After that, you can send offers and promote products to generate sales easily.
- Better than Other Communication Channels with Higher ROI: Email marketing gives you higher returns on investment with better communication than other channels.
- Easy to Stay Connected with Your Audience: You can stay connected with your audience regularly by sending emails to them. This way, you can better know your audience and share what they like most to easily convert them into sales.
- Increase Engagement and Traffic: Email Marketing is the best option for online businesses to increase engagement and traffic. The email subscribers can be the regular traffic you can attract by sending regular emails for higher engagement.
- Build You A Brand Name by Adding Trust: You can send emails and build a brand name online with a great reputation. Email Marketing can build trust with your audience and the trusted audience can easily be converted into customers.
- Reach Your Audience on Any Device: Email Marketing platforms are responsive and can be used in any device size. You can send emails to your subscribers and they can check it on any device.
- Automated Way of Marketing to Save Time: You can create sales funnels with automated emails to generated sales automatically. The automated business saves more time to grow subscribers and increase conversions and sales.
How to Start Doing Email Marketing (3 Easy Steps)?
There are many email marketing services available online and to start doing Email Marketing, I recommend you to choose Sendinblue all-in-one email marketing platform that can fulfill all your email marketing needs. It comes with all the essential email marketing tools and easy to use interface to take your marketing to the next level.
Sendinblue is one of the most trusted email marketing and SMS marketing platforms to easily Generate Leads, Create Email Campaigns, Contact Management, Email Automation, Social Media Marketing, Facebook Ads, and much more on one single platform.
The Most Noteworthy thing here is that you can use Sendinblue forever Free plan to generate leads and grow your unlimited email list. However, the free plan of Sendinblue comes with a limit of 300 emails/day.
But, you can generate unlimited leads and manage unlimited email lists with segmentation and email list management without any investment. To send emails more than 300/day, you can upgrade to its premium plan in the future.
Let’s find out how to start doing email marketing with the step-by-step process in this Email Marketing tutorial given below:-
Step 1: Signup and Create an Account with the Best Email Marketing Platform
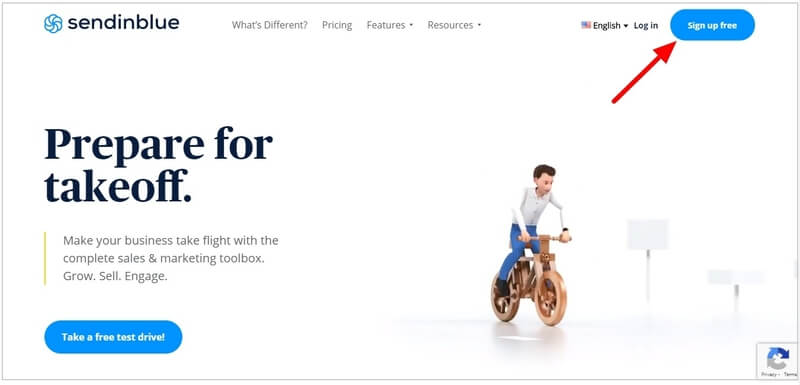
First of all, open the Sendinblue homepage. You can also use the below button to visit the homepage.
➜ Go to Sendinblue Homepage (Forever Free, Unlimited Subscribers, No Credit Card Required)
On the homepage, click the ‘Sign up free’ button or ‘Take a free test drive’ button to start creating an account.
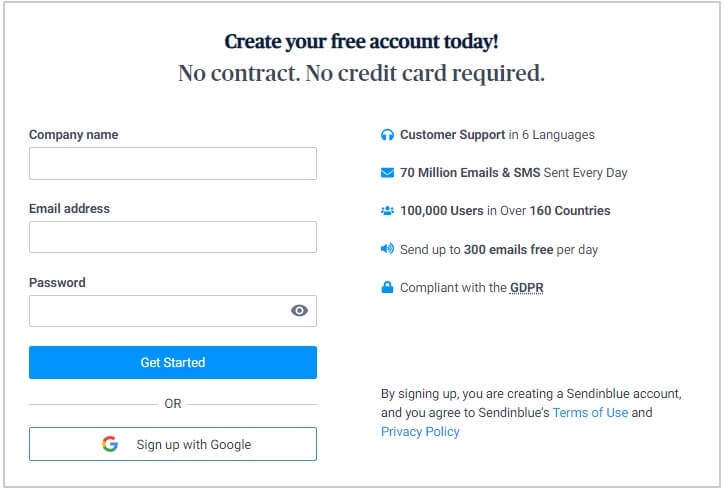
You will get an account creation form where you have to provide your name, email, and password for the account. After you have completed the form, click on the ‘Get Started’ button to go to the next page.
If you have a Gmail account, you can also create a free Sendinblue account using your Gmail account by clicking on the ‘Sign up with Google’ button.
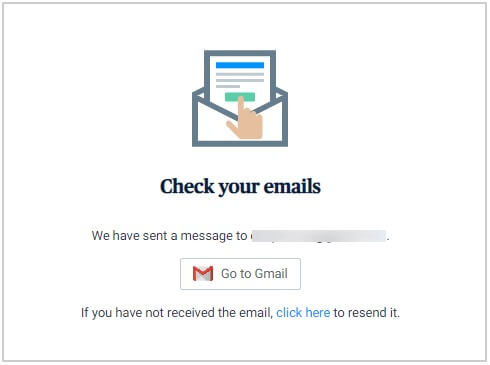
After that, Sendinblue sends you an email to your above-provided mail id account to validate your account. You have to log in to your email id and open the Sendinblue email to click on the verification link and confirm your email id.
Complete Your Sendinblue Profile
You have to provide all your details like personal information and company information to the form as given below to complete your profile for the account.
Also, click the checkboxes to accept their terms and conditions and receive regular updates from Sendinblue. After have completed filling the below form, click the ‘Complete my Profile’ button.
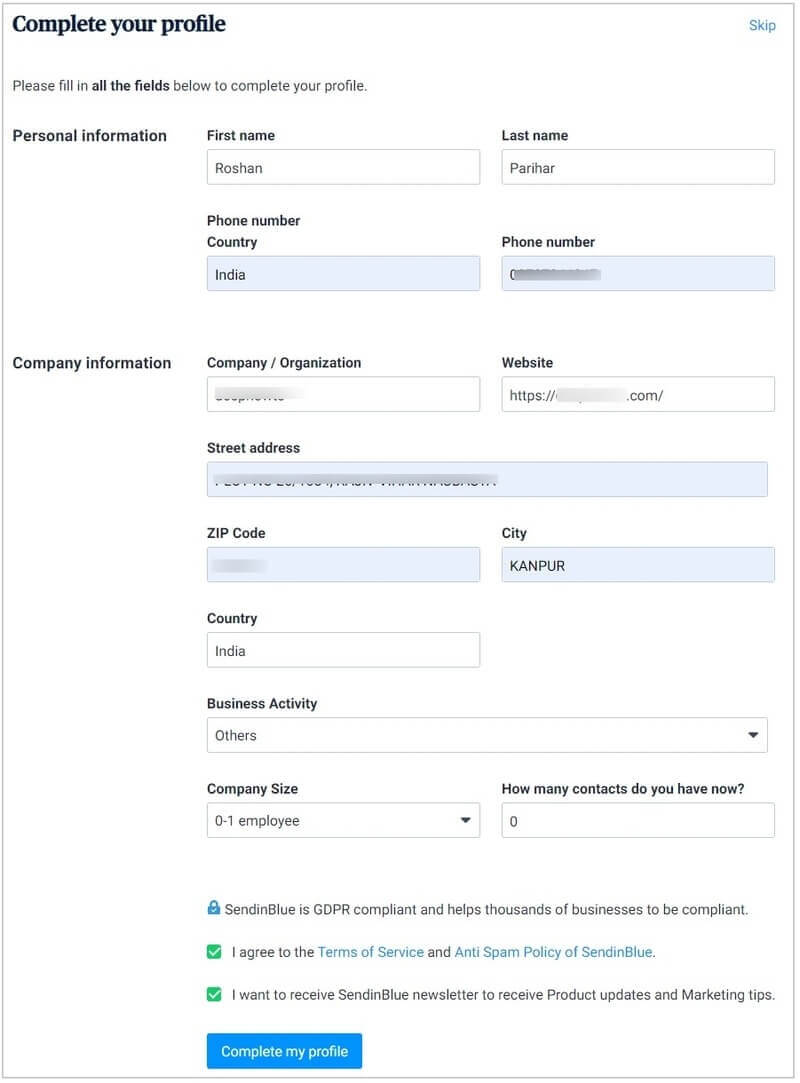
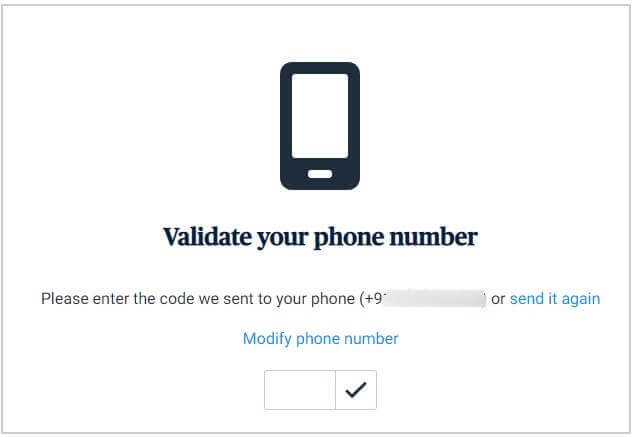
In the above form, you have provided a phone number that you have to validate using your mobile.
You will get an OTP to your mobile number that you have to enter in the input box as given below. After that, click the tick(✓) mark button as given in the image below to validate your phone number.
Select A Plan For Sendinblue Account
Now, it’s time for you to select a plan for your Sendinblue account. If you have just started email marketing in this Email Marketing tutorial, you can choose the ‘Free’ plan by clicking on the ‘Signup’ button given under the ‘Free’ plan as indicated below. Don’t worry, you can upgrade to a premium plan when you need more advanced features of email marketing in the future.
If you want to create a Sendinblue account with the premium plan, I recommend you choose its ‘Premium’ plan that comes with all the essential email marketing features in one single package.
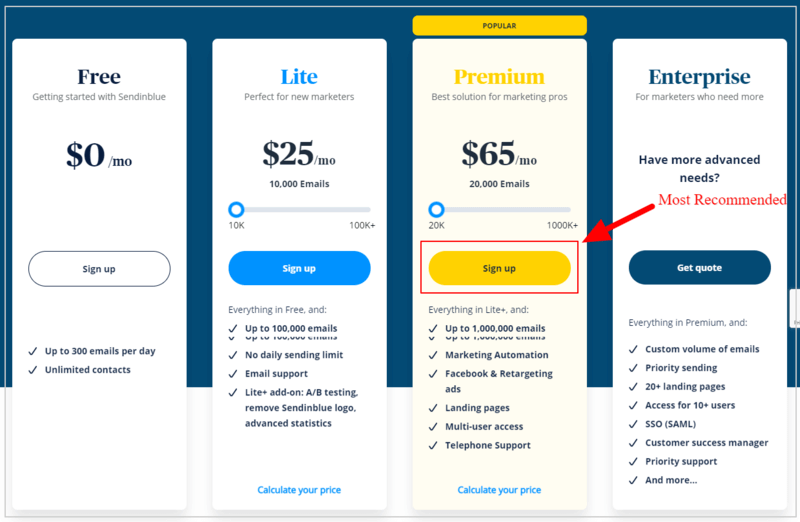
After you have completed selecting your plan, it will take you to the Sendinblue dashboard whose first appearance is as showing in the image below.
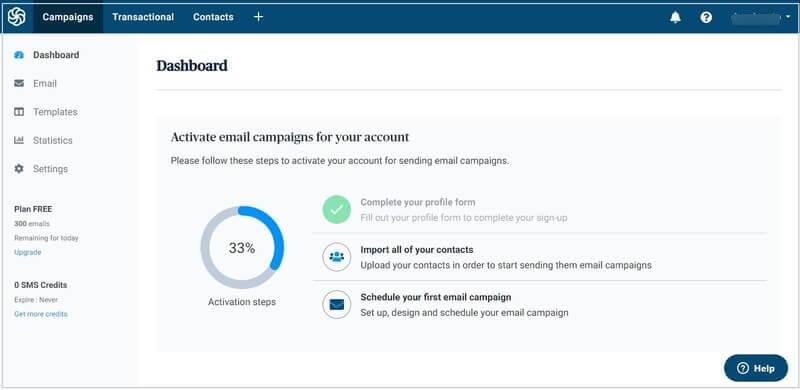
In the dashboard, you will get steps as showing in the image below to activate your Sendinblue account and start sending email campaigns.
To activate your Sendinblue account and start sending regular emails, you need to follow 3 steps given below:-
- Complete your profile
- Add contacts to your email list
- Schedule your first email campaign
As you have completed your profile above in Step 1, you just need to add contacts and create an email campaign to send emails.
You can generate leads and add contacts to your email list by following Step 2. After that, you can set up and schedule the first email campaign to send emails by following Step 3.
So, let’s start by generating leads and adding contacts to your email list.
Step 2: Create Lead Generation Form to Start Build Your Email List
To generate leads and add contacts to your email list, you need to create a lead generation form and add it to your website pages. Each time the visitors visit your email, they may signup with the lead generation form and the contacts get added to your email list.
You can grab more signups by offering free downloads that add some value to your visitor’s knowledge. If you want to attract more signups, you can learn proven strategies below in this post.
So, let’s start generating leads by creating a lead generation form and add it to your website posts and pages.
After you have created your Sendinblue account in step 1, you will be taken to the Sendinblue dashboard. Here, you have to click the ‘Contacts’ menu option as showing in the image below.
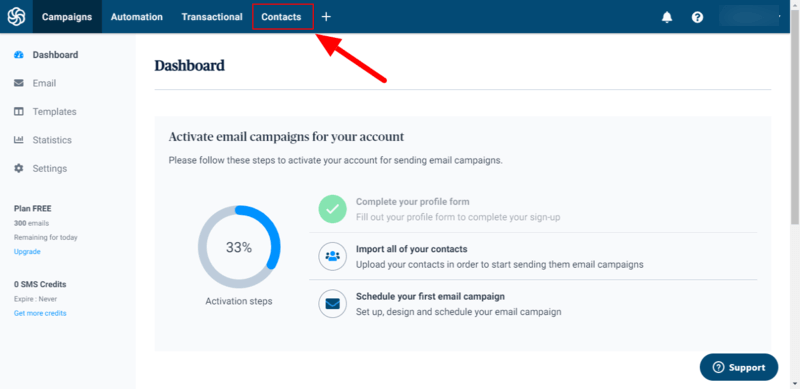
If you have already existing contacts, you can find all of them here. But, as you have just started and don’t have any contacts in your email list, you have to create a form.
To create a lead generation form, click the ‘Forms’ sidebar menu options as indicated in the image below.
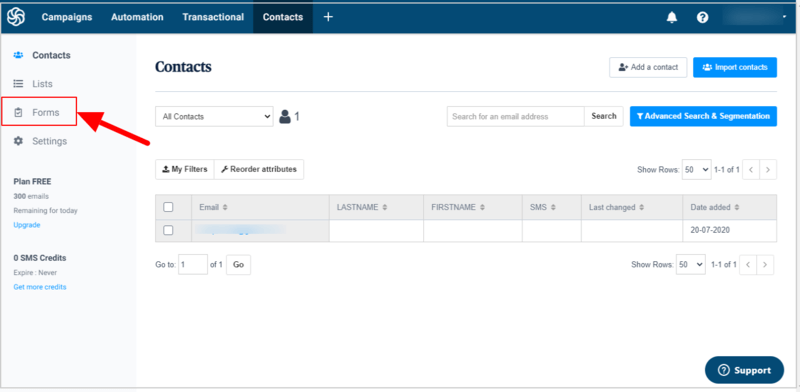
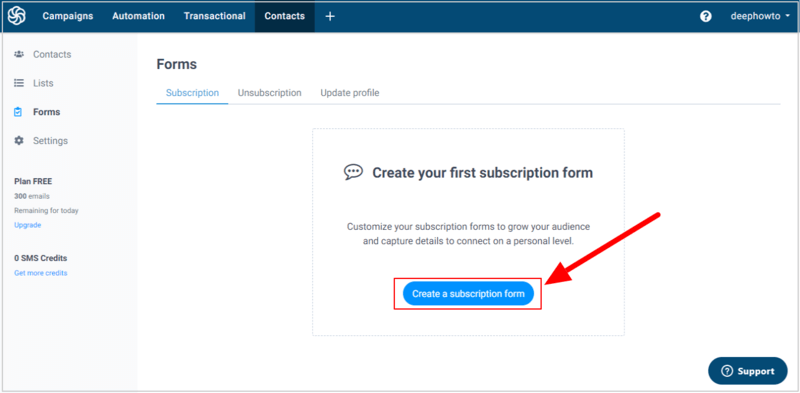
Here, on this page, you will get all your lead generation forms. You have to create the first subscription form that you can do by clicking on the ‘Create a subscription form’ as indicated below.
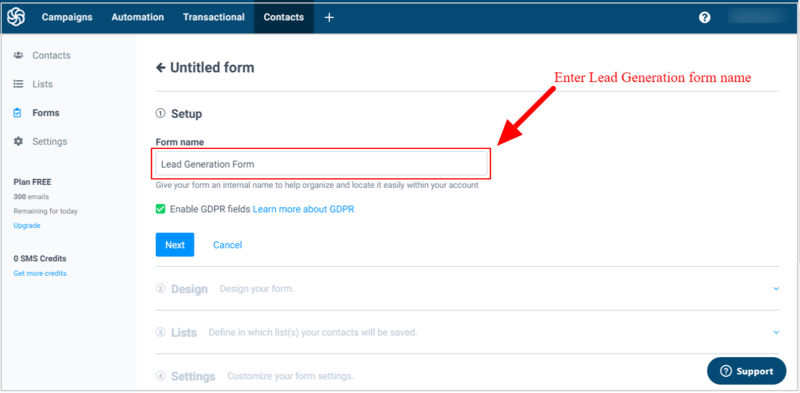
Now, provide a name for your lead generation forms in the input box as showing in the below image. Also, enable the GDPR field by clicking on the checkbox as showing below to make your form GDPR compliant. You can learn more about GDPR by clicking on the ‘Learn more about GDPR’ link.
Click the ‘Next’ button to proceed to the next process where you have to make a design.
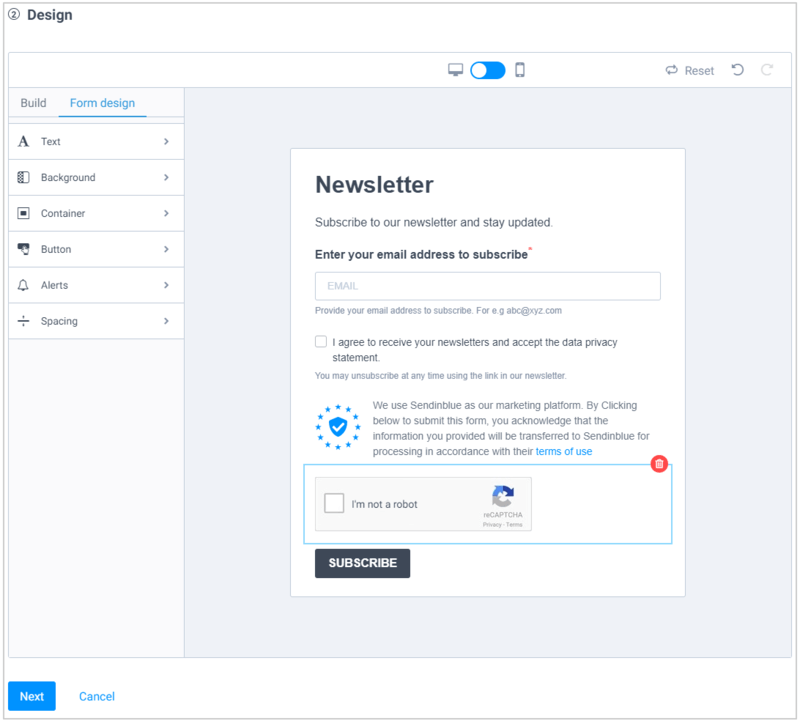
After that, you have to create the best design for the lead generation form as per your requirements. The form is a pre-made template that already contains an input box for email, a checkbox to agree to receive the newsletter, GDPR compliant text, and a button.
Also, don’t forget to add a Google Recaptcha to stop spamming with the lead generation form on your website. After you have done with the design, click the ‘Next’ button to go to the next process.
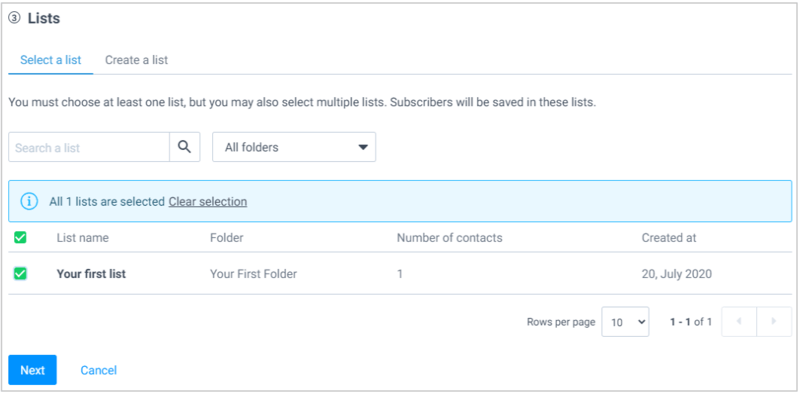
Here, you have to select an email list where you are going to add leads with the lead generation form you are creating. After you select an email list, click the ‘Next’ button for the next process.
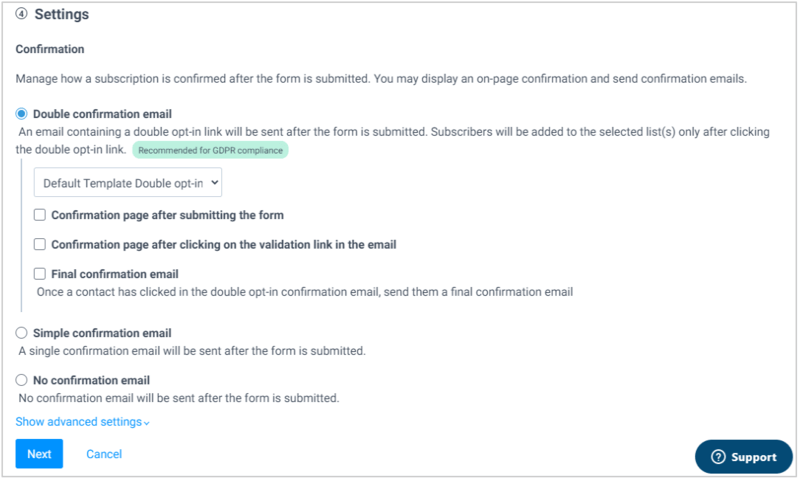
Now, make setting about how to leads gets confirmed after submitting the form. I recommend you to select the ‘Double confirmation email’ required for GDPR compliance. Select a default template from the dropdown and click the ‘Next’ button for the next process.
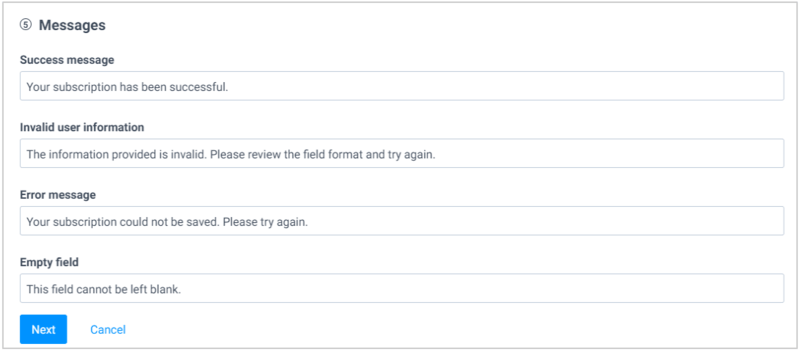
After that, set the messages your users receive on form submissions like success message, invalid user information, error message, and empty field. When you have done with the text messages, click the ‘Next’ button for the next process.
Once you have done with all the above setup, you will get a quick share and embed code. I recommend you to select the iframe code indicated below and paste it to your website post and pages where you want to place the form.
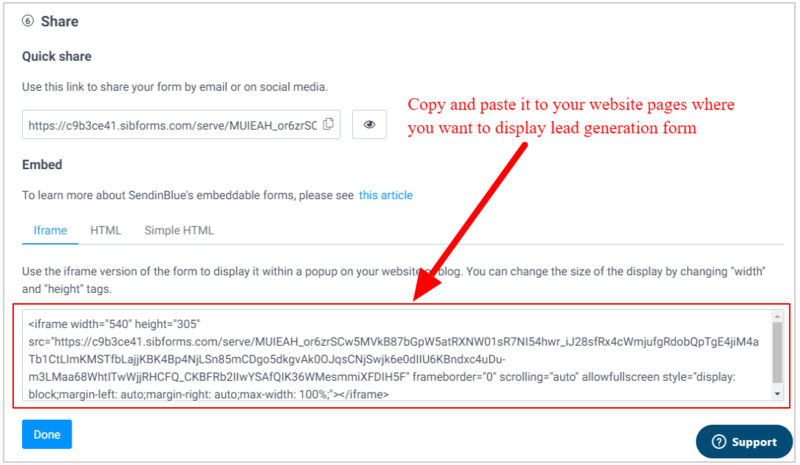
Furthermore, you can learn proven strategies below in this post to generate more leads and fastly increase your email list contacts.
When you have done adding a few contacts to your email list, you can start creating email campaigns to send emails to your leads.
Let’s find out how you can create and schedule your email campaign below.
Step 3: Setup and Schedule Your Email Campaign
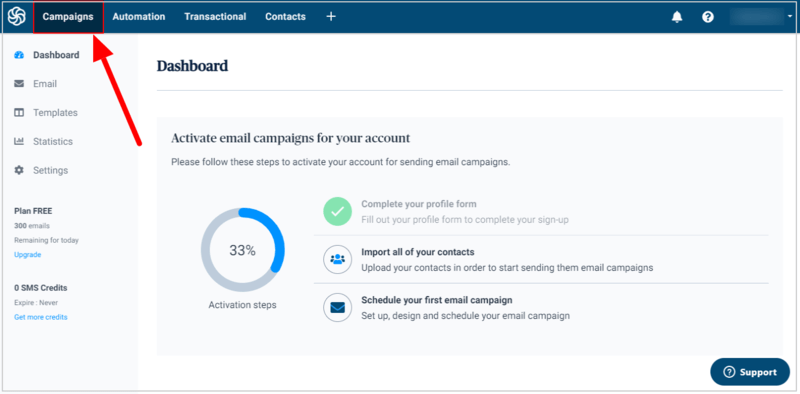
To start creating an email campaign, you have to click the Sendinblue dashboard ‘Campaign’ menu option as indicated in the image below.
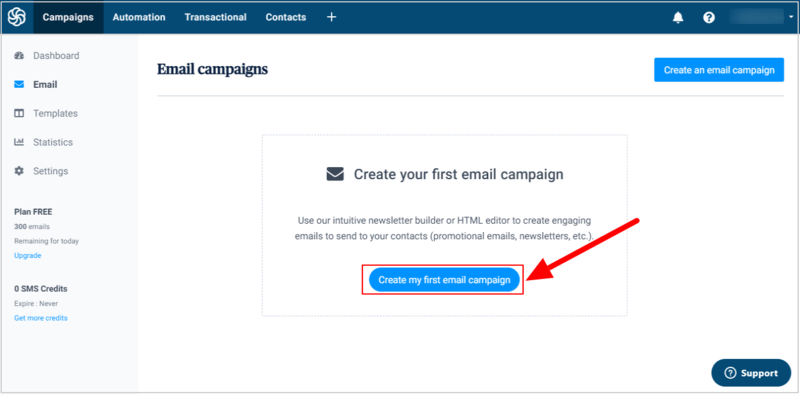
You can create your first email campaign by clicking on the ‘Create my first email campaign’ button as showing below.
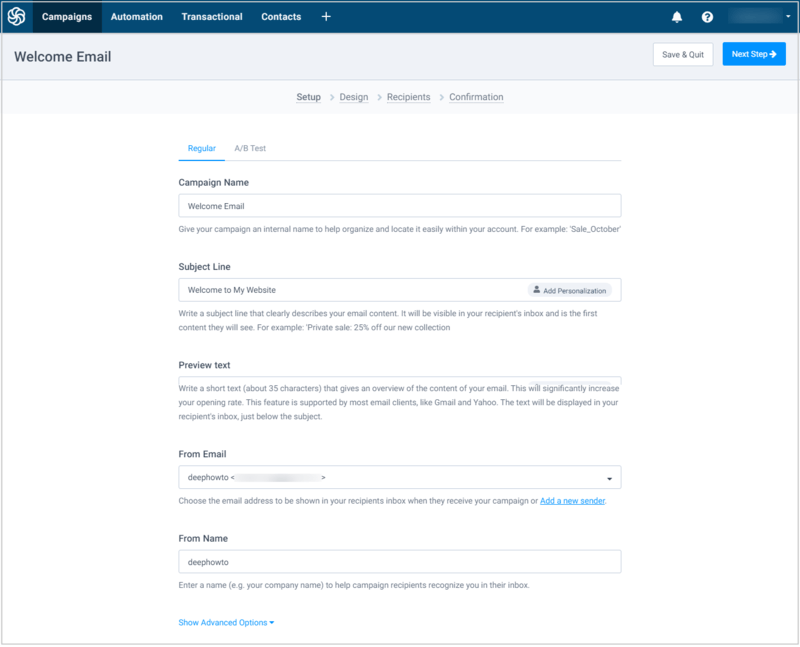
This will take you to the email campaign setup page where you have to fill in the campaign name, subject line, and preview text. The ‘From Email’ and ‘From Name’ will be automated captured from your Sendinblue account details.
Click the ‘Next Step’ button to proceed further.
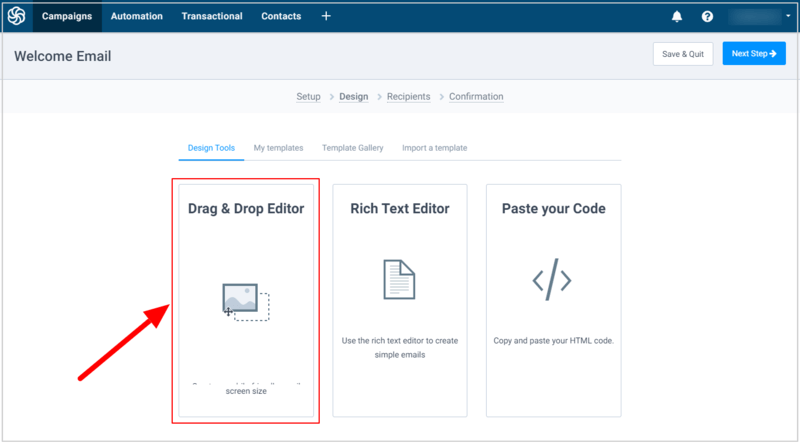
Here, you need to make the best design for your email campaign. Select the ‘Drag & Drop Editor’ option to fastly create the email campaign. The editor comes with many useful elements that you can drag-n-drop to your email campaign to create the best design.
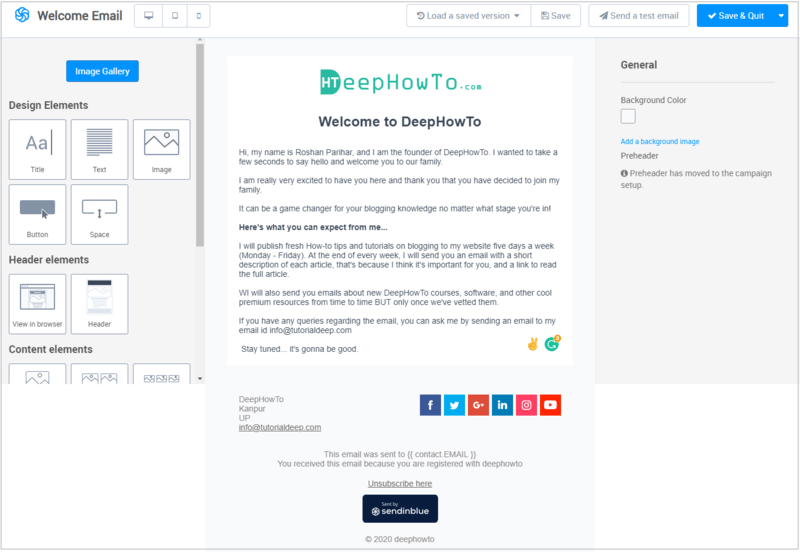
Now, add your brand logo in the email and set a heading for the welcome email that you have to send to the leads after they successfully completed the signups. You can add an address and social media links for the various social media platforms like Facebook, Twitter, Linkedin, and more.
The email campaign also contains an unsubscribed link at the bottom of the email campaign. This is required for the subscribers or leads to offer them unsubscribed when they opt not to get more emails from you. After that, click the ‘Save & Quit’ button to save the design for the email campaign.
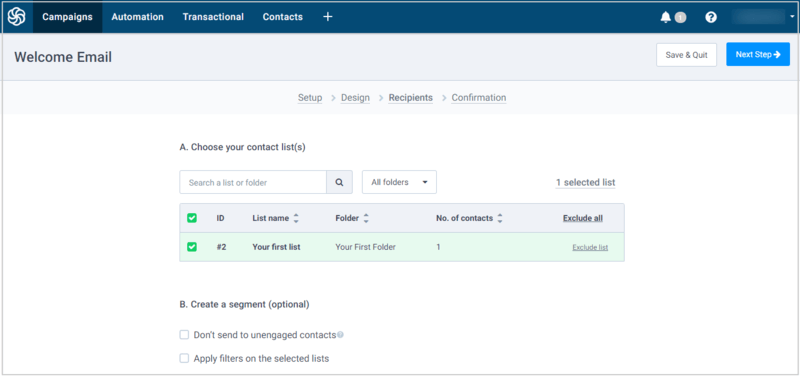
After that, select an email list of recipients of the email campaign. Click the ‘Next Step’ button to proceed to the next process.
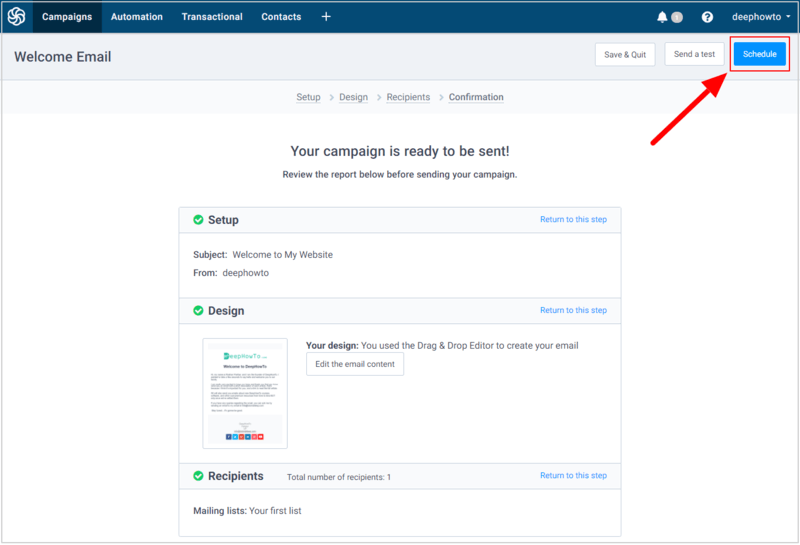
Once you have done with all the above setup for the email campaign, you can check the setup confirmation for the email campaign.
Also, click the ‘Schedule’ button to set the time on which your recipients receive the emails.
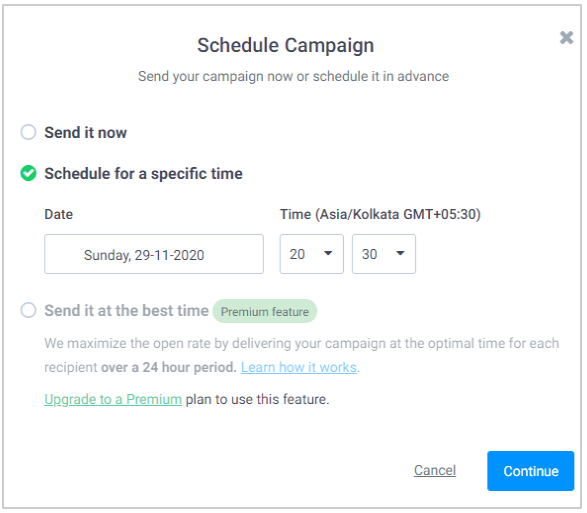
To schedule your email campaign, you choose either the ‘Send in now’ option to send immediately or the ‘Schedule for the specific time’ to send at a specified time of your choice. Set the time as per your requirements and click ‘Continue’ and after that click the ‘Confirm’ button to complete scheduling your email campaign.
The above steps are the manual email campaign that you have to manually create and send to your leads. However, you can also set up an automated email campaign to send automatically to your email list when you publish a new post on your website.
How to Create Automated Newsletters With RSS Feed Campaigns
As you have already start doing email marketing, you can learn how to create automated newsletters with RSS feed campaigns. It is the emails send automatically to the subscribers when a new will be published on the website.
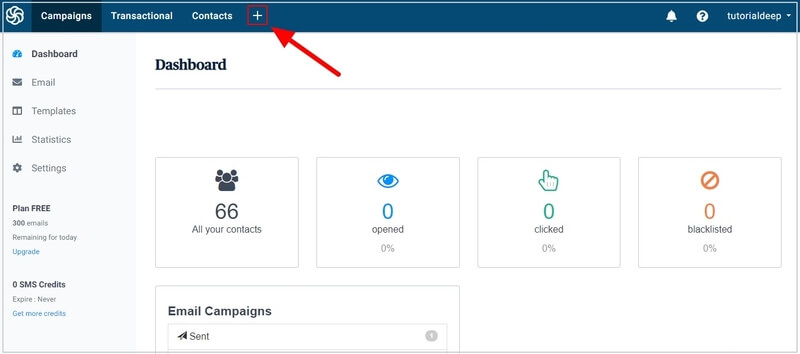
On the Sendinblue dashboard, you have to click the plus(+) sign button given at the top of the dashboard as indicated in the image below.
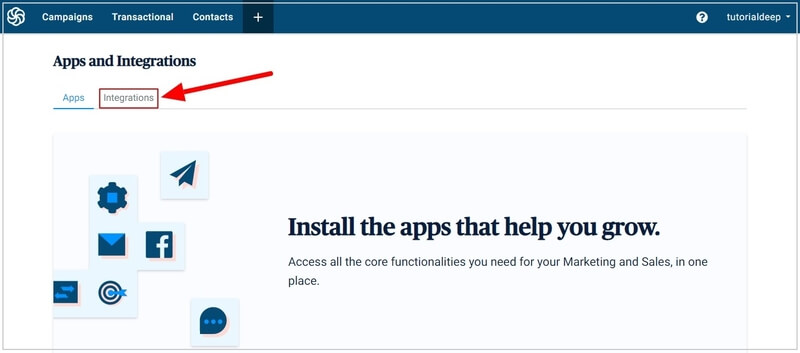
You will get the ‘Apps and Integrations’ page where you have to click the ‘Integrations’ tab that gives you the option for the automated RSS campaign.
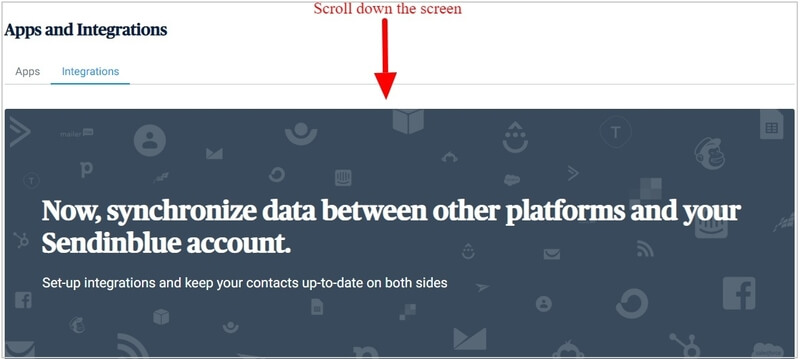
Scroll down the screen to see the different integration options.
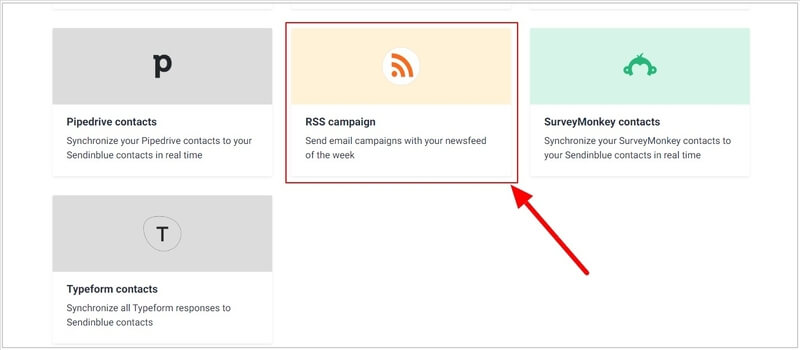
After that, click the ‘RSS campaign’ option as showing below to start creating the automated RSS feed campaign.
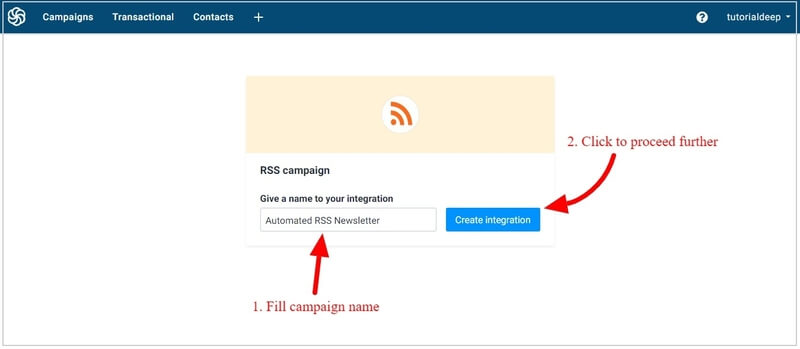
A page will open where you have to enter the RSS campaign name. Provide a unique name that can be helpful to identify it from other campaigns. Click the ‘Create Integration’ button to proceed to the next step.
After you have done with the campaign name, you have to enter the RSS feed URL of your website where it fetches the latest website updates automatically to send emails. If you are using a WordPress website, you can easily find the RSS feed URL of your post type by adding the /feed at the end of the URL.
The below image showing the RSS feed URL of my website(TutorialDeep.com). You can replace the name of my website with the name of your website to make your RSS feed URL for the campaign.
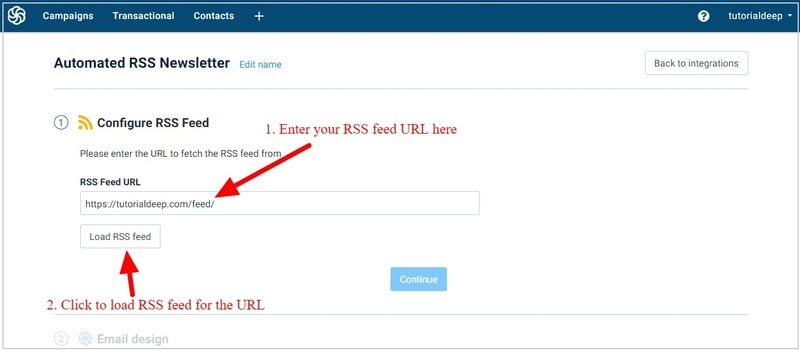
Once you have completed adding the RSS feed URL, you have to click the load RSS feed URL to load RSS feed to your RSS campaign.
After that, scroll down the screen and click the ‘Continue’ button to complete configuring the RSS feed and proceed further.
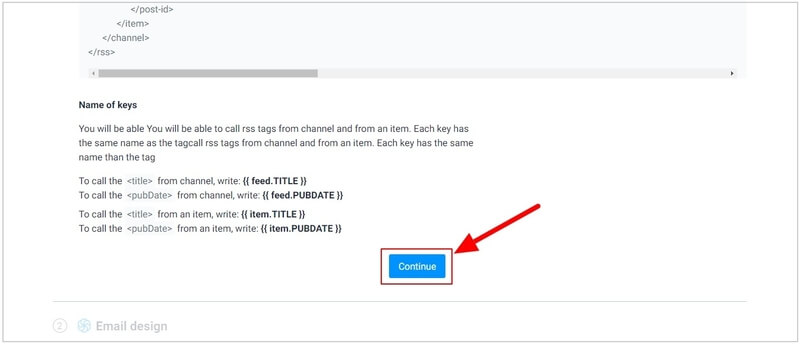
The above image showing that you have to use the notations whose details as given below. This is useful to call the RSS tag from the channel and from an item.
To Call RSS Tag From Channel, you have to use:-
{{ feed.TITLE }}to call the<title>from channel.{{ feed.PUBDATE }}to call the<pubDate>from channel.{{ feed.DESCRIPTION }}to call the<description>from channel.
Call RSS Tag From an Item, you have to use:-
{{ item.TITLE }}to call the<title>from an item.{{ item.PUBDATE }}to call the<pubDate>from an item.{{ item.LINK }}to call the<link>from an item.{{ item.DESCRIPTION }}to call the<description>from an item.{{ item.CONTENT }}to call the<content>from an item.
Now, let’s design your automated RSS campaign and change the look and feel of your campaign.
Step 4: Design Your Automated Newsletters With RSS Feed Email Campaigns
After you have completed creating your RSS feed campaign, you can start designing your RSS campaign to send the best-designed email to your contacts.
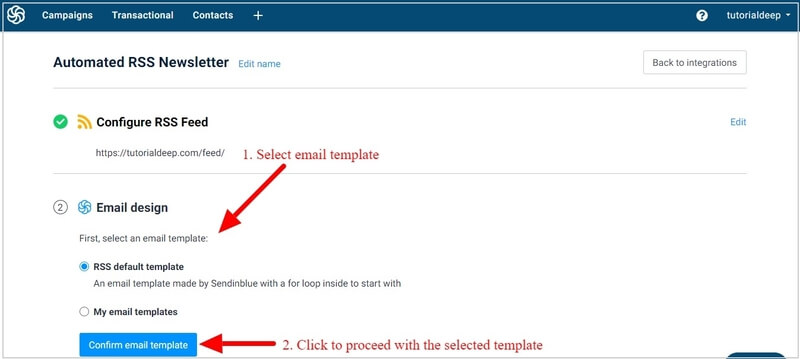
You will get two options to create the best design for the RSS campaign. I recommend you to choose the ‘RSS default template’ option to start with the default email template created by Sendinblue to save your time. After that, click the ‘Confirm email template’ button to proceed to the next step.
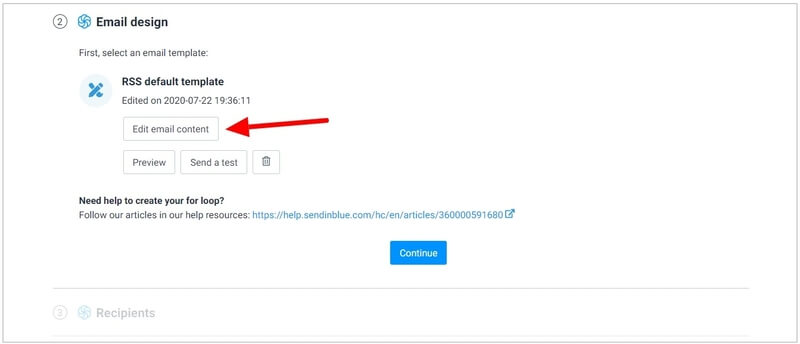
Click the ‘Edit email content’ button to start editing the template design as per your requirements. The below image indicated the button to go to the Sendinblue template builder.
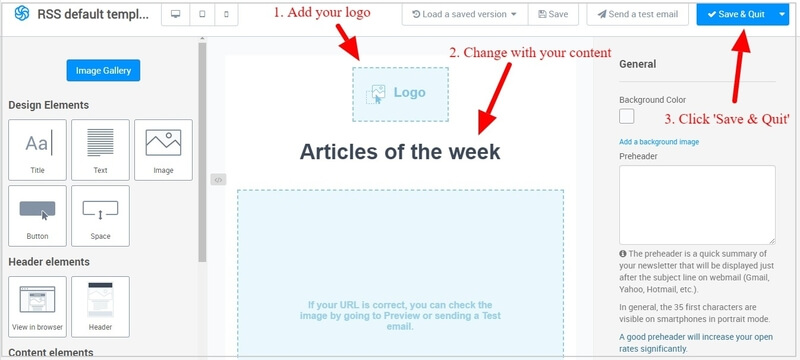
Here, you will get a template builder where you can edit and change every part of the default template. You can add a logo, RSS tags, and change the layout as per your requirements. The default RSS template contains the dynamic content with the for loop parameters to start.
Drag-n-drop builder contains the different block elements given at the left-hand side of the screen as showing below. You have to click the content to edit and change it as per your requirements.
The default RSS feed template already comes with the added RSS tags useful for your automated RSS newsletters. The useful RSS tags are given below:-
{{ item.TITLE }}: Display the title of the published post in the RSS email.{{ item.PUBDATE }}: This code displays the published date of the post in the RSS email.{{ item.DESCRIPTION }}: To display the description of the post in the RSS email.
After you have completed the design of your RSS email campaign, you can check the design by sending a test email to any of your email ids. You have to click the ‘Send a test email’ button as given above in the image to send a test mail.
When you are satisfied with the design of your RSS feed email campaign, click the ‘Save & Quit’ button indicated in the image above to save the template and proceed to the next step.
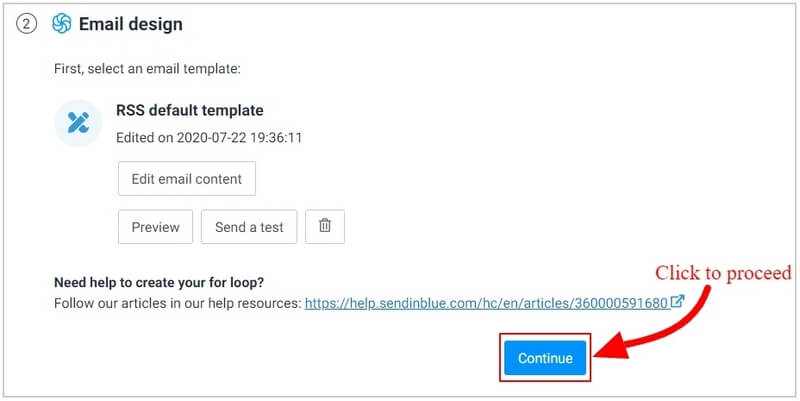
You can also click the ‘Preview’ button given in the below image below to see the preview of your RSS feed email campaign. When you are fully satisfied with the preview, you can click the ‘Continue’ button indicated below in the image to proceed to the next step.
Step 5: Select Recipient List For Automate Newsletters With RSS Feed Campaigns
Once you have completed designing the RSS campaign, you can select an email list who receive the automated RSS emails each time you publish a new post on your blog.
To select an email list, click the ‘List’ dropdown and select an email list from the list of recipients.
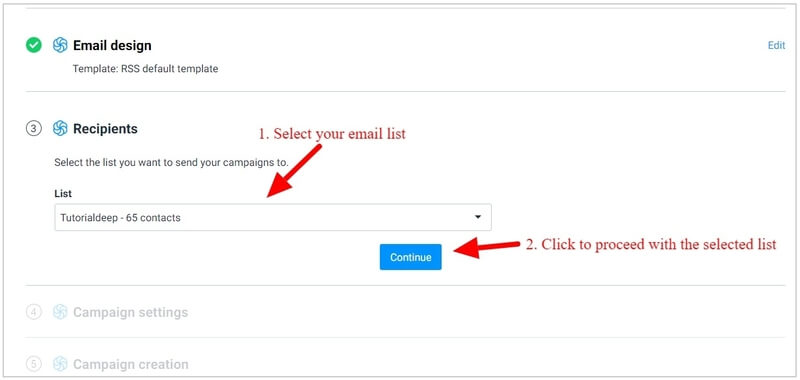
After selecting an email list, click the ‘Continue’ button to proceed to the next step.
Step 6: Make Campaign Settings
In this step, you have to enter a name for the RSS campaign with its subject line, ‘From Email’, and ‘From Name’.
You can add RSS tags to your campaign name and subject line described above. This will automatically generate the subject line from the latest post of your website that you publish recently. As the subject line is the first visible part in the recipient inbox, you can use the {{ feed.title }} RSS tag to display the title of the latest post in the subject line.
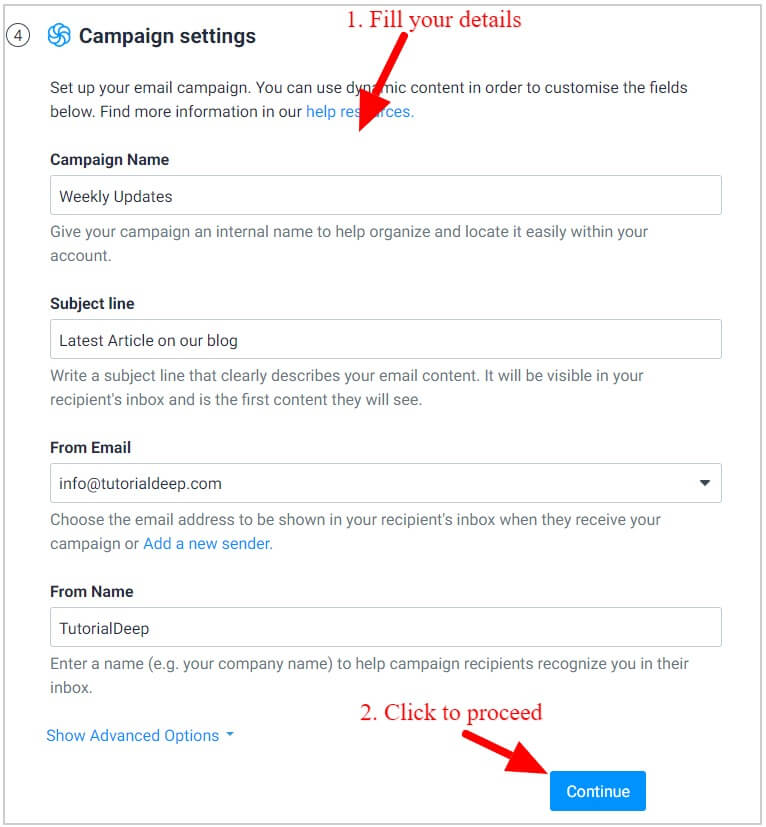
After you have done filling the details in the above form, you can click the ‘Continue’ button to proceed to the next step.
Step 7: Select Frequency For Campaign Creation and Mailing
Here, you have to select how often you want to send the automated RSS newsletters to your subscribers. You have to select a specific day of the week and the time to schedule your RSS email campaign. It can also be used to select the specific day of the month to send the monthly automated RSS newsletters to your audience.
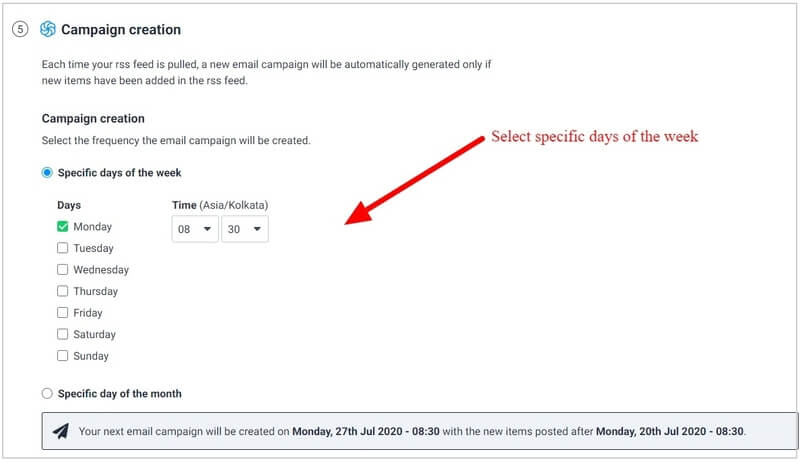
In addition to this, you can also set whether you want to send the RSS newsletters automatically or manually to your subscribers.
If you choose an automatic send option, it will send your RSS campaign as soon as it is created. If you choose a manual send option, it will save your RSS campaign as a draft and send it to your subscribers when you decide to send it.

I recommend you to select the ‘Sendinblue automatically send the campaign’ option to automatically send the RSS campaign emails when you publish posts on your blog. After that, you can click the ‘Continue’ button to proceed to the next step.
Step 8: Save and Activate Your Automated Newsletters With RSS Feed Campaigns
After you have done with all the above setup, you can save and activate your campaign with this step.
There are two button options in this step as given in the below image. You can save and activate your RSS campaign and decide whether you want to activate your campaign or make it inactive after you save it.
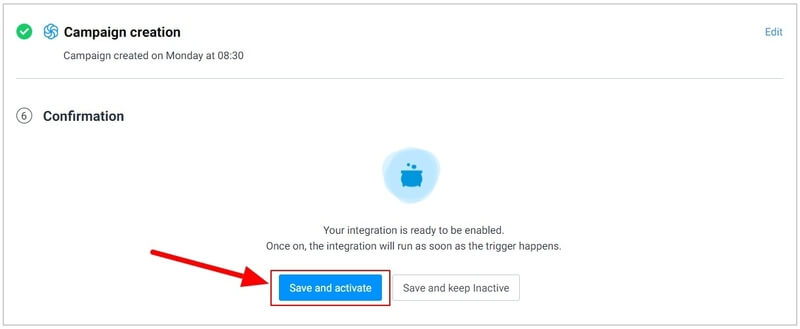
If you want to save and activate your RSS campaign, you have to click the ‘Save and Activate’ button to start sending automated newsletters to your subscribers.
You will get a message as indicated in the image below that your automated RSS newsletter has been saved.
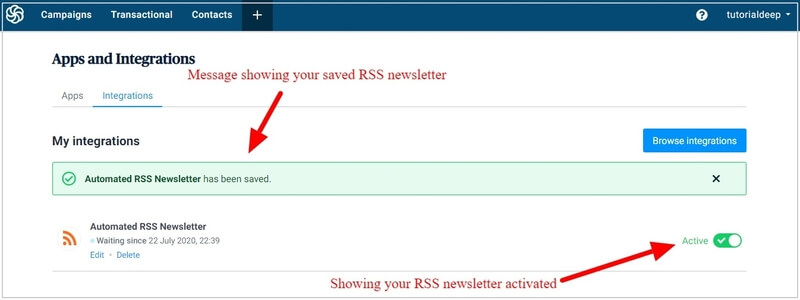
The above image showing that your RSS campaign is ‘Active’ and has been saved successfully. Here, you will get a list of all your created RSS email campaigns on one single page.
That’s all!
You have successfully set up and created your automated RSS email campaign.
Now, each time you publish a new post on your website, your latest post automatically send to your subscribers through the RSS email campaign created above.
In this email marketing tutorial, you will successfully learn how to Start Doing Email Marketing and create a lead generation form, email campaign, and automated RSS email campaigns to send email automatically to your subscribers.
➔ Signup with Sendinblue Now (No credit card required)
I am using Sendinblue in the above email marketing tutorial. However, there are many other best email marketing platforms that are given below. Let’s find out about them in this email marketing tutorial.
10 Best Email Marketing Platforms (Most Affordable and Trusted + Free)
In this Email Marketing tutorial, you have already learned that how to Start Doing Email Marketing. Let’s find the best Email Marketing platform as given below:-
1. Sendinblue (#1 Best Free Email Marketing Platform)
Sendinblue is an all-in-one email marketing and SMS marketing tool. It is the #1 tool and most powerful email marketing platform for any type of business from small to large size.
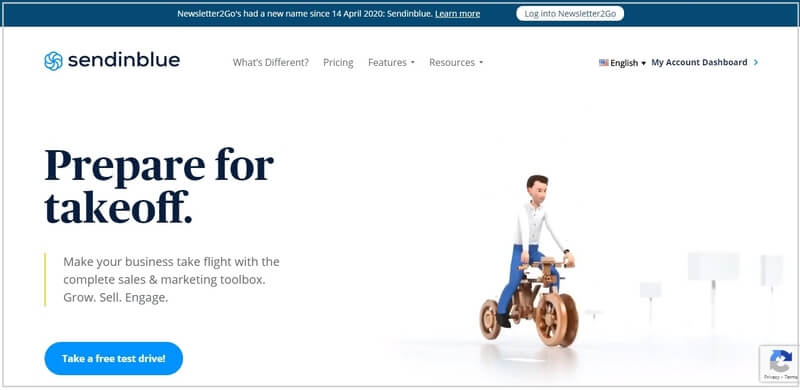
It comes with all the features to easily create email marketing campaigns, contact management, email automation, social media marketing, Facebook ads, landing pages, SMS campaigns, live chat, and much more on one single platform.
You can start with a ‘Free’ plan that helps you generate unlimited email leads and segmentations with 300 emails/day. However. I recommend you choose its ‘Premium’ plan that comes with 1 million emails with Marketing Automation, Landing Pages for more conversions, expert chat and phone support, and more to generate more conversions and sales.
➔ Try Sendinblue Now (No Credit Card Required + Unlimited Subscribers For FREE + 300 emails/day For Free)
2. Constant Constant (#2 Premium Email Marketing Platform + Free)
Constant Constant is the best premium email marketing platform trusted by well-known bloggers like ‘Syed balkhi’, and many others. If you want to make your brand successful, you can start with its email marketing platform.
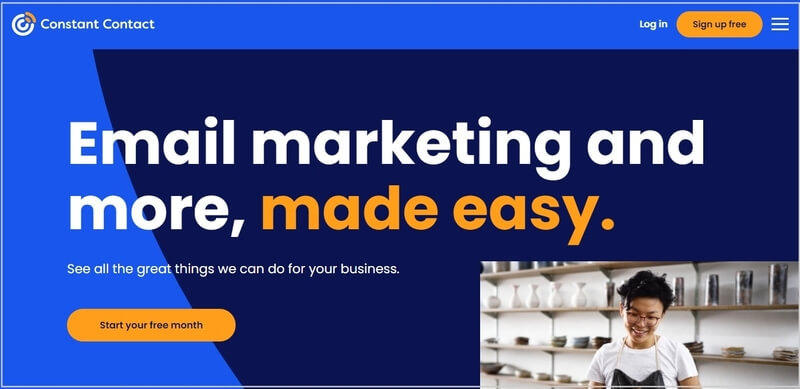
It helps you easily create email campaigns, build your websites, upload your products to your eCommerce websites, share your posts to social media, Google Ads, and much more. In addition to this, it also guides you in each stage of your progress to increase your performance.
You can try Constant Contact free for up to 60-days. After that time period, you have to upgrade your plan to the premium version to use it. I recommend you to choose ‘Email Plus’ to get better results with automated emails with all the powerful features.
➔ Try Constant Constant Now (No Credit Card Required + 60-days Free)
3. Aweber (Powerful Premium Email Marketing Platform)
Aweber is a simple yet powerful email marketing for small to medium size businesses. It can give you awesome results to grow your business online faster than ever.
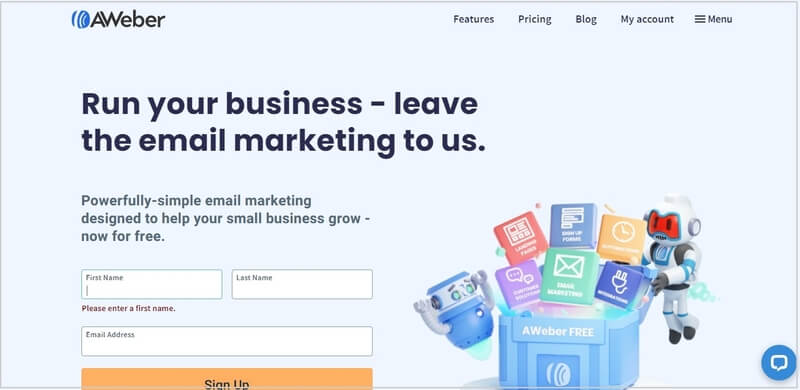
It comes with all the features of email marketing to create beautiful AI-based faster email designs in seconds to quickly start. It also comes with a pre-built email template library to use and customize with the drag-n-drop builder.
You can start with its ‘Free’ plan that comes for 500 subscribers with 3000 emails/day. However, I recommend starting with the ‘Pro’ that provides all the essential email marketing features to get huge results.
➔ Try Aweber Now (No Credit Card Required + 500 Subscribers Free + 3000 email/month)
4. GetResponse (All-in-one Solutions)
GetResponse is the All-in-one Toolkit for email marketing and digital marketing. It is useful to grow small to any size businesses with all essential features.
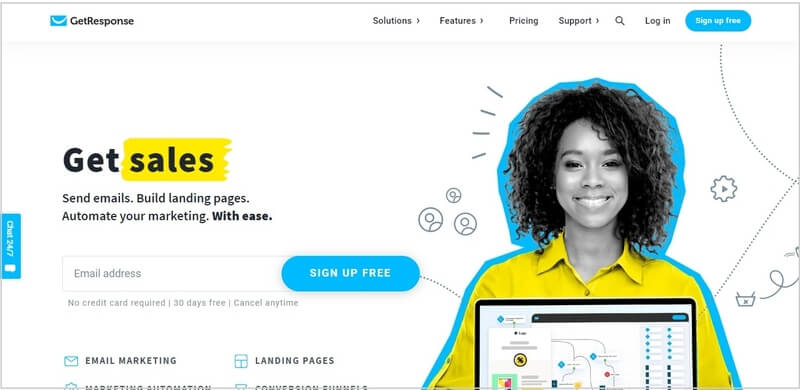
It comes with features like email marketing, autoresponders, landing pages, automation, forms and surveys, and integration options for all your favorite apps include CMS like WordPress, Magento, BigCommerce, Shopify, PrestaShop, and many more. In addition to this, you can also create webinars to increase subscribers and capture more interest.
You can start with a 30-days free option to try all its features. After that, I recommend you choose the ‘PLUS’ plan for everything in one single pack.
➔ Try GetResponse Now (No Credit Card Required + 30-days Free)
5. HubSpot Email Marketing
HubSpot Email Marketing is the best email marketing platform with many other CRM features useful from small to large enterprise businesses. You can increase your subscribers and convert them into sales with this all-in-one marketing tool.
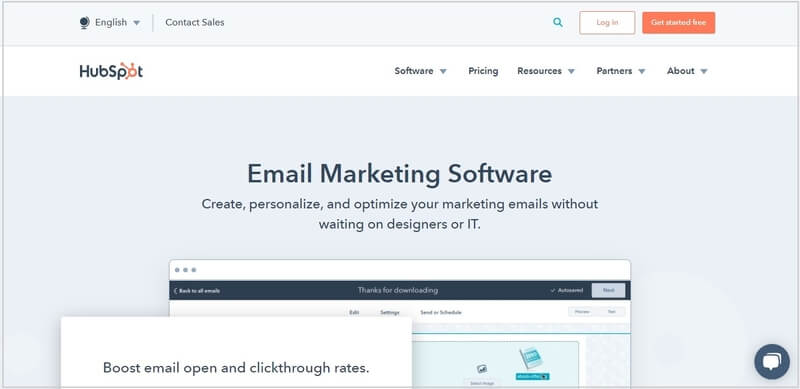
It helps you to create beautiful signup forms that can easily generate leads from your website. After that, you can create engaging emails with its online drag-n-drop editor and send them to your subscribers when required. Create landing pages, marketing automation, share your content to social media, and much more with HubSpot email marketing tools.
You can start with its free plan to try its features and interface for up to 2,000 subscribers. After you find it useful for your marketing to increase sales, you can upgrade to its premium Marketing Hub plan that starts from $800/month.
➔ Try HubSpot Email Marketing Now (No Credit Card Required + 2,000 Subscribers Free)
6. MailChimp
MailChimp is the all-in-one marketing platform to grow your online business with its professional features. You can create professional design emails to send and reach your audience easily.
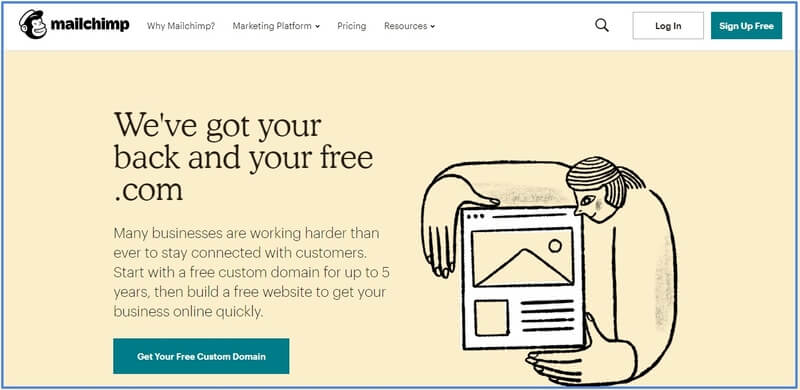
It offers easy to use drag-n-drop builder, email list management, segmentation, signup forms with popups, landing pages, build your brand with domains, website builders, templates, digital ads, postcards, marketing automation, and much more at one single platform.
You can start with its free plan that comes for up to 2,000 subscribers with 12,000 emails/month.
7. OmniSend (Best For eCommerce Store)
OmniSend is the best email marketing platform for an eCommerce website to capture products automatically. It collects products and their detais from your store and adds them to your emails to send to your subscribers.
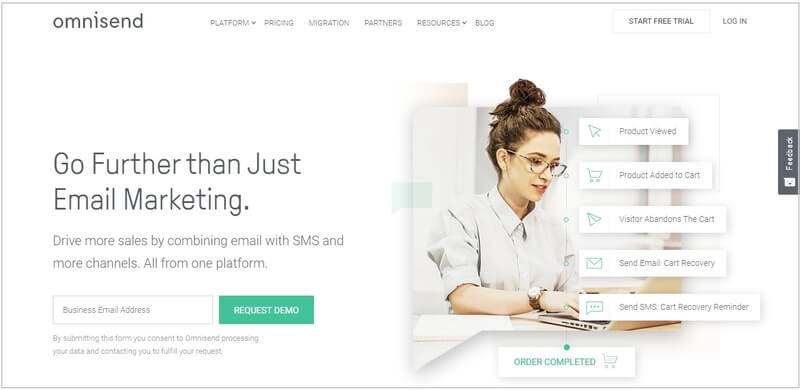
It comes with pre-made templates and its drag-n-drop builder for better customization of emails. Create landing pages, lead generation forms, emails, and SMS to increase sales of your online stores.
You can start with its free plan to try its email marketing features for eCommerce stores for unlimited subscribers. However, I recommend you to choose the ‘PRO’ plan to get all essential features with an advanced reporting system to generate more conversions and sales.
8. Moosend
Moosend is the All-in-one email marketing Toolkit for all your marketing needs. If you are a beginner and want to grow up your business, you can try it to generate more sales.
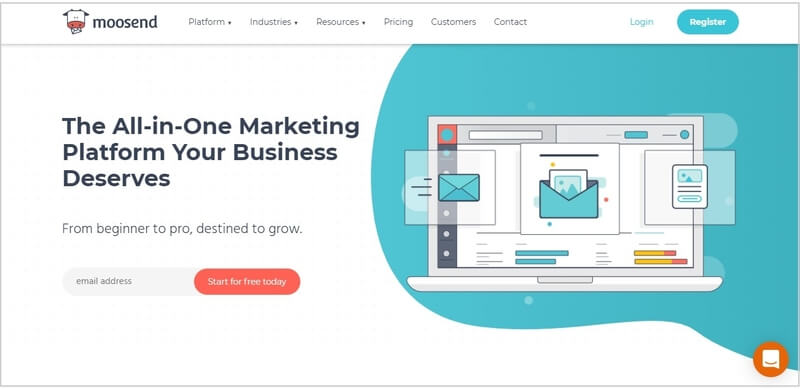
It is a powerful platform to deliver emails and save your time with the advanced automation tools to reach your goals easily. Moosend helps you send relevant emails to your subscribers to improve clicks and open rates of emails.
You can start with its forever free plan to generate up to 1,000 subscribers with unlimited emails every day. However, I recommend you to choose the ‘Pro’ plan to get all the essential features at one single platform to increase more conversions and sales.
9. Convertkit
Convertkit is the most popular platform among bloggers and effectively promoted by top bloggers like Pat Flynn. It offers many useful tools for bloggers to promote their blog and convert traffic into sales.
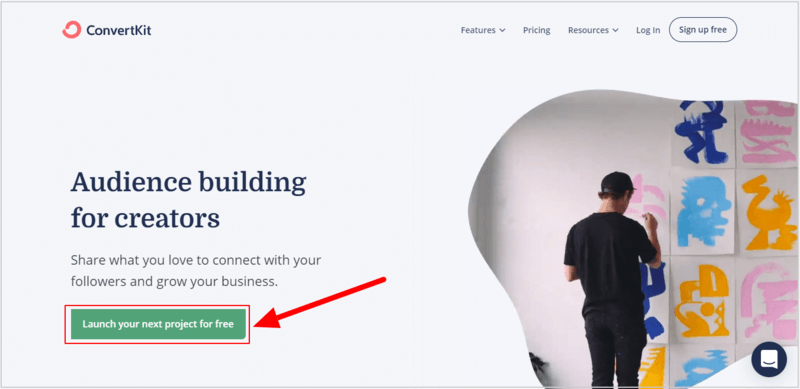
It can help you create any type of emails and landing pages to generate more conversions and increase your brand popularity.
You can start with its free plan to try its email marketing features that gives you 1,000 subscribers and unlimited emails. However, I recommend you to choose the ‘Creator’ plan to get all essential premium features in one single pack.
10. Benchmark Email
Benchmark Email is easy to use the platform and helpful to fastly create email designs with its drag-n-drop email builder. It’s useful to spend less time on email customizations and focus more on your online business to generate more sales.
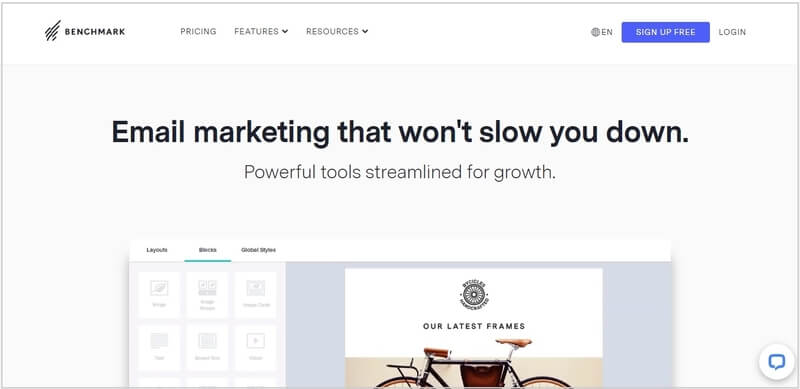
Turn your traffic into sales with its automated emails and automation tools to take follow-ups for more conversions. Track all your email marketing performance find which works for you and which is not working with its A/B testing.
You can start with its forever free plan that gives you the freedom to generate and manage unlimited leads with 250 emails/month. However, I recommend you to choose its ‘Pro’ plan to get the best value pack with all the essential features to increase more conversions and sales.
Let’s find out the comparisons among these platforms in this Email Marketing tutorial below.
Free Version Comparison of Best Email Marketing Platforms
In this Email Marketing tutorial, I have already given you the process on how to start doing email marketing. Now, here is the comparison among these top Email Marketing platforms to make it easier for you to choose one for your business.
| Email Marketing | Subscribers Limit | Monthly Send Limit | Daily Send Limit |
|---|---|---|---|
| SendinBlue (#1 Platform) | Unlimited | 9,000 | 300 |
| Constant Contact (free for 60 days) | Unlimited | Unlimited | Unlimited |
| Aweber | 500 | 3,000 | 100 |
| GetResponse (free for 60 days) | Unlimited | Unlimited | Unlimited |
| HubSpot Email Marketing | 2,000 | 2,000 | None |
| Mailchimp | 2,000 | 12,000 | 400 |
| OmniSend | Unlimited | 15,000 | 2,000 |
| Moosend | 1,000 | Unlimited | Unlimited |
| Convertkit | 1,000 | Unlimited | Unlimited |
| Benchmark Email | Unlimited | 250 | None |
Top 3 Proven Strategies and Techniques to Grow Your Email Lists
In this Email Marketing tutorial, you have already learned the process on how to start doing email marketing. Now, let’s learn proven strategies to grow your email lists.
I recommend you choose Optinmonster as it the #1 lead generation plugin for a WordPress website. It comes with all the essential features like Exit-Intent Technology, Exit Popups, Announcement Bar, Content Locking, Multi-step Popups, Countdown Timer Popups, Spin-to-Win Campaigns, and connection between WordPress leads and Salesforce CRM to generate more leads from your website.
Let’s find out a few of the top proven strategies and techniques to grow your email lists below:-
1. Lead Magnet
Offer free downloads with your lead generation form. Each time visitors will signup with your lead generation form, they will get a link to the free eBook in PDF, Word, and other doc formats. This will attract them to complete the lead generation form and you will generate more leads.
Here is a simple example of a website WPBeginner where Syed Balkhi provides access to free eBooks to users who signup for the lead generation form.
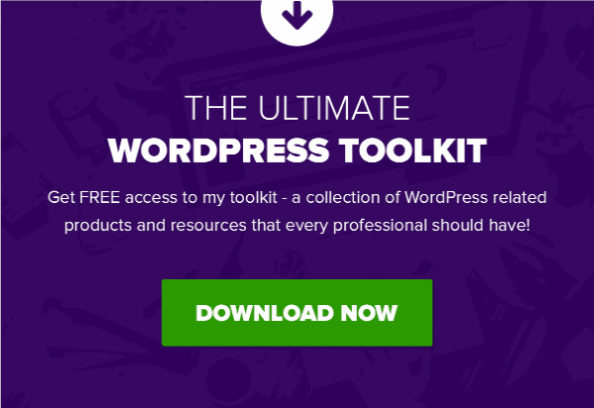
When the user clicks on the button “DOWNLOAD NOW’ given above, they will get a popup form as given below.
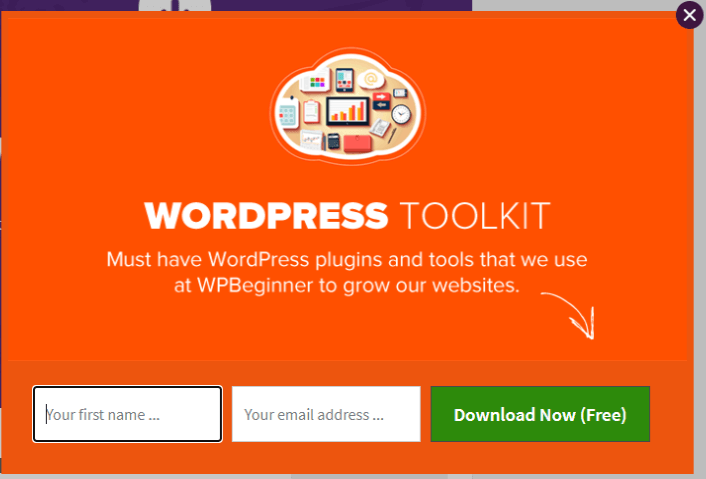
Here, the users have to provide their name and email id to get the free eBook download immediately on their computer system. This way you can attract users or visitors to your website to get the free eBook. People really like the gift that they get for free.
So, add a lead generation form to your website posts and pages and offer valuable free eBooks related to your website content.
You can create a lead generation form with Sendinblue. After that, you can add it to your popup and display it on a button click by using the Optinmonster #1 lead generation plugin.
2. Exit-Intent Popups
If you want to display popup campaigns when the visitors about to leave your website, you can use OptinMonster Exit-Intent technology.
Exit-Intent® technology can boost your conversions by grabbing attention when visitors about to abandon your website. You can display discounts, offers, deals, and downloads to attract visitors and generate more leads.
➜ Guide: How to Get Started with Mobile Exit-Intent on OptinMonster.
3. Content Locking
Content locking is a great lead generation strategy for any type of blog to generate more leads. You can grab the most targeted leads by locking the best content of your website. When visitors want to read the most popular content, they need to signup before getting the content visible to read and learn.
➜ Guide: How To Boost Email List with WordPress Content Locking Using OptinMonster.
In this Email Marketing tutorial, I will regularly update and add more to the above list of a proven strategy to help you grow more email lists for more conversions and sales.
I hope you like this post of how to start doing email marketing for beginners. If you have any queries regarding the post, please comment below.
Also, tell me, what other methods you’re using to generate more leads, I will definitely add them to the above list in this Email Marketing tutorial. Do comment below.
You May Also Like to Read

