Learn how to create a form in WordPress website. Forms are the most essential parts of a website to collect customers’ data.
There are many types of forms like contact forms, feedback forms, payment collection forms, lead generation forms, etc. When you have the right plugin on your WordPress website, you can easily build these forms in just a few clicks.
Looking to create a forms with in WordPress without plugin and coding knowledge? Create beautiful-looking forms with JotForm.
Without a form on your WordPress website, you cannot gain more customers for your business. To build a business-ready website, you should consider adding a form to it.
In this post, you will learn a step-by-step process on how to create a form in WordPress website. So, let’s get started.
How to Create a Form in WordPress (Step-by-step)
Step 1: Choose A Best WordPress Form Builder Plugin
There are many plugins available in the market to create forms on your WordPress website. One wrong plugin can make building form a tough task and break your website design. You need to choose a form builder plugin that should be well-rated and highly positively reviewed.
Required features and functionality in a form builder plugin:
- Easy to use drag-n-drop builder.
- Beautiful looking pre-made form templates to a quick start.
- Should be responsive and mobile friendly
- Give a response immediately on form submission.
- Collect and view your leads generated from forms.
- Can easily create any type of forms like contact forms, survey forms, payment collection forms, lead generation forms, application forms, and any type of forms quickly.
- Integrate with your favorite apps you are already using for your automation business.
- Easy to embed.
- and most importantly should be secure and protected from spam.
Recommended plugin with all these features
After trying and testing the best form builder plugins for WordPress, I recommend our readers to use WPForms for creating any type of form in minutes.
![]()
WPForms is a highly positively reviewed plugin in WordPress to create forms. It is already trusted and used by more than 6 million WordPress users to build their forms. You can easily create a form of your type in WordPress without the need to write a single line of code.
The plugin comes with free version that can be useful when you want to create a simple form with only basic features. However, if you want to create more advanced forms for your WordPress website, it is recommended to go with the WPForms Pro version of the plugin. The premium version comes with more powerful features to easily convert your visitors into regular customers.
Step 2: Install and Activate your Chosen WordPress Plugin
Now, After you choose WPForms as your required form builder plugin, you have to install and activate the plugin on your WordPress website.
If you don’t know the process of installing a plugin in WordPress, you can read our guide on how to install the WordPress plugin.
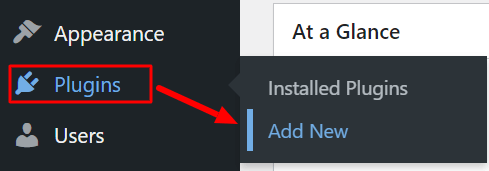
To install the plugin, go to your WordPress website dashboard menu option Plugins >> Add New as shown in the image below.
You will get a page where you can upload, search, and install the plugin. To install the pro version of the WPForms plugin, click the ‘Upload Plugin’ button to upload the zip file of the plugin.
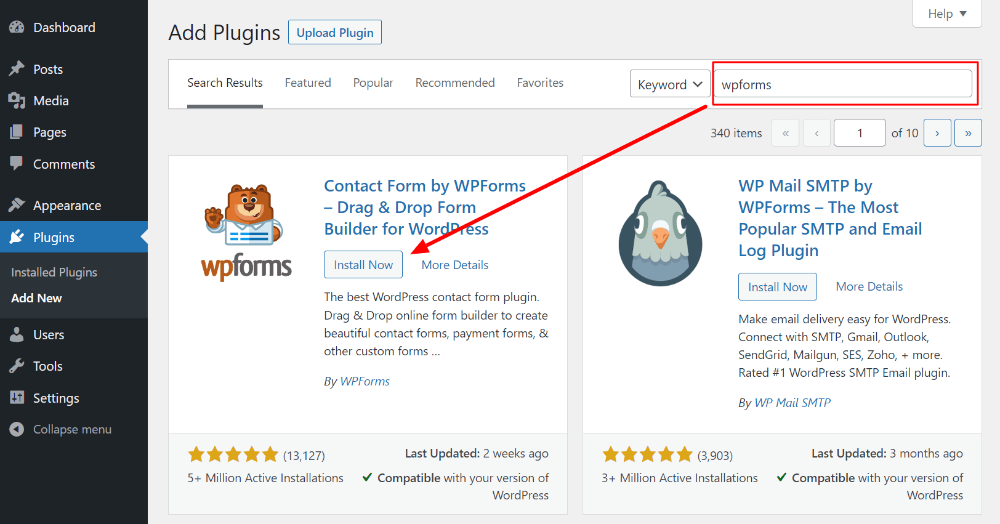
To install the free version of the WPForms plugin, you have to use the search input box. Enter the keyword ‘WPForms’ in the input box as indicated in the image below. To make the search work, click outside of the input box to get search results.
You will get the WPForms plugin as shown in the image below. Click the ‘Install Now’ button given with the plugin to install it on your WordPress website.
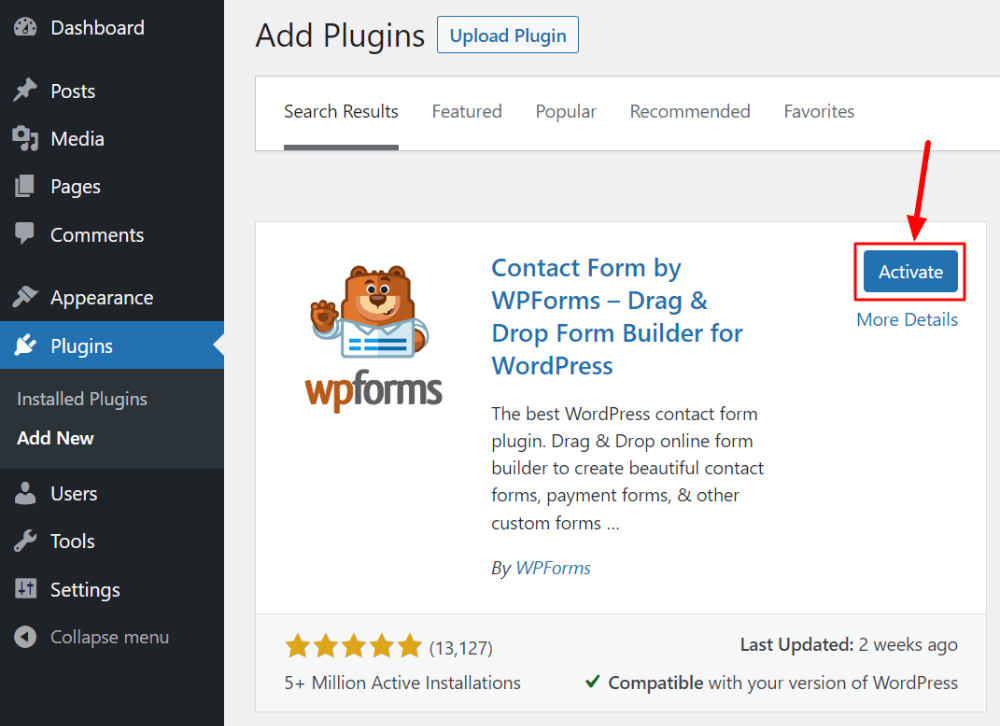
To make the plugin work, you have to click the ‘Activate’ button as shown in the image below.
After the plugin installation completion, you can move to the next step to start creating a form for your WordPress website.
Step 3: Select a Form Template to Create a Form in WordPress
After you install the WPForms plugin on your WordPress website, you will get the screen as shown in the image below.
Now, click the ‘Create Your First Form’ button as shown in the image below to start creating your first form.
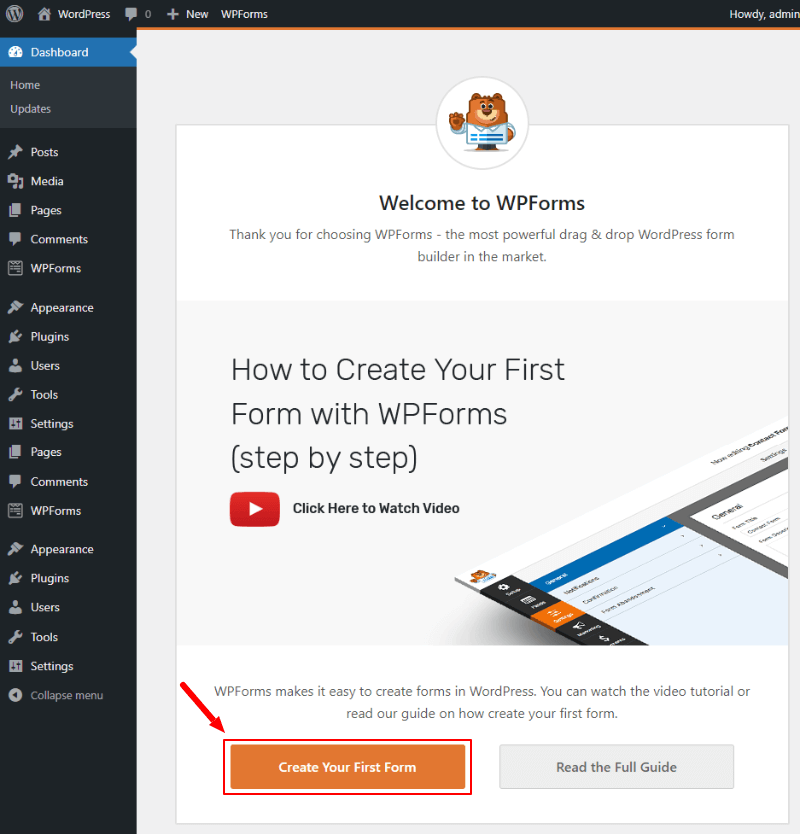
If you do not get the above screen, you can also go to the WordPress dashboard menu option WPForms >> Add New.

It will take you to the page where you will get the list of pre-made form templates for a quick start. You just have to select a form template by clicking on the ‘Use Template’ button as indicated below.
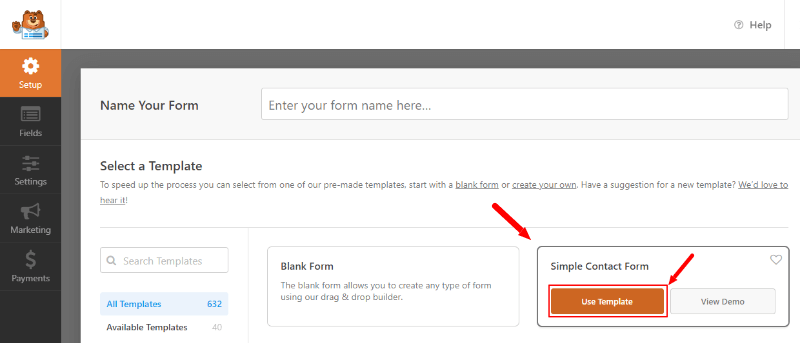
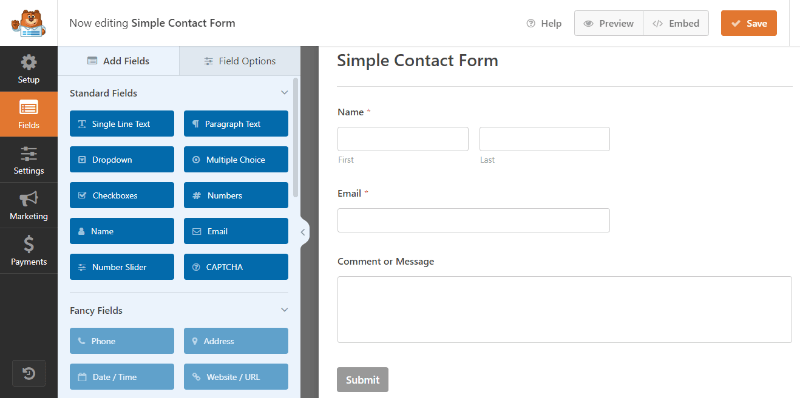
You will get the pre-made form template as shown in the image below. Each form template contains pre-added form fields to help you quickly create any forms in minutes.
WPForms comes with 800+ pre-made form templates. Select a form template as per your requirements and move further with it.
Step 4: Add More Fields and Make Customizations
The pre-made forms already contain pre-added fields that are enough to collect customers’ data. However, WPForms comes with a drag-and-drop builder that you can use to easily add more fields to your forms. You can also make more customizations to the form.
Add or Drag-n-drop Form Fields
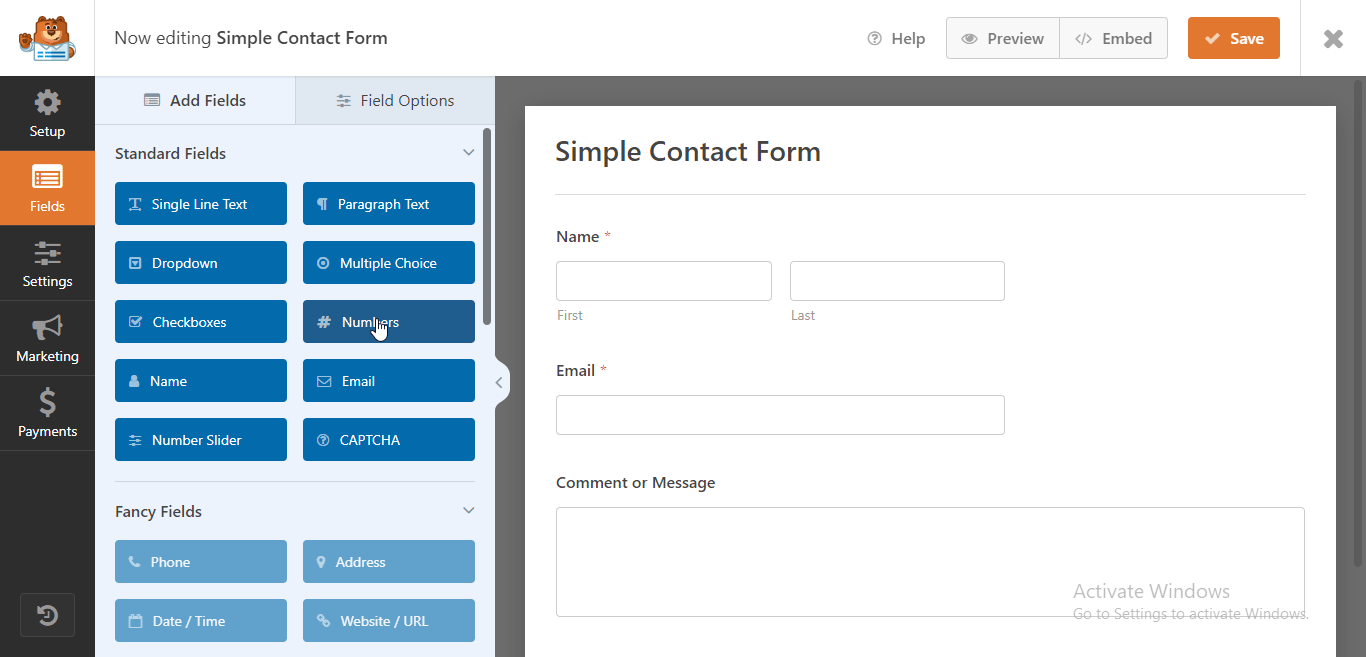
To add more fields to your form, WPForms has an easy-to-use drag-and-drop form builder and editor. If you want more fields to your form, you just have to choose a form field given on the left side of the screen.
After you decide on the form field, you can drag-n-drop it to add to your form. The below image shows the process of adding more fields to your form using drag-n-drop builder.
Make Form Field Setting Options
To collect the required data according to the form field, you have to make form field settings. Each form field has different setting options in WPForms built according to the need of the customer’s data.
To get the form field settings options, you just have to click the form field. After you click the field, you will get its settings options on the left-hand side of the screen under the ‘Field Options’ tab as shown in the image below.
There are three field setting options tab that are General, Advanced, and Smart Logic.
Let’s start with the ‘General’ form field setting option.
In the ‘General‘ field setting option, you can make settings like Label, Format, Description, etc. You can also make fields required with this setting option.

The Advanced setting option is useful to make settings like Field Size, Placeholder, Default Value, Name, CSS Classes, Hide Labels, and Hide Sublabels.
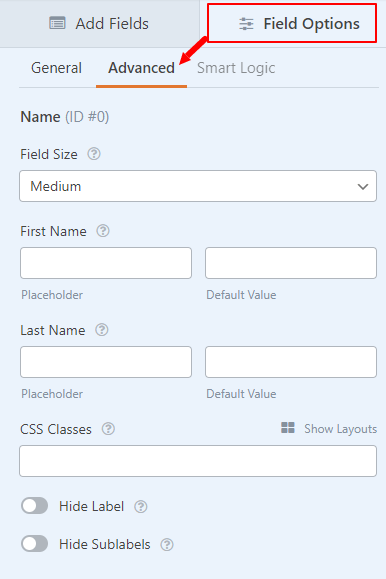
The third field setting option is the ‘Smart Logic’ field setting option which is only for technical users. However, the ‘Smart Logic’ is not required to create a simple form for your WordPress website. That’s why we are not covering it in this post.
Step 5: Configure Form Settings
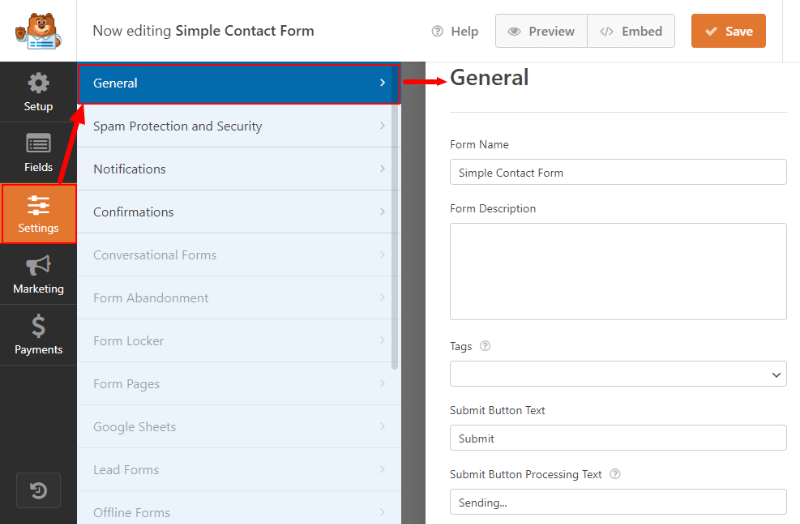
In this step, you can configure form settings like General, Security, Notifications, and Confirmations settings. So, let’s move further to make these settings.
General Settings
In this setting option, you can set up the Form Name, Form Description, Tags, Submit Button Text, Submit Button Processing Text, etc.
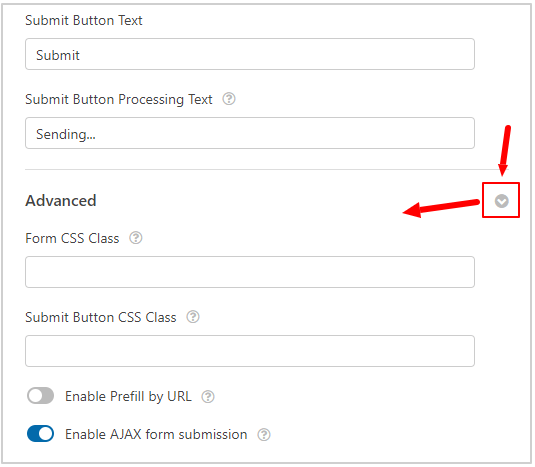
You can also make an advanced section to add Form CSS Class, Submit Button CSS Class, etc. If you want to allow users to submit the form without a page refresh, you have to just enable AJAX form submissions.
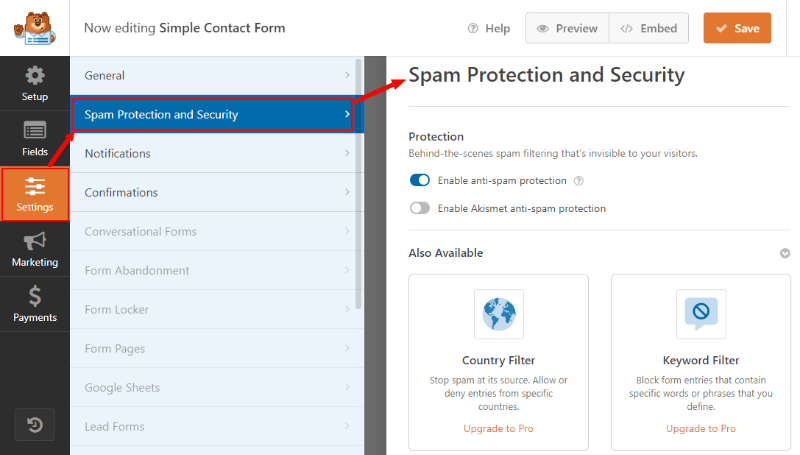
Spam Protection and Security Settings
To make your form secure and protect from spammers, you can enable an anti-spam protection system with this setting option. You can enable Akismet, Country Filter, Captcha, and many other security options.
These options can easily protect your form and stay away from spam and other threats.
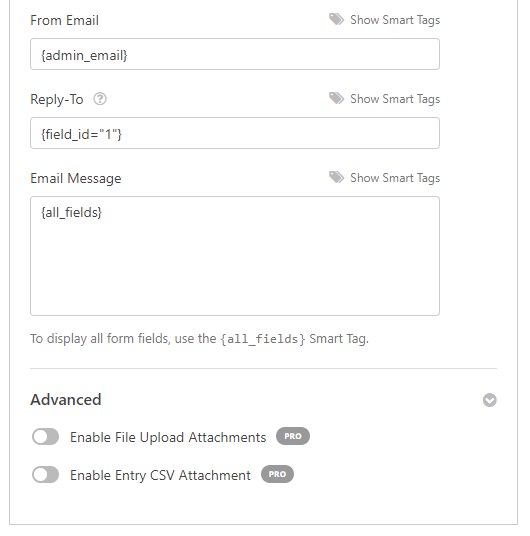
Notifications Settings
To send notifications to the owner of the website via emails when the visitors fill and submit the contact, you can make notification settings.
The notification setting options are Send to Email Address, Email Subject Line, From Name, From Email, Reply-to, and Email message. Their fields are already filled with dynamic shortcode that you can leave as it is.
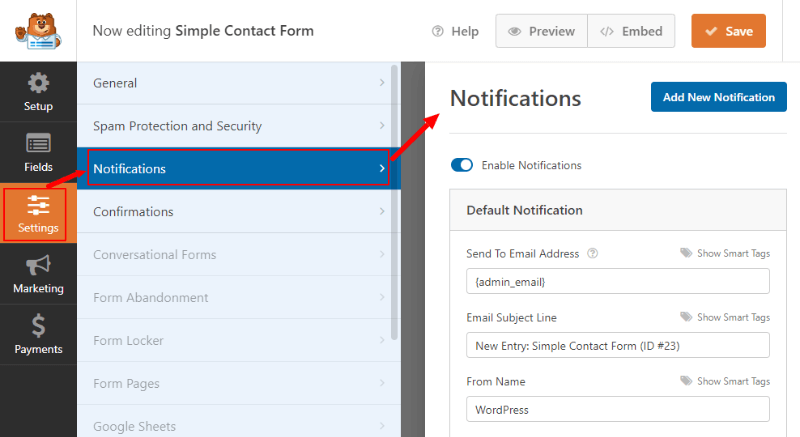
You can also collect attachments via emails from the contact form. It just requires enabling the file upload attachment option under the advanced notification setting options.
Confirmations Settings
To display confirmation messages of form submission to users, you can make this setting. Messages are pre-filled by default. However, you can change the confirmation setting options like Confirmation type, Confirmation message, etc.

You can also add a thanks page URL to redirect users to that thank you page after form submission.
Step 6: Embed Form to Your WordPress Website
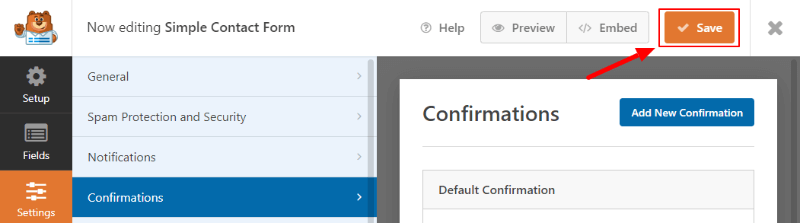
After the above steps are completed, click the ‘Save’ button to save all your hard work.
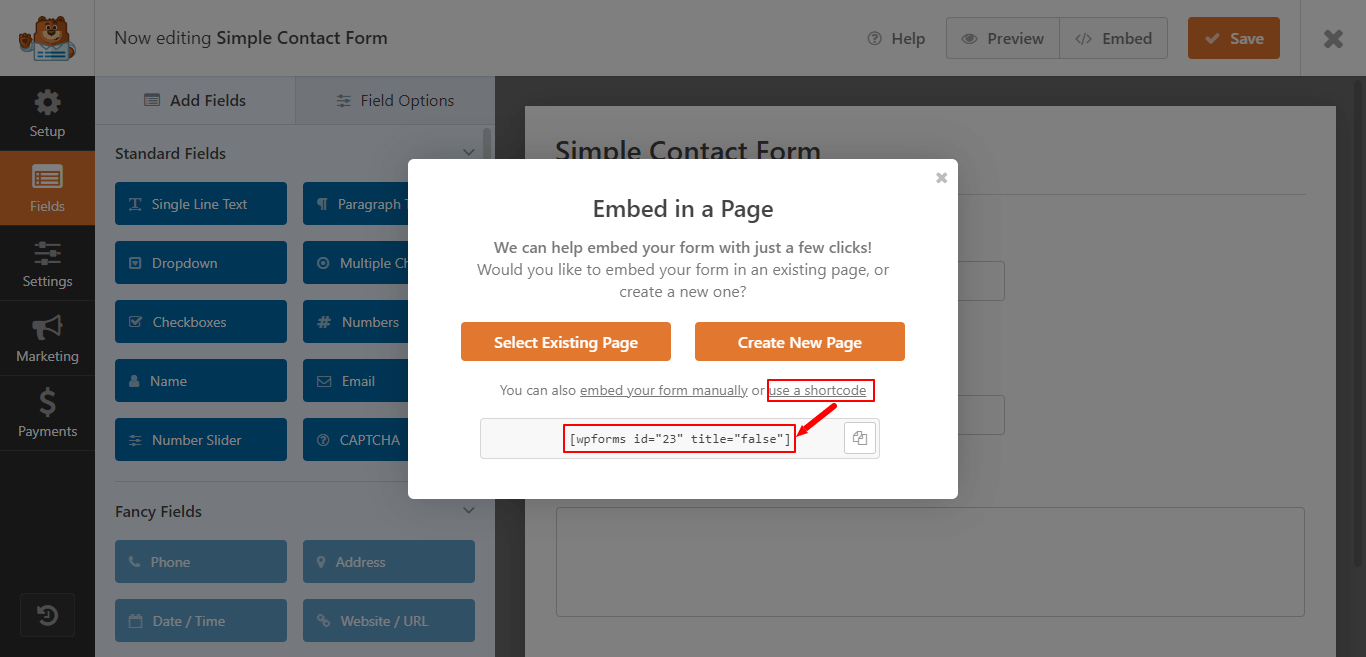
Now, your form is ready to embed or add to your WordPress website posts and pages. To embed the form on your WordPress website, click the ‘Embed’ button as indicated in the image below.

The easiest way to add the form to your WordPress website posts and pages is by using the shortcode. To get the shortcode, click the ‘use a shortcode‘ link as indicated below.
You will get the embed shortcode as shown in the image below that you can click to copy. After that, paste it to your website page where you want to display the form.
Congratulations! You have successfully created a form in WordPress.
Now, you know how to create a form in WordPress. Each time your visitors fill out the form, the owner of the website will get an email that contains all users entered data. After that, you can start making communication to convert the users into your regular customers.