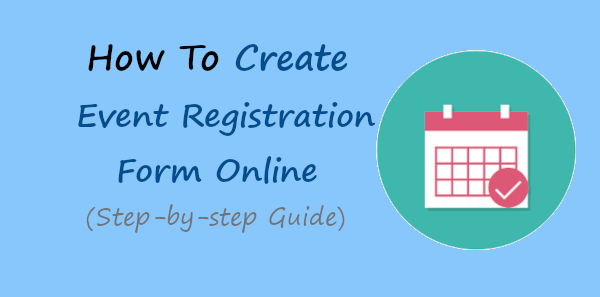
Do you want to create an event registration form online? It is useful to organize events sell tickets and collect records of attendees.
You may also want to easily track and manage records of the person who is attending the event. It can help you easily check who will attend the events with their contact details.
If you have team members who are going to help you with registration, you can share a login with them to register attendees.
In this post, you will get a step-by-step process on how to create an event registration form. So, let’s get started.
How to Create an Event Registration Form Online (Step-by-step)
Setting up an event registration form is an easier task when you have the right tool in your hand. The tool should give a better user experience and faster to create forms.
The platform should provide features like collecting and managing records, sending emails of registration, and mobile friendly to fill from anywhere and any device.
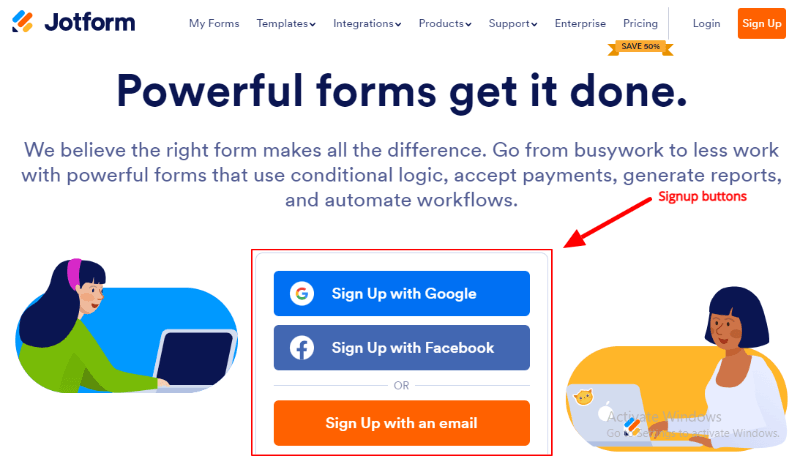
After trying and testing the best online form builder platforms, I recommend Jotform to our readers. Jotform provides all the features to easily create an event registration form. You can also collect and manage records and send emails in each registration.
![]()
Jotform also helps you easily export records in PDF and Excel format. If you want to search and find records, you can also do this with Jotform.
It comes with a rich library of 10,000+ templates including 438+ event registration form templates. These templates help you quickly create event registration forms in just a few clicks.
So, let’s move further to create an event registration form using Jotform.
Step 1: Signup Jotform to Create Your Account
First of all, create your account with Jotform. Please read our guide on how to sign up for Jotform and create your account.
After you complete the signup process, you can move further to follow the next step of this post.
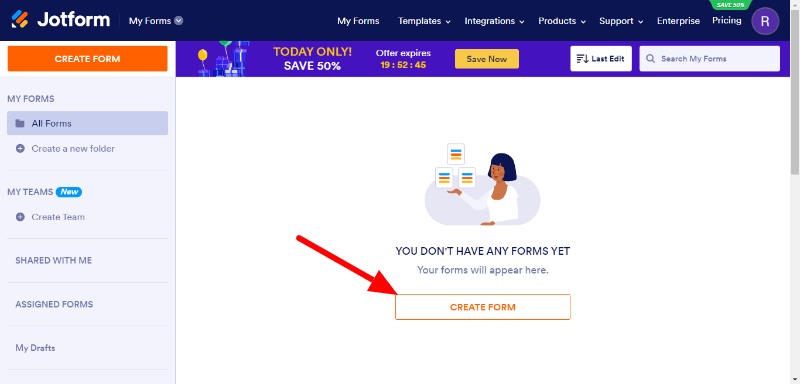
Step 2: Select the Event Registration Form Template and Start the Creation
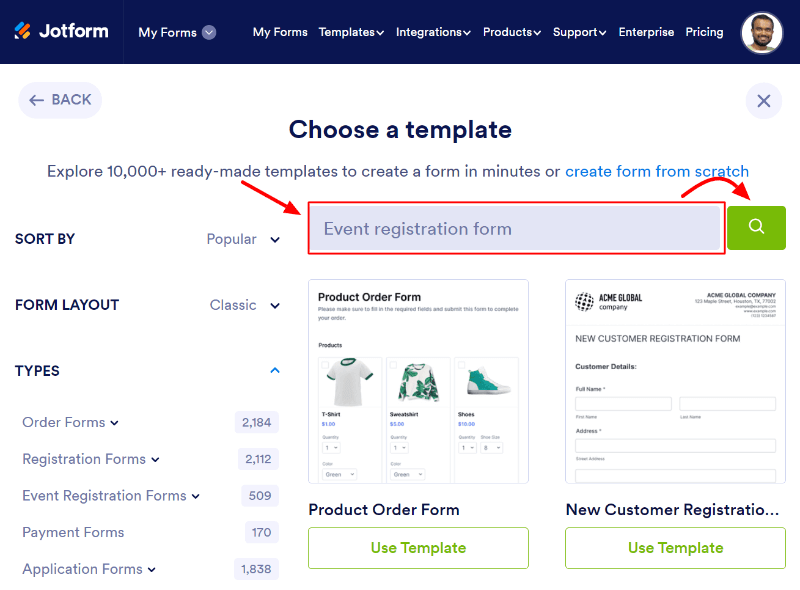
After you sign up with Jotform, you will be taken to the Jotform dashboard. Here, you will get the ‘CREATE FORM’ button that you have to click to start creating your event registration form with Jotform.
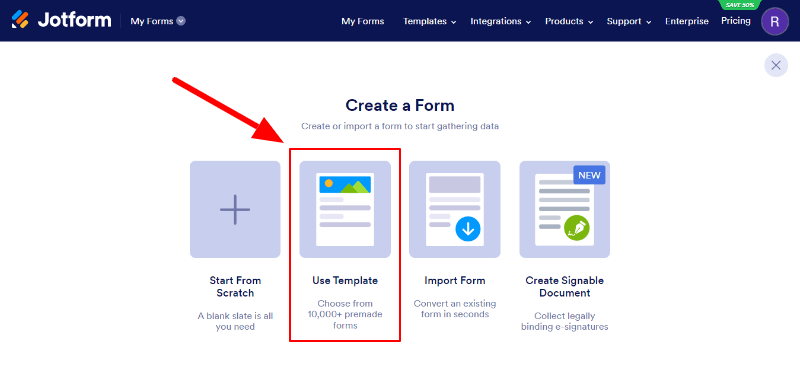
Next, select the option ‘Use Template’ to get all the pre-built templates that can help you quickly create an event registration form.
Now, to get the event registration form template, you have to enter the keyword ‘Event registration Form’ in the left-side search input box. After that, press the enter button or search () button to get the list of feedback form templates.
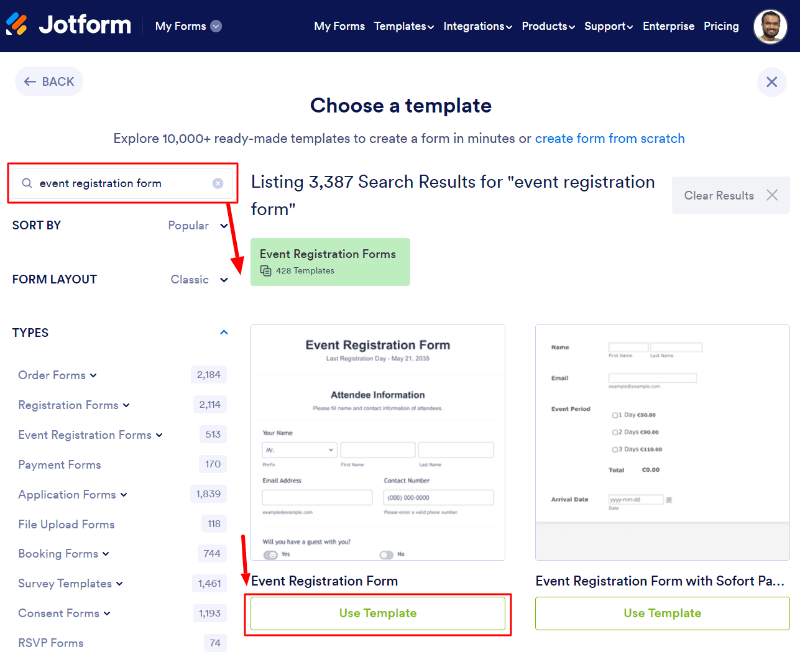
You will get a list of event registration form templates. Choose an event registration form template of your choice and click the ‘Use Template’ button to proceed with it.
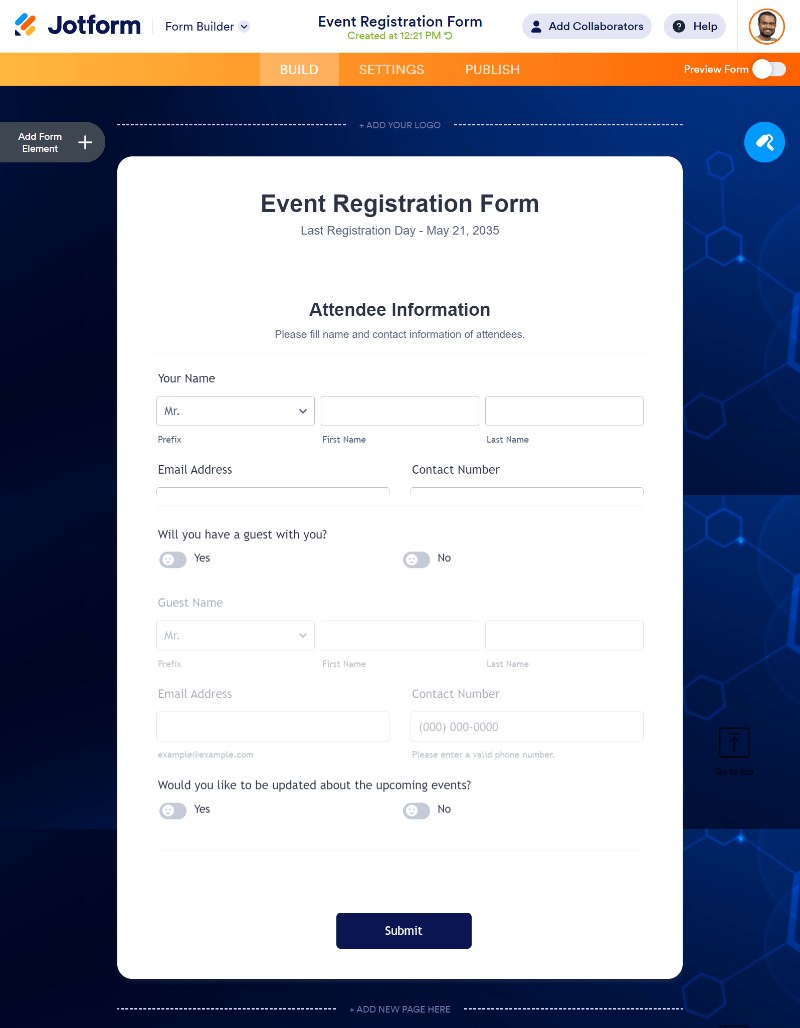
Next, you will get your selected event registration form template preview with pre-added form fields. All these fields are pre-added to help you easily create your event registration form in just a single click.
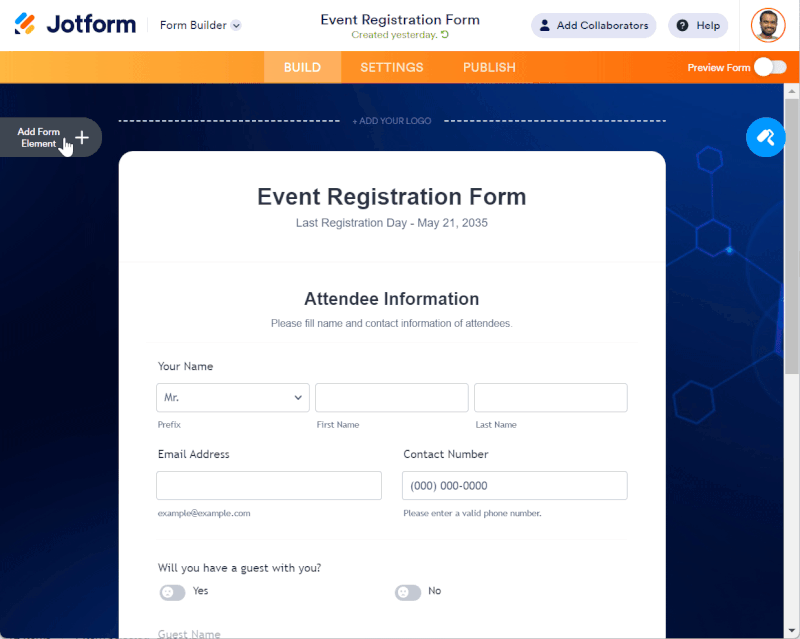
Add More Fields
The form fields are enough to collect the required registration data from attendees. However, if you want to add more fields to your form, you can use the drag-and-drop builder of Jotform. To add more fields, just drag and drop the field to your form as shown below.
Let’s move further to make field settings of the form.
Step 3: Make Event Registration Form Field Settings One by One
If you want to collect accurate required data from your attendees, you will have to make field settings. There are many fields available in the form. However, we are going to include the most common settings to make according to field type.
To get the field setting options, click the field for which you want to get the setting options. Now, click the setting icon ()to get the settings popup.
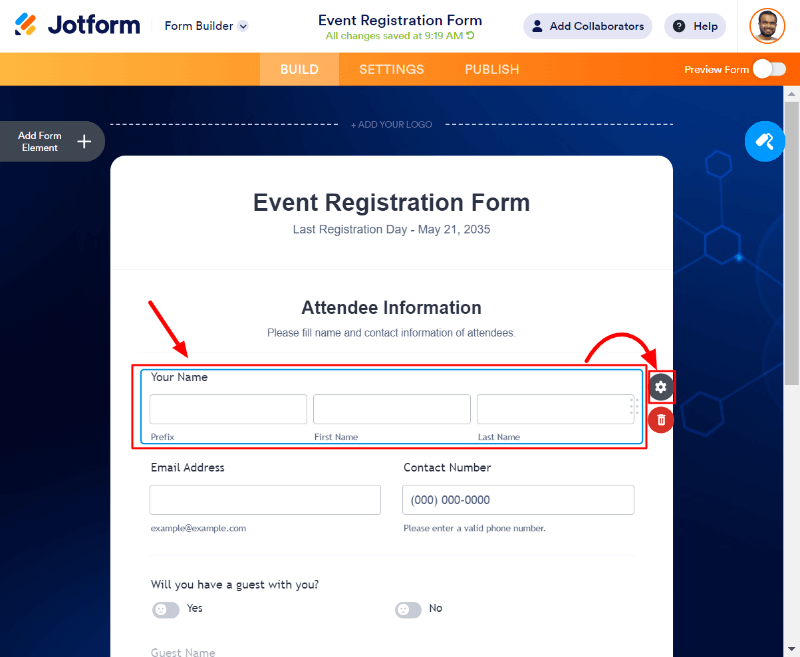
After you click the settings icon, you will get the setting options tab given below.
1. GENERAL
In this setting tab, you can make general field settings like Label, Alignment, Required, etc.
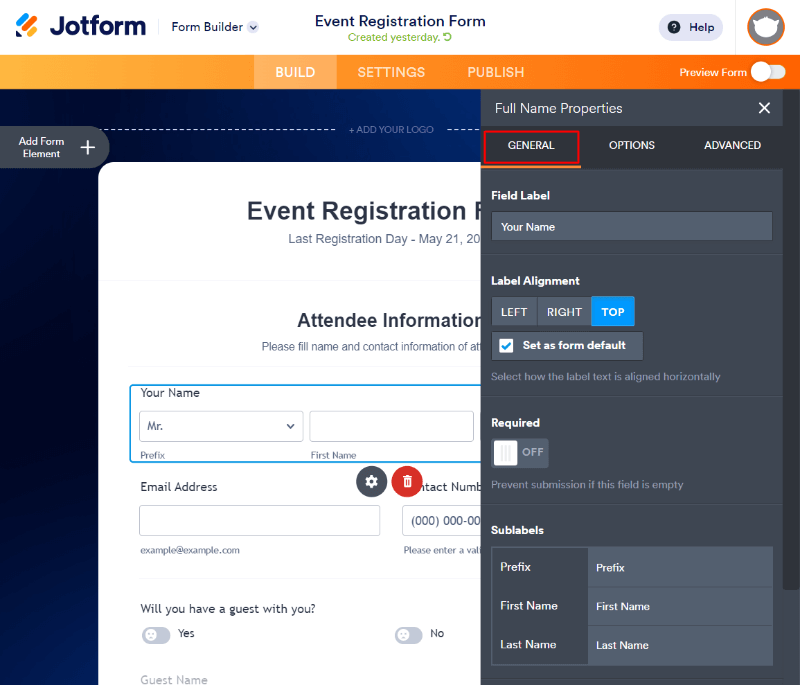
Set your labels for each field according to its data (Like ‘Name’ to collect the name of the person). Also, make fields required to do not allow registration without filling out the required field.
2. OPTIONS
The ‘Options’ tab is useful for setting field option settings like adding select dropdown Options, Width, Height, Predefined Options, Validation, etc.
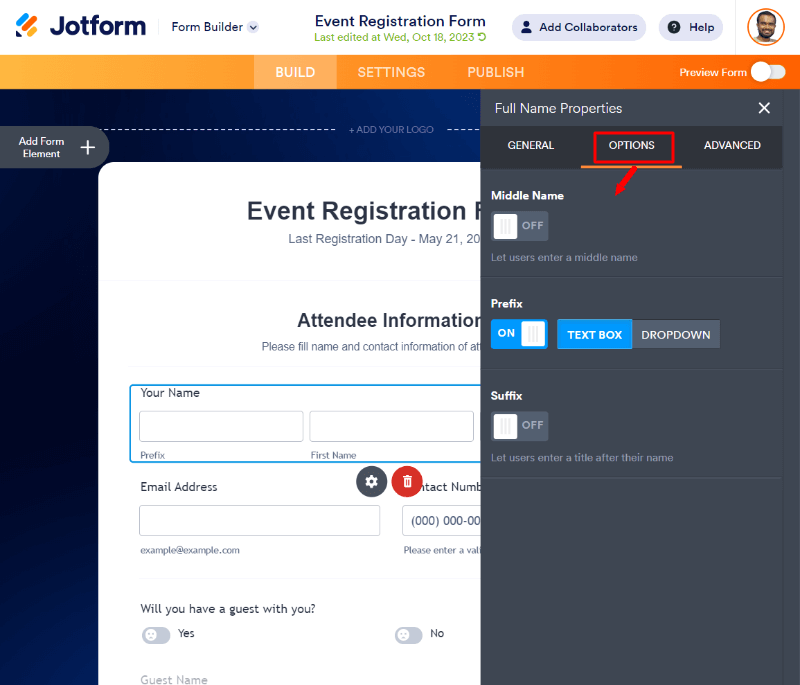
If you are using the dropdown, you can easily set up options for it. Validate fields according to the need of the data to get from the attendees.
3. ADVANCED
In the advanced field settings, you can make settings like Selected by Default, Hover Text, Read Only, Hide Field, Shrink, etc.

You can set the field as default selected and set a hover text to display on hover. If you want to hide the field, you can do so with advanced setting options.
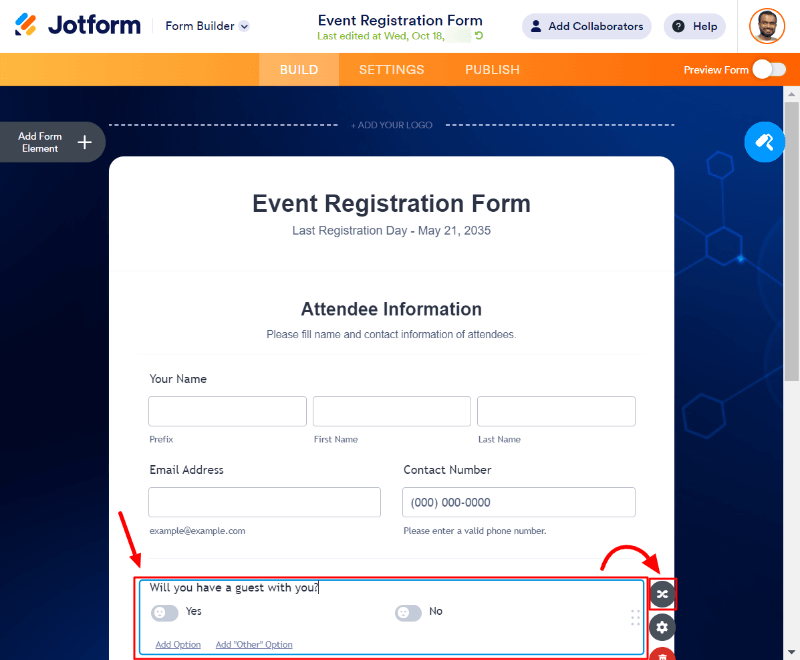
4. CONDITIONAL
The event registration form also contains the ‘Yes No’ question field that requires additional conditional settings. To make a conditional setting for the ‘Yes No’ field, click the field first. After that, click the conditional icon as indicated below.
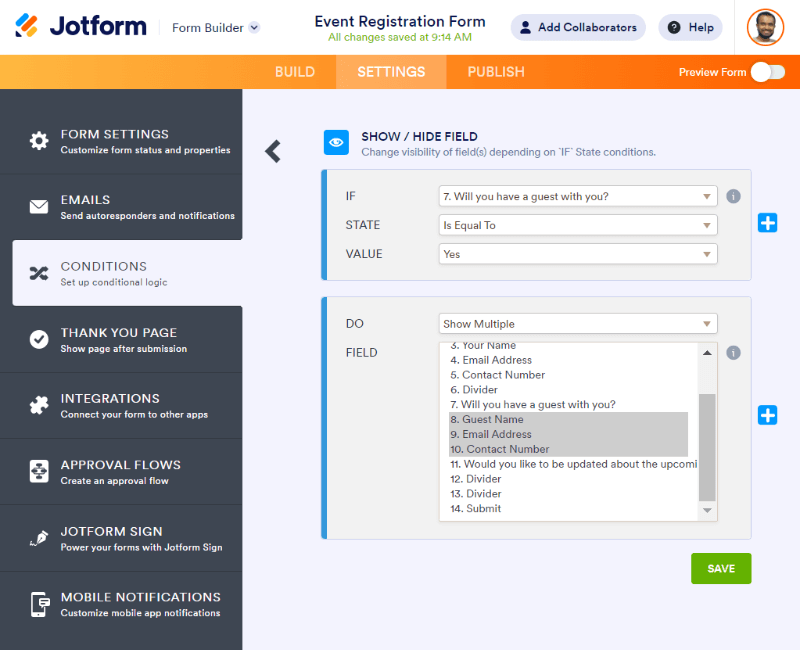
You will get the conditional settings for the field as shown below. To edit and set the condition according to your requirement, you have to take your mouse and click the edit icon () as shown below.
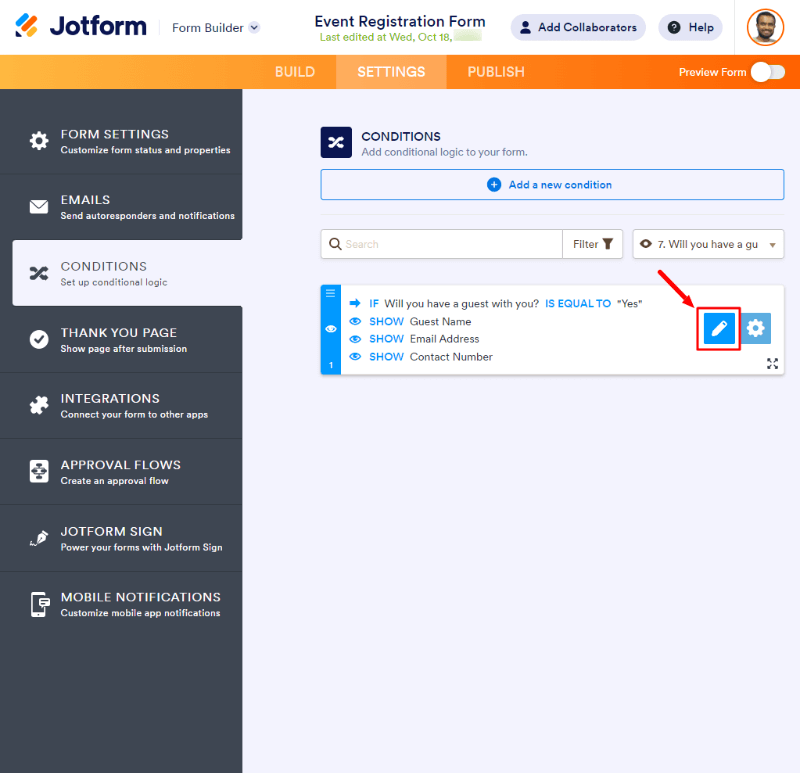
Now, you can set up the answer condition for each question in the ‘Yes No’ field. If the value of your question is yes, then you can show single or multiple options as per your requirements.
Now, you have made the common field settings and conditional field settings. You can move further to make notifications and confirmations settings.
Step 4: Setup Notifications and Confirmations Settings
To display confirmation messages of submissions and get notifications of submission, you have to make notification and confirmation settings.
In the notification setting, the owner will get an email containing all the attendee’s data submitted in the event registration form. If you want to display confirmation of form submission, you can set up confirmation messages.
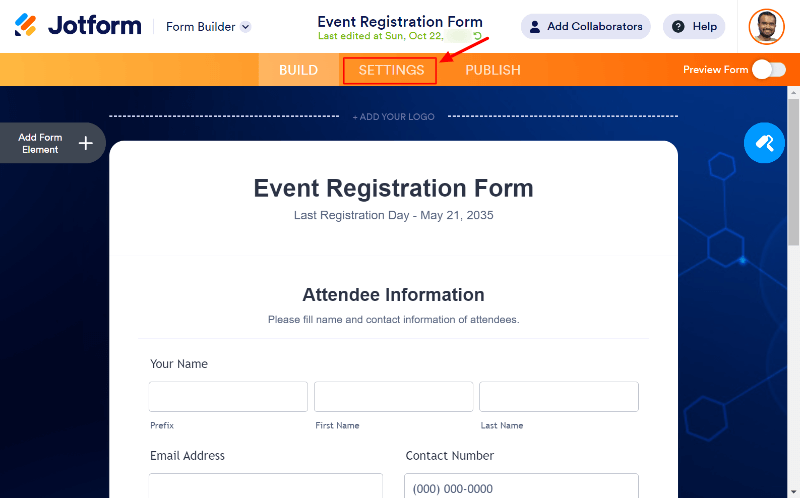
So, let’s make these settings get the form settings, click the ‘SETTINGS’ option as indicated in the image below to get all the setting options.
Now, let’s move further to make these settings.
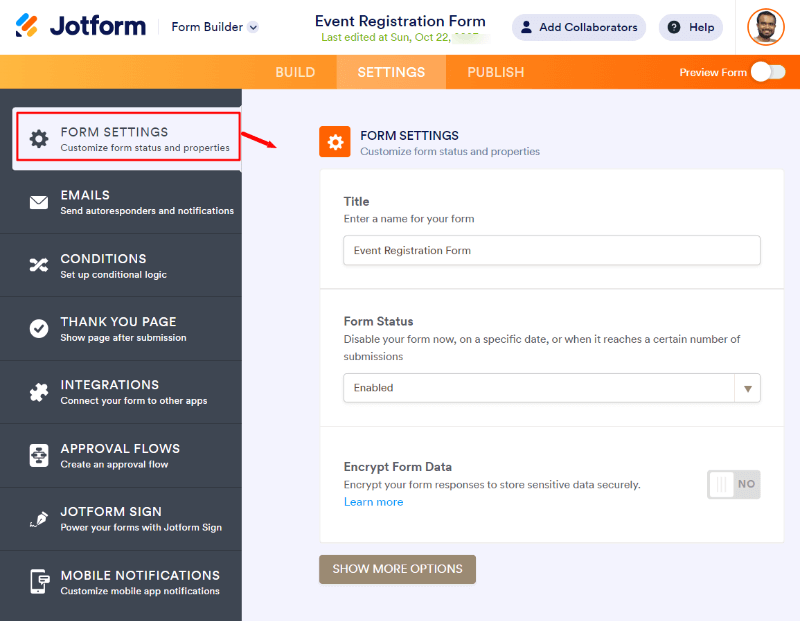
1. FORM SETTINGS
First of all, you will have to make the form settings like setting up the form name to identify from other forms. To get the form setting options, you have to click the ‘FORM SETTINGS’ option on the left side.
Here, you can make settings like Form Title, Status, Encrypted Form Data, etc. To get more form setting options, you can click the ‘SHOW MORE OPTIONS’ button.
2. EMAILS SETTINGS
This is a notification setting to collect attendees’ data via emails on form submission. So, let’s move further to make email notification settings.
Send Email Notifications to the Owner
To get email notifications when the attendees fill out the form, you have to click the ‘EMAILS’ option as indicated in the image below.
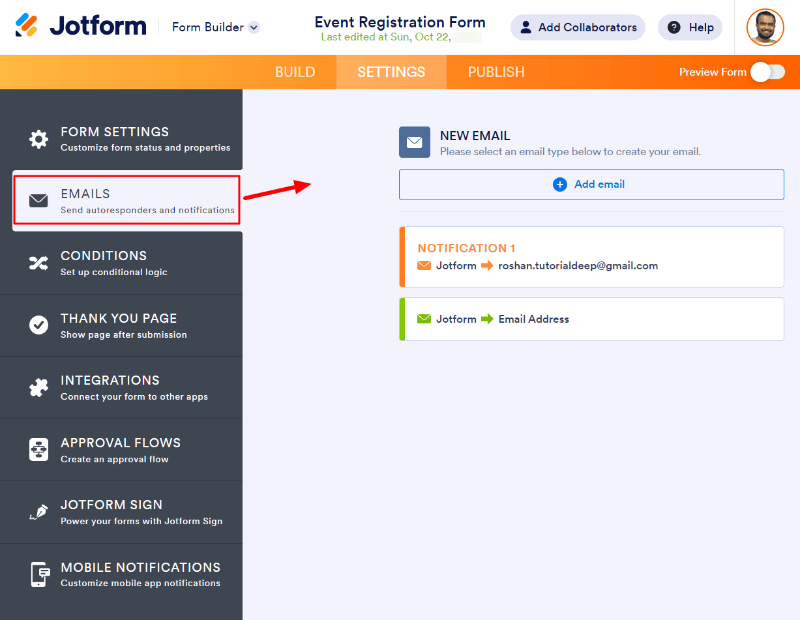
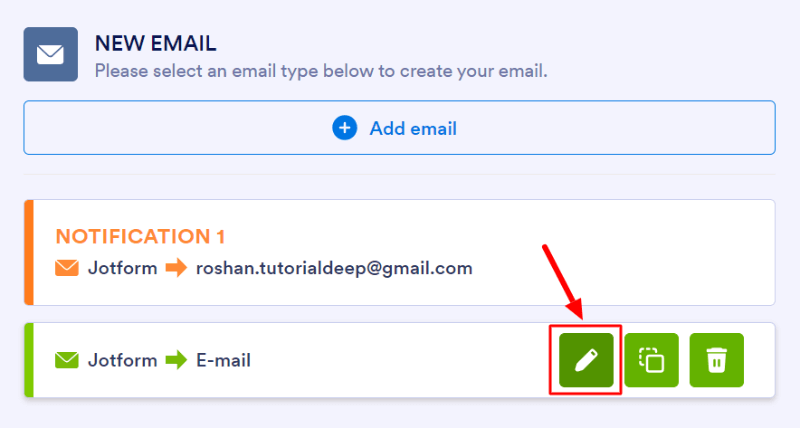
You will get the ‘NOTIFICATION 1’ option email setting option as shown below. Take your mouse to it and click the edit () icon as indicated below.
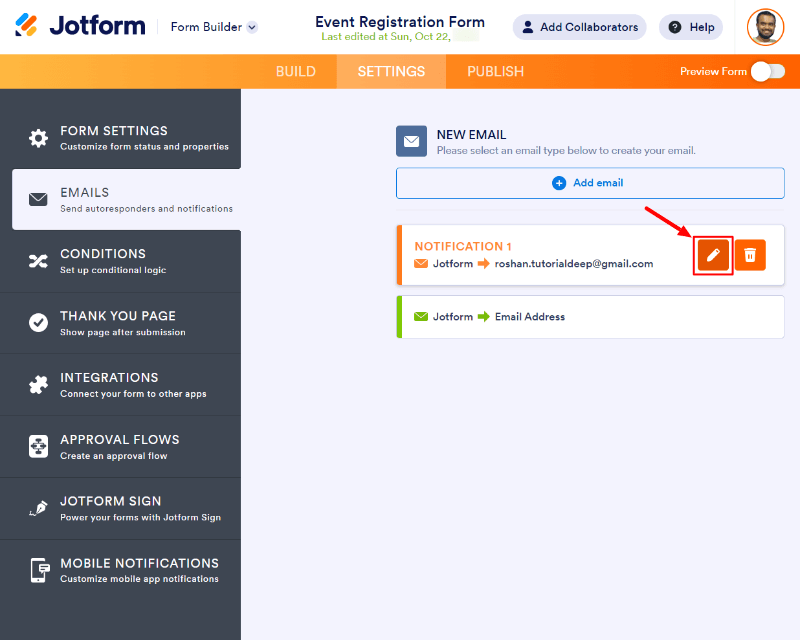
There are three email notification settings that you have to make to get email notifications of submissions.
The first tab is the ‘EMAIL’ tab where you have to set up the format of the email. Set a logo and inner content as per your requirements of emails to get in each submission.
You can also test the email format by clicking on the ‘TEST EMAIL’ button.

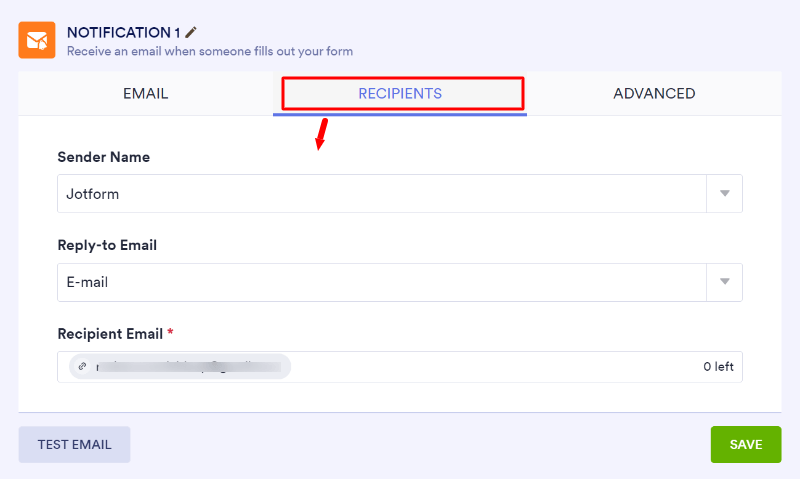
Next is the ‘RECIPIENTS’ tab where you can add the Sender Name, Reply-to Email, and Recipient Email. The recipient’s email address will be the email address of the owner.
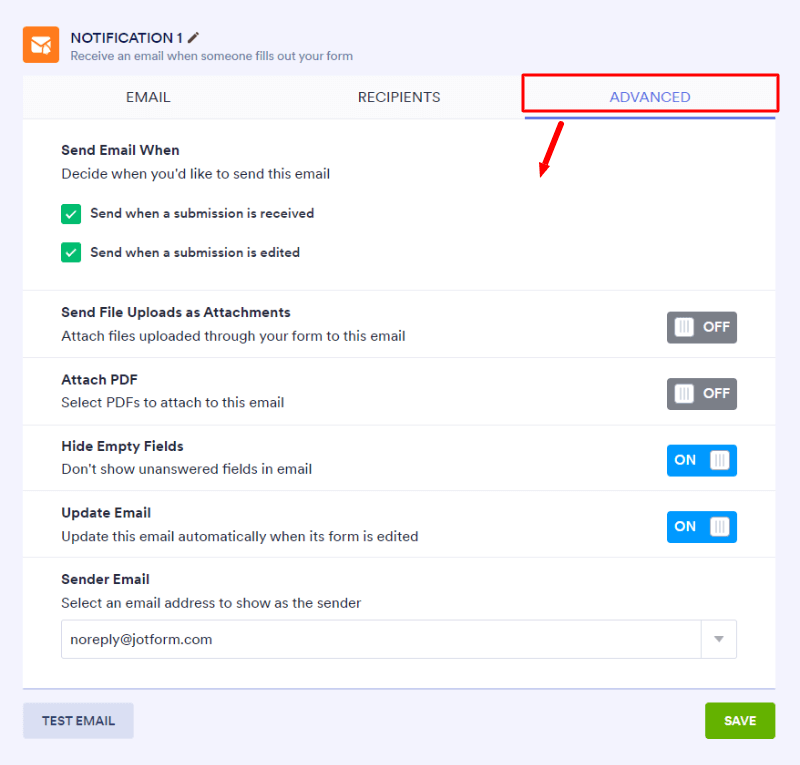
The last email notification setting option is the ‘ADVANCED’ where you can make advanced settings like sending emails, sending attachments, Attaching PDFs, hiding empty Fields, updating emails, and sending Email.
Similarly, if you want to send email notifications to the person who submitted the form, you have to click the edit () icon of the second notification as shown in the image below.
After that, you will get the same setting options ‘EMAIL’, RECIPIENTS, and ADVANCED options to make to same setup that you have made for ‘Notification 1’.
When you have done with the email notification settings, you will be able to get email notifications of submissions. You can move further to make the confirmation setting.
To give confirmation to the person who fills out and submits the form, you have to set up a thank you page to give a confirmation message.
So, let’s move further to set up a thank you page.
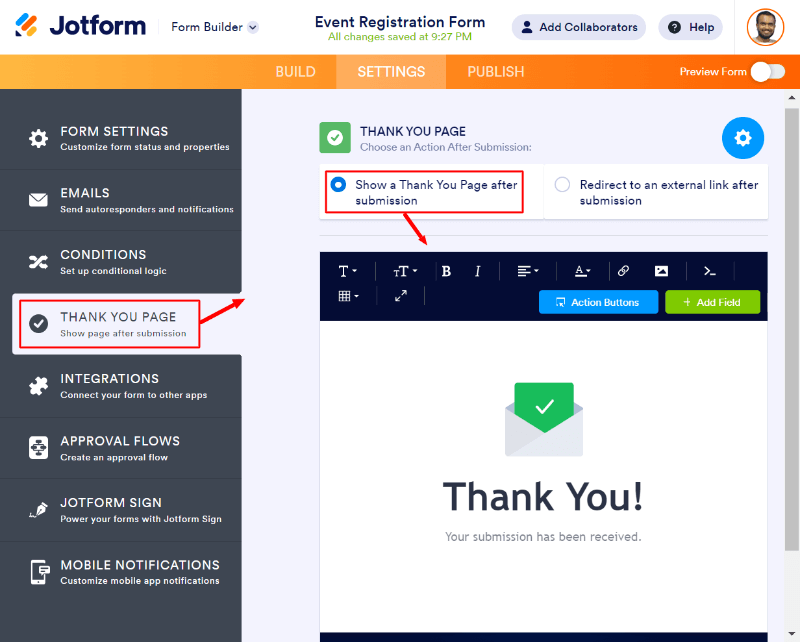
3. THANK YOU PAGE
A thank you page is useful to confirm form submission to the person who submits the form. You can say thank you to the person for using your form and give their details.
To get the thank you confirmation message set up, click the ‘THANK YOU PAGE’ option given on the left side. You will get the thank you page templates as shown in the image below.
This will display the thank you page template you set up.
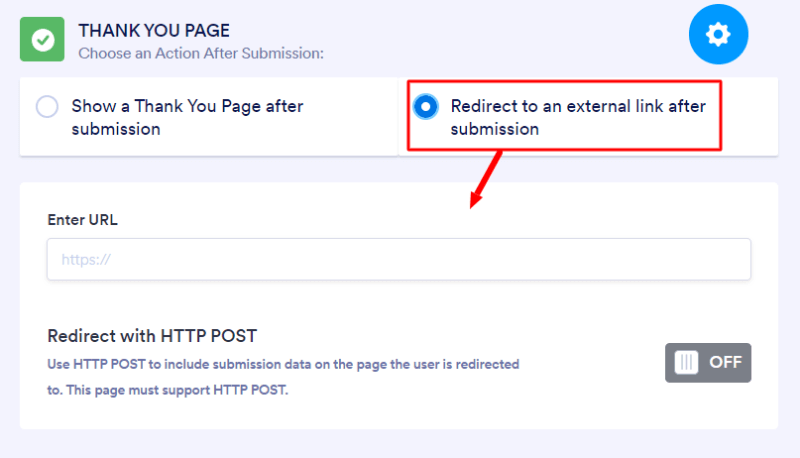
If you want to redirect users to your other created thank you page, you can also choose the second option. This will redirect users to the external link.
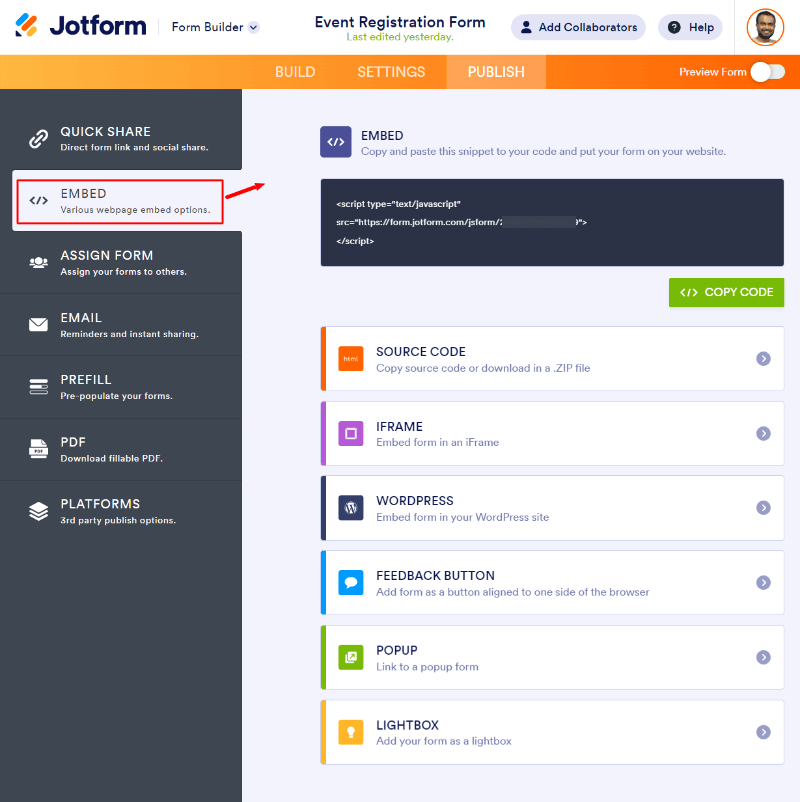
Step 5: Finally, Embed Event Registration Form to your Website
When you have completed all the above setups for the event registration form, you are ready to publish it to make it online.
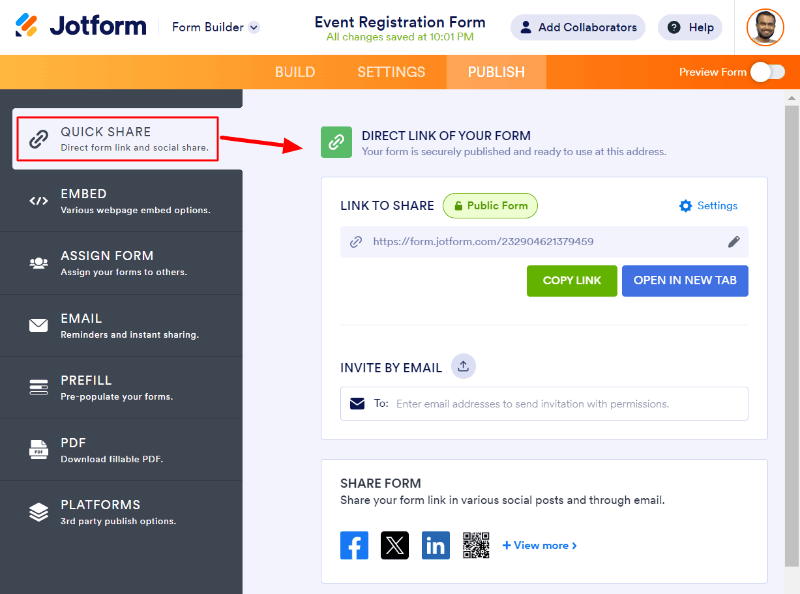
To publish your event registration form, click the ‘PUBLISH’ option as indicated below.

After you publish the form, you can choose to share the URL of the form by clicking on the option ‘QUICK SHARE’ as indicated below.
If you have a website where you want to display our event registration form, you can choose the ‘EMBED’ option as indicated below. After that, copy the embed code and place it on your website page where you want to display it.
Now, you can fill out the form and press the submit button to test the emails and records of attendees. Also, ask attendees to check their email inbox to see the email received. You can attach a PDF to send event tickets via email.
That’s all!