Are you looking to automate newsletters with RSS Feed campaigns?
RSS to email campaigns is the best option for bloggers to automatically send the latest blog post updates to their subscribers. You can send regular updates automatically without any need for manual creation of emails every time you publish content.
All you have to do is to signup with the best email marketing software and start creating RSS email campaigns.
In this post, you will learn a step-by-step guide on how to automate newsletters with RSS feed campaigns.
Affiliate Disclosure: At Tutorialdeep, we believe in transparency for our users. In this blog, there are some referral links. If you signup with these links we will earn some commission with no extra cost to you. We recommend these links because these are our trusted brands.
What is RSS Feed
RSS feed is a web feed that is useful for websites to allow users and applications to access website latest updates. The full form of RSS is Really Simple Syndication or Rich Site Summary. It is in XML format and easy to read by the computers.
It is easy to use features in websites to automatically convert the RSS feed files into the latest updates. After that, it can easily be sent in emails with heading and summary with the link to the latest posts. People can check emails and click on the links to go to your blog and read the latest post in detail.
Why You Should Automate Newsletters with RSS Feed Campaigns
You should automate newsletters with RSS feed campaigns for the following reasons:-
✓ Automatically Send Latest Website Updates: You can automatically send the latest updates about your newly created posts to your subscribers. The latest update contains the heading, summary, and link to the post.
✓ Maintain Relationship with Regular Visitors: By sending regular newsletters to your subscribers, you can build a strong relationship and reputation with them. They feel lucky to join you when find your post content useful to solve their problems.
✓ Analyze Readers to Improve Performance and Engage the Audience: You can use tracking tools to track the performance of your newsletters. It can help you to find which subscribers are more engaged and which ones are not. You can create more engaging content to improve your performance more.
✓ Save Time and Focus Only on Content: Sending regular updates to your subscribers automatically can help you save your valuable time. You don’t need to create manual emails each time you create new content on your blog. It’s easy for you to focus more on content rather than creating regular emails manually for your readers.
✓ Increase Traffic and Popularity: Automating newsletters brings you more traffic to your blog without any extra effort. You can increase the popularity of your blog by sending regular updates to your subscribers.
How to Automate Newsletters with RSS Feed Campaigns
To automate newsletters with RSS feed campaigns, you can use the SendInBlue all-in-one email marketing platform that can fulfill all your email marketing needs. It comes with easy to use interface or email builder to easily create and send emails in minutes.

SendInBlue is one of the most trusted email marketing platforms to easily create email marketing campaigns, contact management, email automation, social media marketing, Facebook ads, and many more at one single platform.
You need to follow the step-by-step process given below to automate newsletters with RSS feed campaigns:-
Step 1: Signup and Create an Account with the Best Email Marketing Platform
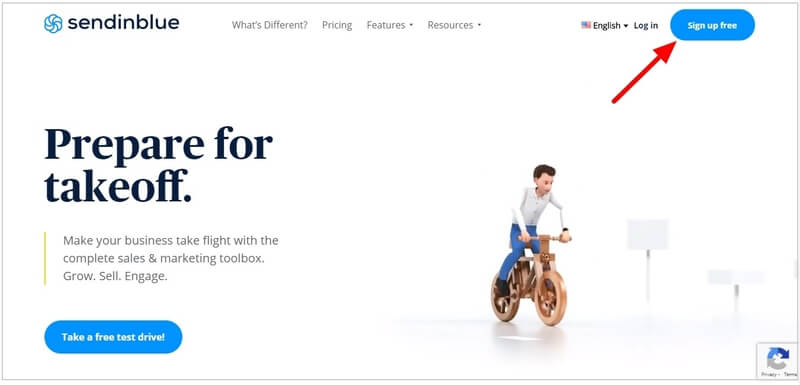
First of all, open the SendInBlue homepage.
→ Click Here to Go to SendInBlue Homepage
On the homepage, click the ‘Sign up free’ button given at the top right corner of the page.
An account creation form will open where you have to fill your name, email, and password for the account. After that click on the ‘Get Started’ button to go to the next page.
You can also create a free account using your Gmail account by clicking on the ‘Sign up with Google’ button.

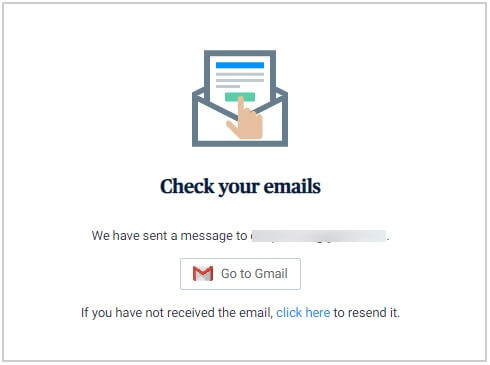
They send you an email to your above-provided mail id to validate your account. Login to your email id and click on the verification link to confirm your email id for the SendInBlue account.
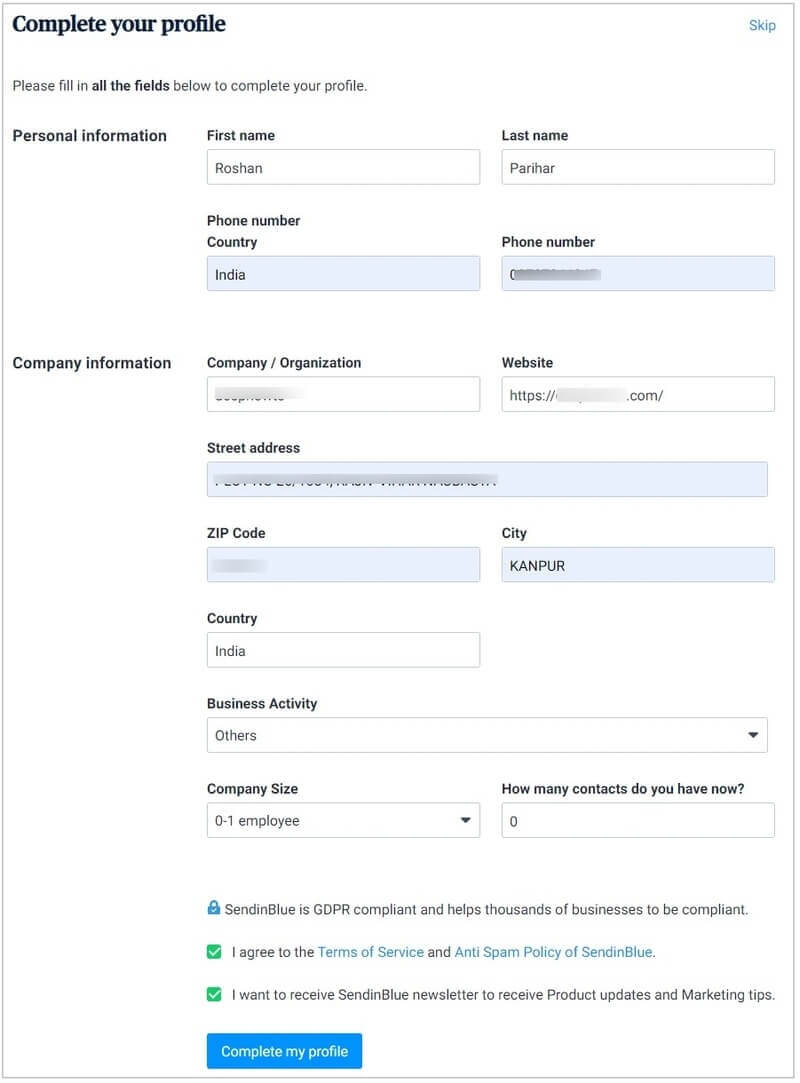
You have to now provide all your details to the form as given below to complete your profile for the account. Fill your personal information and company information in the form.
Also, click the checkboxes to accept that you are agreeing to their terms and conditions and receive regular updates from SendInBlue.
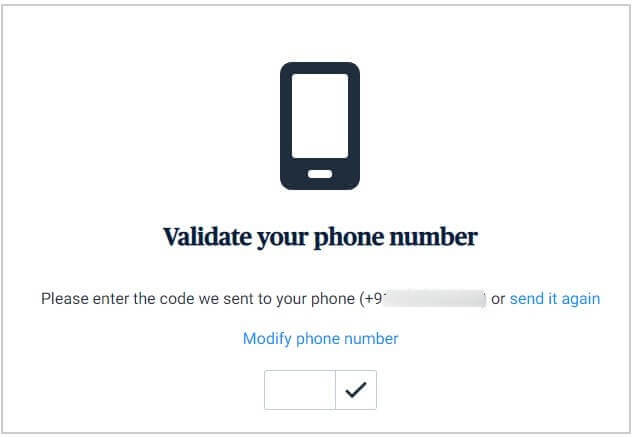
In the above form, you have provided your phone number and you have to validate it using your mobile.
They will send you an OTP to your mobile number that you have to enter in the input box given below. After that, click the tick(✓) mark to validate your phone number.
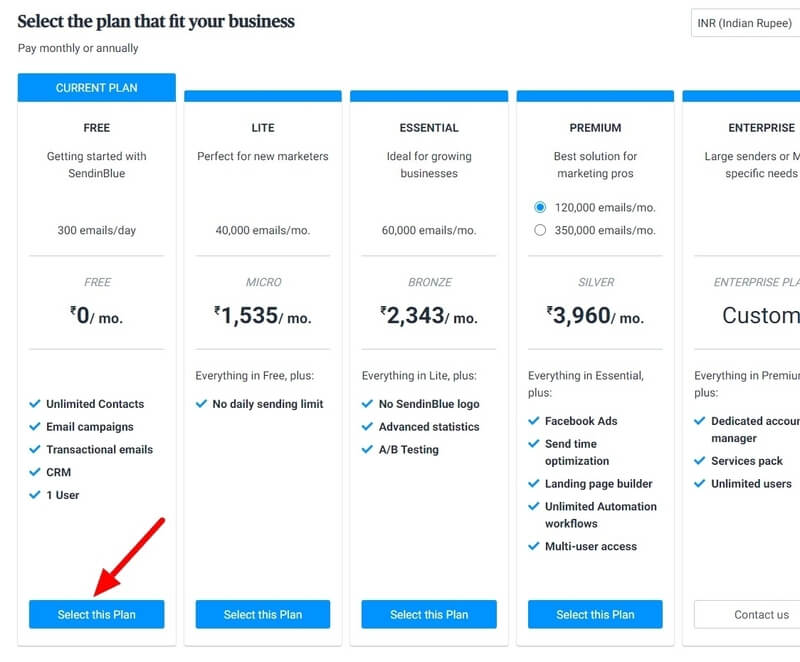
Now, it’s time to select the plan for your SendInBlue account. If you have just started email marketing, you can choose the ‘FREE’ plan by clicking on the button as indicated below. Don’t worry, you can upgrade to a premium plan in the future when you need more advanced features for email marketing.
If you want to create SendInBlue account with the premium plan, I recommend you to select its ‘ESSENTIAL’ plan that provides all the essential features at one single package.
After you have done with selecting your plan, it will take you to the SendInBlue dashboard. The first appearance of the dashboard is as showing in the image below.

To activate the SendInBlue account and start sending a regular email, you need to complete your profile, add contacts to your email list, and schedule your first email campaign that can be an automated RSS feed campaign.
As you have completed your profile above, you need to create an email list and add contacts to it.
So, let’s start adding contacts to your email list.
Step 2: Add Contacts to Your Email Lists
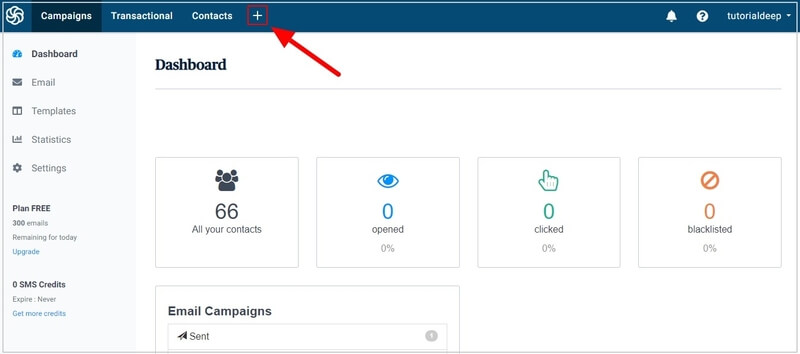
To create an email list and add contacts to it, go to the menu option ‘Contacts’. A page will open where you have to click the ‘Add a contact’ button given at the top right corner and below the header.

A form will open where you have to fill the contact details like email, name, mobile, and others. If you already have an email list, you can select the email list to add the contact to it.
However, if you don’t have an email list, you can create a new one by click on the button ‘Add a new list’ as indicated in the image below.
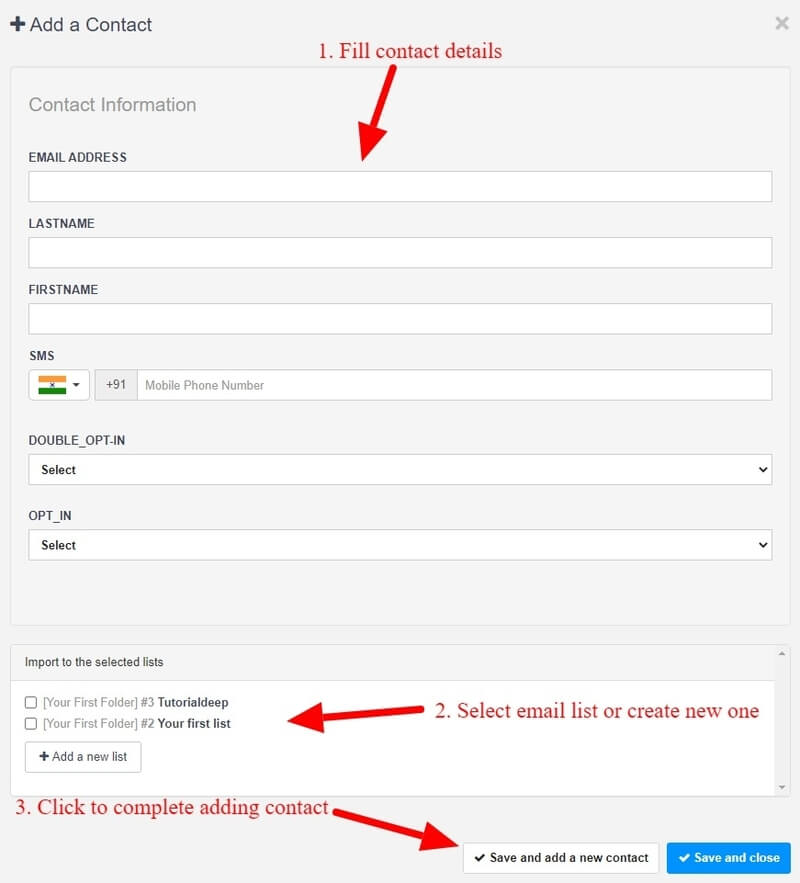
After you have done with the filling the form, click the ‘Save and add new contact’ to save the contact and again fill the form to add more contacts. You can also click the ‘Save and close’ button to close the form after saving it to the email list.
Let’s start creating the RSS feed email campaign to automate newsletters.
Step 3: Create Automate Newsletters With RSS Feed Campaigns
On the SendinBlue dashboard, click the plus(+) sign button given at the top of the website as indicated in the image below.
This opens an ‘Apps and Integrations’ page as showing in the image below. Here, you have to click the ‘Integrations’ tab that contains the option for the RSS campaign.

Now, scroll down your screen to see the various integrations options.

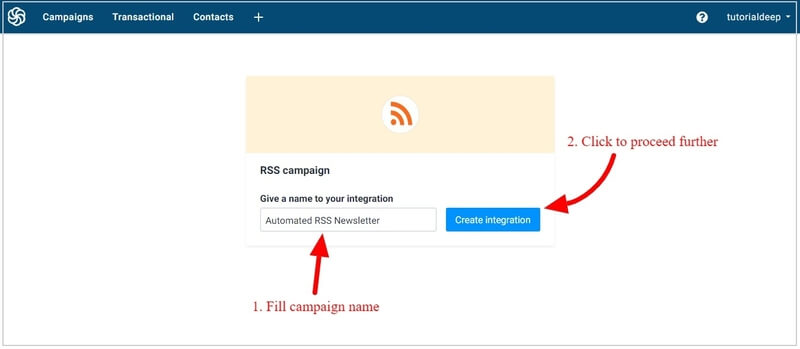
Click the ‘RSS campaign’ as indicated below to start creating the RSS feed campaign.

Name your RSS campaign by entering your campaign name to identify them from others. Click the ‘Create Integration’ button to proceed for the next step.
After entering your campaign name, enter your RSS feed URL where it fetches the latest website updates. If you are using WordPress, you can easily get the RSS feed URL by adding the /feed at the end of each URL.
The below image showing my website TutorialDeep RSS feed URL. You can replace my website name with your website name to make your RSS feed URL.
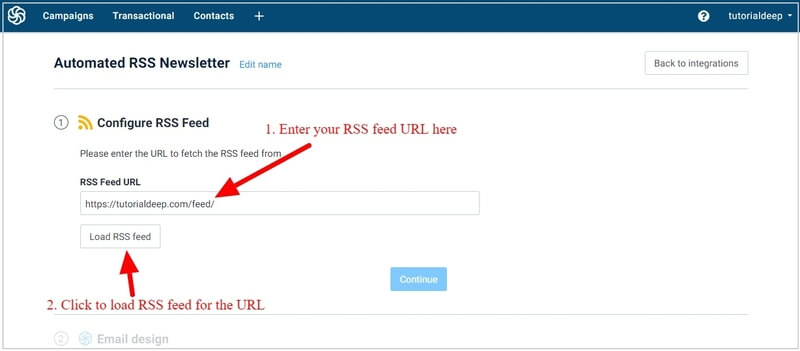
Once you have done with adding the RSS feed URL, click the load RSS feed URL to load RSS feed to the campaign.
After that, scroll down the screen and click the ‘Continue’ button to complete configuring the RSS feed.
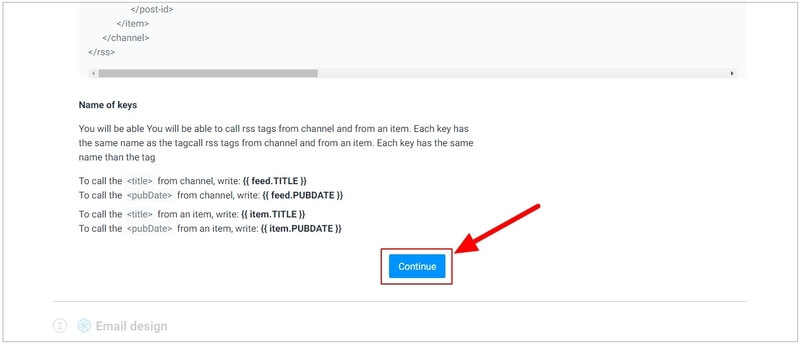
The above image showing that you have to use the notations given below to call the RSS tag from the channel and from an item.
To Call RSS Tag From Channel, you have to use:-
{{ feed.TITLE }}to call the<title>from channel.{{ feed.PUBDATE }}to call the<pubDate>from channel.{{ feed.DESCRIPTION }}to call the<description>from channel.
Call RSS Tag From an Item, you have to use:-
{{ item.TITLE }}to call the<title>from an item.{{ item.PUBDATE }}to call the<pubDate>from an item.{{ item.LINK }}to call the<link>from an item.{{ item.DESCRIPTION }}to call the<description>from an item.{{ item.CONTENT }}to call the<content>from an item.
Now, let’s design your campaign and change the look and feel as per your requirements.
Step 4: Design Your Automate Newsletters With RSS Feed Email Campaigns
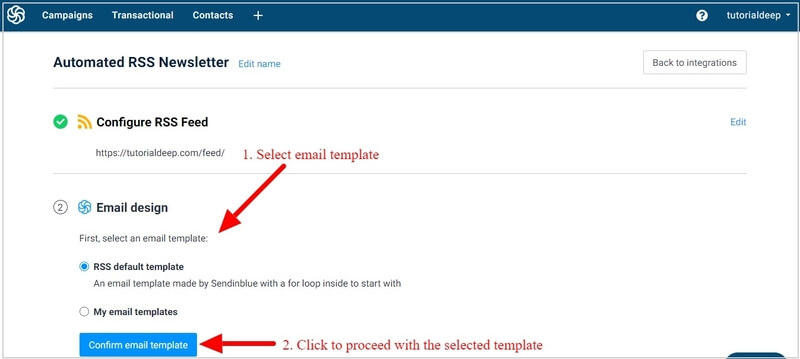
After you have done with creating the RSS campaign, you can start designing the best RSS campaign to send to your contacts.
There are two options to create the best design for your campaign. I recommend you to choose the ‘RSS default template’ to start with the email template created by SendInBlue to save your time. After selecting the email template, click the ‘Confirm email template’ button to proceed to the next step.
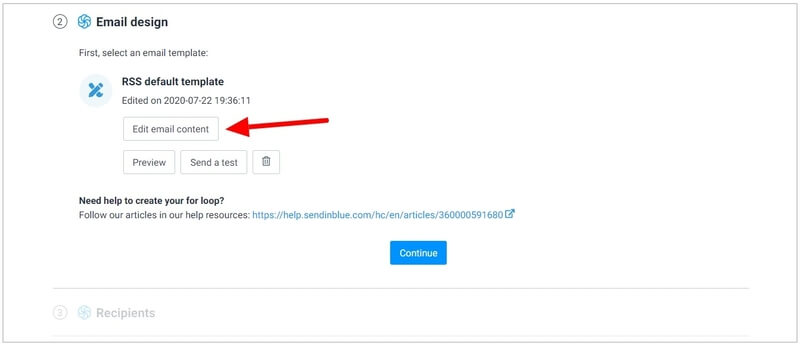
You can now start editing the template to design it as per your requirements. Click the ‘Edit email content’ button as indicated below to go to the SendInBlue template builder.
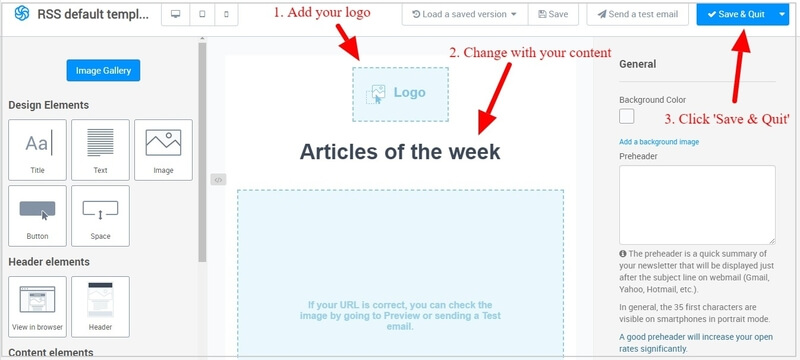
Here, you can edit and change each and every part of the template using the template builder. Add your logo, RSS tags, and change the layout as per your requirements. The RSS default template contains the dynamic content with a for loop parameters to start with.
You can drag-n-drop the different block elements given at the left-hand side of the template builder screen. Click the content that you want to edit and change them as you want.
The default template already comes with the added RSS tags useful for your automated newsletters. These RSS tags are given below:-
{{ item.TITLE }}: Display the title of the published post in the RSS email.{{ item.PUBDATE }}: This code displays the published date of the post in the RSS email.{{ item.DESCRIPTION }}: To display the description of the post in the RSS email.
After you have done with designing your RSS email template, you can check the design by sending a test email to your email id. Click ‘Send a test email’ given in the image above to send a test mail to your email id.
Once you are satisfied with the design of your RSS email template, click the ‘Save & Quit’ button indicated in the image above to save the template and proceed to the next step.
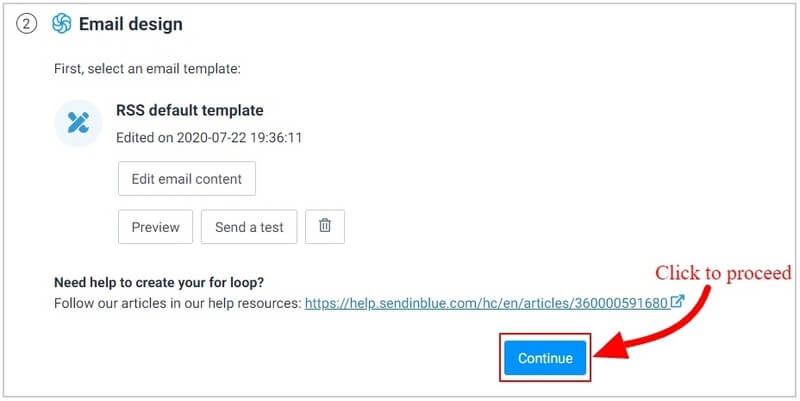
You can also check the preview of your RSS email template by clicking on the ‘Preview’ button given in the image below. Click the ‘Continue’ button indicated as in the image below to proceed to the next step.
Step 5: Select Recipient List For Automate Newsletters With RSS Feed Campaigns
As you have designed the template for your subscribers. It’s time to select your email list to automatically send RSS emails to them each time you publish a new post on your blog.
To select your audience email list, click the select dropdown, and select your email list to which you want to send regular automated newsletters.
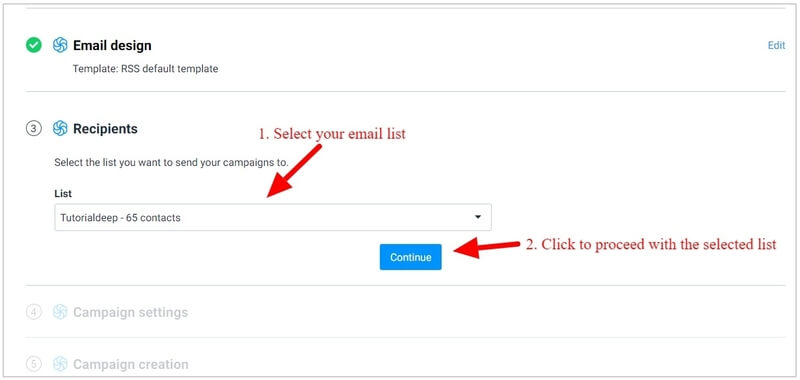
Click the ‘Continue’ button to proceed to the next step with the selected email list of subscribers.
Step 6: Make Campaign Settings
In this step, you have to provide a name to your campaign, subject line, from email, and from name.
You can use RSS tags described above to add to your campaign name and subject line. This will automatically generate the subject line according to your latest posts. The subject line is the first visible part in the recipient inbox, you can use the {{ feed.title }} RSS tag to display the title of the latest post in the subject line.
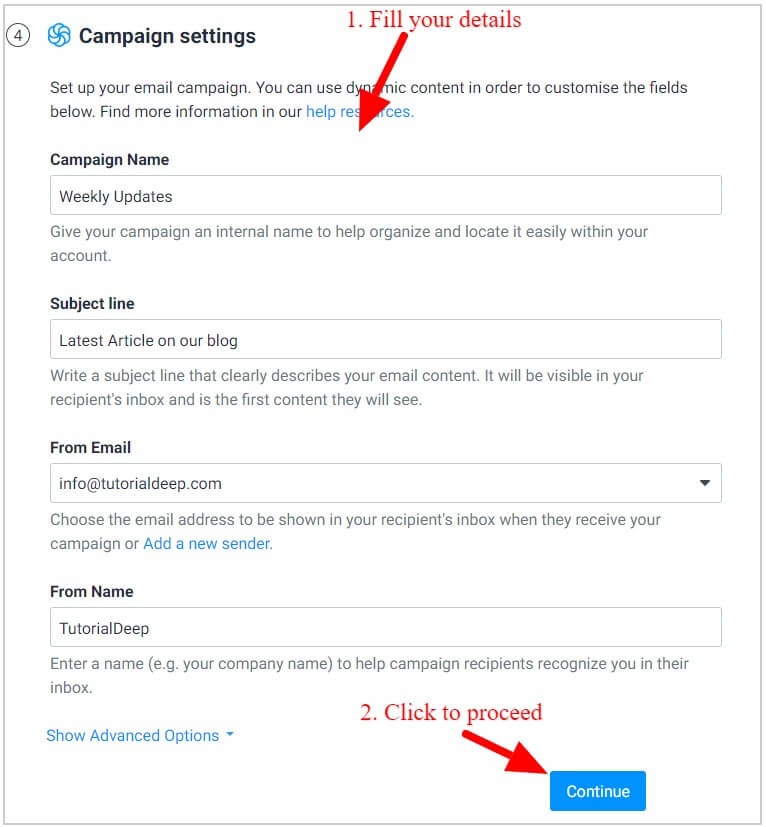
Once you have completed filling the details in the above form, click the ‘Continue’ button to proceed to the next step.
Step 7: Select Frequency For Campaign Creation and Mailing
Here, you have to select how often you want to send the automated newsletter to your subscribers.
Select the specific day of the week with the time to schedule your RSS email. You can also select the specific day of the month to send the automated newsletter monthly to your audience.

You can also define whether you want to send the newsletter automatically or manually to your subscribers.
If you choose the automatic send option, it will send your campaign as soon as it is created. If you choose a manual send option, it will save your campaign as a draft and send it when you decide to send it.
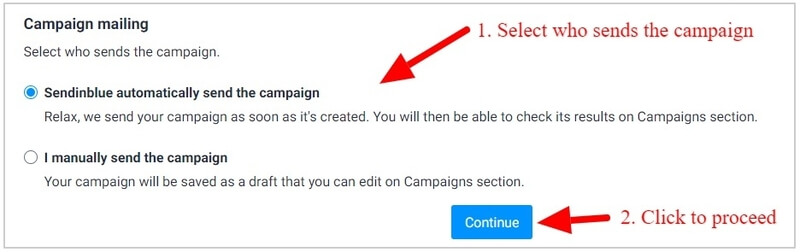
I recommend you to select the ‘SendInBlue automatically send the campaign’ to automatically send the RSS email when you publish posts on your blog. Click the ‘Continue’ button to proceed to the next step.
Step 8: Save and Activate Your Automate Newsletters With RSS Feed Campaigns
After you have done with all the setup given above, you can activate your campaign with this step.
There are two buttons in this step as given in the image below. You can save your campaign and decide whether you want to activate the campaign or make it inactive after you save it.
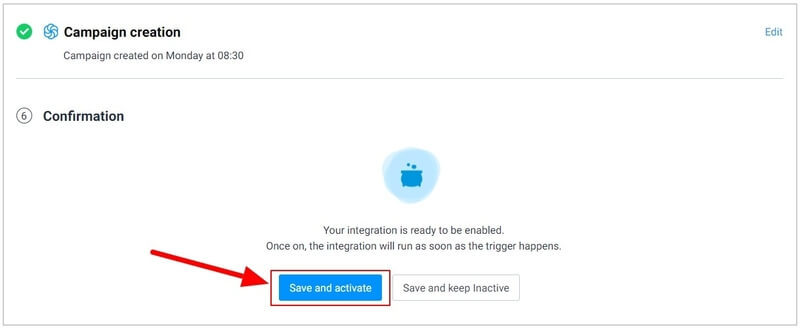
If you want to activate the campaign, you need to click the ‘Save and Activate’ button to start sending automated newsletters to your subscribers.
You will get a message as indicated below showing that your automated RSS newsletter has been saved.
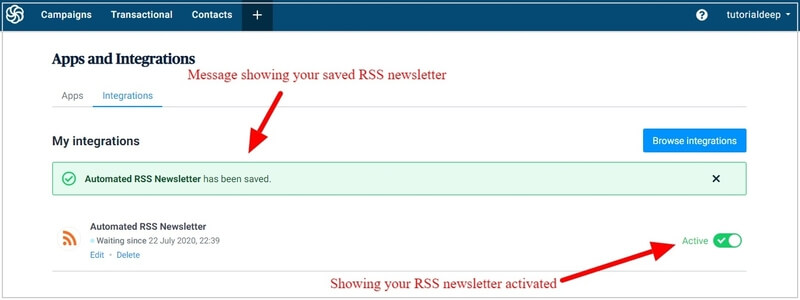
The above image showing your activated RSS email newsletter. This is the place where you can find a list of all your created RSS email newsletters at one single page.
That’s all!
You have successfully set up your automated newsletter with an RSS email campaign.
Now, each time you publish a new post on your blog, your latest post updates automatically send to your subscribers through RSS email campaign created above.
→ Click Here to Signup with SendInBlue Now (No credit card required)
Conclusion
You can create your automated newsletter RSS campaign and forget it on your website. It doesn’t require anymore configuration or regular manual creation to send RSS emails. It automatically sends emails to your subscribers containing the latest post of your website.
SendInBlue helps you to easily create RSS campaigns and design your template with a drag-n-drop email builder. You can use SendInBlue for all your email marketing needs. It is one of the best email tool and a great solution to grow your business with its free and premium plan.
I hope you like this post on how to automate newsletters with RSS feed email campaigns. If you have any queries regarding the tutorial, please comment below.
You may also like to read