In this post, Learn how to create an online job application form using Jotform. After creation, you can share your form with applicants or embed it on your website pages to display.
If you are a non-technical user, you need a tool that can help you easily create a job application form. When you have the right tool in your hand, you can easily build a job application without coding requirements.
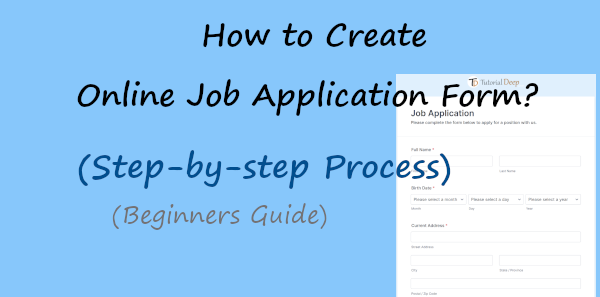
After trying and testing the best online form builder platforms, I recommend JotForm to our readers to easily create a job application form. It has more than 20 million users worldwide and comes with more than 10,000 form templates in all form category.
Jotform comes with 400+ pre-made job application form templates. These templates can help you easily create any job application form for your website in minutes.
You just have to select the job application form category to get all the templates with predefined fields. After that, you just have to select the template for a quick start.
Affiliate Disclosure: At Tutorialdeep, we believe in transparency for our users. In this blog, there are some referral links. If you sign up with these links we will earn some commission at no extra cost. We recommend these links because they are our trusted brands.
So, let’s get started to create a job application form with a step-by-step process.
How to Build Job Application Form in JotForm Without Coding (Step-by-step)
Here is the step-by-step process on how you can create a job application form using Jotform:-
Step 1 Create an Account with Jotform
First of all, open the Jotform website and click the signup button to create your account. There are various options to easily sign up with Jotform. You can sign up using your Google account Facebook account or email address to create an account with JotForm.
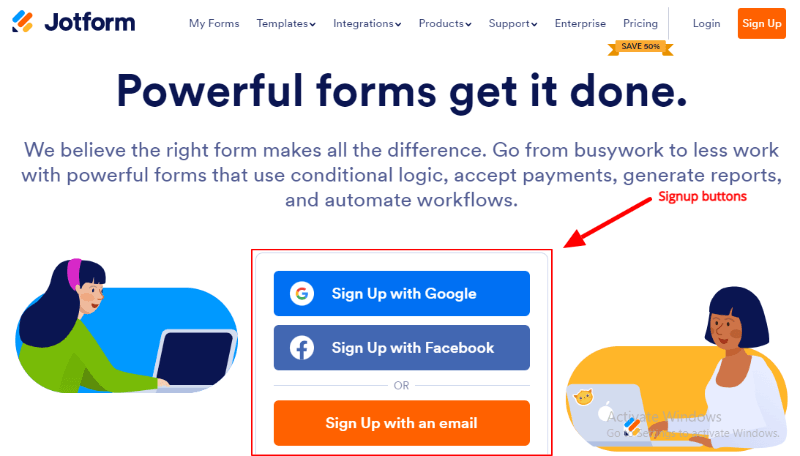
Choose the button option your choice to easily sign up with Jotform.
Step 2 Start Creation and Select a Template to Build Job Application Form with JotForm
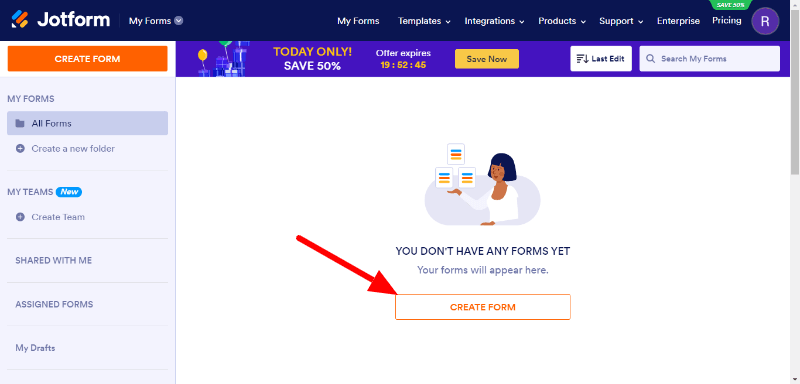
After creating an account with Jotform, It will take you to the dashboard where you have to click the ‘CREATE FORM’ button to proceed.
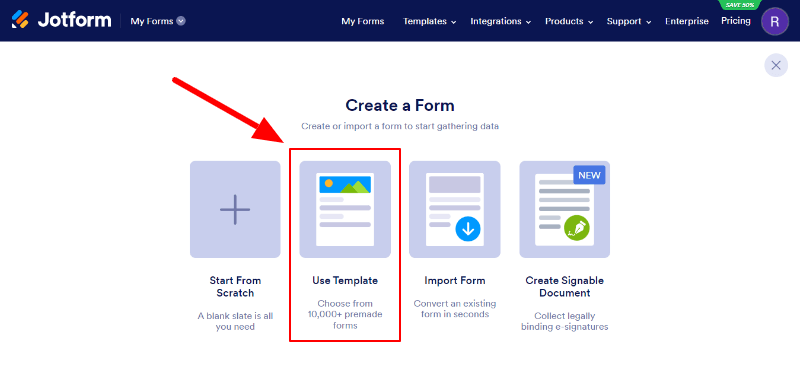
You will be taken to the page where you have to select the ‘Use Template’ option to get the pre-made job application form template.
Now, enter the search term ‘Job Application Form’ in the input box as given below and click the search icon () button.
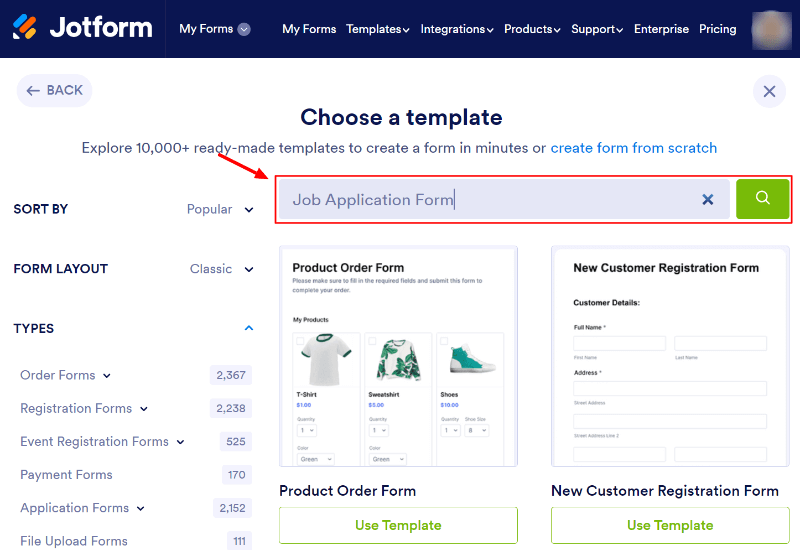
This will give you 400+ job application forms with beautifully designed pre-made templates. Click the indicated option as shown in the image below to get specially designed templates.
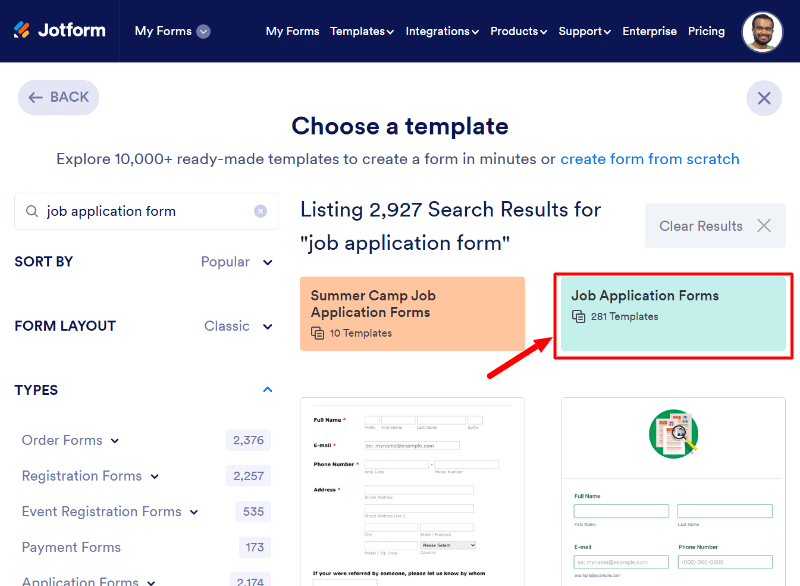
You will get the job application form templates as shown in the image below. You just have to click the button ‘Use Template’ given with the template to a quick start.
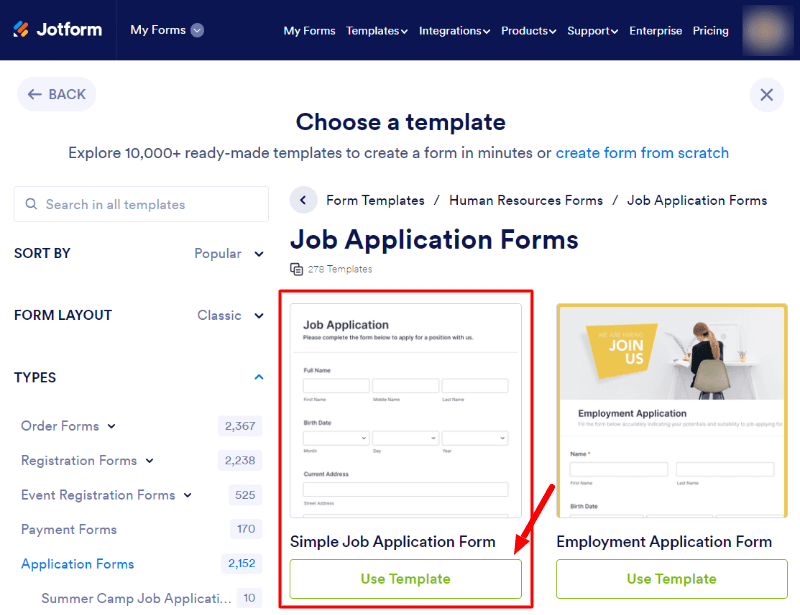
Get a preview of the template as shown below with pre-added form fields. To use the template, click the ‘Use Template’ button to proceed. The below fields are enough to build an efficient job application form to get applications from your applicants via email.
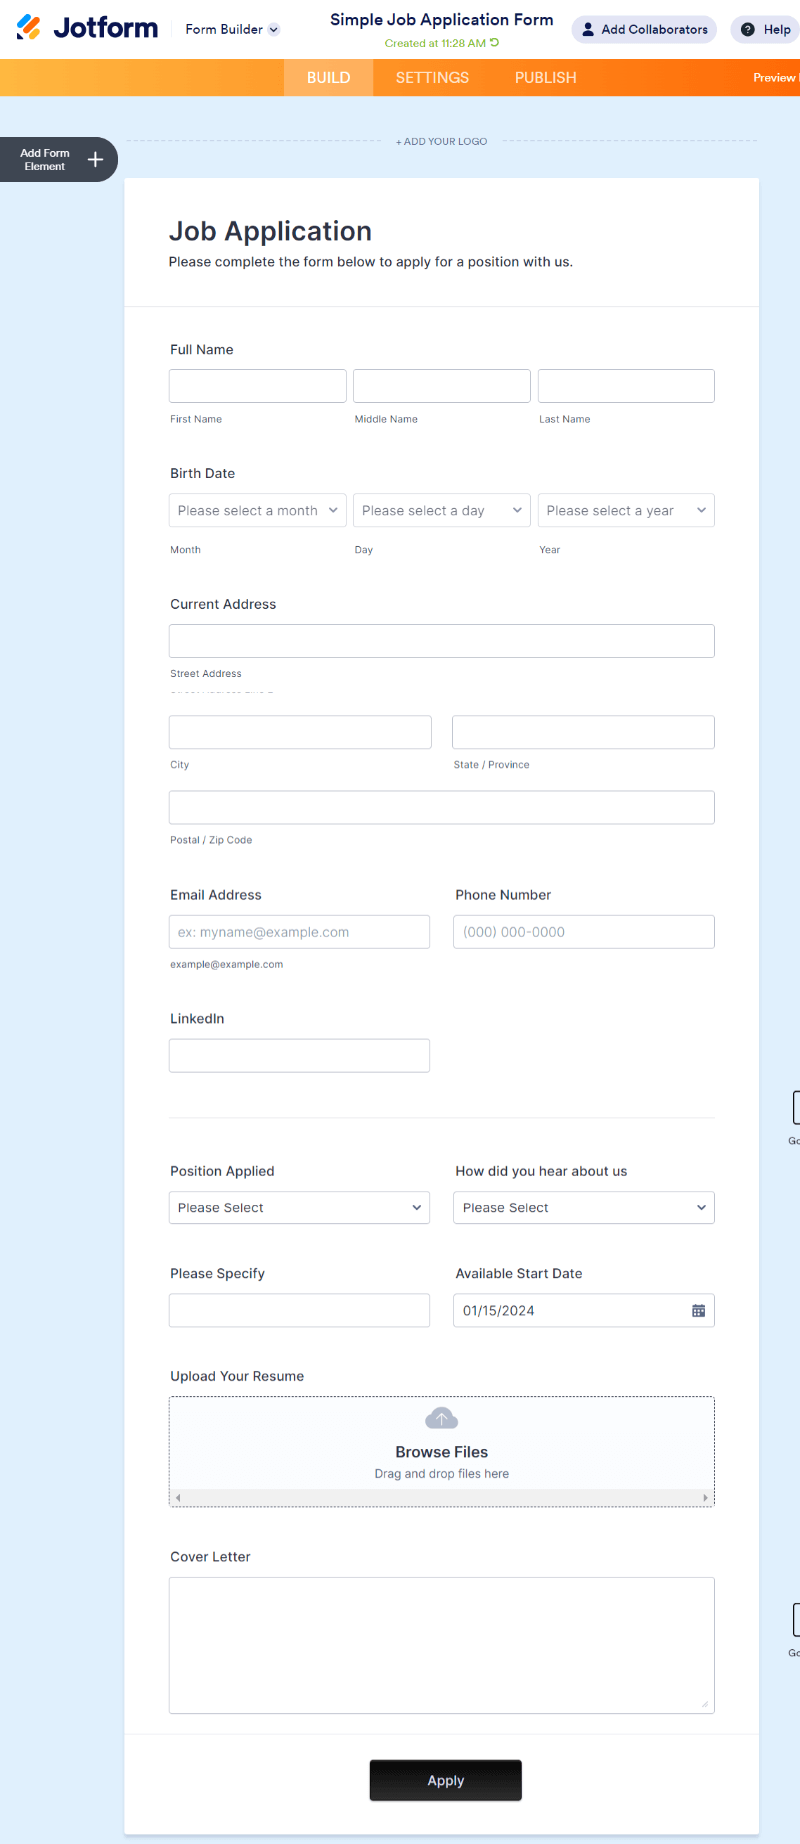
If you want to add your brand logo to your form, you can click the ‘ADD YOUR LOGO’ option as indicated in the image below.
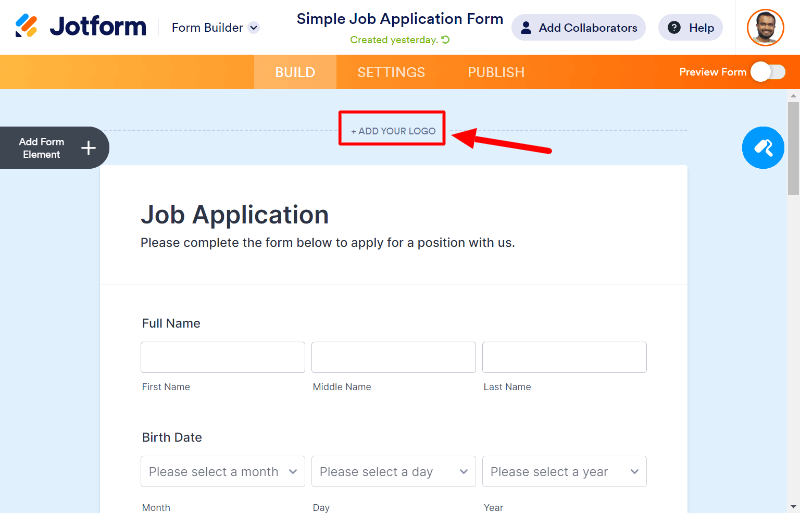
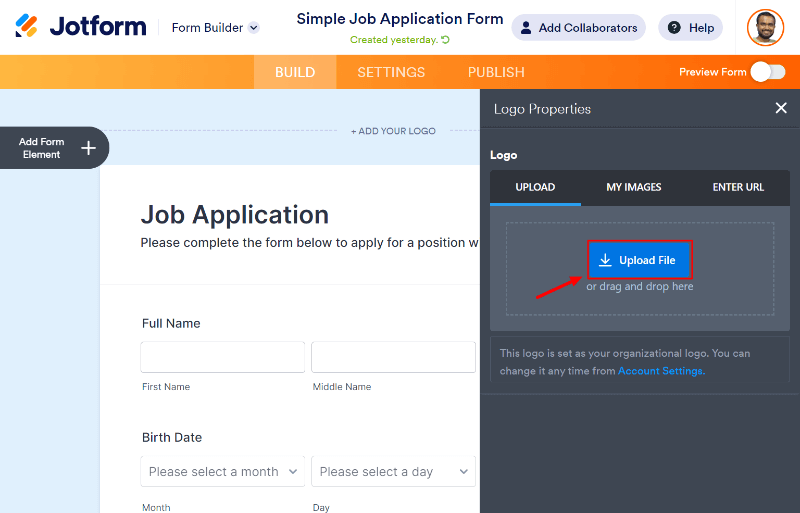
Now, upload your brand logo and add it to your form to match the form with your brand.
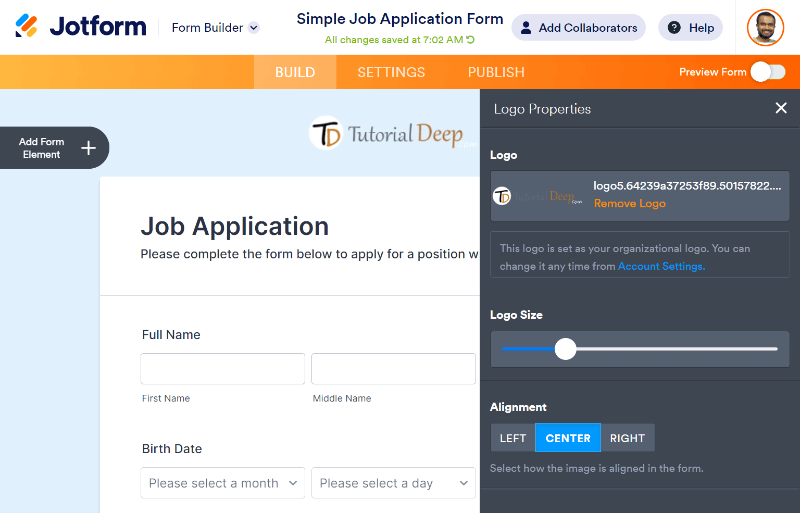
You can increase or decrease the logo according to your requirements. It is shown in the center position of the form. However, you can also change the alignment of your logo with the setting option.
The next step is to make form field settings one by one according to your requirements. So, let’s start making some settings of the form in the next step.
Step 3 Make Job Application Form Fields Settings One-by-one
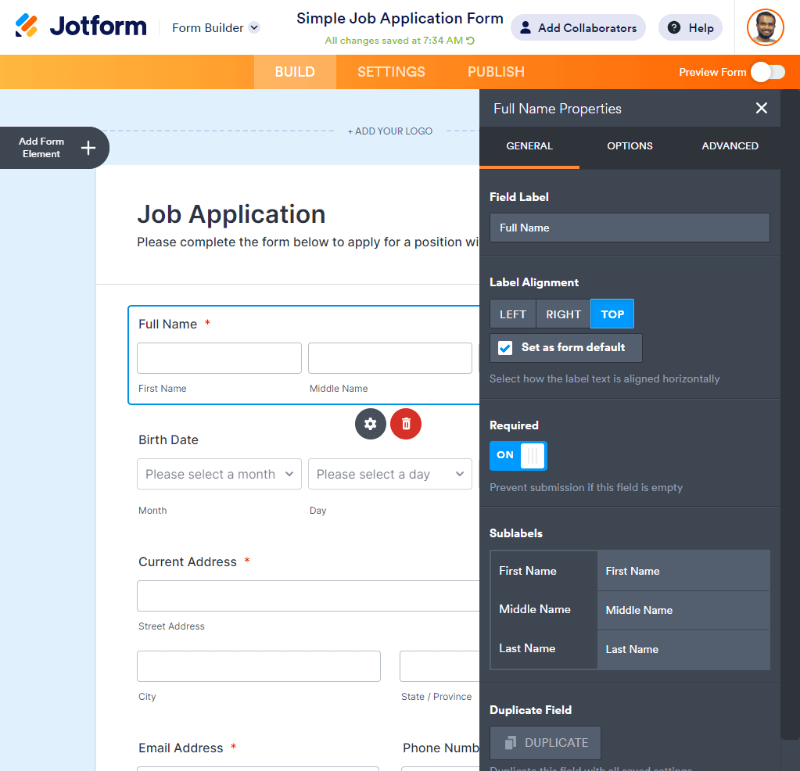
To get the form field settings, you have to click the form element for which you want to make settings. After that, click the setting () icon as shown below.
![]()
You will get input field setting options like General, Options, and Advanced. Making settings and collecting the accurate required data from users is useful.
Let’s start with creating the ‘General’ setting option. In the General setting option, you can change the label, and alignment, and make your field required for users. You can also change the sub-labels of your fields.
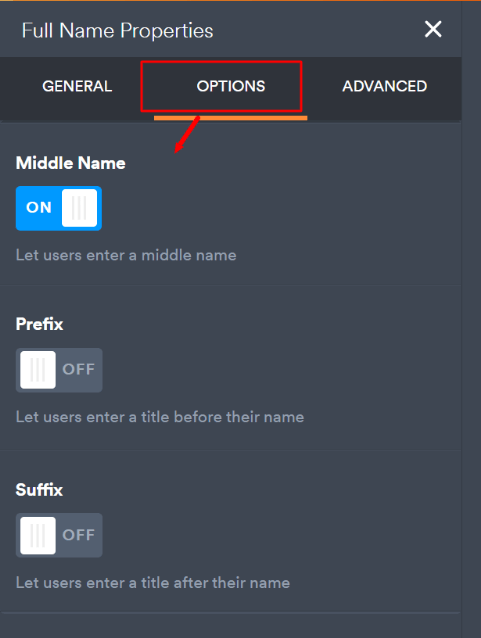
The next is the ‘Option’ setting where you can set the width, validation to get valid entries, and character limit for the fields. For the name field, you can set up a middle name to display or not. You can also add prefixes and suffixes to add for the name field.
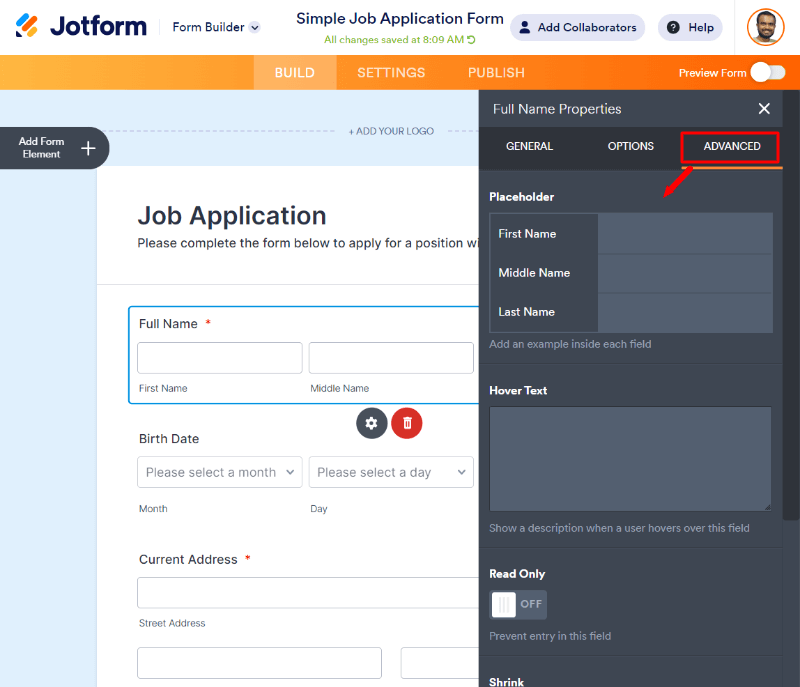
In the next setting option, you will get advanced settings where you can set advanced options like the Placeholder for the field, Hover Text, make field read-only, and Default Value for the field.
Furthermore, let’s make form settings, email settings, conditions, and a thank you page for your form to display on submission. These settings are useful to give notifications and confirmations to your applicants and collect form data via emails.
So, let’s start making form settings one by one in the next step.
Step 4 Add Form Settings for Notifications and Confirmations
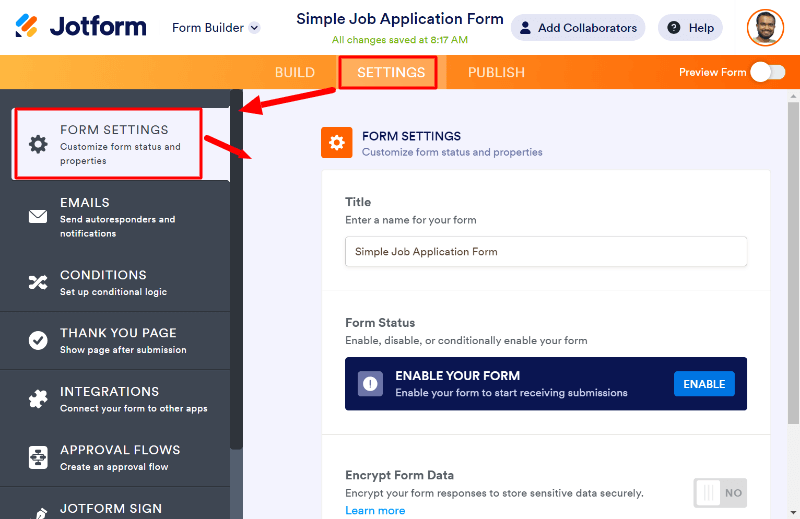
Form Settings
In the form settings, you can set a name for your form to be present everywhere in emails and other notifications.
Email Settings
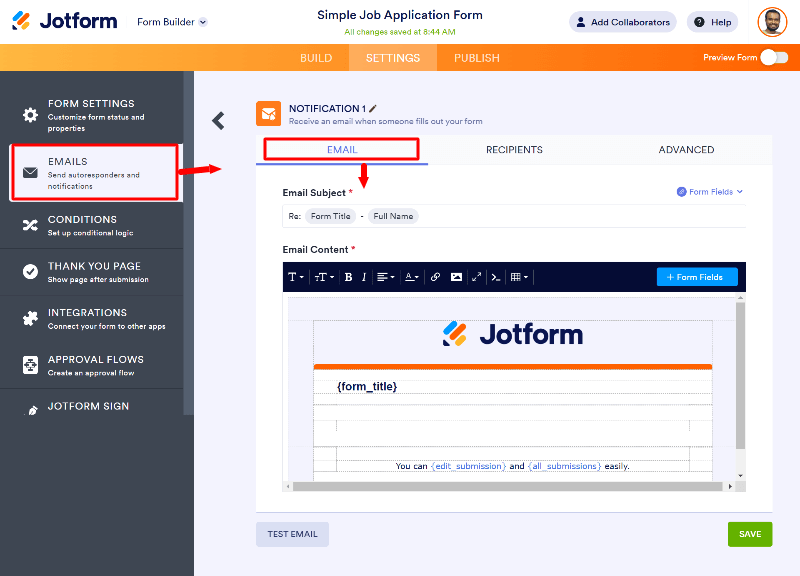
In this setting, you will get three email setting tab options Email, Recipients, and Advanced. These settings are useful for setting up email format, adding the recipient’s email address, and advanced settings.
The ‘EMAIL’ tab setting is useful where you can set up email format and message content to collect from applicants.
Below is the email format that you can set and change according to your requirements. The content includes the email subject and all the form fields like form name, full name, email, and other form fields user input data.
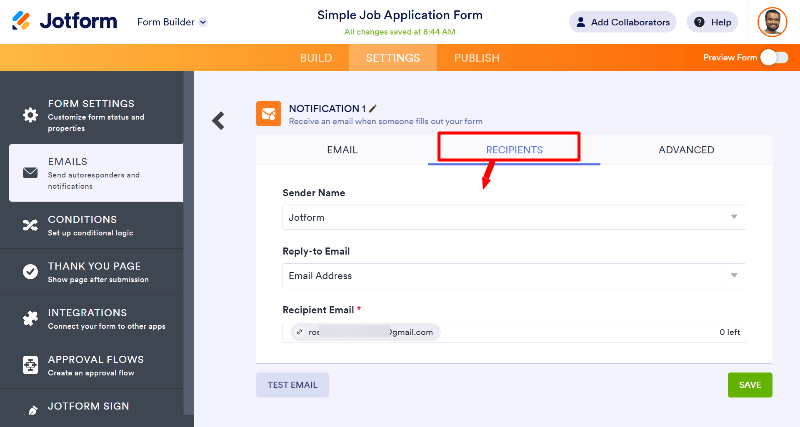
Next is the ‘RECIPIENT’ email setting where you can set the sender name, reply-to email, and recipient email address. The recipient email address is the email address of the owner who wants to get applicants’ data.
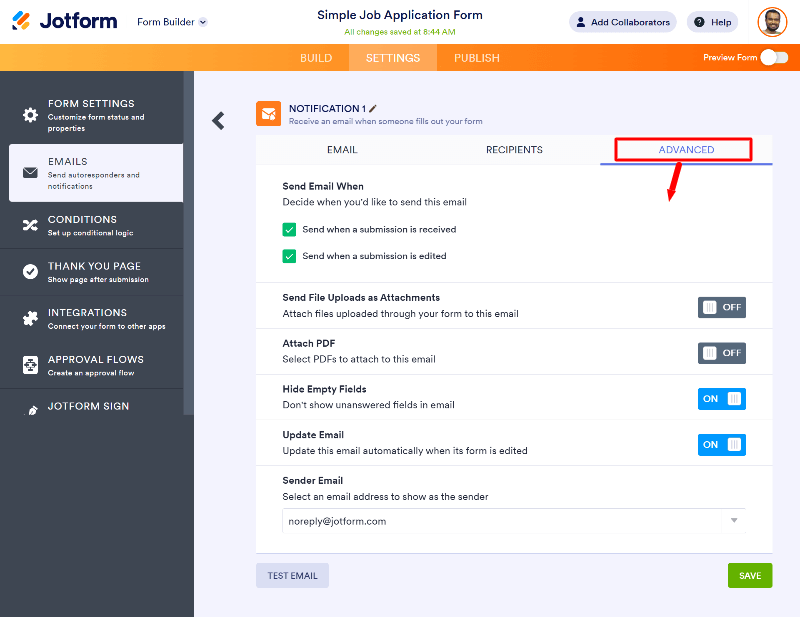
In the ‘ADVANCED’ email setting option, you can set the send email option, send email with PDF attachment, sender email address, and others.
Thank You Page Settings
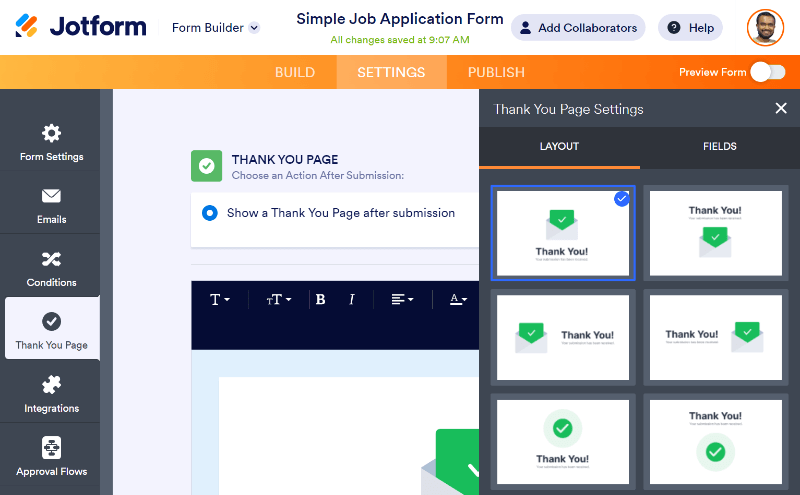
You can also set up a thank you page to display a thank you message when someone fills in and click the submit button.
If you want to change the thank you page template, you have to click the settings icon ().
![]()
After that, you will get a different thank you page template. You can choose a template of your choice to display to your applicants.
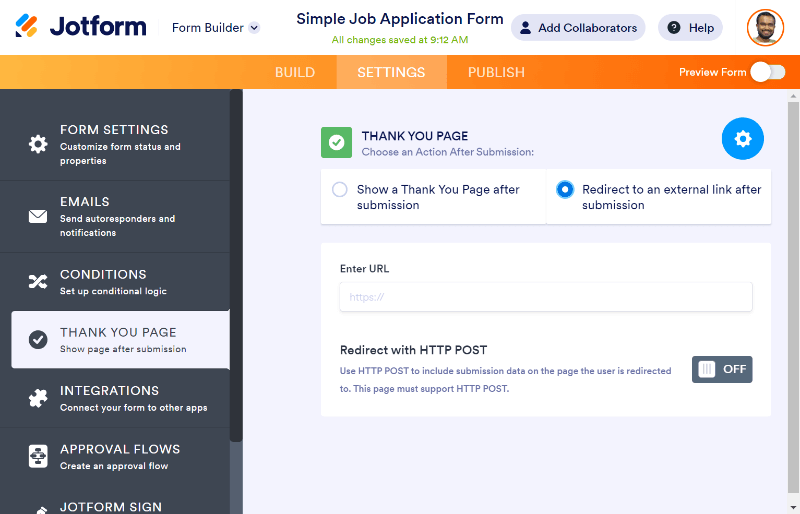
If you want to redirect applicants to other pages of your website, you can also set up a redirect URL to show a different page as a thank-you page to your users.
Step 5 Finally, Embed Job Application Form to your Website
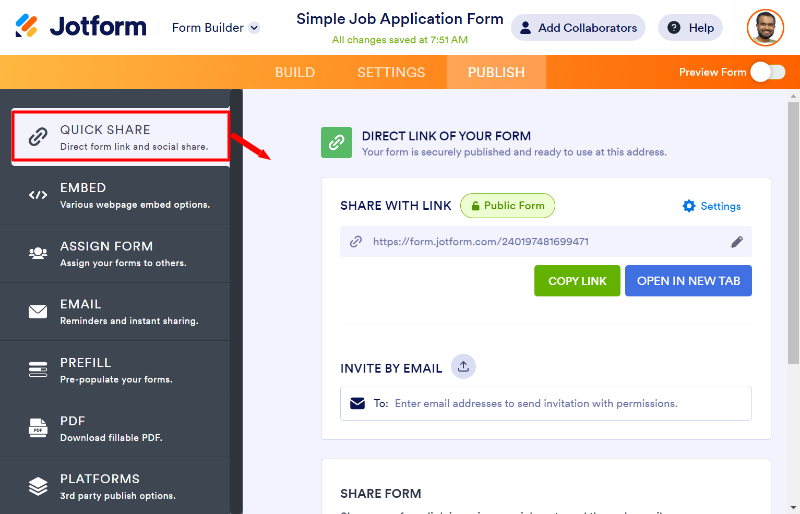
After all the above setup, your form is ready to share with your audience via URL. You can click the ‘PUBLISH’ option and click the ‘QUICK SHARE’ option as indicated below.
Before you share the form, click the ‘OPEN IN NEW TAB’ button to check the working of your form and the email format received on your email.
When it is confirmed that everything working fine on your form and the received email is in the correct format, you can share the form with your applicants.
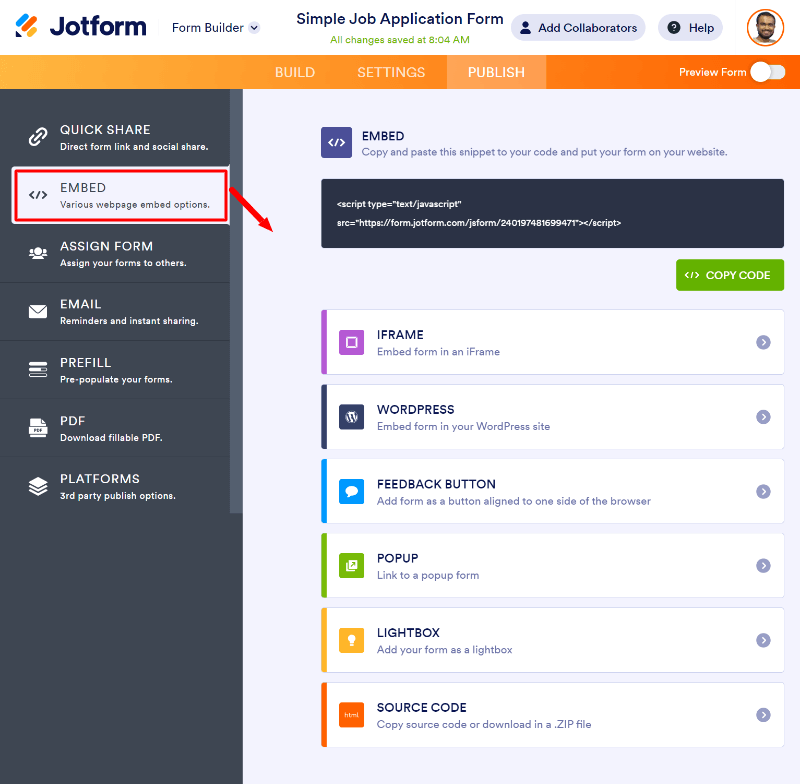
You can also add it to your website posts and pages. JotForm provides an easy-to-embed shortcode to easily copy and paste to your website location where you want to display the form. You will get the shortcode as shown in the image below.
After you add a job application form to your website pages, it’s time to open the page and see your job application form working.
It is also recommended to check the work on your form on your website. For this, fill out the form and press the submit button to get the email as an owner of the website.
Also, check the recipient email inbox to see the received email format by the applicant who submits the form.
That’s all.
You May Also Like to Read
