In this post, learn about the PHP feedback form and the script for validation and send form data via email. You will also get PHP code to insert customers’ data into the database and display it within a table.
If you want to collect the opinions of customers about your products, a feedback form can be the best solution for you to collect. You can display a feedback form on your website with products.

Looking to create feedback forms without coding? Create beautiful looking feedback forms with JotForm.
Each time when your customers want to give feedback, they can fill out the feedback form to reach you. After collecting customer feedback data, you can improve your products and the performance of your business.
You can easily create a feedback form and collect its data via emails using PHP. The PHP feedback form sends emails only after getting valid entries from customers. It also inserts form data into the database when every entry is valid.
So, let’s get started.
PHP Feedback Form Appearance
The feedback form should contain all the necessary fields to easily collect the opinions of customers. Longer-size feedback forms are difficult for customers to fill. That’s why, to make the feedback form as easy and simple I have decided to add only the below given form fields:-
- Name
- Email Address, and
- Phone number
- Feedback type
- Description of your feedback
The above fields are enough to easily collect customer feedback and useful data. The HTML code for the feedback form is given below.
|
1 2 3 4 5 6 7 8 9 10 11 12 13 14 15 16 17 18 19 20 21 22 23 24 25 26 27 28 29 30 31 32 33 34 35 36 37 38 |
<!DOCTYPE html> <html lang="en"> <head> <title>PHP Feedback Form</title> <meta charset="utf-8"> <meta name="viewport" content="width=device-width, initial-scale=1"> </head> <body> <div class="main-feedback-form"> <h2 style="text-align:center;">Feedback Form in HTML and CSS</h2> <form action="#" method="POST"> <label for="name">Name</label> <input type="text" id="name" name="name" class="name" placeholder="Your name" required> <label for="email">Email</label> <input type="email" name="email" id="email" class="email" placeholder="Your email" required> <label for="tel">Phone Number</label> <input type="tel" name="tel" oninput="validationall('tel', '0-9')" class="tel" maxlength="10" id="tel" placeholder="Your phone number" required> <label for="Email">Feedback Type</label><br> <input type="radio" id="comments" name="feedback_type" value="Comments"> <label for="comments">Comments</label> <input type="radio" id="suggestions" name="feedback_type" value="Suggestions"> <label for="suggestions">Suggestions</label> <input type="radio" id="questions" name="feedback_type" value="Questions"> <label for="questions">Questions</label><br><br> <label for="feedback_description">Description of your Feedback:</label> <textarea name="feedback_description" id="feedback_description" placeholder="Please describe your feedback here" rows="5" required></textarea> <input name="submit" type="submit" value="Submit"> </form> </div> </body> </html> |
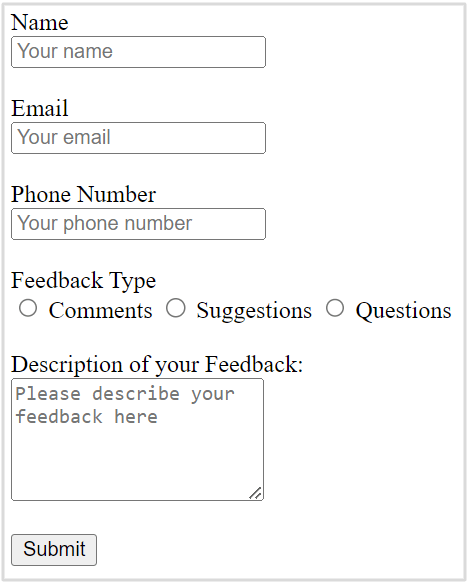
The appearance of the form in HTML is shown in the image below. The interface does not look to add to your website. You have to consider adding some CSS for the styling of your form and give a better user experience.
To add styling to your feedback form, you have to add some CSS code as given below. It adds some styling to your form input fields, textarea, and the submit button of the form. You can change the submit button color according to your website brand color.
Add Style to Feedback Form
|
1 2 3 4 5 6 7 8 9 10 11 12 13 14 15 16 17 18 19 20 21 22 23 24 25 26 27 28 29 |
<style> input[type='text'],input[type='email'],input[type='tel'],textarea{ width: 100%; padding: 10px 0 10px 6px; border-radius: 3px; border: 1px solid #ccc; margin-top: 10px; margin-bottom: 20px; } input[type='text']:focus,input[type='email']:focus,input[type='tel']:focus,select:focus,textarea:focus{ border: 1px solid #5db6db; box-shadow: 0 0 10px #b9eaff; outline: none !important; } input[type='submit']{ background: rgb(39,160,210); color: #fff; border: none; padding: 10px 20px; cursor: pointer; } .main-feedback-form{ max-width: 400px; margin: 0 auto; background: #e9e9e9; padding: 20px 45px 20px 25px; border-radius: 5px; } </style> |
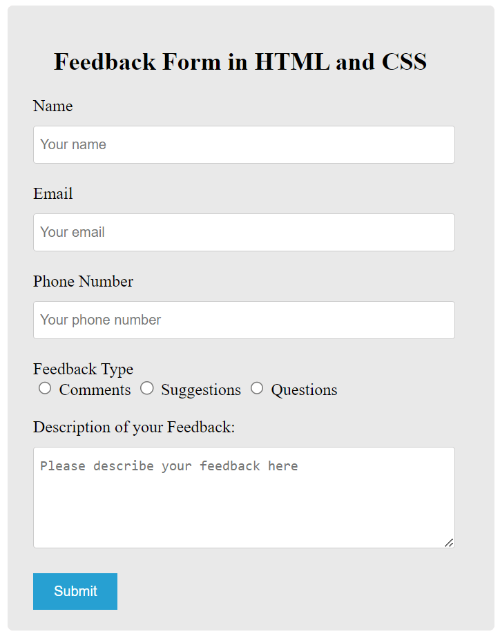
After adding some CSS for the styling of your feedback form, your form appearance will change like the image shown below. Now, the interface and design look better and are ready to add to your website. It is also responsive to easily resize itself to any screen size like desktop, laptop, tablet, and mobile.
Now, let’s add some validation to your feedback form to collect valid feedback data from customers. After that, you can collect valid opinion data via email with the PHP code given below.
PHP Feedback Form Add Validation and Send Data Via Emails
To make your field required to fill for customers, you have to add required attribute to your form fields. To know your customers, you have to collect valid emails and phone numbers from customers. So, the main required validation here is for email format and Phone number format.
Validate Phone Number Using Javascript
Set the phone number input field type as input type="tel". To get the phone number in numeric format, you have to add Javascript validation with the code given below. You can make the below code work for the phone number field by adding an attribute oninput="validationall('tel', '0-9')".
|
1 2 3 4 5 6 7 8 9 |
<script> function validationall(id, data){ var str=document.getElementById(id); //var regex=/[^0-9]/gi; //var re='[^'+data]'; var regex = new RegExp('[^'+data+']', 'gi'); str.value=str.value.replace(regex ,""); } </script> |
Also, if you want to allow customers to enter only 10-digit phone numbers, you have to add an attribute maxlength = "10". It restricts customers to type only 10 digits for the phone number field. So, your input field for the phone number will change as given below.
|
1 |
<input type="tel" name="tel" oninput="validationall('tel', '0-9')" class="tel" maxlength="10" id="tel" placeholder ="Enter phone number" required> |
Validate Email Address Using PHP
The below example code matches the email address regex expression with the customer’s input email address to find the valid email data. If the email address is not valid, it displays error messages to customers.
Please see the email address validation code below using PHP to get an idea.
|
1 2 3 4 5 6 7 8 9 10 11 12 13 14 15 16 17 18 19 |
<?php if(isset($_POST['submit'])){ //Get form data $name = $_POST['name']; $email = $_POST['email']; $tel = $_POST['tel']; $feedback_type = $_POST['feedback_type']; $feedback_description = $_POST['feedback_description']; //validation for email $email_exp = '/^[A-Za-z0-9._%-]+@[A-Za-z0-9.-]+\.[A-Za-z]{2,4}$/'; if (!preg_match($email_exp, $email)) { echo "The Email address you entered is not valid."; exit; } } ?> |
Send Form Data Via Email
To collect customers’ entered data via email to your email address, you can use SMTP in PHP. For this, you have to first download the PHPMailer library with the button given below. You have to extract the PHPMailer library where your main PHP file is located.
After that, use the below code just after the above PHP code. If every customer’s entered form data is correct and validated, it executes the below code to send the form data via email.
Note: don’t forget to change the $sender value with your Gmail address, $gmailapppassword value with the Gmail app password, and the recipient email address with your email address and name.
|
1 2 3 4 5 6 7 8 9 10 11 12 13 14 15 16 17 18 19 20 21 22 23 24 25 26 27 28 29 30 31 32 33 34 35 36 37 38 39 40 41 42 43 44 45 46 47 48 49 50 |
<?php if(isset($_POST['submit'])){ //If everything above is ok then move further //Use PHPmailer require "phpmailer/PHPMailerAutoload.php"; $mail = new PHPMailer; //Mailbody to send in email $mailbody = '<p><b>Customer feedback details:-</b></p> <p><b>Name:</b> '.ucfirst($name).'</p> <p><b>Email:</b> '.$email.'</p> <p><b>Phone Number:</b> '.$tel.'</p> <p><b>Feedback Type:</b> '.$feedback_type.'</p> <p><b>Description of Feedback:</b> '.$feedback_description.'</p>'; //Sender email address $mail->isSMTP(); // Set mailer to use SMTP $mail->SMTPDebug = 0; //See errors, change it to 4 $mail->Host = 'smtp.gmail.com'; // Specify main and backup SMTP servers $mail->SMTPAuth = true; // Enable SMTP authentication $mail->Username = $sender; // SMTP username $mail->Password = 'yourgmailapppassword';// Gmail SMTP password $mail->SMTPSecure = 'tls'; // Enable TLS encryption, `SSL` also accepted $mail->Port = 587; // TCP port to connect to $mail->setFrom($email, $name); //$mail->addAddress('[email protected]'); //add more recipient (optional) $mail->addReplyTo($email, $name); //$mail->addCC('[email protected]'); //$mail->addBCC('[email protected]'); $mail->isHTML(true); // Set email format to HTML $mail->Subject = 'Feedback Form Submitted by '.$name; $mail->Body = $mailbody; //$mail->AltBody = 'This is the body in plain text for non-HTML mail clients'; //Email your contact form data with an attachment using Gmail SMTP with PHPMailer if(!$mail->send()){ echo "Message could not be sent. Please try again."; echo 'Mailer Error: ' . $mail->ErrorInfo; }else{ echo "Message has been sent successfully."; } } ?> |
Now, next is to insert the customer’s feedback data into the MySQL database and display it on a page. Displaying feedback is useful to show new customers and gain more customers for your business. So, let’s do this in the next section.
Insert Form Data Into Database and Display in a Page
In this section, you will learn to insert your feedback form data into the database using PHP. This is useful to get your customer’s feedback and details again to easily call them when required. After you insert the data, you can display the data anywhere on your website.
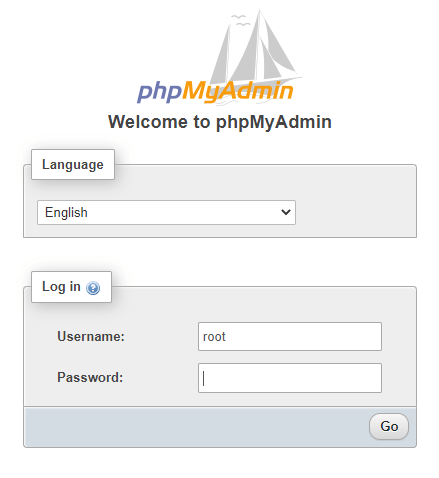
Firstly, you have to open PHPMyadmin of your MySQL database.
login to PHPMyAdmin
After that, open the ‘SQL’ tab there in PHPMyAdmin.
Open the ‘SQL’ tab of PHPMyAdmin

Create a database to insert PHP Feedback form data
Now, copy the below SQL code and add it to the input box in the ‘SQL’ tab as shown in the image below. After that, press the ‘Go’ button to execute the SQL code and create a database with the name ‘create_forms’.
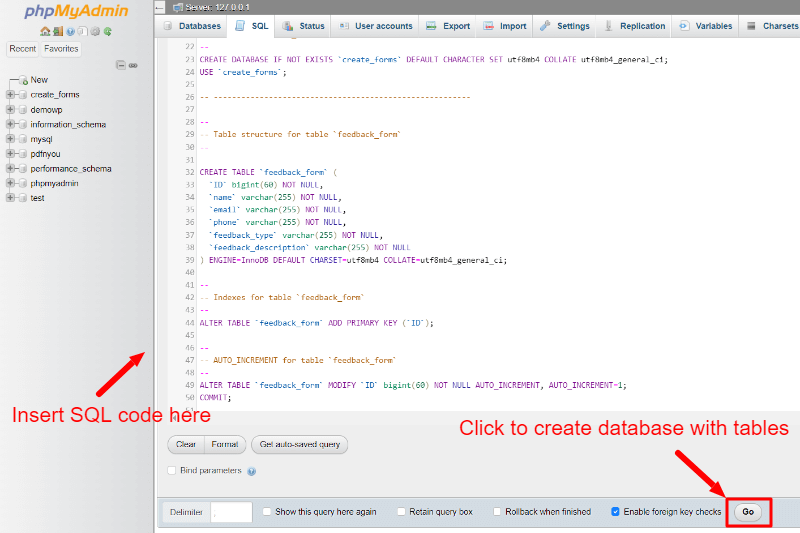
The below SQL code also creates a table ‘feedback_form’ with the creation of the database ‘create_forms’. This is the table where you have to store your customer’s data entered in the feedback form.
|
1 2 3 4 5 6 7 8 9 10 11 12 13 14 15 16 17 18 19 20 21 22 23 24 25 26 27 28 29 30 31 32 33 34 35 |
-- -- Database: `create_forms` -- CREATE DATABASE IF NOT EXISTS `create_forms` DEFAULT CHARACTER SET utf8mb4 COLLATE utf8mb4_general_ci; USE `create_forms`; -- -------------------------------------------------------- -- -- Table structure for table `feedback_form` -- CREATE TABLE `feedback_form` ( `ID` bigint(60) NOT NULL, `name` varchar(255) NOT NULL, `email` varchar(255) NOT NULL, `phone` varchar(255) NOT NULL, `feedback_type` varchar(255) NOT NULL, `feedback_description` varchar(255) NOT NULL ) ENGINE=InnoDB DEFAULT CHARSET=utf8mb4 COLLATE=utf8mb4_general_ci; -- -- Indexes for table `feedback_form` -- ALTER TABLE `feedback_form` ADD PRIMARY KEY (`ID`); -- -- AUTO_INCREMENT for dumped tables -- -- -- AUTO_INCREMENT for table `feedback_form` -- ALTER TABLE `feedback_form` MODIFY `ID` bigint(60) NOT NULL AUTO_INCREMENT, AUTO_INCREMENT=1; COMMIT; |
Now, you are ready with your database and a table with all the required fields to easily insert the form data into the MySQL database.
Connect to Your Database Using PHP
After you create the database, you have to connect with the database using the PHP code given below. The code requires the four arguments for PHP mysqli_connect() which are the server name, the username of the database, the password of the database user, and the database name.
If you are connected to your local computer system, you can use the below values for these variables. However, if you want to connect to your hosting server, you have to change these with the database user and password with all privileges.
|
1 2 3 4 5 6 7 8 9 10 11 12 13 14 15 16 |
<?php //Make database connection $servername = "localhost"; $username = "root"; $password = ""; $dbname = "create_forms"; // Create a connection $conn = mysqli_connect($servername, $username, $password, $dbname); // Check the connection if (!$conn) { die("Connection failed: " . mysqli_connect_error()); }else{ echo "connected successfully"; } ?> |
The code also displays a success message after a successful connection is made with the database.
Insert Feedback Form Data Into the Database
Now, to insert the feedback form data into the database, you have to use the PHP code given below. The code for the PHP feedback form inserts the data into the database using the SQL insert query.
|
1 2 3 4 5 6 7 8 9 10 11 |
<?php if(isset($_POST['submit'])){ $sql = "INSERT INTO feedback_form (name, email, phone, feedback_type, feedback_description) VALUES ('$name', '$email', '$tel', '$feedback_type', '$feedback_description')"; if (mysqli_query($conn, $sql)) { echo "New feedback added successfully"; } else { echo "Error: " . $sql . "<br>" . mysqli_error($conn); } } ?> |
Now, you have successfully sent the email and inserted the form data into the database. It’s time to display the customers entered data on your website posts and pages. This can make it easier for the website owners to keep a record of the customers.
Display Inserted Data in a Table
To display the data in a table, you have to first select the table ‘feedback_form’ using a select query. It first checks whether it contains customers’ records or not. When it contains some data, it displays all the data in a table using a while loop in PHP.
|
1 2 3 4 5 6 7 8 9 10 11 12 13 14 15 16 17 18 19 20 21 22 23 24 25 26 27 28 29 30 31 32 33 34 35 |
<?php $sql = "SELECT * FROM feedback_form"; $result = mysqli_query($conn, $sql); $i = 1; if (mysqli_num_rows($result) > 0) { ?> <table class="table table-bordered table-hover table-striped"> <tr> <th>Sr. No.</th> <th>Name</th> <th>Email</th> <th>Phone no.</th> <th>Feedback Type</th> <th>Description</th> </tr> <?php while ($row = mysqli_fetch_assoc($result)) { ?> <tr> <td><?php echo $i; ?></td> <td><?php echo $row['name']; ?></td> <td><?php echo $row['email']; ?></td> <td><?php echo $row['phone']; ?></td> <td><?php echo $row['feedback_type']; ?></td> <td><?php echo $row['feedback_description']; ?></td> </tr> <?php $i++; } ?> </table> <?php } mysqli_close($conn); ?> |
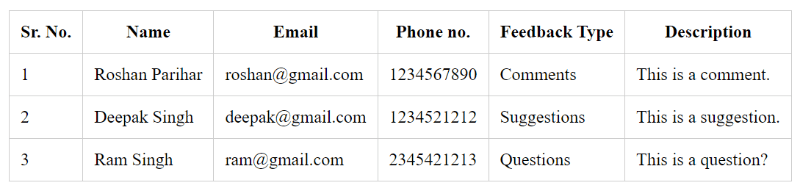
You will get the customer’s data in a table format on your website as shown in the image below. To make your table look better on your website, you can consider adding some CSS code for styling as given below.
|
1 2 3 4 5 6 7 8 9 10 |
<style> table{ border-collapse: collapse; margin: 20px auto; } table, td, th { border: 1px solid #ccc; padding: 10px; } </style> |
You will get the feedback data as shown in the image below.
You May Also Like to Read