
Picture a freelancer who gets ten inquiries from their website this week. For each one, they write a reply by hand, copy the details into a spreadsheet, and make a mental note to follow up. By the end of the week, one inquiry has slipped through the cracks and the potential client has moved on.
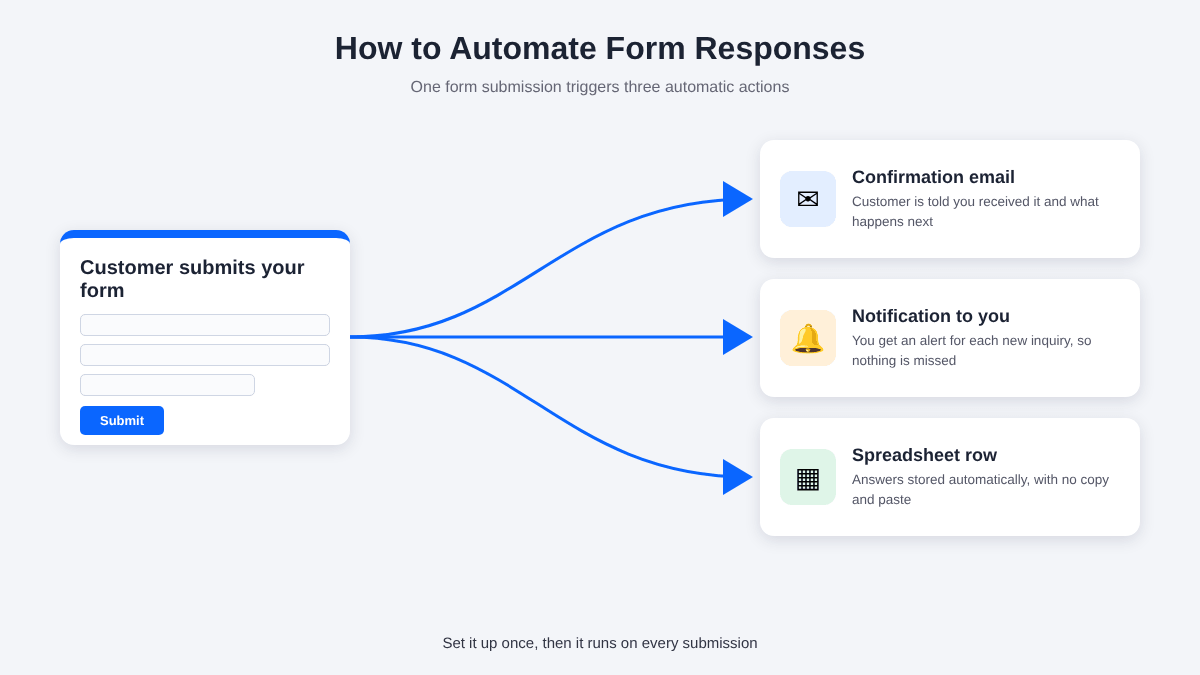
None of those tasks is hard. The problem is that they’re repetitive, and every minute spent on them is a minute not spent on paid work or on the customers you already have. The good news is that most of this can be automated with an ordinary online form and a few settings.
Why Manual Form Responses Become a Problem
- Customers don’t get immediate confirmation. They’re left wondering whether the form worked.
- You send the same emails again and again. That’s time you can’t get back.
- Important inquiries get overlooked. A busy day is all it takes.
- You waste time copying information between your inbox, spreadsheet and other tools.
- Customers don’t know what happens next. Silence after submitting feels like being ignored.
What Can You Automate After Someone Submits a Form?
Send an automatic confirmation email
The simplest win. As soon as someone submits your form, they get an email confirming you received it, with a line about what happens next, such as “We’ll reply within one business day.” For this to work, your form needs to collect an email address.
Notify yourself or your team
Get an email each time a new inquiry arrives, so nothing waits unseen in a dashboard. For a team, you can usually send notifications to more than one address.
Organize form submissions
Store responses somewhere you can search and sort. Most form tools keep a submissions inbox, and many can also send responses to a spreadsheet or another tool, where supported, so you stop copying details by hand.
Send follow-up messages
A follow-up can give next steps, booking instructions or expected response times. Simple follow-ups can be part of the confirmation email. More advanced, multi-step follow-ups may need an integration or a separate email automation tool.
How to Automate Form Responses, Step by Step
Let’s use a realistic example: a freelance web developer collecting website project inquiries. The steps are the same in most form tools.
Step 1: Create a project inquiry form
Start from a contact or project inquiry template rather than a blank form. It’s faster and gives you a sensible layout.
Step 2: Add only the fields you need
For the developer, that’s name, email, type of project, budget range, deadline and a short description. Each extra field lowers the number of people who finish the form, so cut anything you won’t use.
Step 3: Configure an automatic confirmation email
Write a short, specific message. For example: “Thanks for getting in touch. I’ve received your inquiry and will reply within two business days with next steps.”
Step 4: Set up an internal notification
Choose the inbox where alerts should go, and include the key answers in the email so you can see the inquiry at a glance.
Step 5: Connect a spreadsheet, CRM or other service (if needed)
If you track leads in a spreadsheet or CRM, connect the form so new submissions are added automatically. Check that your form tool supports your chosen service, and whether that integration is available on your plan.
Step 6: Submit a test and check everything
Fill in the form yourself. Confirm that the confirmation email arrives (and isn’t in spam), the notification reaches the right inbox, and the answers appear where they should.
Demo: Automating Form Responses with Jotform
Here’s how that workflow looks in Jotform. The exact options you see can depend on your account and plan, so check what’s available to you.
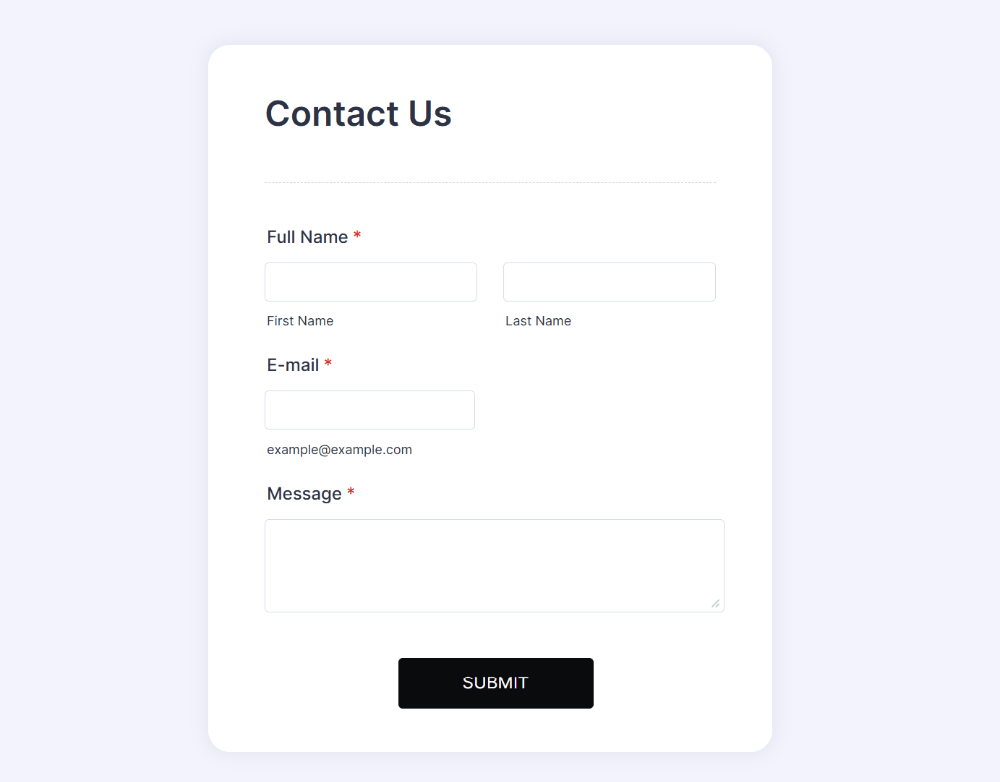
1. Open a sample contact form
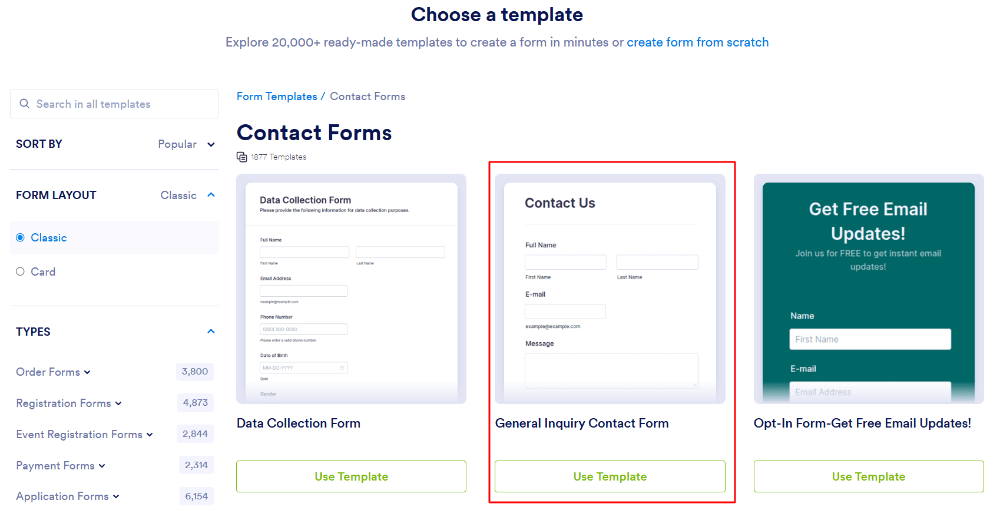
Click Create, choose Use a template, search “contact form” or “project inquiry”, and pick one. Make sure there is an Email field, since the confirmation needs somewhere to go.
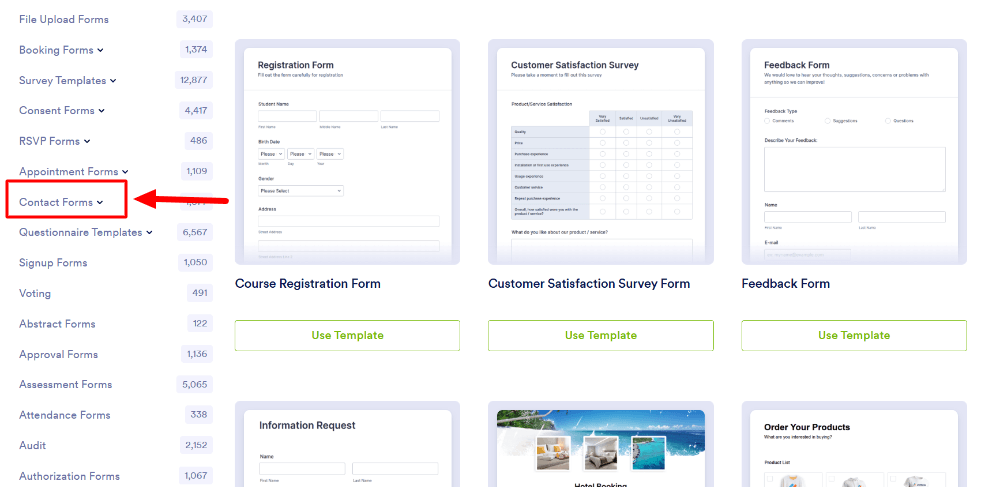
Choose which form layout you want for your form. Select ‘Classic’ option for now.
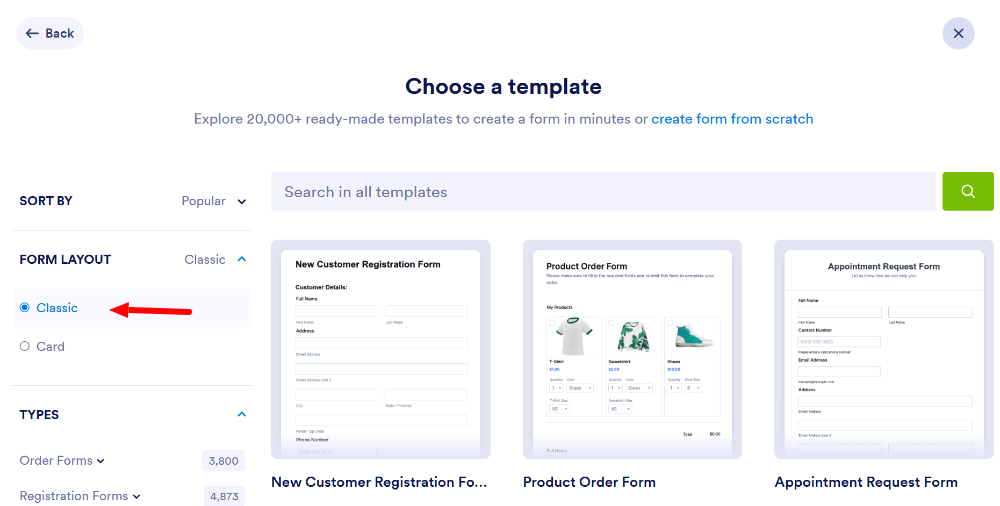
After selecting these, you will get the contact form as shown in the image. Click the ‘Use Template’ to choose the template and start creating a contact form.
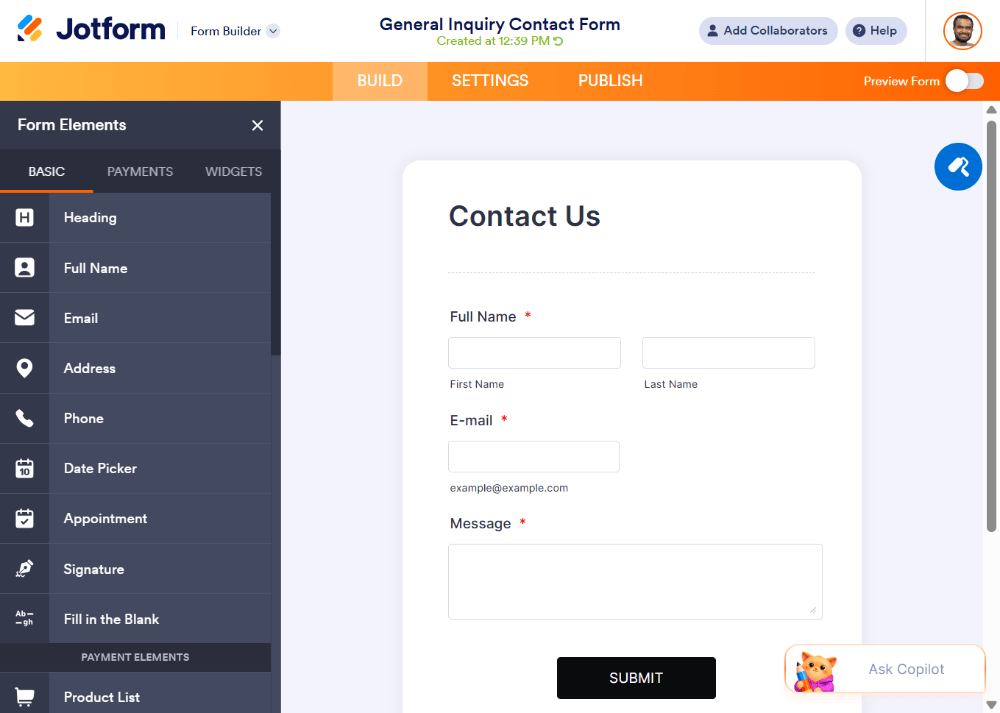
Your selected form will appear in Jotform builder as shown below. Used contact form template already contains enough form fields to collect contacts.
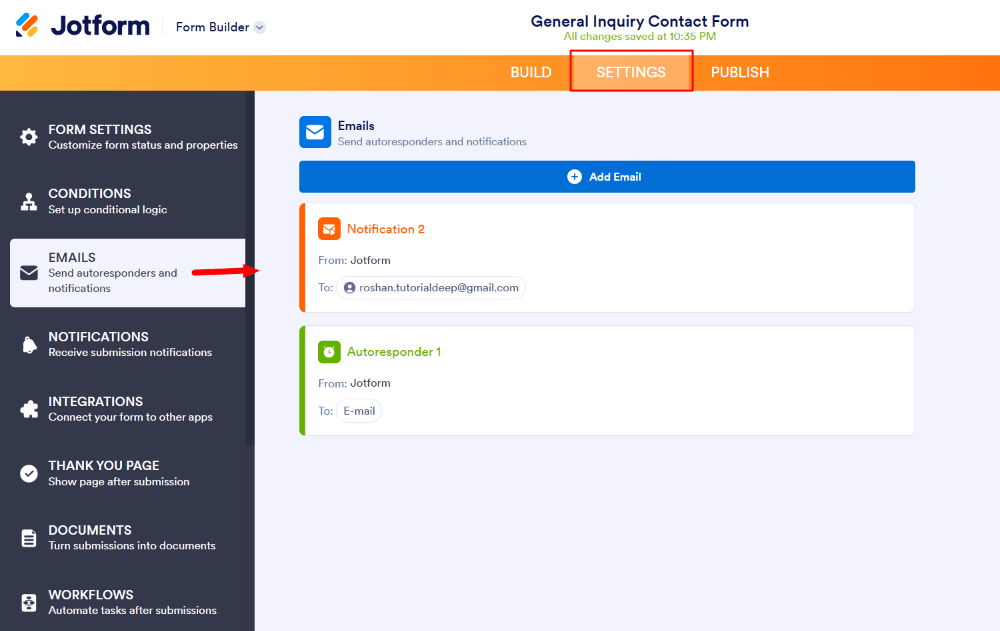
2. Find the notification settings
Open the Settings tab and go to Emails. This is where notification and confirmation emails are managed.
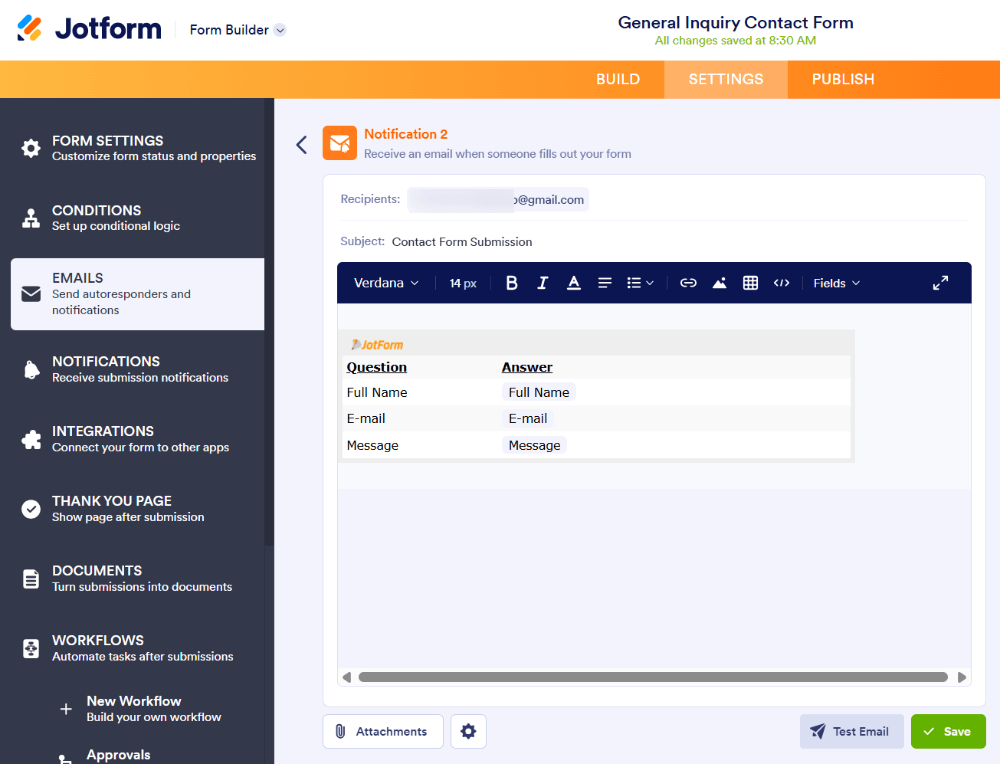
3. Configure a notification for the business owner
Set the recipient to the inbox you check often, and review which answers are included in the email.
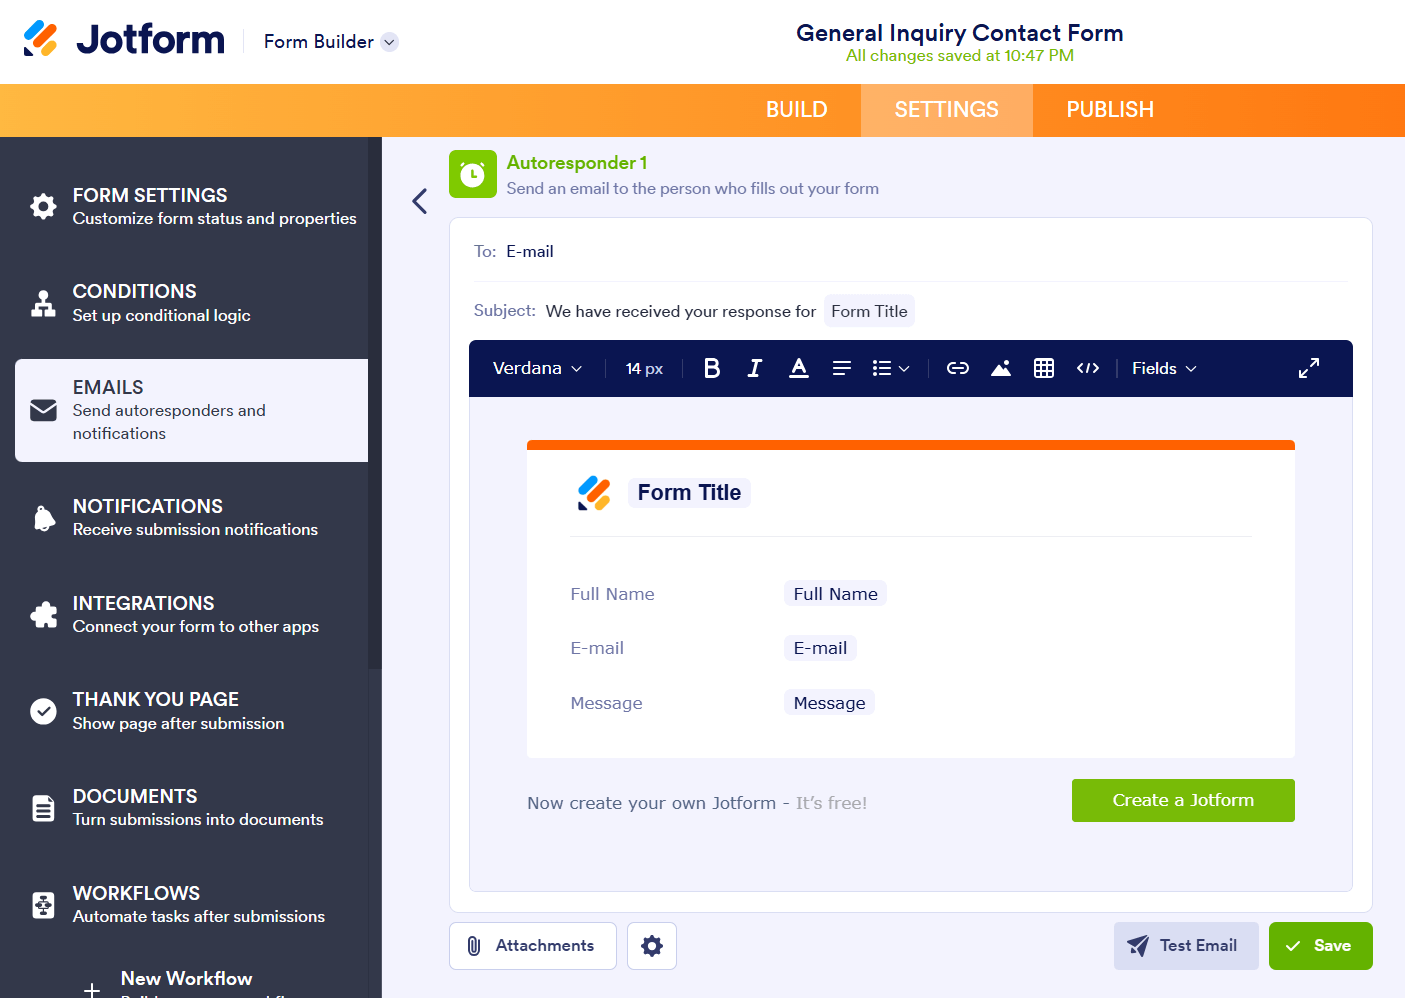
4. Configure a confirmation email for the person submitting the form
Add an autoresponder email that goes to the email address the visitor entered. Write the subject and message, including what happens next and when they can expect a reply.
5. Setup Thank You Page
Thank you is useful when you want to show that form has been submitted successfully. To setup a thank you page, click the top menu option ‘SETTINGS’ and click the ‘THANK YOU PAGE’.
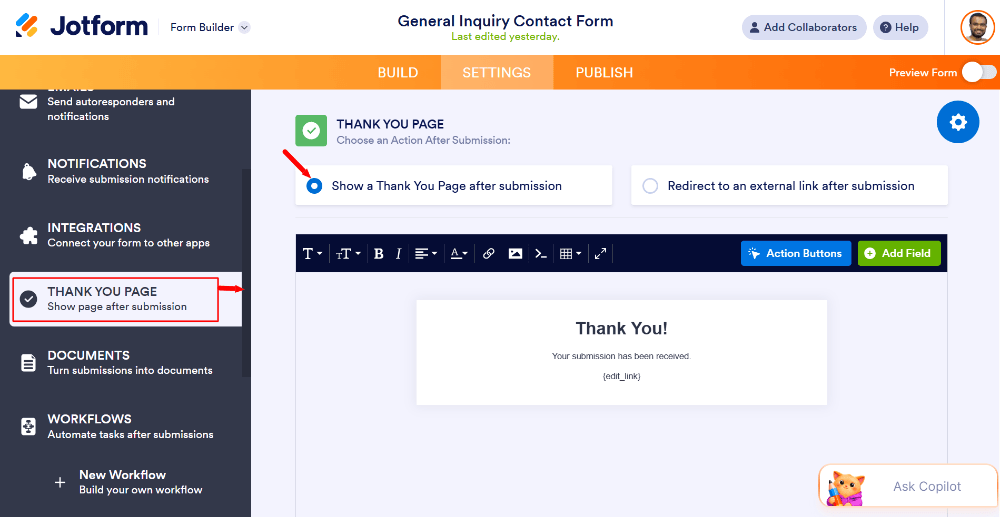
Here, you can show a thank you message by selecting the first radio button. If you have a seperate page for thank you, you can choose the secong option to redirect to external link after submission.
6. Submit a test entry and check the results
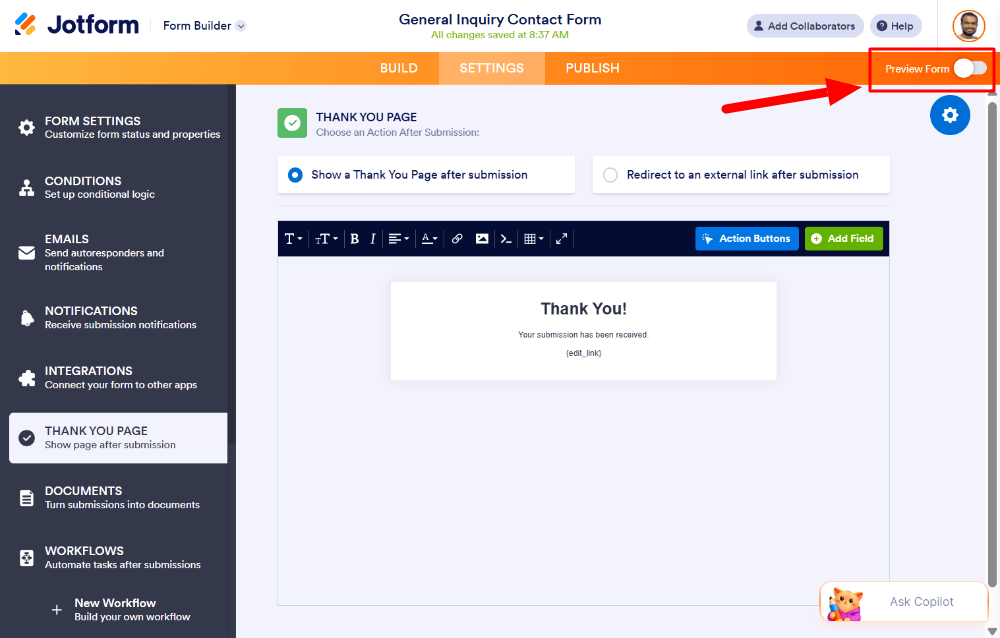
Click Preview Form given to the top right corner as shown below.
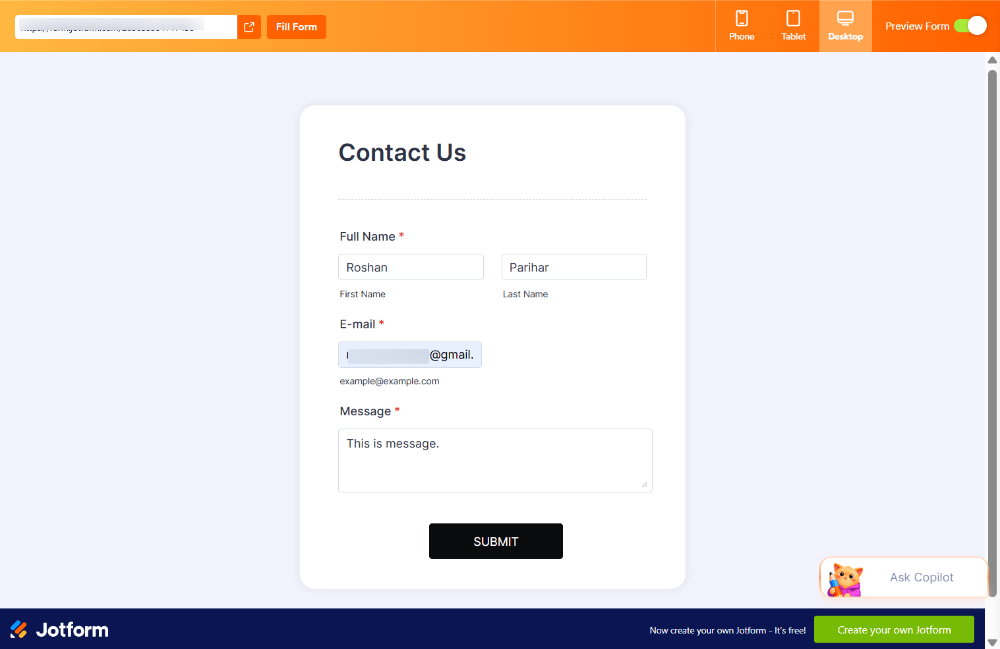
A preview of the contact form will appear like below. It contains all the form fields required for contact form. Fill your test name, email, and a message.
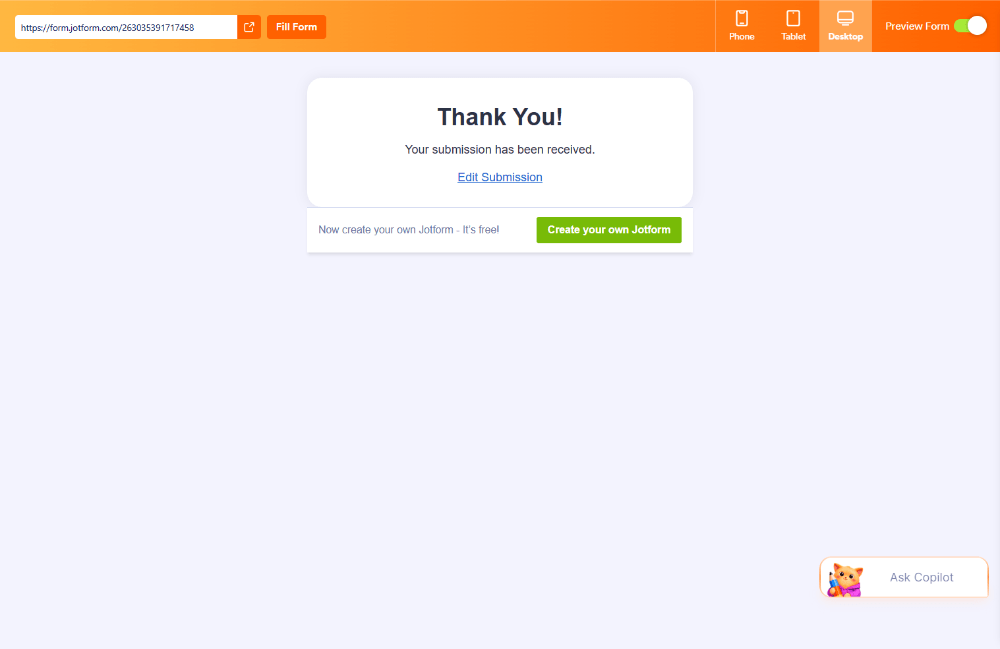
Now, submit the form. check three things: the confirmation arrived at the address you entered, the notification reached your inbox, and the entry appears in your submissions list.
You will get a thank you page which shows the the form has been submitted successfully.
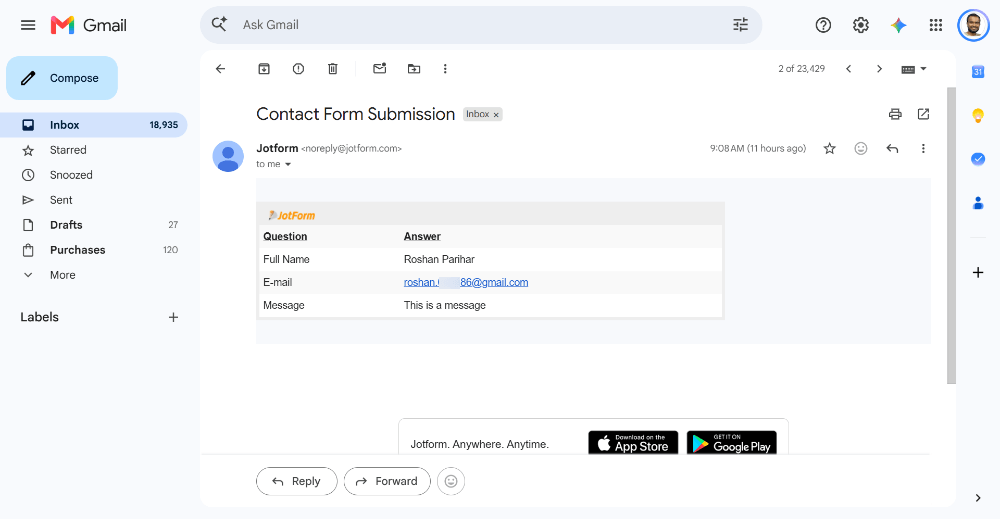
After submission, the owner will get the submitted form details as shown below in the owner email inbox.
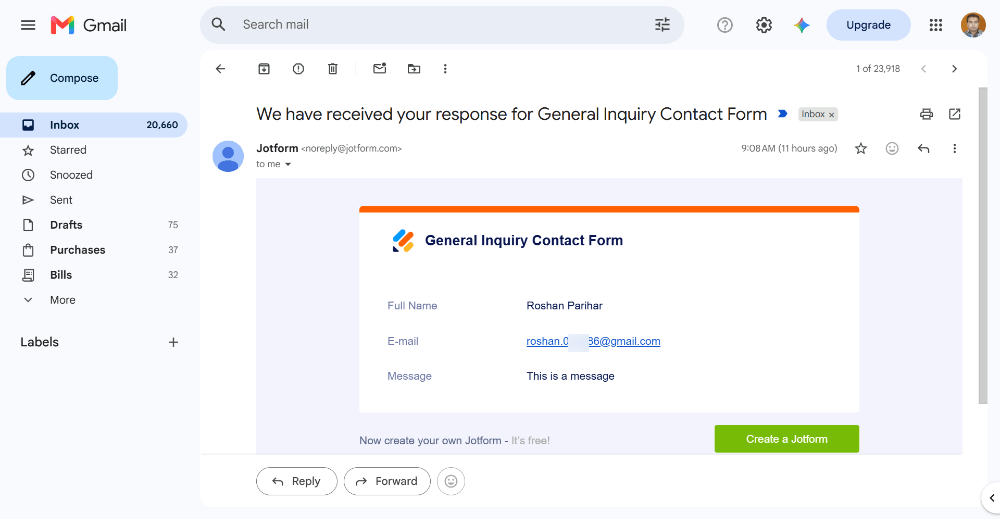
The form submitter also get confirmation email that the filled data received by the owner.
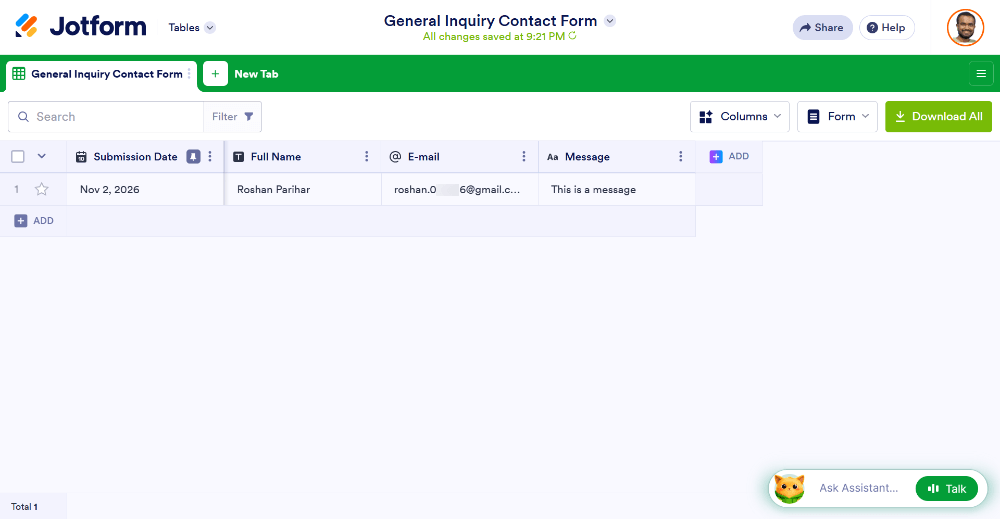
Finally, the entries appear in the submission list as shown in the image below.
Your notes: What was easy? Was anything confusing or limited by the free plan? How quickly did the emails arrive?
Do You Need a Form Builder to Automate Responses?
Not always. The best option depends on the tools you already use, how complex your workflow is, and what you’re willing to pay.
| Option | Best suited for |
|---|---|
| Existing website form | A form that already supports your required workflow |
| Google Forms and supported integrations | Basic data collection and simple workflows |
| Jotform | Customizable forms and supported notification workflows |
| Custom HTML/PHP form | Developers who need control over the backend and automation logic |
If your current form already sends the emails you need, you may not need to change anything. If you’re starting from scratch and don’t want to code, an online builder is usually the faster route.
Common Mistakes to Avoid
- Confirmation emails that don’t explain the next step. Say what happens and when.
- Asking for unnecessary information. Every extra field costs you submissions.
- Failing to test notifications. Always send a test, and check spam folders.
- Sending duplicate or irrelevant messages. One clear confirmation beats three overlapping ones.
- Collecting personal information without privacy safeguards. Collect only what you need, explain how you’ll use it, and follow the privacy rules that apply to you.
- Assuming an automated confirmation means a person has reviewed the inquiry. Make sure the message doesn’t promise more than you’ll deliver, and still check your inbox.
Spend Less Time Handling Form Submissions
If you regularly receive customer inquiries, automating confirmations and notifications can reduce repetitive work. If you want to set up this type of workflow without building everything from scratch, explore Jotform’s available form and automation features. Start with the free plan and a test form, and confirm it covers what you need before you rely on it.
Frequently Asked Questions
Can I automatically reply to someone who submits a form?
Yes. Most form builders can send an automatic confirmation email to the person who filled out the form, as long as the form collects their email address.
How do I receive an email when a form is submitted?
Turn on the notification email in your form tool’s settings and enter the address you check often. Then submit a test to confirm it arrives and doesn’t land in spam.
Can Google Forms send automatic responses?
Google Forms can email respondents a copy of their answers, and notifications for new responses can be turned on. Custom confirmation messages and more advanced workflows generally need an add-on or a connected automation tool.
Can I automate form responses without coding?
Yes. Many online form builders let you set up confirmations and notifications through settings, with no code.
Can form submissions be sent to a spreadsheet or CRM?
Often yes, through built-in integrations or an automation tool. Which services are supported, and whether they require a paid plan, depends on the form tool.
Is Jotform suitable for automating customer inquiries?
It can be, if its notification, confirmation and integration options fit your workflow and plan. Try it on the free plan with a test form before relying on it.