In this post, Learn how to save contact form 7 entries into the WordPress database. Collecting and saving leads is an essential part of online business.
The main task of contact forms on websites is to get users’ queries and send emails to the owner of the website. After getting customers’ queries via email, you can contact them again by replying to them.
However, sometimes it can be not easy to find the email of the customer in your inbox. If you are not able to find the customer’s email, you may lose it without getting any sales. It won’t happen to you when you save customers’ data on your WordPress website database.
But, how can you save Contact Form 7 data into the WordPress database?
It’s very simple with the steps given below. I am going to show you how to save contact form 7 entries and see them on your WordPress website dashboard.
After saving, you can easily find your customer’s data with various filter options. You can also send emails easily without losing customers in the future.
So, let’s get started.
How to Save Contact Form 7 Entries into Database (Step-by-step Process)
Here is the step-by-step process on how to save Contact Form 7 entries into the database:-
Step 1: Setup Contact Form 7 on Your Website
Contact Form 7 is the best plugin to create a contact form for your website. It comes with every form field for free to create for your website and collect customers’ data.

However, it can happen to you that your Contact Form 7 plugin is not set up correctly on your website. If you have not set up Contact Form, it won’t work correctly to save entries. You can follow our guide on setting up the Contact Form 7 plugin the right way with the link given below.
Read the full guide here➜ How to Use Contact Form 7 Plugin in WordPress
Step 2: Install and Activate ‘Contact Form Entries by CRM Perks’ Plugin
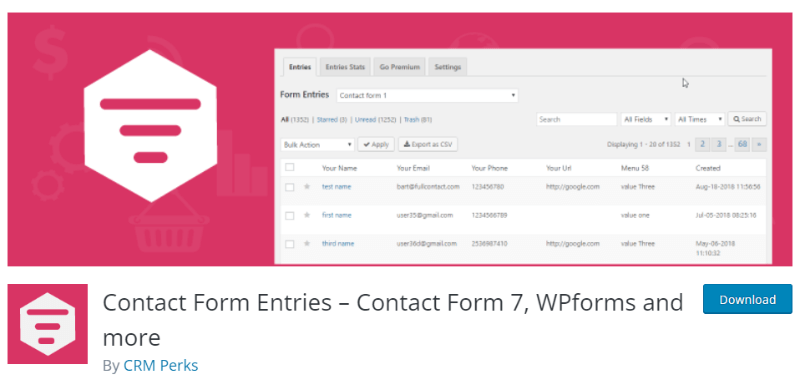
To save contact form entries into the database, I recommend our readers use the ‘Contact Form Entries‘ plugin developed by CRM Perks. It comes with features like Save Contact Form 7 data into the database, Checking records, Filter options to find records, Exporting records in CSV format, Edit entries, Adding notes, Sending emails, and many more.
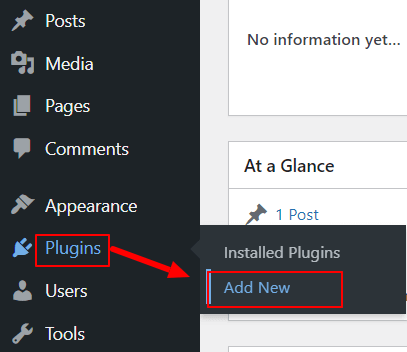
You have to install the plugin on your WordPress website. To install it, open your WordPress website dashboard menu option as shown below.
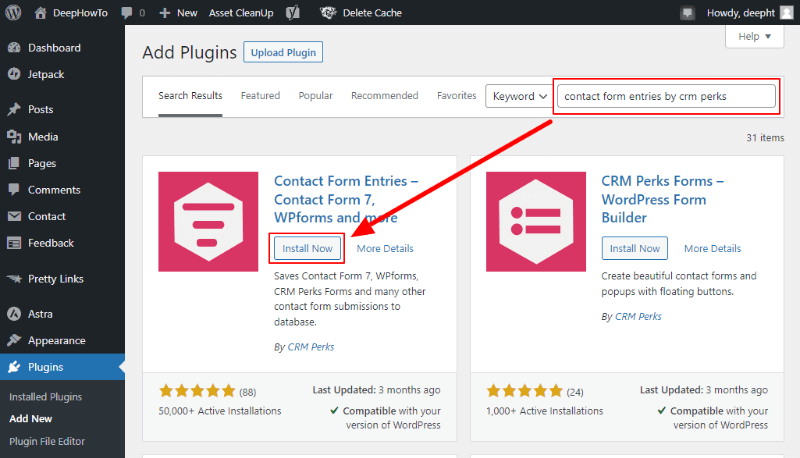
It will take you to the plugin and add a new page where you can search & install or upload your plugin to install. You will get a search input box where you have to enter the keyword ‘contact form entries by CRM Perks’. After that, click anywhere outside to auto-search the plugin.
You will get the plugin as shown in the image below and click the ‘Install Now’ button given with the plugin to start the installation.
After installation is completed, you will get the ‘Activate’ button to click and make the plugin work on your website.
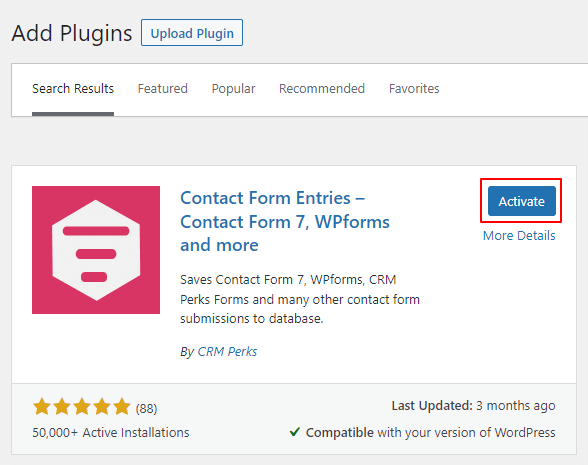
Now, your WordPress website database starts recording the contact form 7 entries users fill and submit. Let’s move further to know how to check and view the entries on your WordPress website.
Step 3: Check and View WordPress Database Contact Form 7 Entries
After users fill out and submit the contact form, they will get the entries under the dashboard menu option ‘CRM Entries’ as shown below. When you click this menu option, the list of entries will be displayed as shown below.
The table contains entries rows and displays all the entries in a single view here.
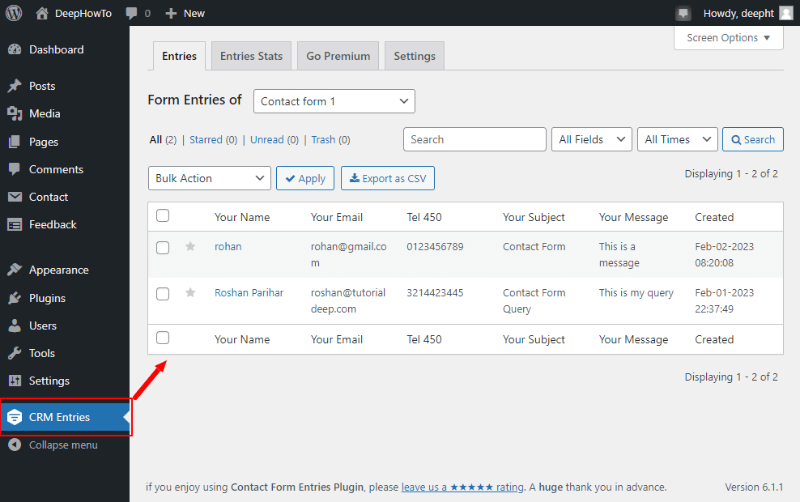
You will get various options here like Selecting form type to see entries, Searching & filter options, Applying various actions, and Downloading records in CSV format.
If you want to know which Device size, Browser, and OS users used are using to fill out the form on your website. You can do so easily and find your users easily about where they come from.
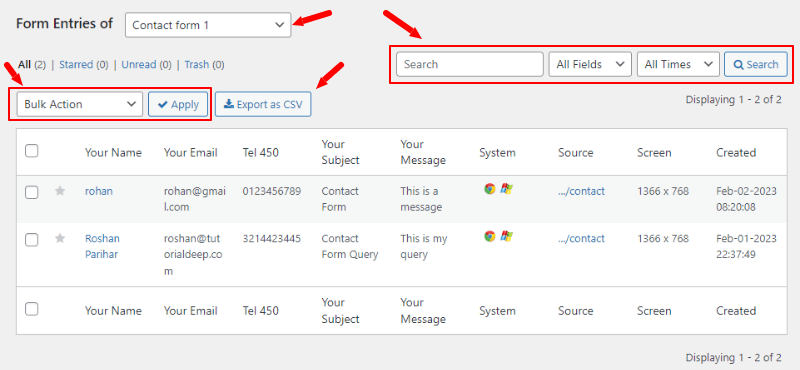
To view the details of entries, you can take your mouse to the entry and click the ‘View’ link as indicated in the image below.

You will be taken to the single entry details page where you will get everything about the single entry. The details are useful to easily know your customer for your business. You can add notes and send emails to your users to track your communication with them.
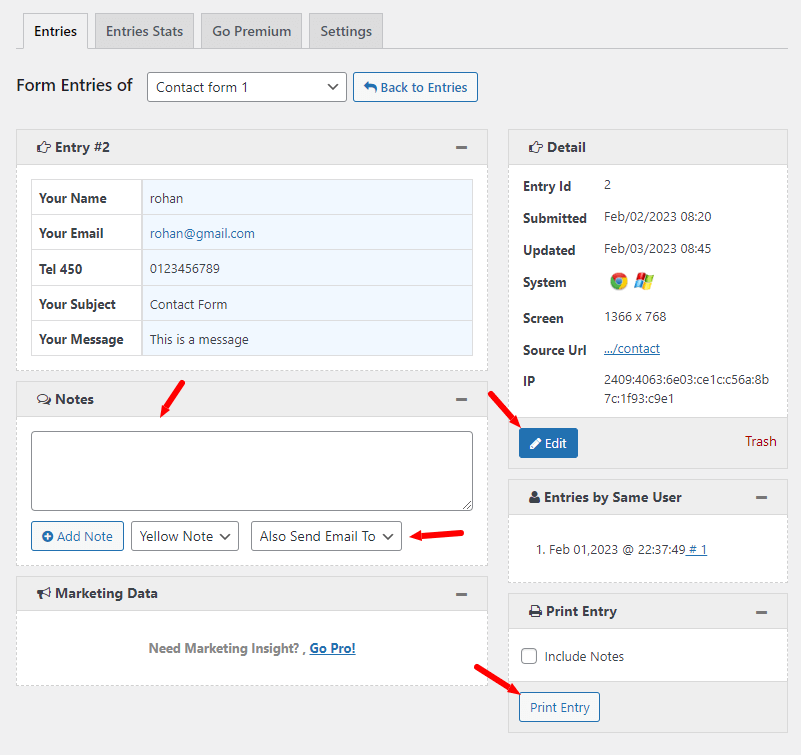
If you want to edit the entry, you can click the ‘Edit’ button as indicated in the image below in blue color. After you click the button, the user’s data is converted into input to edit and update. You can also print the entry with notes to keep the records physically for your business.
Alternative Plugins to Save Data into WP Database
Here are the alternatives of the above plugin that can also help you to save Contact Form 7 entries:-
1. Flamingo (by Takayuki Miyoshi)
Flamingo is developed by the same developer who is behind the development of Contact Form 7. That’s why I have added it as the 1st alternative to the above plugin.

It is simple to use and gives simple features save entries on your WordPress website database. After installation of the plugin, you will get entries under the menu option ‘Flamingo >> Address Book’.
The below image shows the entries saved when users filled the Contact Form 7 and submit it. You can search the data with the filter options and export data in CSV format.
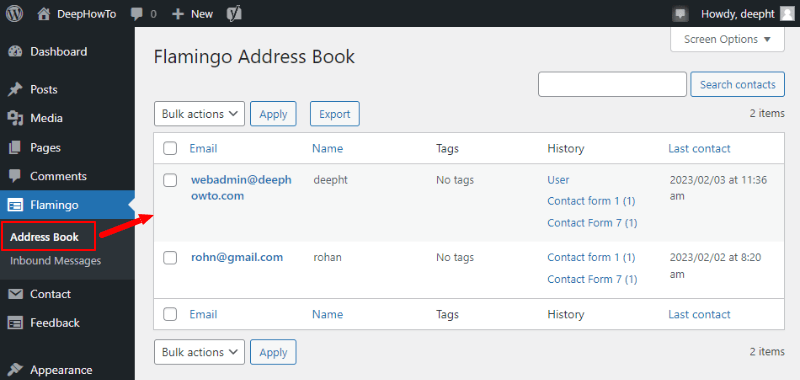
If you want to edit the entries, you can take your mouse to the row and click the edit button. After that, you will be able to edit the data.
2. Contact Form 7 Database Addon – CFDB7 (by Arshid)
With this plugin, you can save your data in the WordPress database. One major drawback of this plugin is that you cannot edit the data and send emails back to your users.
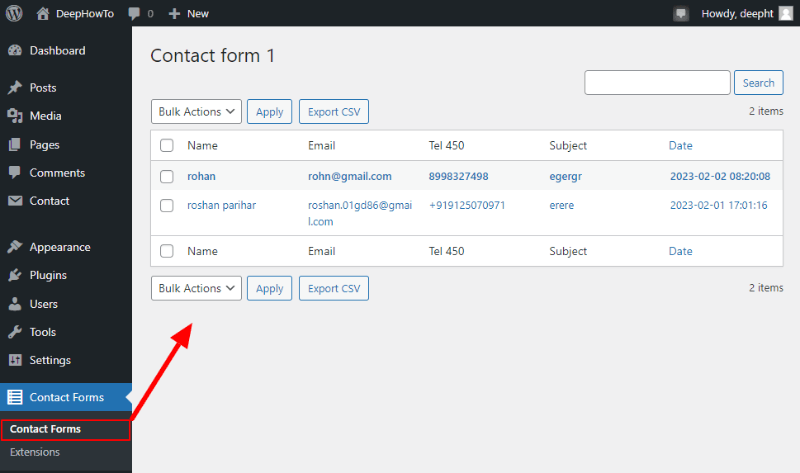
After installation, you have to open the dashboard menu option Contact Forms >> Contact Forms menu option. You will get the list as shown in the image below.
To see the data in more detail, you have to click the data name. After that, you will get the user-entered data in detail but you can’t edit them.
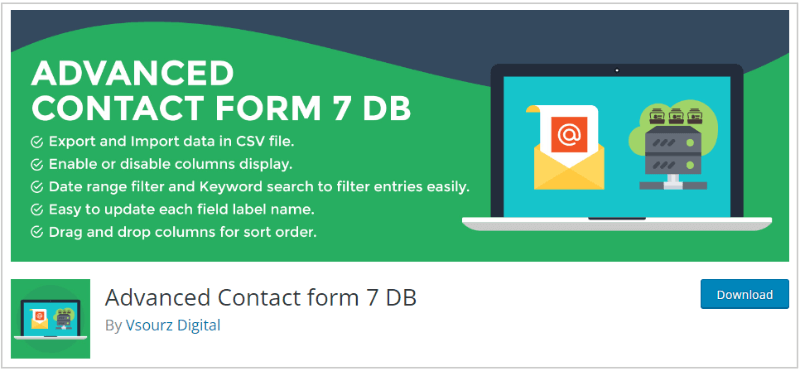
3. Advanced Contact Form 7 DB (by Vsourz Digital)
The advanced contact form 7 DB plugin can also help you save contact form 7 entries into a database. It comes with features to see entries, Filter entries, export entries in CSV format, and edit entries.
After you install the plugin, you have to open the WordPress dashboard menu option Advanced Contact form DB7 >> Advanced Contact form DB7. You will get the list of entries as shown in the image below. You can use the filter option to find the users.
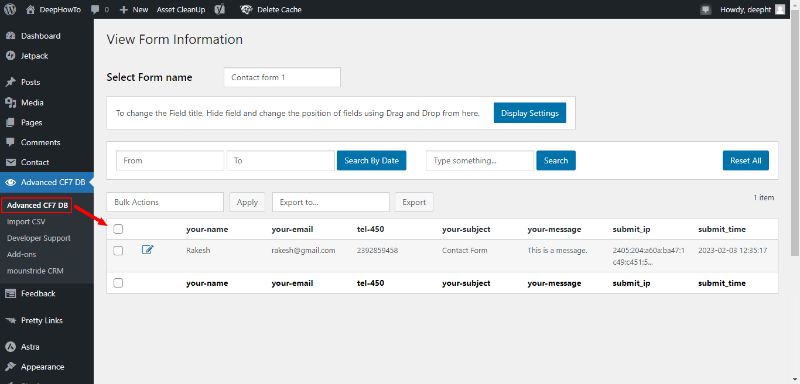
If you want to get data on your local computer system, you can click the ‘Export’ button to export the data in CSV format. To edit the data, you have the click the edit icon given with each record.
Bonus Tip: Create Beautiful Contact Forms and Save Entries Using JotForm
If you want to create beautiful-looking forms and save entries, you can also use JotForm. It is a professional online form builder platform where you can easily create beautiful-looking contact forms.
Why Jotform?
You don’t need to store your form entries in the WordPress database as everything will go directly to Jotform. This does not give extra load to your WordPress website and does not load extra CSS and JS. That’s why it can be the best solution for WordPress users when they don’t want to use plugins on their websites.

How to Create Contact Form Using JotForm?
It comes with 400+ beautifully designed responsive contact form templates. You just have to select a contact form of your choice for a quick start.
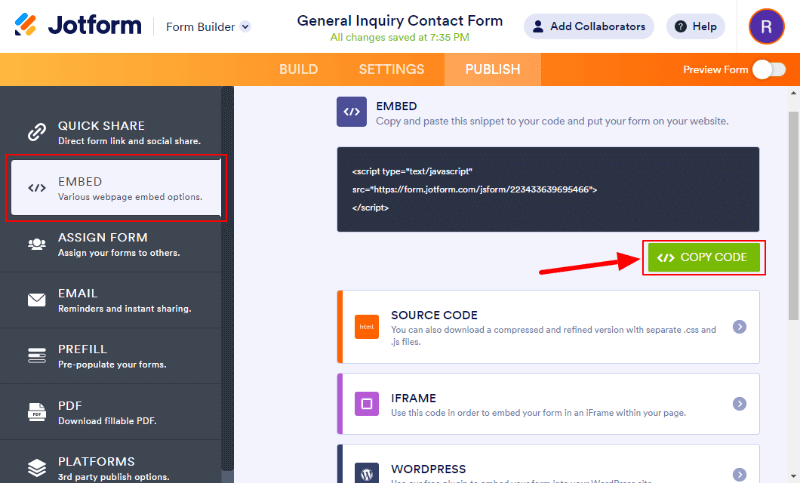
After creating a contact form with JotForm, you will get an embed code as indicated in the image below. You just have to copy the code by clicking on the ‘COPY CODE’ button. After that, paste the code to your website page where you want to display it.
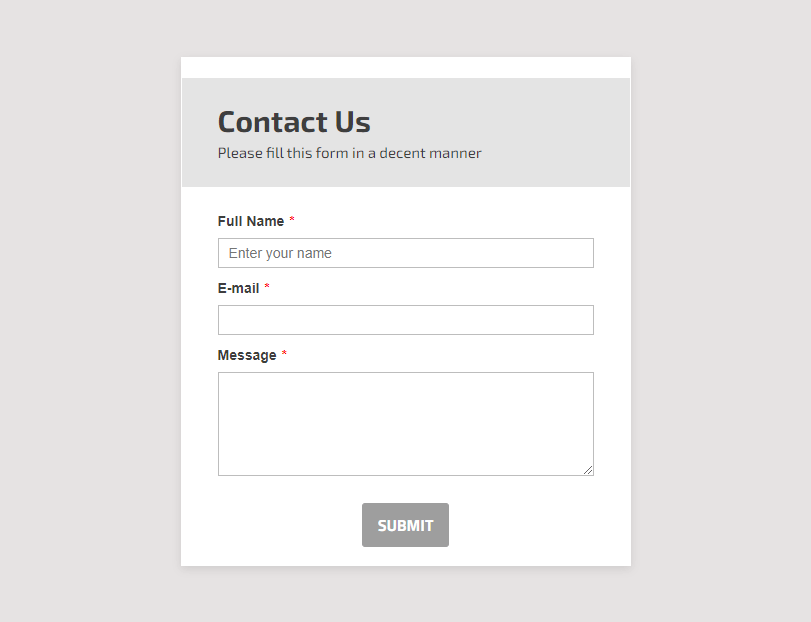
You will get the beautifully designed responsive contact form as shown in the image below. Contact Form 7 requires some CSS coding to make it beautiful. But, Jotform does not require any CSS code to make your form beautiful.
How to Check and View entries in JotForm?
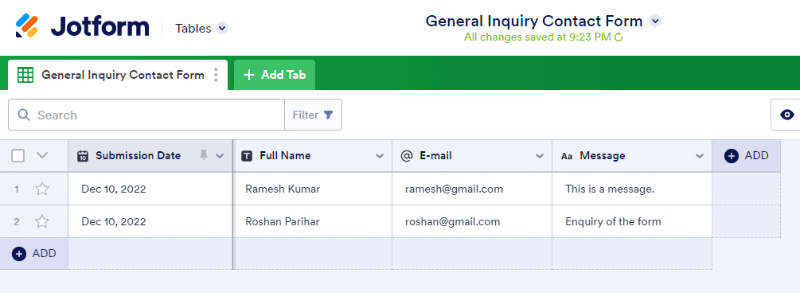
After your audience fills in and submits the contact form, you will get user entries directly on the JotForm website as shown below. You will also get top features like searching, sorting, tagging useful contacts, and downloading submissions in excel format.
So, you will get everything without the need to touch even a single line of code. You can read the full guide on a step-by-step process to create a contact form with Jotform with the link below.
Read the full guide here➜ How to Build Contact Form in JotForm (Without Coding)
If you have any queries regarding this tutorial, please comment below. I will reply and give you solutions.
