Do you want to know how to signup for Jotform to create an account and start creating forms? It is the most popular online form builder platform.
It comes with the largest collection of 10,000+ professionally designed beautiful form templates to create any type of form like Contact Forms, Lead Generation Forms, Payment Collection Forms, and many other form types with conditional logic.
You don’t need to use an email platform to send emails or any coding knowledge to create forms and collect customer data. Jotform comes with email-sending features, check entries directly on Jotform, and download entries in excel format.
It is one of the most popular platforms with a very rich form template library that easily creates forms online. If you are running a website, you can create and add forms without coding knowledge. Select a template of your form type, make some settings, and your form is ready to add to your website.
Affiliate Disclosure: At Tutorialdeep, we believe in transparency for our users. In this blog, there are some referral links. If you signup with these links we will earn some commission at no extra cost to you. We recommend these links because they are our trusted brands.
After creating the form, you just have to embed it to your website using Jotform embed code. It also does give extra load to your website in collecting entries and sending emails. Everything will work from outside of your website directly from JotForm.
So, let’s find out how you can signup for this amazing and powerful platform and start creating forms for your website or business.
How to Signup JotForm and Start Creating Forms (Step-by-step)
Here is the step-by-step process on how to signup for Jotform and start creating forms with it:-
Step 1: Open JotForm Homepage and Choose the Signup Option to Create an Account
First of all, open JotForm homepage to create your account or signup.
On the homepage, you will get three sign-up options buttons given below:-
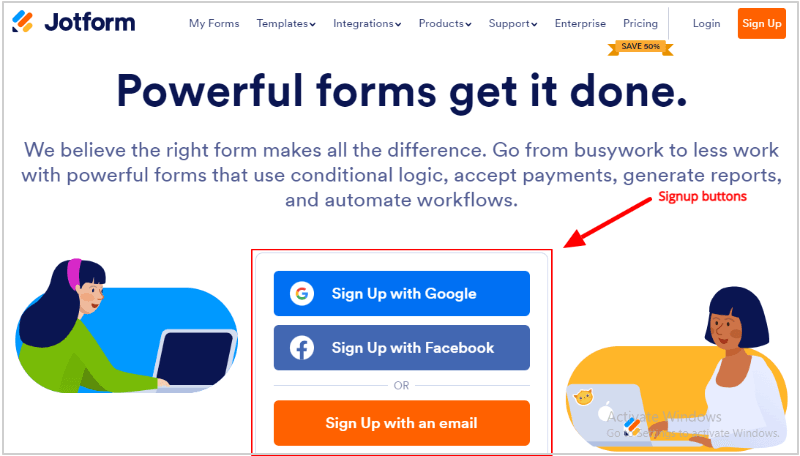
The first two options Google and Facebook are the easiest and fastest way of signing up with Jotform. You can use any one of these two options to quickly signup.
Signup with Google or Facebook
When you click the signup with Google or Facebook, you will get a popup where you have to enter your login username and pass. After that, you need to just allow Jotform to access the account to create your Jotform using its profile details.
That’s it, you are ready to move to the 2nd step to start creating forms with Jotform.
– – – – – – OR – – – – – –
Signup with an email
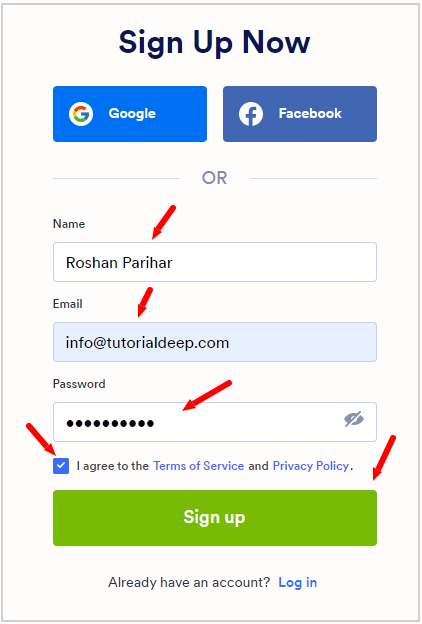
You can also create your Jotform account using your email id. You can choose the third button given on the homepage above. After that, you will get the signup page as shown in the image below.
Enter your name, email, and password for your JotForm account. Also, click the checkbox that you agree with their terms and conditions. Now, click the’ Signup’ button to proceed.
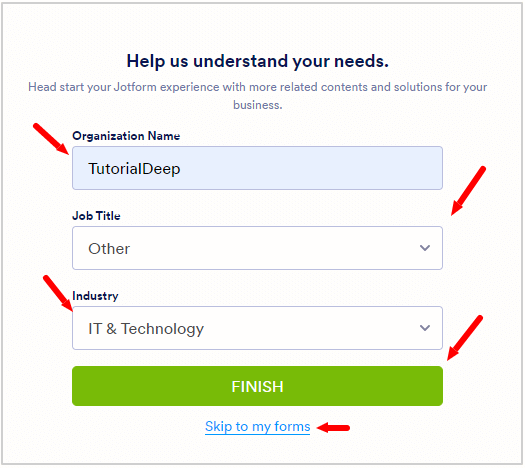
Next, you can enter your organization details and job details. This step is not required and you can click the ‘Skip to my form’ link as indicated below to move directly to the dashboard.
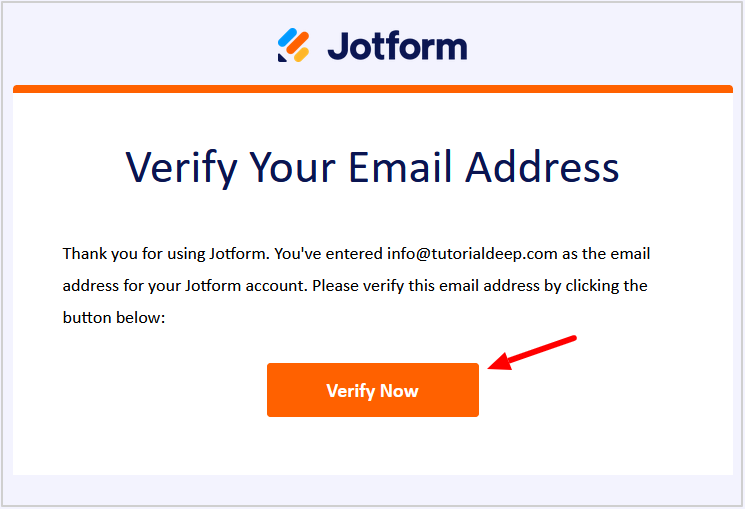
Also, check your email inbox for the email received from JotForm and click the button as indicated below to confirm your email address. This is required to confirm that you are a real person and not a robot.
Now, you have done with the signup process and reached the dashboard. Go ahead and start creating your first form with JotForm using the further steps.
Step 2 Start Creating Forms After Signup and Select a Template
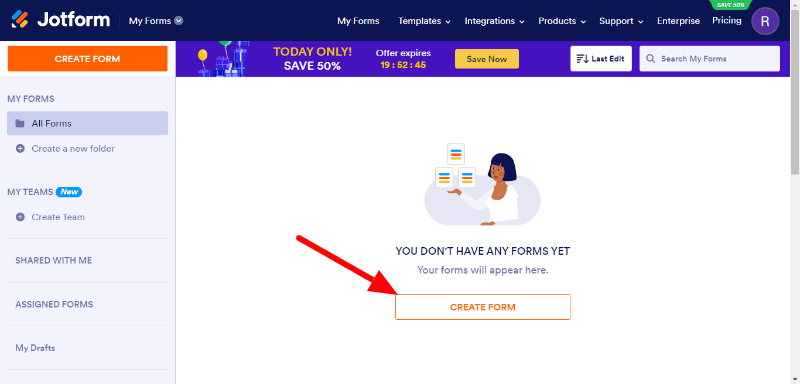
After you create an account with Jotform, it will take you to the dashboard. To start creating your first form with Jotform, click the ‘CREATE FORM’ button to proceed.
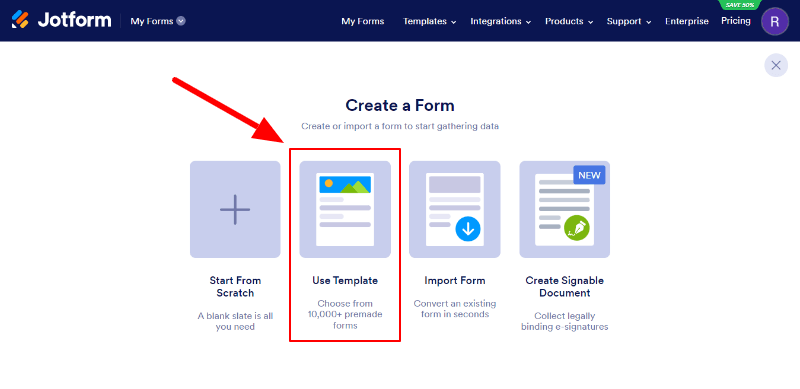
Now, choose the ‘Use Template’ option to visit their largest source of form template libraries to choose one for your business.
You will get rich 10,000+ pre-made form templates for a quick start. On the left-hand side, you will form template categories to filter the templates as per your requirements.
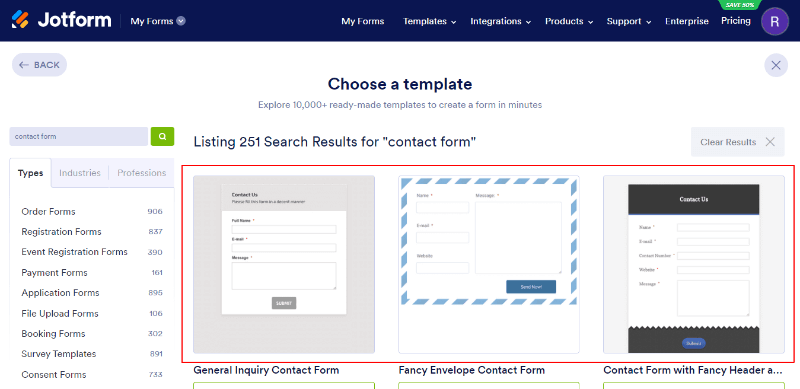
Let’s find out contact form templates to create your first contact form with JotForm. Enter the search term ‘Contact Form’ in the input box as marked in the image below and click the search button.
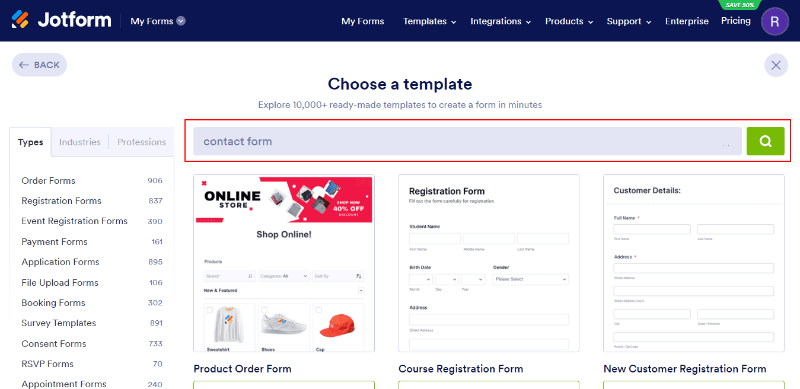
You will get 400+ beautifully designed pre-made contact form templates which is also a rich source of templates compared to other online builders. See the template or scroll down to see more templates to find the template that fulfills your requirements. Just click the template to select.
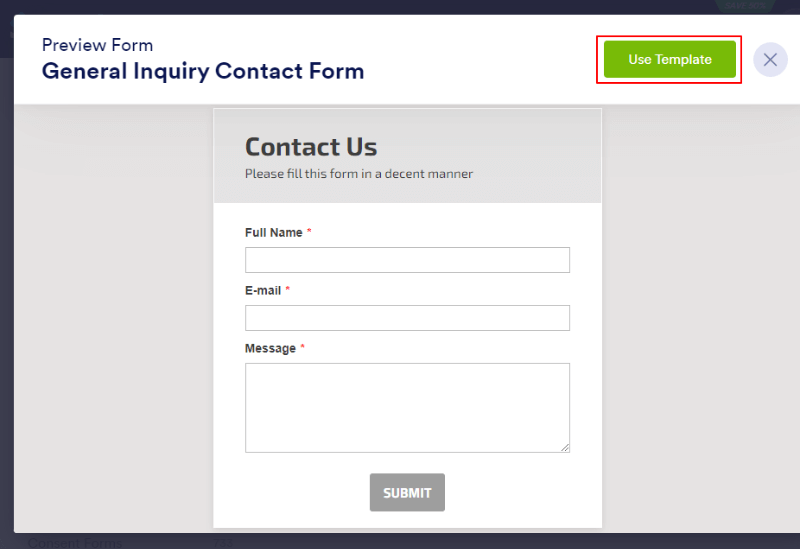
After you select a template, you can see the preview of the template with pre-added form fields. If the template fulfil your requirements, you can click the ‘Use Template’ button to proceed.
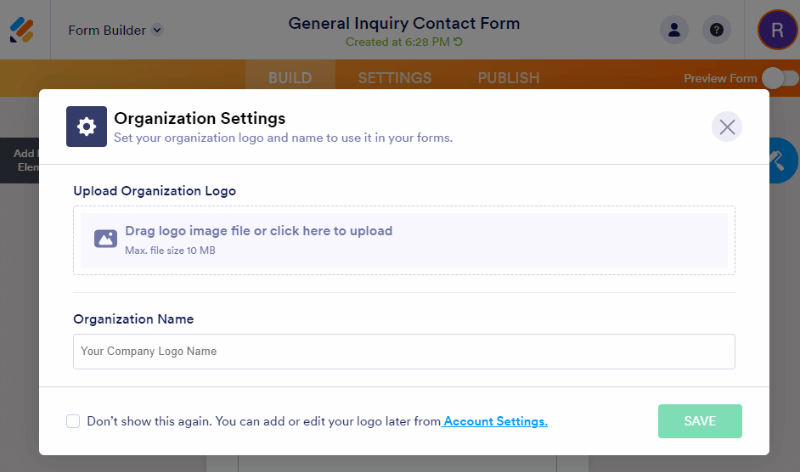
Now, enter your organization settings like your organization logo and name for the branding of your contact form to add to your website. It is useful to make branding through your forms on your website. After that, click the ‘SAVE’ button to move further.
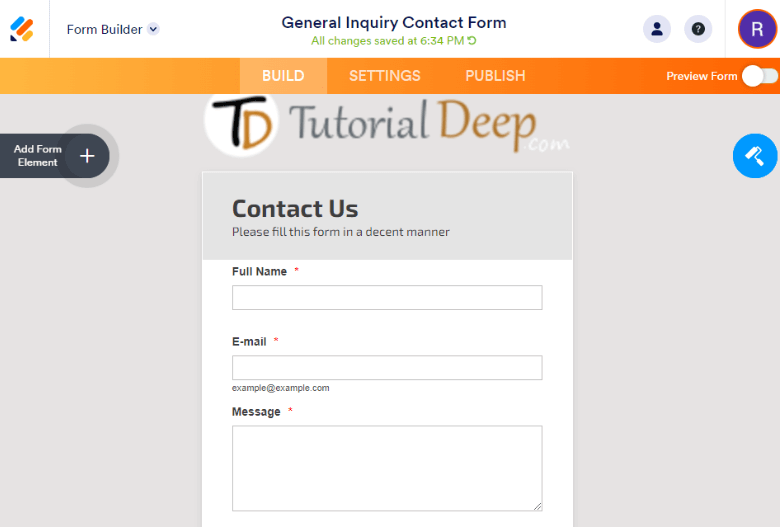
You will get the form with your added branding logo and pre-added form fields. The fields are enough to build a contact form for your website to collect customers’ queries and make communication in the future.
So, let’s start making form field settings in the next step.
Step 3 Make Form Fields Settings One-by-one
In this step, you can add more fields and make form field settings like size, validation, and character limit for users, placeholders, and others. So, let’s go ahead.
You can see the ‘Add Form Element’ with the plus button given at the left top with black color. Click it to add more form fields when required. However, I am moving further with the present form fields to make field settings.
To get the form field settings, click the form fields and click the settings icon () given as indicated below.
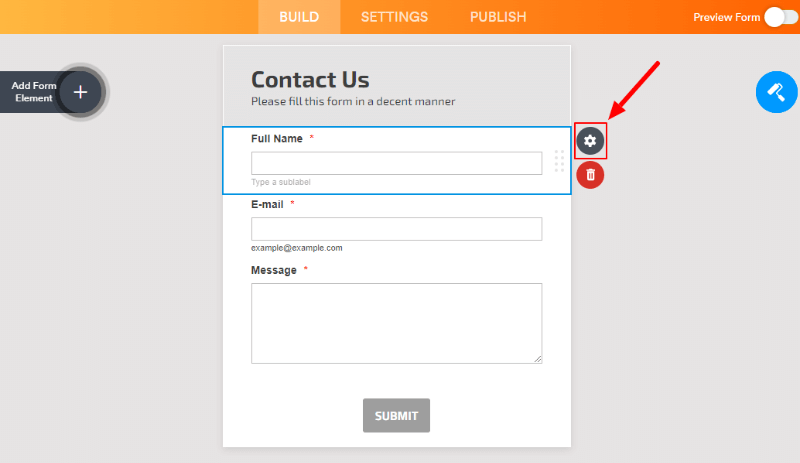
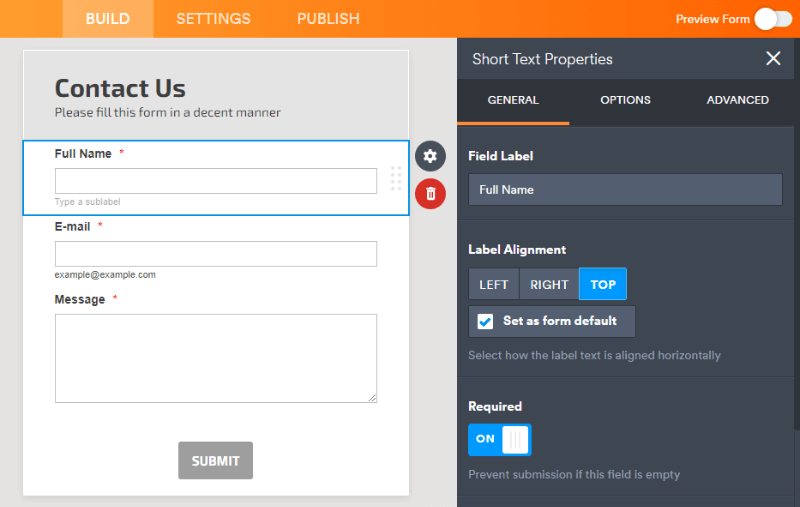
There are 3 different form field setting options General, Options, and Advanced.
Let’s start with the ‘GENERAL’ setting option. In the General setting option, you can change the label, and alignment, and make your field required.
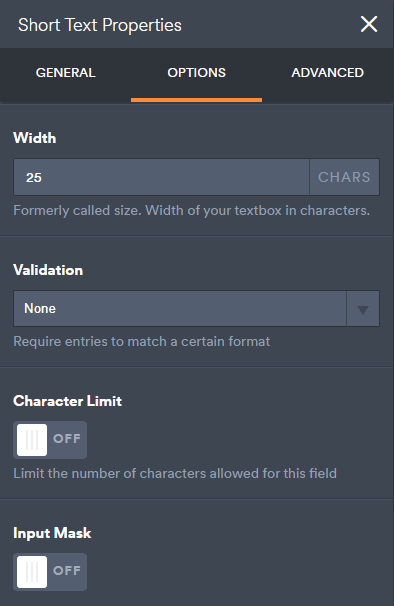
The next is the ‘OPTION’ setting where you can make field settings like width, field validation, and character limit for the field.
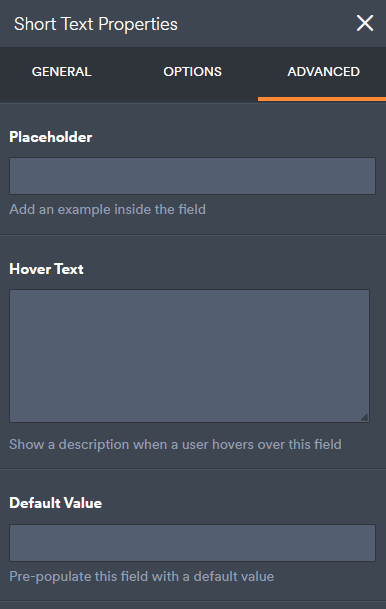
The last field setting is the ‘ADVANCED’ setting option which can make settings like field Placeholder, Hover Text, and Default Value for the field.
So, let’s start making form notification settings on submission in the next step.
Step 4 Make Form Settings and Notification Settings
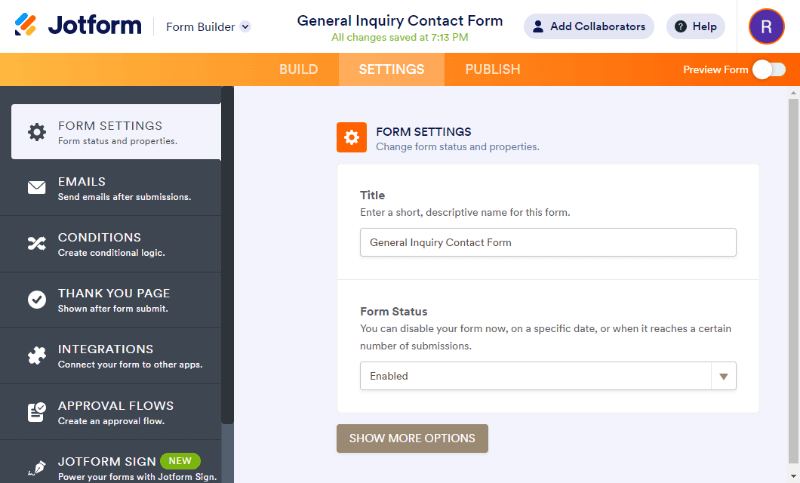
In the form settings, you can set a name for your form to display everywhere as well as email notifications. Enter a name for your form and make sure your form is enabled by selecting ‘Enabled’ in the form status dropdown.
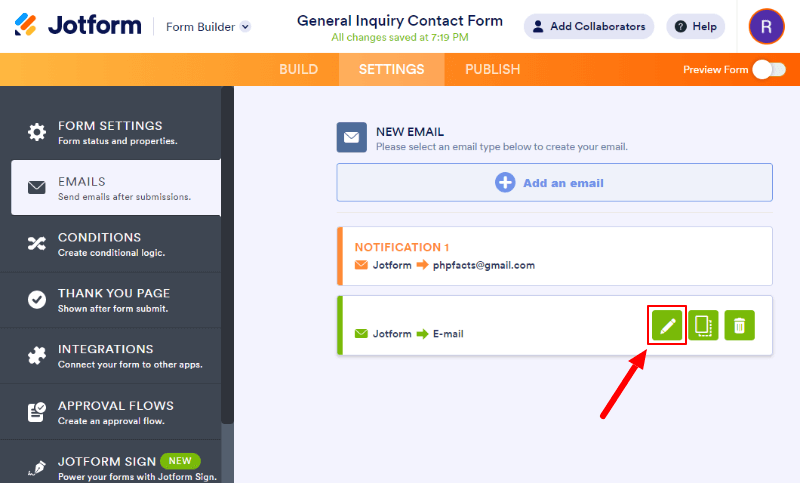
Next is the ‘Emails’ settings where you can make enter the recipient email address and message content to send to your customers and website owner.
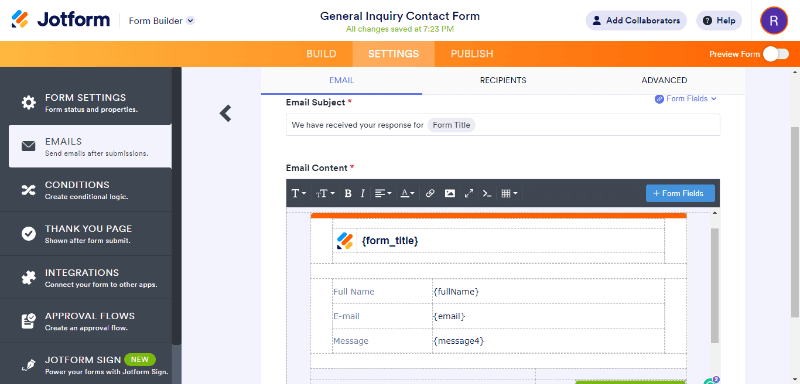
In the ‘Emails’ setting, you can also set up the email format that you can change according to your requirements. The email content includes the form name, full name, email, and message.
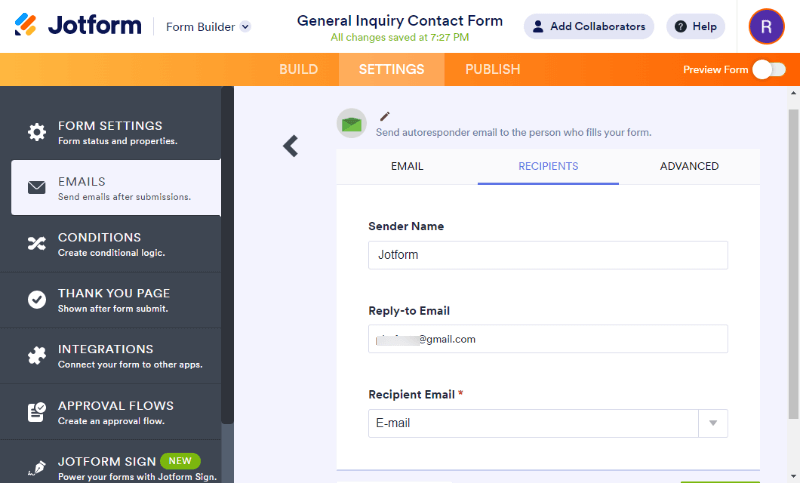
To make the recipient email setting, go to the ‘RECIPIENT’ tab. You can make email settings like sender name, reply to, and recipient email.
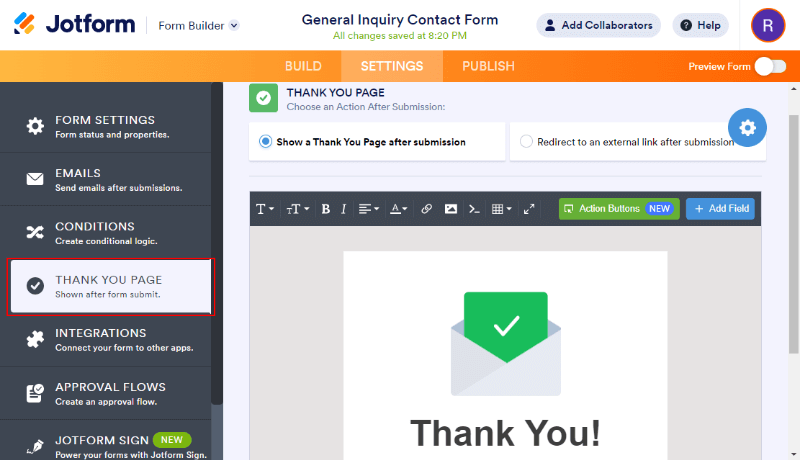
I recommend to setup a thank you page to display after someone fills in the details in the form and clicks the submit button. You can enter a redirect URL to show a different page as a thank-you page for users.
Step 5 Finally, Add Form to your Website Using Embed Code After Signup and Form Creation
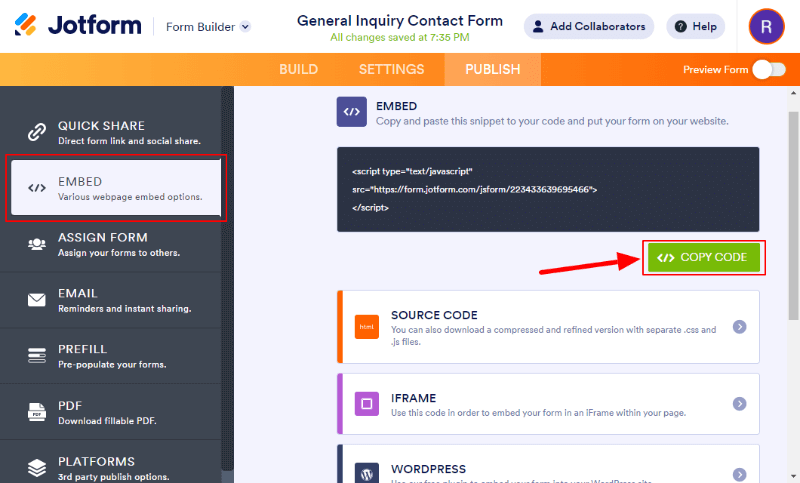
Now, everything has been done for your form. Your form is now ready to add to your website pages. JotForm provides an easy-to-use embed shortcode you can copy and paste to your website page location where you want to display it.
You will get the short embed code as shown in the image below.
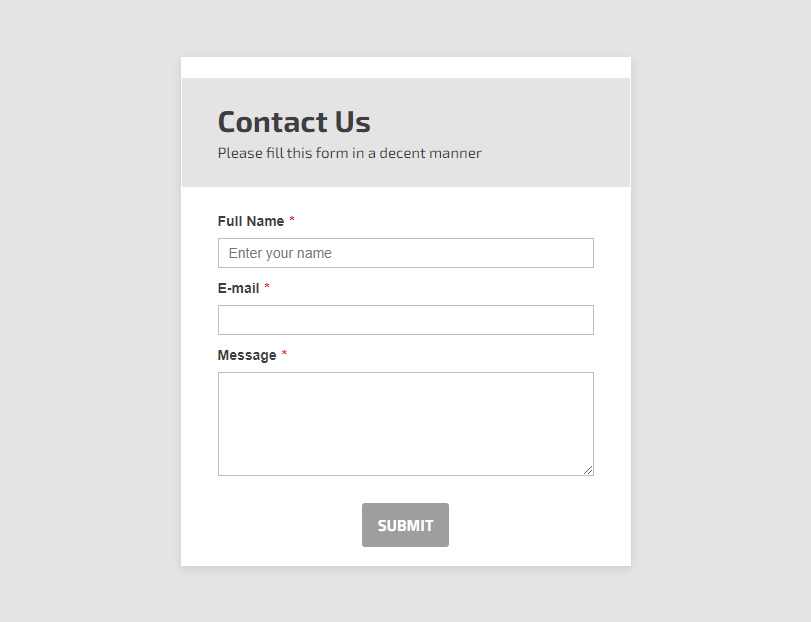
After you add the form to your website pages, it’s time to open the page and see your form displaying as shown in the image below.
Let’s test your form to make sure that your form is working correctly. Fill out the form and press the submit button to get the email as an owner of the website. Also, check the recipient email inbox to see the email received by the user who submit the form.
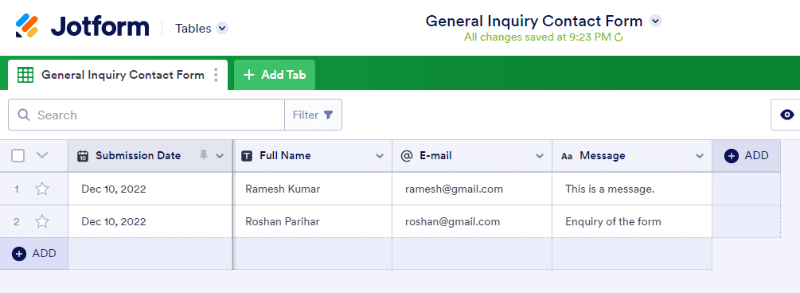
You can also check the entries or submissions in the list format as shown below image. It contains a filter option to help you find submissions when there can be a large contact list. You can also download the entries in excel format.
That’s all.
Now, you know how to signup JotForm and what is the process to create a form with it. It’s time to share your experience with me about JotForm. Please comment below.
You May Also Like to Read
