In this tutorial, learn how to download and install Python on Windows 10. Follow the step-by-step process to install Python on your computer. Install on automated location or on to a specified location of Windows OS.
How to Download Python for Windows 10
To install python, you have to download the latest version of python from the Python official website. This gives the latest version of Python to download on your Windows operating system.
See the screen below giving you a button with text “Download Python 3.7.0“. Click this button to download the latest version of Python on your Windows.
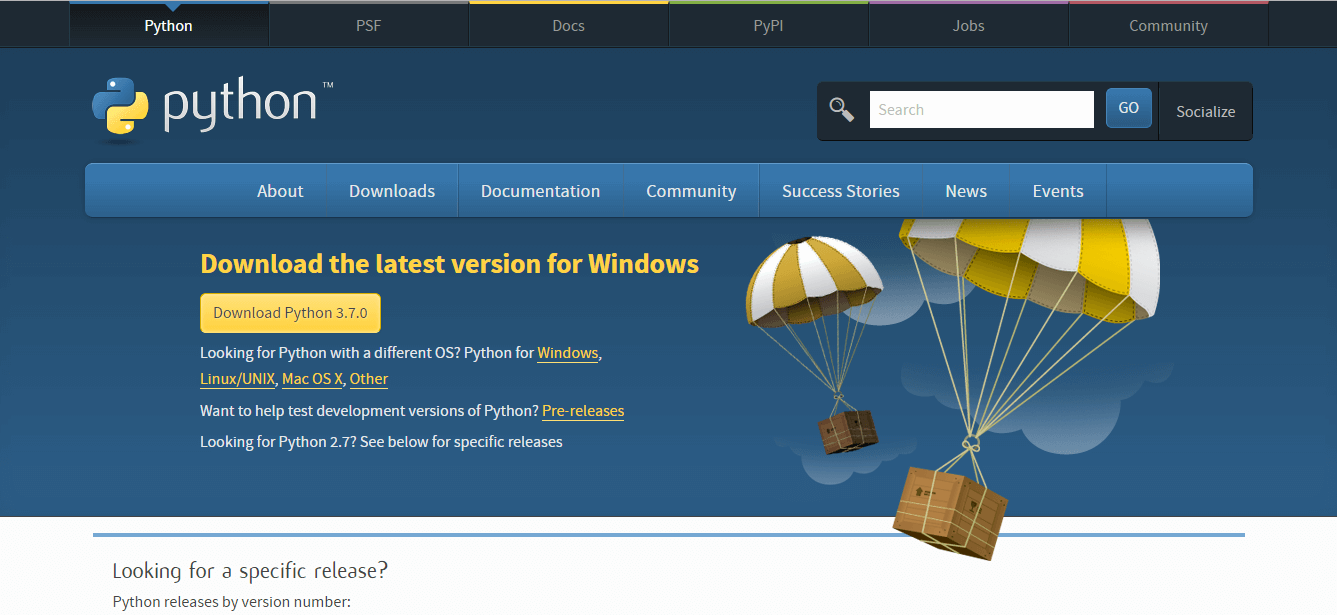
This tutorial gives you download and set up the Python process for your Windows OS. The version of Windows can be any including Windows 7, Windows 10 and all other versions of Windows.
How to Install Python on Windows After Download
After you download the latest version of Python, you have to double click Python setup installer. This gives the below-given image screen to start the process with the two options given below.
- Install Now
- Customize Installation
Let’s start with the “Install Now” process first:
Method1:- Install Python on Windows Using “Install Now”
This process installs the Python on windows automated location. You can check the installation location in the image given below. The location automatic generated for fast process of installation.
Note: If you want to install the Python on the specified location, please follow the second method.
The “Install Now” link is given as in the screen below. This gives you the automated installation location as given in the link.
But before you click the link, you have to click the checkbox. The checkbox set the PATH for Python on your windows on installation. To add the PATH, you just need to click the checkbox given in the image. The check box contains the text “Add Python 3.7 to PATH” above with of
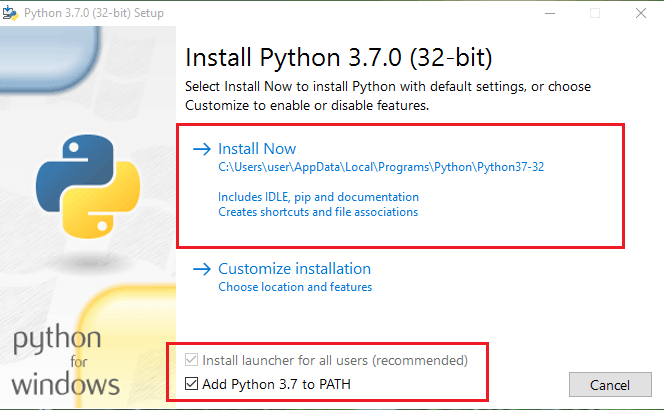
Now, click the “Install Now” link given in the above image. This starts the installation process of Python.
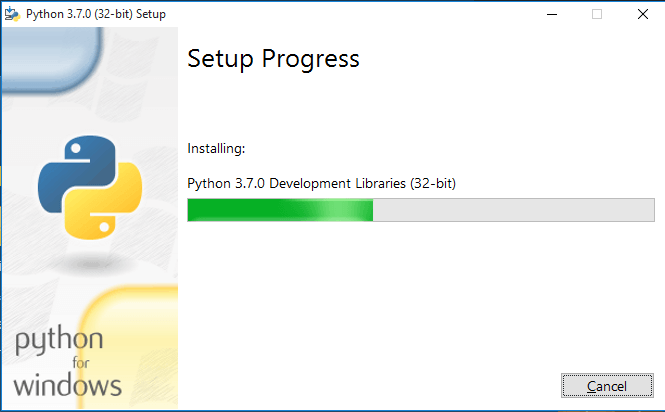
You can check the installation progress as given in the screen above. This installs all the libraries of Python on to your local system.
After the progress is completed, you will see a setup successful message. The successful message screen is as given below.
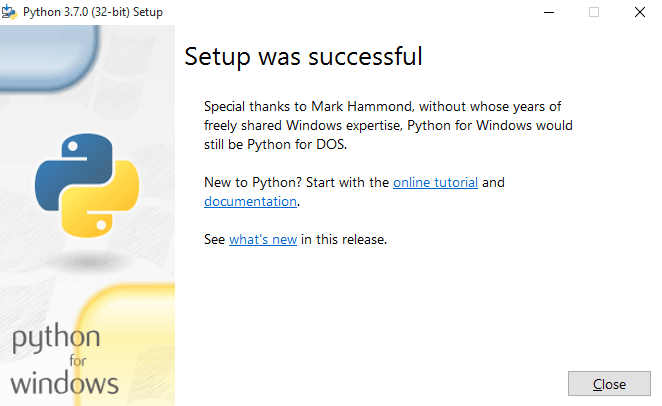
Click the close button to complete the process and open Python.
Method2:- Install Python on Windows Using “Customize Installation”
To install the Python on a specified location of the computer system. follow the steps given below.
Step1: First click the checkbox with the text “Add Python 3.7 to PATH“. This adds the Path of Python on your computer system.
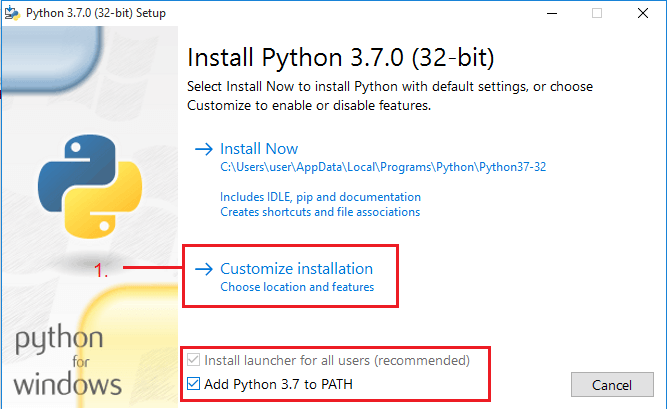
After that, You have to select the link option with the text “Customize Installation“. This starts the installation process of Python on to a specified location.
Step2: In this step, the screen is as shown in the image below. You don’t need to click any checkbox here. Just click the “Next” button here.
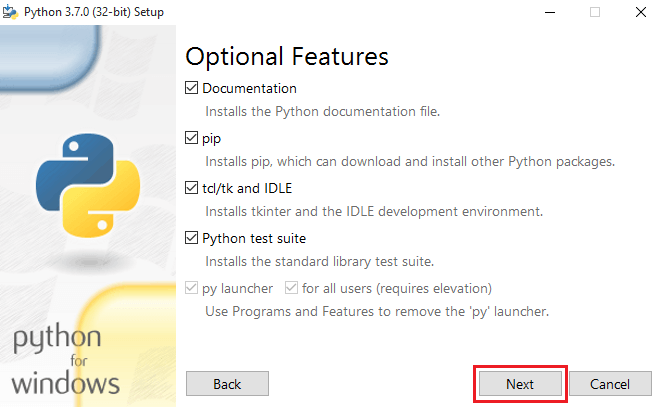
Step3:
In this step, you have to browse and select the location where you want Python.
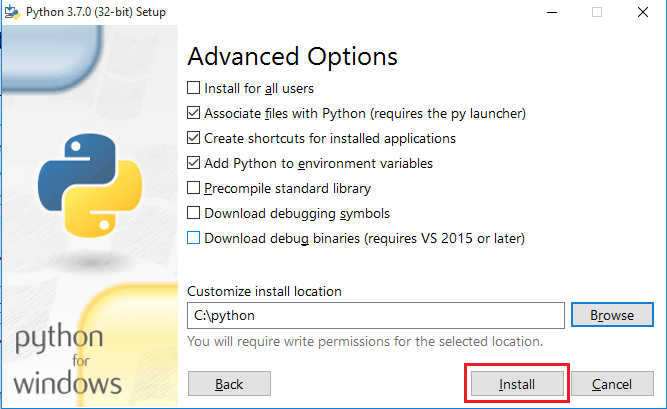
The above image installs the Python software in Python folder of C drive. Click the “Install” button to start the installation progress.
The installation progress shows the addition of all Python files and libraries.

After the progress is completed. You will get a successful message of Python installation.

DOWNLOAD Free PYTHON CHEAT SHEET
You may also like to read.
- Best IDE Text Editor or Code Editors for Python on Windows
- How to Install PyCharm IDE For Python on Windows
Hope you like this tutorial of how to download and install Python on Windows 10. If you have any query regarding the tutorial, please comment below.
Also tell me, which software you have install for Python development on Windows.

Hello and thank you for the help! However, I would like to ask one question. Would there be any trouble had I not clicked on “add Python…to path”? So far, it seems to function just fine, but I wonder if I might encounter problems as I work with a more complex code. If so, what would be the best approach to fix this? Do I need to reinstall the program? Thank you in advance!