In this tutorial, learn how to install PyCharm IDE for Python on Windows. PyCharm IDE comes with all the tools you need for software development with many useful features.
You can start writing and executing your Python codes directly on PyCharm IDE. It provides pretty much features for Python software development like code inspection, integrated version control, highlight syntax, autocompletes code completion, debugger. With these top features of PyCharm, it is the topmost IDE for Python software development.

Let’s find out how to install PyCharm IDE for Python on Windows with the step-by-step process given below.
How to Install Pycharm IDE For Python on Windows
Before you start installing PyCharm, it is recommended to install Python to start creating a Python project on PyCharm after installation. If you have already installed Python on your computer system, you can leave this and proceed with Step 1 below.
Follow this guide for Python Installation ➜ step-by-step process to install Python on Windows
After you have done installing Python, you can proceed further to follow the steps given below to install PyCharm.
So, let’s get started.
Step 1: Download PyCharm IDE to Install
First of all, you need to download PyCharm on your local computer system. To download PyCharm, open the PyCharm download page. You can also use the below button to go to the PyCharm download page.
➜ Click here to download PyCharm
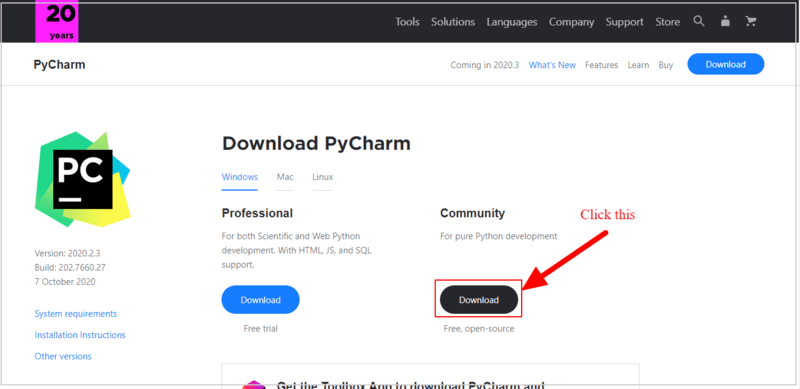
There are two PyCharm download options for you. You need to choose the ‘Community’ edition for pure Python development as it is free to use and open source to download for anyone. Click the ‘Download’ button given below the ‘Community’ edition.
Step 2: Click Setup to Start Process of Pycharm IDE
After you download the PyCharm, you have to double click the PyCharm setup installer. It started the installation with the welcome message as showing in the image below.
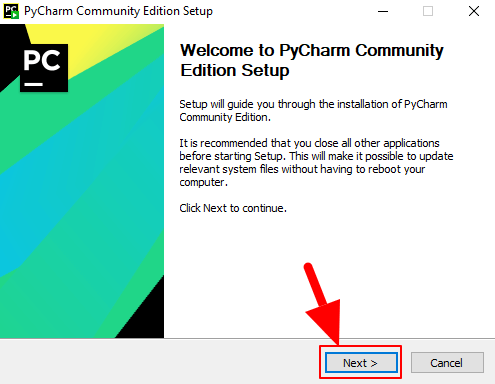
Click the ‘Next’ button to proceed further.
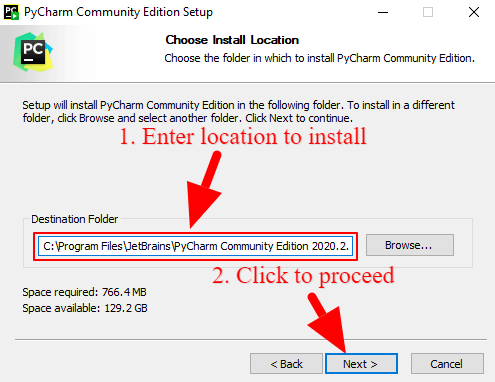
Step 3: Choose Installation Location of Pycharm IDE
Here, you have to choose the installation location where you want to install the PyCharm on your computer system. After you choose the installation location, click the ‘Next’ button to go to the next step of installation.
Step 4: Installation Configuration and Options for Pycharm
Now, set the configuration for the installation of PyCharm with the various options as given in the image below. You can create a desktop icon, update path variables, and create associations for PyCharm.

Click the ‘Next’ button to proceed with the configuration options you have selected.
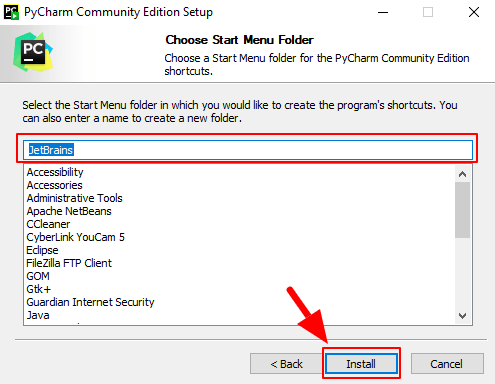
Step 5: Choose Start Menu Folder for Pycharm
Here, you can choose a name for the start menu folder. By default, it creates the name ‘JetBrains’ for the installation. You can leave the process and click the ‘Install’ to start the installation of PyCharm.
Step 6: Install Pycharm IDE Installation Progress
You will get the installation progress as showing in the image below. This shows the percentage of extraction of services and features of PyCharm. You can check the progress and installation of features by clicking on the ‘Show details’ button.

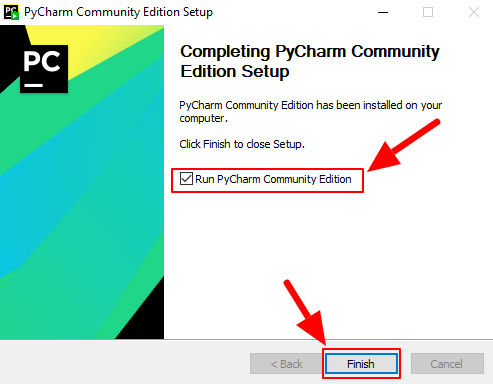
Step 7: Finish Pycharm Installation
After the PyCharm gets installed completely on your computer system, you will get a completion message where you have to click the checkbox. Also, click the ‘Finish’ button to complete the installation process and open the PyCharm IDE software.
That all, congratulation! you have successfully installed the PyCharm IDE on your computer system.
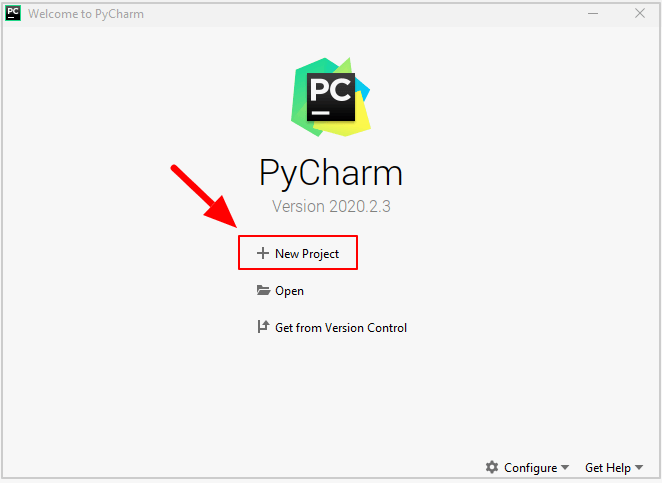
Let’s create a new Python project using PyCharm.
How to Create New Pycharm IDE Project After Installation
To create a new Python project, click the ‘+New Project’ button as showing in the image below.
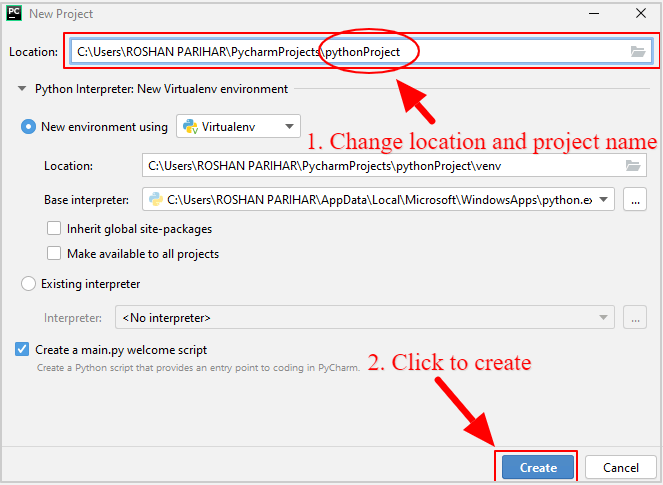
You will get a project creation window where you can choose the location of the project and the name for the new project. After you have done with the location and the name, click the ‘Create’ button to proceed.
Your project gets created and you will get the main file named main.py as showing in the image below.
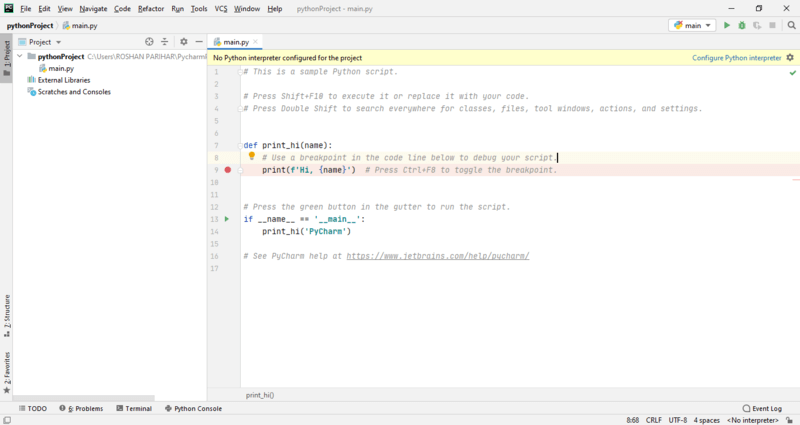
This is all about the process of installation of PyCharm and the new project creation using the PyCharm IDE.
You may also like to read.