To install PHP on Windows, you have to find a server to install on your local computer system. Local servers help you to run PHP codes on your computer system. There are many servers available to install on your computer and start executing PHP codes.
Required Settings to Install PHP on Windows
There are three things require to execute PHP codes that are given below:
- Apache Server
- MySQL
- PHP Engine
All the above applications can easily be installed on your computer system using the options given below:
- WAMP or XAMP for Window Server
- LAMP for Linux
- MAMP for MAC
- MAMP for MAC
In this tutorial, you will learn the process to install the XAMP server as given below.
How to Install PHP on Windows Local Computer in 3 Easy Steps
Here is the step-by-step process to Install PHP on Windows or your local computer system with XAMP:
Step 1: Download XAMP
TO download XAMP on your local computer system, open Apachefriends XAMP download page. Here, you have to click the download as indicated in the image below.
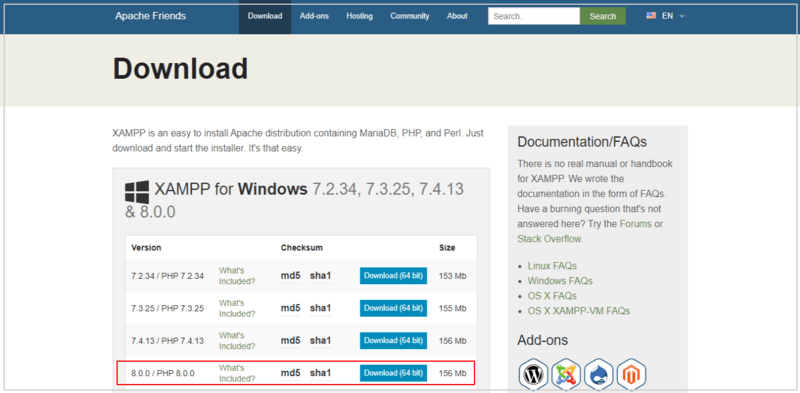
When you click the above button, the XAMP server setup gets downloaded on your local computer.
Step 2: Installation Process of XAMP After Download
After the download process completed, you have to click the XAMP installer you will find after download the above. When you click the setup, you may get a warning message that shows that avoid install on computer location ‘C://Program Files’.
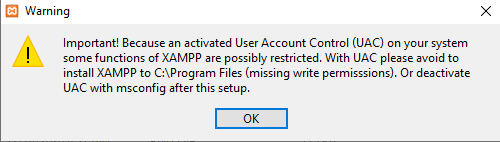
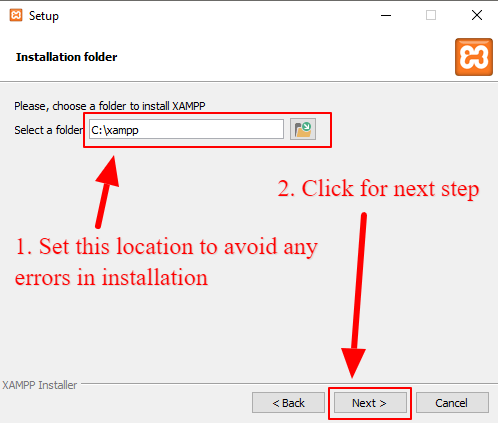
I recommend you to install the XAMP server within the location C://xamp’ on your local computer system to property install PHP on Windows. You will get the option below in the process where you have to select the location to install the server.
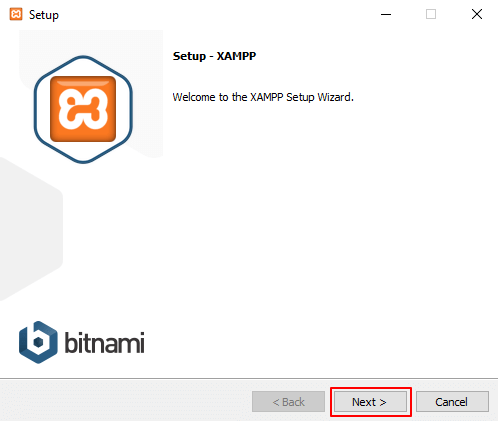
When you click the ‘OK’ button given in the image above, you will get a setup welcome as showing in the image below. Here, you have to click the ‘Next’ button to process further installation process.
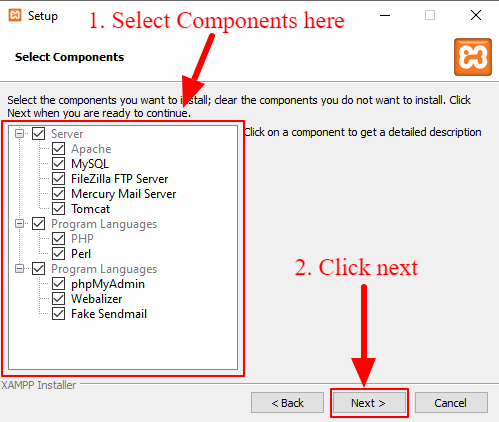
Now, select the components you want to install with the setup. Here, you have to select all the components as showing in the image below to get full features of the XAMP server. After selecting all the components, click the ‘Next’ button for the next step.
After that, you will get the process where you have to select the location to install the XAMP server. An error messaging is showing the start of the setup above. To avoid the above warning errors, you have to select the location ‘C://xamp’ as showing in the image below.
Click the next button to move further.
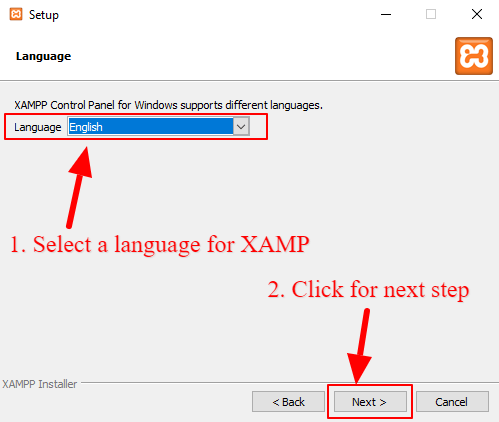
Select your preferred language here for the XAMP to use on your local computer system. After selecting the language, click the ‘Next’ button as indicated in the image below.
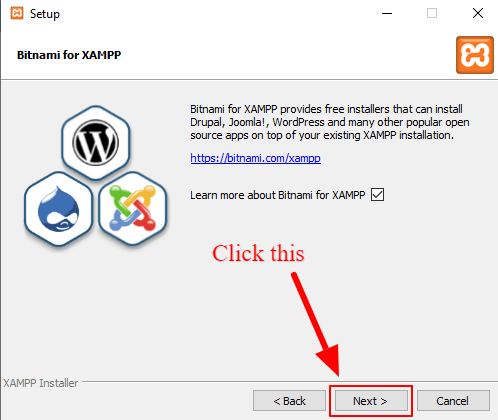
You will get a process where you have to click the ‘Next’ button to move further without the need of selecting an option here.
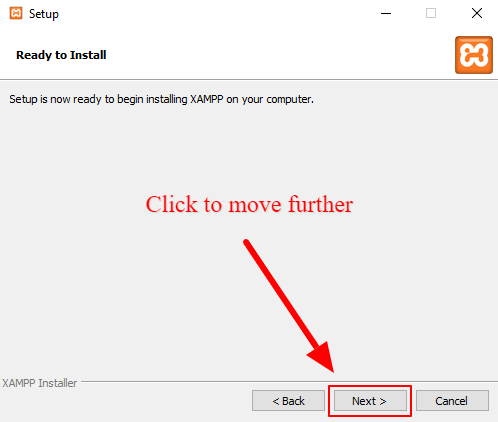
Furthermore, your setup is ready to install XAMP on your local windows computer system. Click the ‘Next’ button to process further.
Here, you will get a progress bar that shows the percentage of completion of XAMP installation. You have to wait till the progress of the installation is completed.

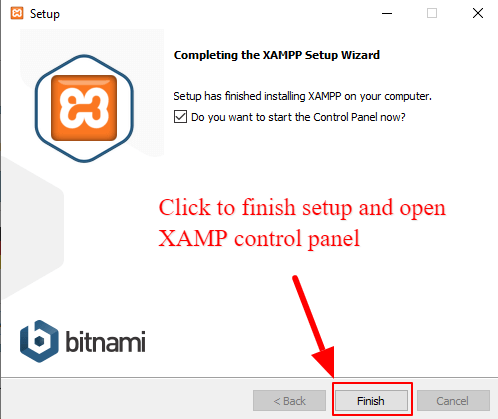
After the above progress bar is completed, you will get a complete message that shows that the installation is completed on your windows computer system. Click the ‘Finish’ button to close the setup wizard and open the XAMP control panel.
Step 3: Start XAMP Server Control Panel After Installation
The XAMP control panel is showing in the image below. The control panel contains 5 different modules as Apache, MySQL, Filezilla, Mercury, and Tomcat. With each module, there is a ‘Start’ button given to start these modules and use them on your local computer system.

You have to click only the first two modules that are Apache and MySQL to start using PHP on your windows computer system. Click the two ‘Start’ buttons as indicated in the image above to start the server that helps you run PHP scripts on your local computer system.
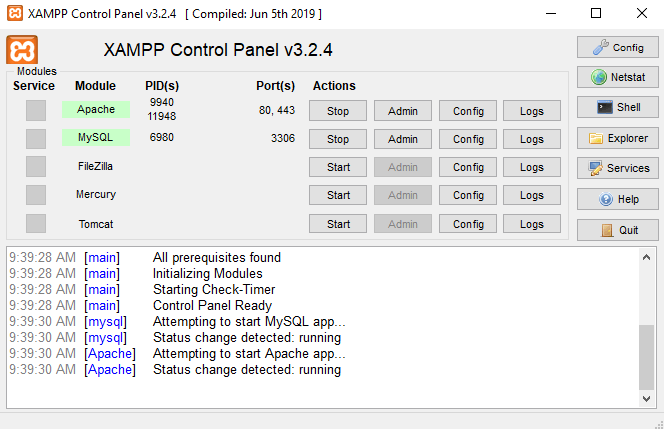
After you click on the start buttons, your Apache and MySQL get started on the XAMP server.
Let’s find out how you can run your PHP scripts using the XAMP start after you start using the control panel above.
How to Run PHP Codes on your Local Computer System
To run PHP scripts, open the C:// drive and visit the location ‘C:/xamp/htdocs/‘ folder of your computer system. Here, you have to create a PHP file for execution using the XAMP server.
Now, create a PHP file with ‘.php’ extension as named demo.php in the location ‘C:/xamp/htdocs/‘. After that, add a PHP code whose sample is as given below. The code should start with a PHP starting tag <?php and closing tag ?>.
|
1 2 3 |
<?php echo "Hello World!"; ?> |
To run your PHP file, open your favorite web browser (like Google Chrome), and type localhost/filename.php in the browser address bar. You have to replace the ‘filename.php’ with your PHP file name.
In my case, the filename is demo.php that I have to enter the web browser address bar to execute the PHP file with the XAMP server.
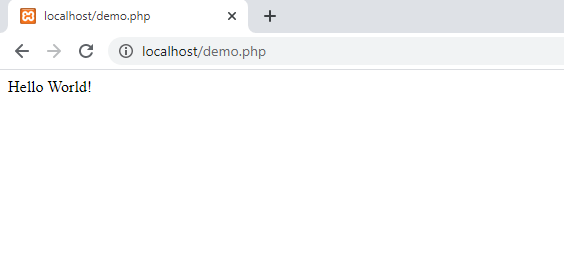
The above image showing the output of the file demo.php as a result of the execution of PHP codes placed inside the file.
This is all about the process of how to install PHP on Windows.
More Tutorials Based on this Post