Ready to take your website to the next level with Nexcess hosting? Follow these simple steps to get started!
Step 1: Visit the Nexcess Website
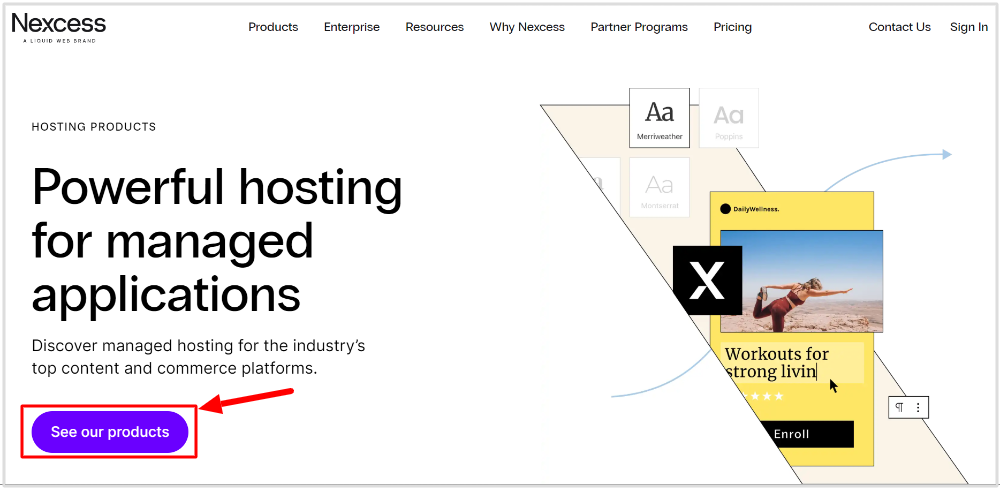
First, open your favorite web browser and navigate to the Nexcess website homepage.

Click the ‘Explore products’ button to move further.
Affiliate Disclosure: At Tutorialdeep, we believe in transparency for our users. In this blog, there are some referral links. If you signup with these links we will earn some commission at no extra cost to you. We recommend these links because they are our trusted brands.
Step 2: Explore Hosting Plans
Once you’re on the homepage, take a moment to explore the various hosting plans available.
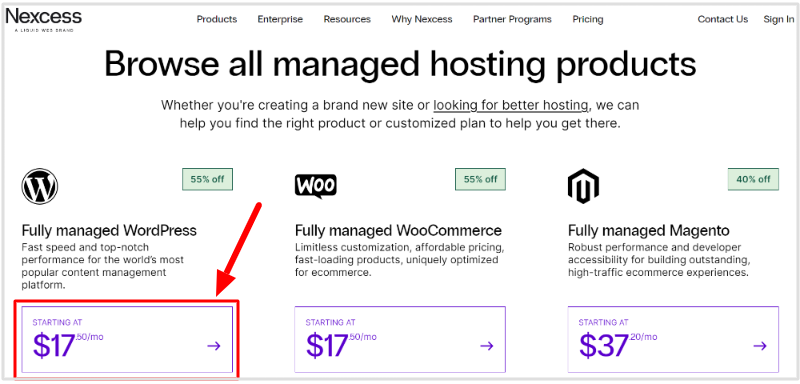
Whether you’re looking for managed WordPress hosting, Magento hosting, or another option, Nexcess has you covered. You just have to choose your type of hosting for your website.
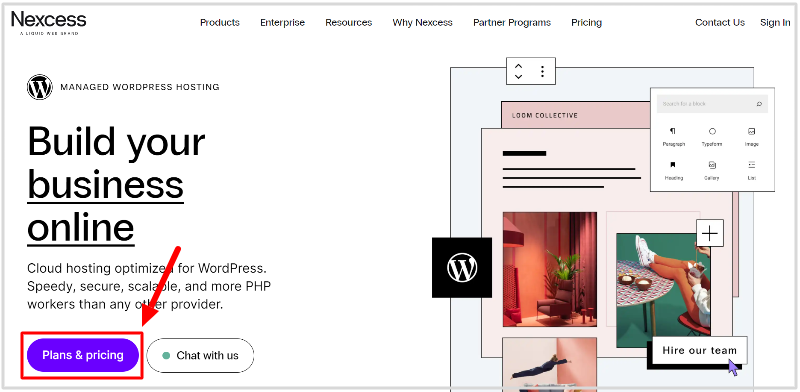
After that, click the ‘Plans & Pricing’ button to see the plans of your type of hosting.
Step 3: Select Your Plan
You will get your plans under your chosen hosting category. Review the different tiers within that category and select the one that best fits your needs.
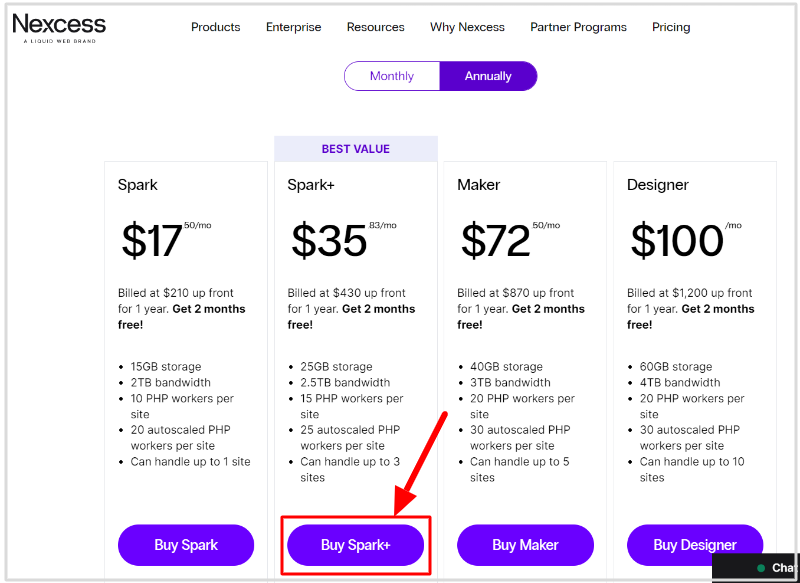
It is recommended to click the “Buy Spark+” button to get the best value pack.
Step 4: Customize Your Plan
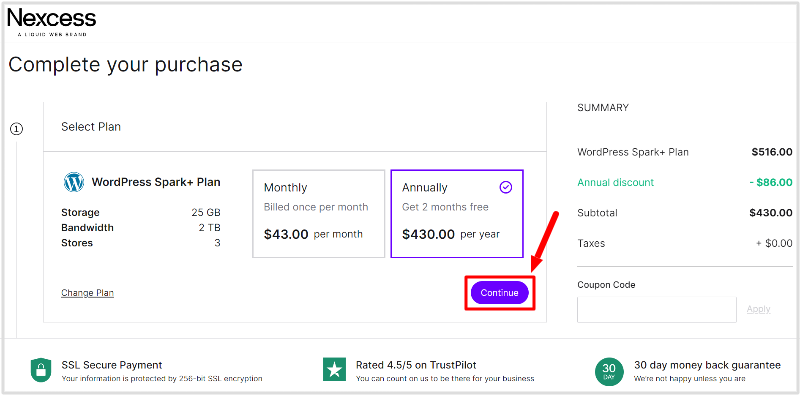
Next, you’ll be taken to a page where you can customize your hosting plan. Here you can select your billing cycle (monthly or yearly) and add any additional features or upgrades that suit your needs. Once you’ve configured your plan, click “Continue.”
Step 5: Create Your Account
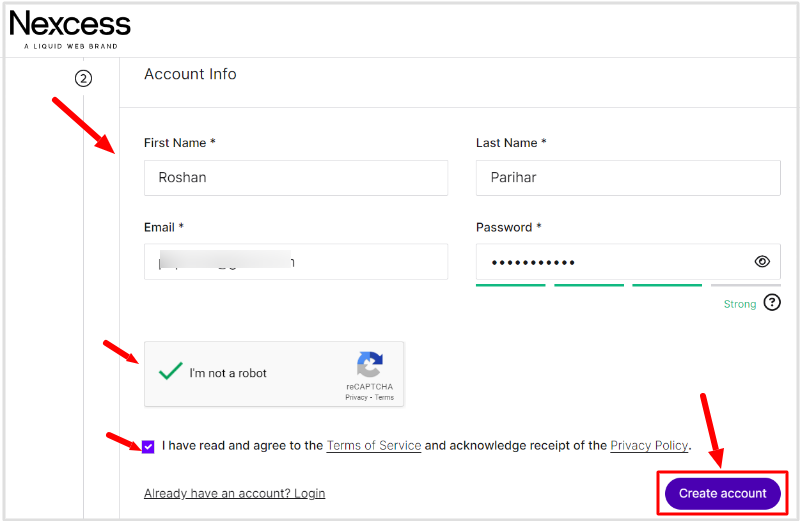
Enter account details
Now it’s time to set up your Nexcess account. Fill in your personal details, including your name, email, and password for your account. You’ll also need to create a secure password. Double-check your information and click “Create Account”.
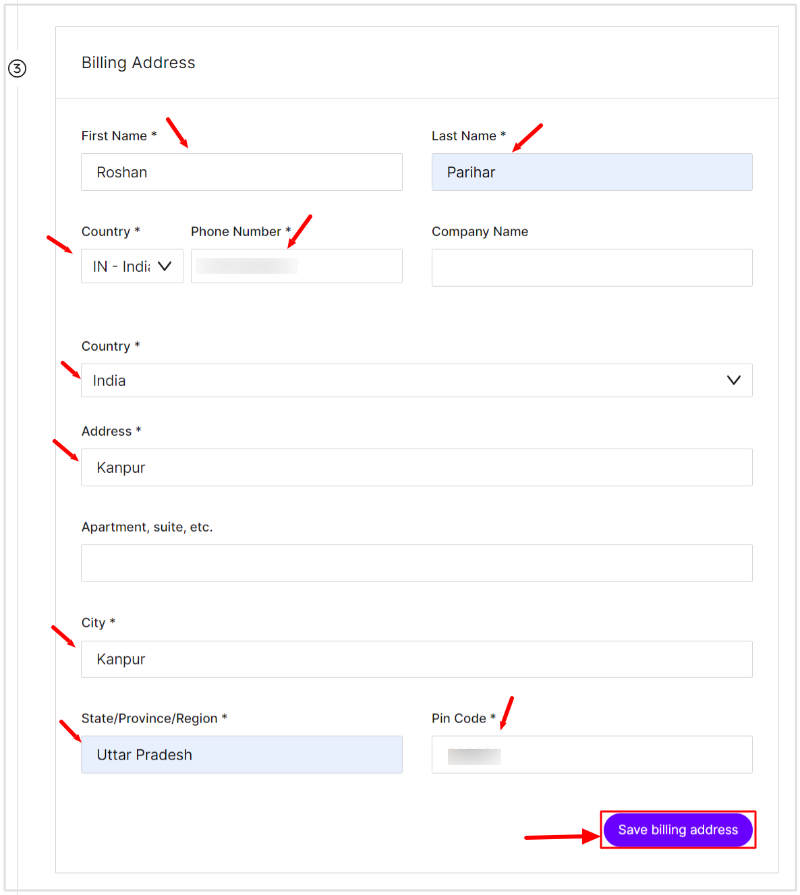
Enter billing details
Fill in your name and complete billing address. After that, click the ‘Save Billing address’ button to move further.
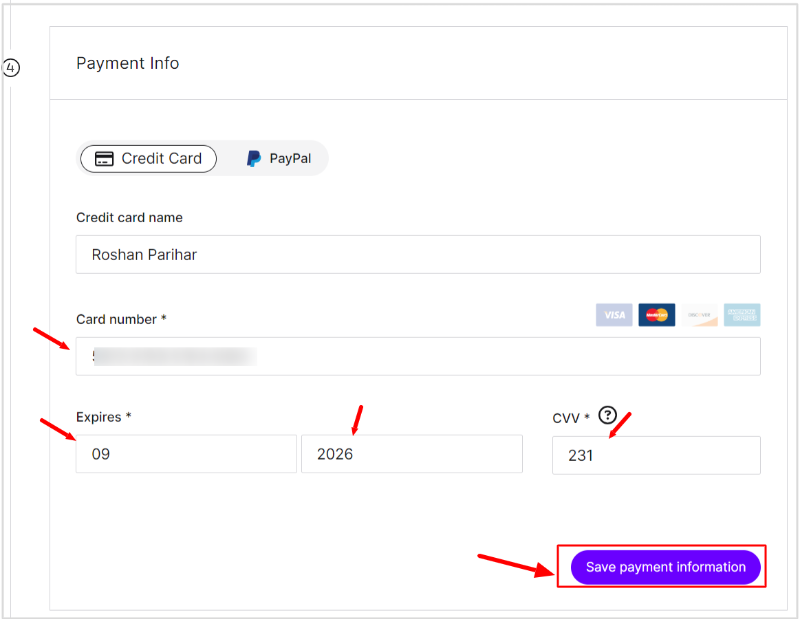
Enter payment details
Now, enter your payment details to make the payment for the hosting. Nexcess accepts various payment methods, so choose the one that works best for you.. After that, click the ‘Save payment information’ button to save your selected payment information.
Step 6: Add Your Domain
If you already have a domain, you can enter it here. If not, Nexcess provides an option to purchase a new domain. Make your selection and click “Continue.”
Step 7: Review and Confirm Your Order
Before finalizing your order, take a moment to review all the details. Ensure your hosting plan, domain information, and personal details are correct. If everything looks good, click “Proceed to Checkout.”
Step 8: Confirmation and Setup
Congratulations! You’ve successfully signed up for Nexcess hosting. You’ll receive a confirmation email with all the details about your new hosting account. Follow the instructions in the email to access your Nexcess dashboard and start setting up your website.
Step 9: Finally, Launch Your Website
With your Nexcess hosting account ready to go, it’s time to build and launch your website. Use the Nexcess dashboard to install your preferred CMS, upload your website files, and configure any settings. If you need help, Nexcess offers excellent customer support to guide you through the process.
