To resolve the problem of MySQL cannot connect invalid settings in XAMP PHPMyAdmin, you have to edit few contents of config.inc in XAMP server.
It’s an annoying thing on your XAMP server when you try to open PHPMyAdmin to access MySQL databases. Sometimes you will get an error message on your PHPMyAdmin login page with message ‘MySQL said: connot connect: invalid settings’. Below is the screenshot of the message.
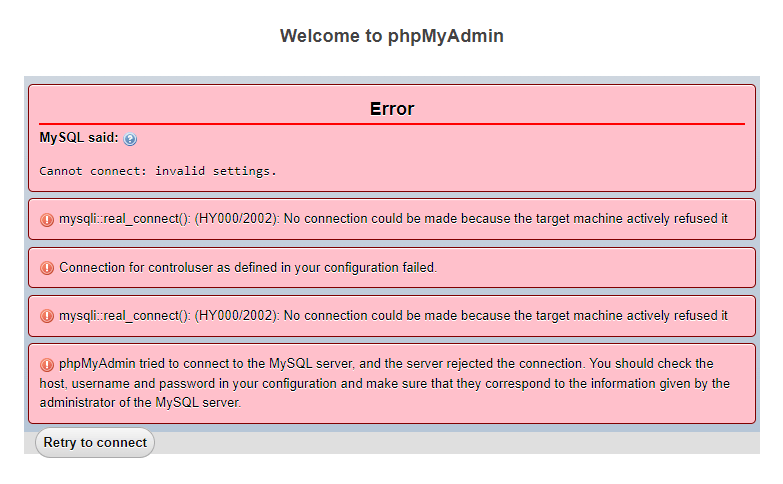
Let’s solve it with my tested step-by-step working process to quickly resolve the problem.
How to Resolve MySQL Cannot Connect: Invalid Settings in XAMP
Here is the step-by-step process to resolve ‘MySQL said: connot connect: invalid settings’ error:-
Step 1: Go to xamp/phpMyAdmin/config.inc
First of all, go to the location where you have installed the XAMP server on your computer. Visit the XAMP PHPMyAdmin folder xamp/phpMyAdmin/config.inc to get the config.inc file. After that, open the file config.inc on the Notepad++ editor to get its content for editing.
Step 2: Change Server Auth Type to ‘cookie’ Under config.inc File
Further, you will get the line in the file config.inc as shown in the image below.
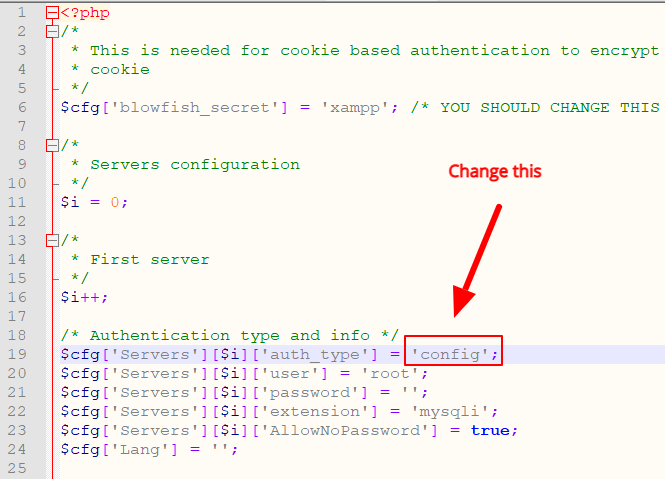
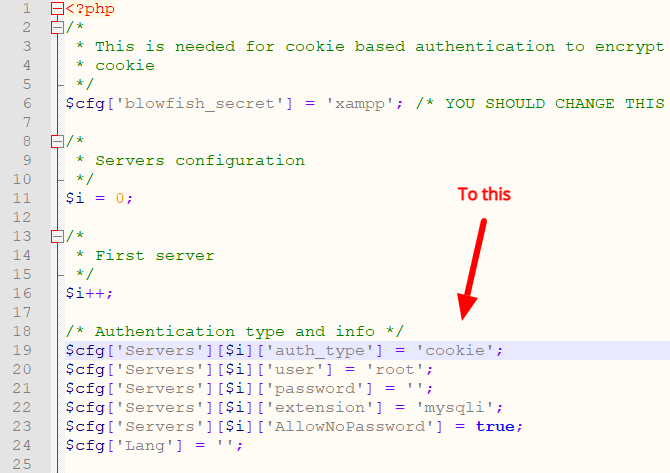
You have to change the above text to the text shown in the image below. This means you have to change the $cfg['Servers'][$i]['auth_type'] = 'config' to $cfg['Servers'][$i]['auth_type'] = 'cookie'.
Now, again go to the PHPMyAdmin login page and refresh the page. The error ‘MySQL said: connot connect: invalid settings’ will not show again. You will get the PHPMyAdmin login page after refreshing the error page.
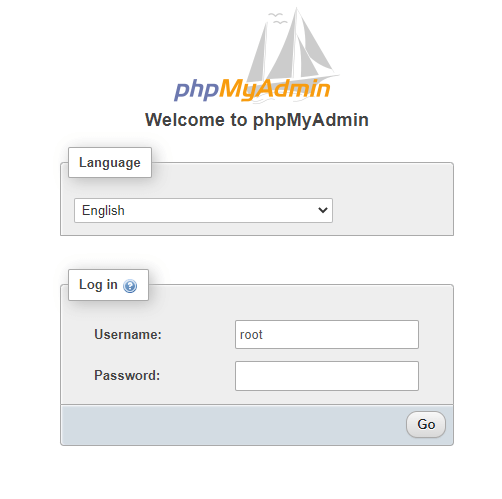
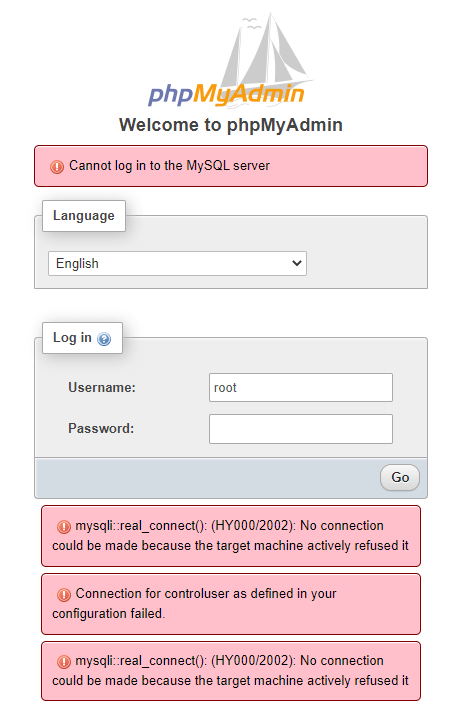
Enter the PHPMyAdmin username and password and click the ‘Go’ button to make a login. You will get the new error showing that ‘Cannot log in to the MySQL server’ as shown in the image below.
Step 3: Change Server Host to ‘http://127.0.0.1:3307/’
To resolve the above error PHPMyAdmin login page, you need to again edit the config.inc file.
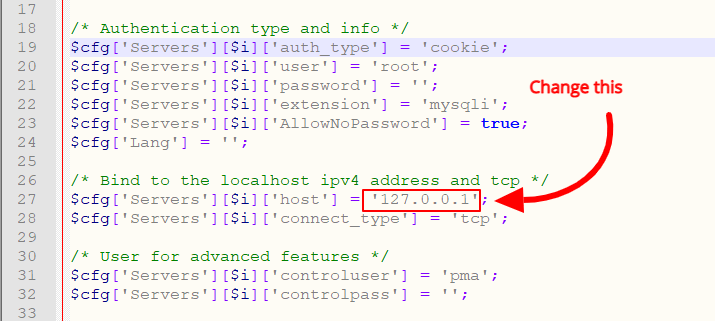
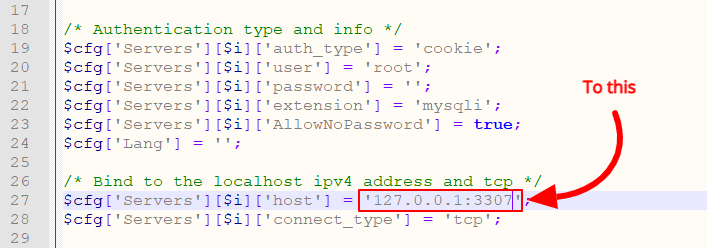
You have to change the line $cfg['Servers'][$i]['host'] = '127.0.0.1'; to the text content $cfg['Servers'][$i]['host'] = '127.0.0.1:3307';.
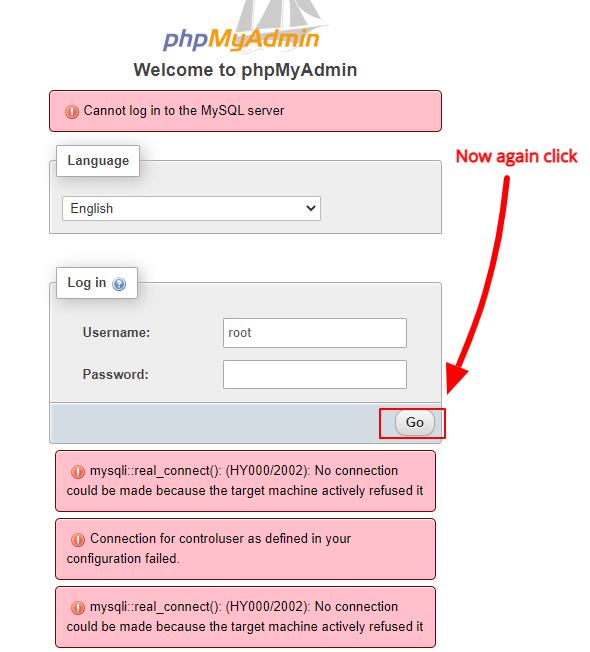
Now, let’s again go to your PHPMyadmin login error page and again click the ‘Go’ button. This time, you will not get any errors and got success to make PHPMyadmin login of your MySQL in the XAMP server.
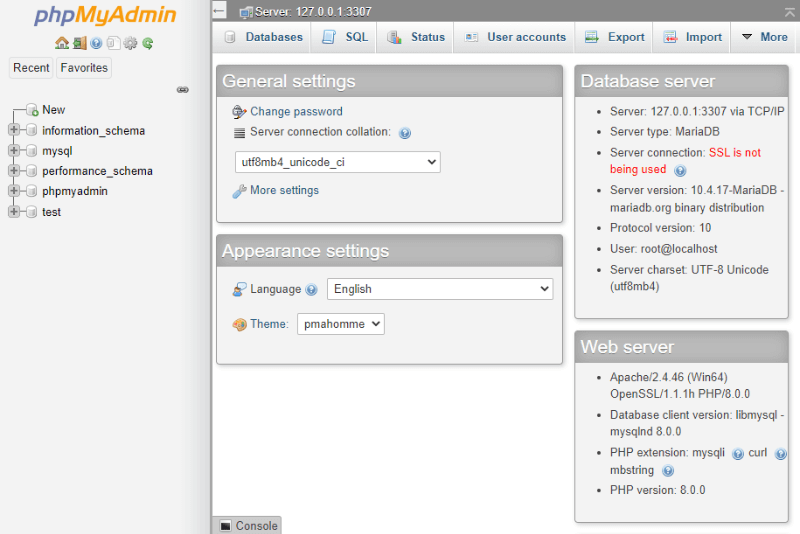
The below image shows that all the errors are resolved and you can now check your PHPMyadmin database. Now, enjoy working again on your XAMP server to create PHP projects.
That’s all.

Thank you! This is the only useful webpage that I have found regarding to this topic!
I am so glad this helped you.
thank you soo much for this useful information
thank you, finally solution found to my problem.