The jQuery :checkbox selector selects the checkboxes in a form. You have to use the checkboxes to provide the options to your users to select.
You cannot apply the background, and other CSS to the checkbox after you select it. To highlight the checkbox, you have to wrap it and apply the jQuery to the wrapped element. By doing this, you can easily highlight the checkboxes. Below are the syntax and examples you can use to learn the selector.

Syntax of the Selector
The syntax of jQuery :checkbox selector is given below.
The above selector requires no argument to pass and select the checkbox. To select a specific checkbox, you can use the class name or id of the checkbox to select. Add the class name with a dot(.) or id with a hash(#) before the selector name.
jQuery :checkbox Selector Selects Input Type Checkbox in a Form
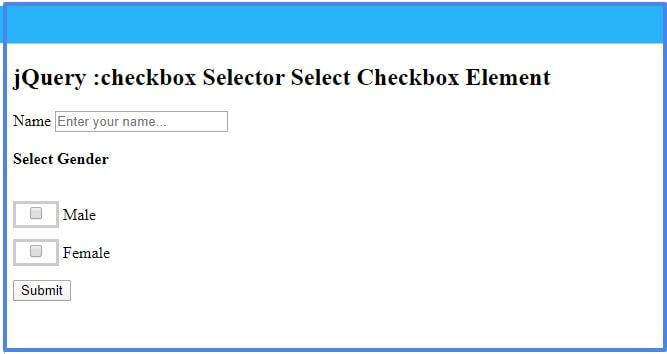
To highlight the checkbox, you have to wrap it with a span element and apply a CSS to it using jQuery. This way, you can highlight the checkbox as given in the output of the example given below.
Example
|
1 2 3 4 5 6 7 8 9 10 11 12 13 |
<script> $(document).ready(function(){ $( ":checkbox" ).wrap("<span style='border:3px solid #ccc;padding: 2px 10px;'></span>"); }); </script> <form action="#" class="mydemoformbutton"> <label>Name</label> <input type="text" name="name" placeholder="Enter your name..."><br> <strong>Select Gender</strong><br> <input type="checkbox" name="male" value="male"> Male<br> <input type="checkbox" name="female" value="female"> Female<br> <button type="button" class="mybtn">Submit</button> </form> |
Output
The above example showing the border and the padding to the checkbox. It’s actually the border and padding to the span element. But, it appears to be the checkbox as the highlighted element.
If you have any queries regarding this tutorial post, please comment below.
Also tell me, what other methods you are using with the selector by commenting below.
References
